Gear & Review
How does it sound?
Contrary to popular belief, there is only a relatively loose connection between the technical specifications of an audio device and its ability to play music in an authentic fashion. Manufacturers today mostly compete with a range of similar audio devices on the market and need to attract buyers who will mostly be unable to hear the actual product, let alone test it out in their domestic environment, before making their purchase. In this scenario, customers will be comparing the technical specifications of a device rather than the product’s ability to convey the recorded music event with lifelike musicality.
Before the receiver wars of the late 1970s and early 1980s, and even more so before we started comparing prices and purchasing products online, HiFi electronics mostly had to compete with music events and the sounds produced by real-life instruments. Judgement on the performance of audio equipment was based on the ability to satisfy the human ear rather than ultra clean measuring results that would out-spec the competition. Tube amplifiers are a relict of such times, in that they provide more joy to the listener than they do to the reader of their data sheets. Even today, true High End manufacturers will place more emphasis on the subjective human perception of sound than on the objective data that is derived from measurements. Not surprisingly then, the merits of a given audio device are entwined with the personal history and motivation of the people who have spent much of their professional lives to create it.
Turntables
I must confess that I am still a relative ‘newbie’ to the subject of turntables. Like most turntable owners around in the 80s, I was excited about the emergence of the new, super silent, digital technology that came in the shape of a shiny and more compact disc. And, honestly, at the affordable price range of an adolescent, the CD performed much better. I consequently sold my record player in the early 90s, never to look back until ... summer 2018, when we found a 1972 Philips 212 deck in our grandpa’s basement.
Lots of time reading and experimenting has passed since then. The Philips needed a new belt, bracket, and cartridge. We lubricated the moving parts, upgraded the internal wiring, and changed the output terminal from 5-pin DIN to RCA/cinch sockets. We checked the platter speed, corrected the azimuth, as well as the offset and rake angle. We made sure that the turntable was placed on non-resonant footing and was level with the ground. The result is astounding, and for the first time, our turntable actually does sound more impressive than CD, if the record itself is of a good pressing. Since buying a well-engineered LP can be a bit of a gamble, it is a good idea to share personal experience on sound quality, as I have started doing here.
The Lenco shown here was our second project. Once famous as a well-built budget player with surprising sound quality, it arrived here in pretty poor condition. We have had to remove motor noise, bring in new blocks, and adjust the other parameters described above to uncover its potential. The investment of time and effort has not been in vain. For audiophile listening, turntables should not be underestimated.
Dual CS 505-3 Audiophile Concept

Published: 03/02/2022
Manufacturing date: 1987
Author: Karsten Hein
Category: Gear & Review
Tag(s): Turntables
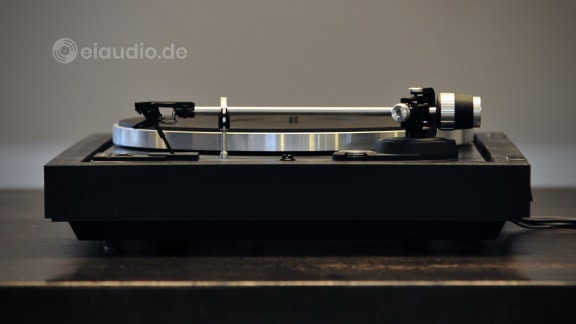
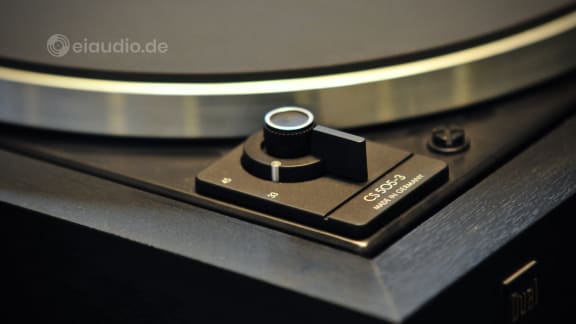
The CS 505-3 is a semi-automatic turntable with full-size suspended sub-chassis that effectively protects the unit's drive mechanism from external vibrations. The 505 features a straight, tubular, high torsion aluminium tonearm measuring just over 22cm in length, and a low-resonance, non-magnetic platter that is driven by a 16-pole-synchronous Dual motor and belt-drive mechanism. The turntable's basic design and layout have been tried and tested and it can, at the time of writing this, still be purchased new, in the form of the revised Dual CS 505-4 that is built by Alfred Fehrenbacher’s Dual Phono GmbH, in the company’s original home town of St. Georgen. The factory is located deep in the Black Forrest, a region famous for its customs, folklore, and precision clockwork mechanisms.
The CS 505-3’s semi-automatic drive unit is easy to operate. Moving the tonearm in position over the record will automatically set the platter in motion at the pre-selected speed. The tonearm initially remains in raised position, until a lever is flipped to gently put it down. The platter stops spinning automatically when the stylus reaches the end of a record, and the tonearm is automatically raised once again. On our unit, there was a mild plopping sound as the turntable shut off. It was probably caused by the tonearm lifting rather abruptly. However, this is just meant as an observation and not as complaint. I was at first a little surprised by the phenomenon, but it never really bothered me. The tonearm remains raised and then needs to be returned to the start position by hand.
In 1987, the first CS 505-3 sold for just under 500.00 DM, (96.00 GBP) and modern customers of its successor, the CS 505-4, are once again asked to pay the same in euros. This might seem a bit pricey in both cases. However, having listened to the CS 505-3 perform in our living room for some days, I feel it is still quite a good deal. More so than our Sansui 525, the Dual with its original ULM 65 E cartridge and elliptical diamond stylus had me listening to one record after another, enjoying its charming sincerity and musical drive. But what was it exactly that enthralled me?
Advert eiaudio/shop:
I have always been fond of the Thorens 318 turntable design for getting the balance between technical sophistication and elegant understatement right. As if its engineers had taken their pointers from Japanese furniture design, more so than the tech-savvy Japanese electronics industry ever had by itself. And I found very similar design choices to be present in the Dual CS 505-3, especially in combination with its black, wooden plinth. Sadly, most turntables of those days still featured permanent interconnects which made it difficult to make adjustments to the sonic balance by means of connection alone. I would have loved to attach my favourite silver solid-core cables, of course.
The ULM 65 E was the original Dual cartridge for the 505-3 to which an Ortofon-made, bonded, elliptical, diamond stylus was attached. The ULM was not a High End cartridge and only offered a limited frequency bandwidth of 10-25,000 Hertz. Channel separation was also not impressive at 20dB. And still, it offered considerable output rated at 4 mV. This suggested that it could play loud. The combination of cartridge, stylus, and drive unit worked quite well, but also showed some obvious weaknesses that one could find either off-putting or endearing, case by case.
I first whipped out a bad pressing of Norah Jones’ album “Come Away With Me”, and was disappointed that the Dual’s elliptical stylus brought out lots of sibilance that our Sansui 505 with AT VM 95 ML cartridge had so well hidden. This was not surprising perhaps, considering how deeply the micro-linear stylus of the AT could reach into the groove. The record sounded worse the closer the stylus moved to the centre. I next put on Stacey Kent’s album “I Know I Dream” and was surprised by a pleasant forward drive and rhythm that instantly made me tap my foot. I loved how Stacey’s voice seemed stronger, more direct, and also more engaging than I was used to. The music sounded slightly less delicate and did not reveal transients so well, but I did not miss this somehow.
The Dual’s ferocious and rhythmically engaging character had me smiling several times though the album. “I Know I Dream” being a good pressing, I had no issues with sibilance whatsoever. I noticed that voices were perhaps not revealed in the most authentic fashion and could sound a little “vintage” at times. They did not manage to free themselves from the instruments as much as I was used to, but, in the overall scheme of things, were endearing and lots of fun to listen to. If I had first thought about replacing the permanent interconnects with RCA jacks and upgrading the cartridge to a modern one with a more sophisticated stylus and better specs, every time that I came back listened I decided that any updates or upgrades could wait for another day.
Dual Company History
Christian and Joseph Steidinger started out as a manufacturer of clockwork and gramophone in the German Back Forest town of St. Georgen in 1907. The original company simply bore the family name, until they rebranded as Dual in 1927. The new company name was chosen in reference to their signature “dual-mode” power supplies in which they were true pioneers. Gramophones featuring these supplies, could either be powered by electricity or wound up for playback. Given their early success as a parts supplier, the Steidinger brothers began designing their own turntables.
During the German economic recovery that followed World War II, Dual became the largest producer of turntables in Europe. The German economy still enjoyed a price advantage over the rest of Europe and became known for high-quality once again. The Steidinger brothers had to hire up to 3,000 factory staff in order to keep up with the growing demand in entertainment devices in the world. Although Dual stretched the brand into other consumer electronics items, their turntables have remained iconic to this day.
The original Dual company went bankrupt in the early 1980s, following a decade of fierce competition from cheap and sophisticated imports from Japan. It was sold to the French electronics group Thomson SA. In 1988, the German company Schneider Rundfunkwerke AG bought Dual and then spun off the ‘Dual Phono GmbH’ to Alfred Fehrenbacher in 1993. Fehrenbacher produces Dual turntables 'Made in Germany', in the Black Forest town of St. Georgen, based on Dual’s original product lines until this very day.
Specifications
- Concept: suspended chassis, belt-drive
- Drive unit: 16-pole-synchronous motor
- Motor type: Dual SM 100-1
- Power consumption: 8 Watts
- Platter: non-magnetic, 1.2 kg
- Platter speeds: 33 1/2 and 45 RPM
- Pitch control: +/- 6%
- Wow and Flutter: 0.06% (WRMS 0.035%)
- Rumble: 52 dB (75% weighted)
- Channel separation: > 25 dB
- Channel balance: < 2 dB
- Arm length: 221 mm
- Offset angle: 24” 30’
- Tracking error: 0,15 “/cm
- Cartridge type: Dual ULM 65 E
- Cartridge system: moving magnet (MM)
- Stylus model: Ortofon DN 165 E
- Stylus type: elliptical diamond, bonded
- Tracking force: 15 mN (10-20 mN)
- Frequency range: 10-25,000 Hz
- Output: 4 mV / 5cms (1,000 Hz)
- Compliance: (h) 25 um/mN; (v) 30 um/mN
- Cartridge weight: 2.5 g
- Total capacitance: 160 pF
- Dimensions: (W) 437mm; (D) 369mm; (H) 138mm
- Weight: 6kg
- Country of manufacture: Germany
- Year(s): 1987-1990
Dual CS 630Q
Published: 16/03/2023
Manufacturing date: 1983
Author: Karsten Hein
Category: Gear & Review
Tag(s): Turntables
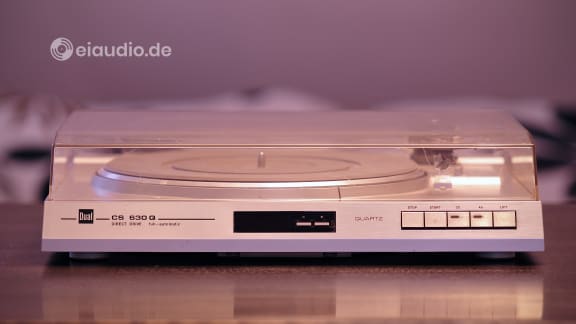
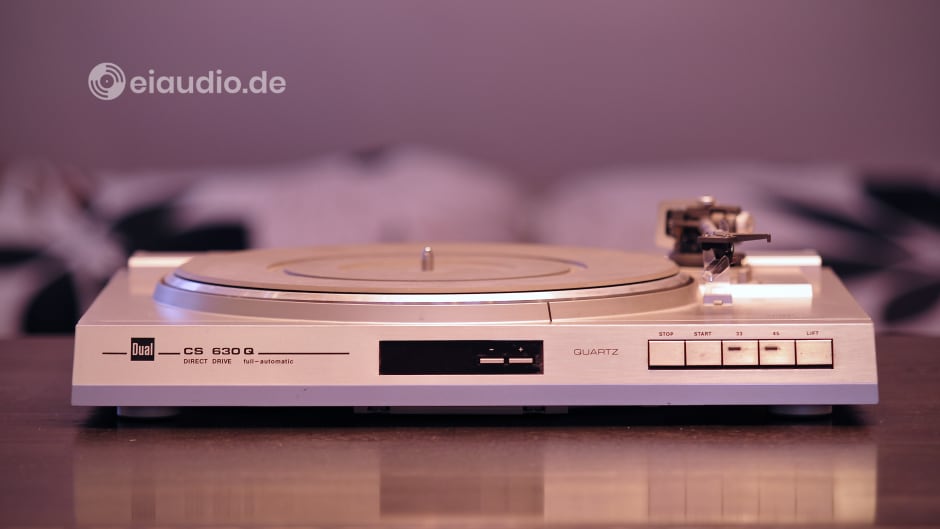
I confess that, when the Dual CS 630Q was brand new on the shelves during the early 1980s, I would have walked straight past it, only to marvel at the cleaner-looking and trendier Technics decks from Japan. And the sad demise of the Dual company alongside many other German manufacturers of quality audio gear during that same period suggests that I was not alone in this assessment. 40 years later, I am sitting in our studio listening to one Dual turntable after another only to find that we had been utterly wrong in ignoring them. But, as so many times in the history of mankind, we are only smarter after the fact.
During the 1980s, I was a teenager who had to stretch his allowance. More often than not, the money for HiFi gear came from my father. I mostly liked what my friends at school liked and what I was able afford. And this is also my excuse for purchasing a JVC AL-F3 as my first turntable, a mass-produced fully automatic direct-drive deck in plain black that can be found in mint condition for EUR 20.00 on ebay these days. Sellers of the Dual, on the other hand, usually for at least five times as much for their machine regardless of its condition. The trouble for Dual was that both turntables played music, and, as most people did not have the time, expertise, or equipment to compare the sound of turntables, the difference between the devices was a matter of marketing.
Japanese turntables often boasted the latest in technology, even before it was proven that this actually served the purpose better than established means. The S-shaped tonearm, turntable automation, and direct drive technology were cases in which German manufacturers were slow to follow the hype. The ULM tonearm, for example, did have excellent tonal and rhythmical characteristics on the Dual turntables. It was lightweight and torsion-free by which it could offer a forward drive that feels natural in music. Earlier idler wheel turntables and some well-engineered belt drives could very well compete with newer direct drive models and have remained favourite classics in many audiophile communities. And turntable automation has long since outlived itself, with modern decks often only having a single switch that is required to set the motor speed.
While Dual and other German manufacturers were seemingly out-classed in the 1980s, listening to the old decks perform suggested that they were still excellent choices when it came to their musicality, especially when played within a well-set-up system. The Dual CS 630Q that is presented here was handed down to my daughter from her recently deceased great aunt along with some other mid-Fi gear. Among the items were a Dual CV 1260 receiver (manufactured by Denon), a Dual CT 1260 tuner that was connected via 5-DIN plug, a Denon DCD 660 CD player, and two Canton GLX 100 bookshelf speakers that served to wrap up the ensemble. And, as the equipment had been sitting on a shelf for some years, I wanted to take the opportunity to run some routine checks and to present it in this forum.
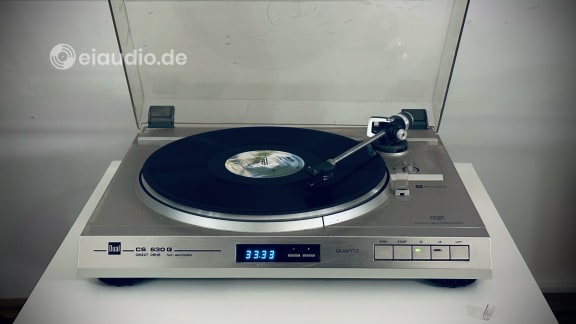
Among these new devices, the CS 630Q interested me the most. I was already a great fan of the earlier and more elaborate Dual CS 721, for which I had built a walnut plinth for improved drive isolation. The CS 630Q was claimed to offer an improved signal-to-noise ratio paired with a more modern look. Where the famous Technics decks had a visible strobe light that reflected on iconic dots along the platter rim, Dual featured an accurate LCD display that interpreted the speed reading electronically. Dual’s legendary 4-point gimbal rested on adjustable tip bearings and served to stabilise the straight ultra-low-mass (ULM) tonearm well. The Start, Stop, and Lift buttons felt firm and gave great sensory feedback, and I also enjoyed the fact that the rotation speed adjustment was executed in the same manner. The record size was set separately via a selector switch located to the right of the tonearm. All in all, this seems like a well thought out design.
Modern users might object that the layer’s surface was not flat but instead showed all kinds of elevations and crevices. On the other hand, these oddities gave the CS 630Q its low silhouette and recognisable appearance. While I would not perhaps have thought of purchasing this Dual for myself, I did enjoy the look of it while it was perched on our makeshift audio sideboard with our experimental system in the studio. The system consisted of the Dual CV 1260 integrated amplifier and our Epicure 3.0 loudspeakers that had already shown that it worked very well together when playing from a CD source. I did have some difficulties adjusting the tracking force, because the automatic features got in the way of performing the action: Moving the arm towards the platter started the motor, and taking the Dual off the power grid automatically elevated the arm. There seemed to be no way out of this predicament, and I ended up adjusting the raised arm by also raising the tracking scales, which was probably not the most accurate method.
My reason for wanting to confirm and set the tracking force was due to an error that I could hear as sibilance on the inner LP tracks. The original ULM 66E cartridge had been replaced with an Ortofon DN 166 E which still seemed to work alright. I started my explorations with Fleetwood Mac’s 1977 album Rumours, of which I had the 2009 pressing. For a 70s album, Rumours offered a decent recording quality, as well as a wide range of songs that varied both tonally and rhythmically. Listening to the album with the CS 630Q for the first time, I also notice a humming that sounded like a grounding issue. I inspected the original cinch plugs and found that the metal grounding had corroded. The original plugs were already quite cleverly designed featuring a broken outer ring and a split centre prong. I decided to replace them with some decent modern standard Neutrik Rean, which were much less sophisticated in terms of sonic virtues, except for their debatable gold-plating, perhaps.
Looking at stylus options for the ULM/Ortofon cartridge, I came across the elliptical stylus that was now in place for about 75.00 EUR and then found the complete headshell with cartridge and Shibata stylus for just 14.00 EUR more. For my daughter learning to play records for the first time, the present stylus would do, but if this turntable had been mine for the keeping, I would have gone for the ‘Ortofon OM PRO S SH4 bl hs’ full package as advertised on the Thomann website, among others. For the time being, I set the tracking force with the scales on a CD case next to the rotating platter to 1.05g and the anti-skating to approximately half this value. I noticed that the Ortofon cartridge started to muffle the treble when the tracking force exceeded 1.25g. The original sibilance might have been caused by the anti-skating force exceeding the tracking force when, really, the opposite should be the case.
Fleetwood Mac’s album Rumours had started to sound just right, with a good amount of drive and swing. I enjoyed the amount of detail presented by the elliptical stylus, but I could also hear its limitations in terms of treble nuances. The higher the tone, the more it seemed to blend in with other high tones playing in the recording. This gave the music a robust and danceable presence rather than an audiophile experience. Bass on the other hand was tight and layered. I was able to get a good feel for the different materials of the drum set that stayed quite separate of the other instruments in “Don’t Stop Thinking About Tomorrow”. At the same time, I was missing some of the genuinely low bass frequencies that would have served the overall music impression well.
Considering the fact that the Dual CS 630Q already had a universal headshell mount, there was a wide range of cartridges available for the arm that were easy to swap and experiment with. While setting the tracking and anti-skating correctly improved the sibilance on the inner tracks, I was not able to eliminate it completely using the old stylus. The straight arm’s tracking error of 0.15° was, at least in my opinion, not large enough to explain the extent of the phenomenon. And it was sad as well, because “Songbird” was among my favourite tunes on the album. If I could only trust our kids and their friends (and the friends of their friends) to keep the stylus free from harm, I would be tempted to take that Ortofon SH4 offer.
Specifications
- Type: direct drive turntable
- Features: Fully automatic, with PLL quartz lock
- Microprocessor type: EDS 910
- Platter type: non-magnetic, removable
- Platter dimensions: (D) 304mm x (H) 10mm
- Platter weight: 1,170gr (700gr, without matt)
- Speeds: 33.33 and 45rpm
- Pitch-control: 30-36 RPM / 42-48 RPM
- Wow and flutter: +/- 0.035%
- Signal to noise ratio: 80dB, weighted
- Tonearm: distortion free ultra-low-mass tubular aluminium
- Gimbal: 4-point tip bearing
- Effective tonearm length: 211 mm
- Offset angle: 26°
- Tangential tracking error: 0,15°
- Headshell overhang: 19.5 mm
- Original cartridge: Dual ULM 66E
- Stylus-replacement: DN 166E
- Stylus-type: biradial diamond
- Tracking force: from 1 to 1.5g
- Frequency response: 10Hz to 28kHz
- Power consumption: 12,5 watts
- Compliance: (h) 35 / (v) 30
- Original cartridge weight: 2.0 g
- Dimensions: (W) 440mm x (H) 111mm x (D) 364mm
- Total weight: 5.5 kg
- Country of manufacture: Germany
- Year(s): 1983 - 1986
Dual CS 721

Published: 27/07/2022
Manufacturing date: 1976
Author: Karsten Hein
Category: Gear & Review
Tag(s): Turntables
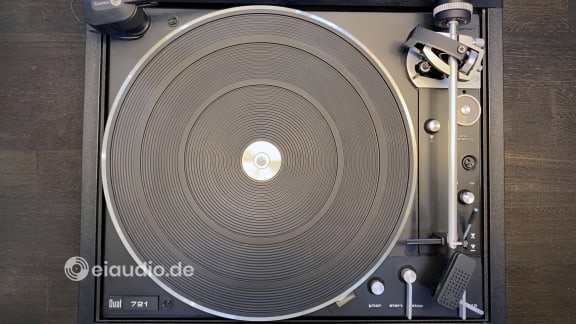
The CS 721 was Dual’s flagship turntable towards the end of the 1970s and is, by many, considered to rank among the best Dual turntables ever made. When there is disagreement between the experts, this is usually about the merits of the drive system. Proponents of idler wheel turntables, the ‘Treibrad Classics’, would cite Dual models CS 1219 and CS 1229 as their favourites, whereas belt-drive fans would give preference to the CS 5000 or CS 7000 Golden. The CS 721 was a direct drive design (DD) and, in all fairness to the other two camps, had the most audiophile specifications in terms of rumble, wow, and flutter of them all. However, we do not listen to specifications but to music, of course. And I must confess that I do love the straightforward sound of our smaller CS 505-3 as well.
In its most affordable form, the CS 721 was not the most beautiful deck on the market. Its plinth was a base of cheap plastic that was skirted with a frame of laminated wood. Dual had to rely on its good name in audiophile circles in order to be able to sell its products next to the sleek and slim looking Asian designs from Technics, Pioneer, Sony, etc. In fact, the new lack of genuine wood on the products of the German manufacturer from the Black Forest was already a tribute to the increasingly price-driven market. However, the pressure to surpass its competition by means of sophistication assured the CS 721 some highly sophisticated features that are rarely found on turntables of any age.
One obvious highlight of the CS 721 was its tonally rich made-for-Dual Shure V15-III cartridge with its Super-Track-Plus stylus. The Shure V15-III was an excellent tracker with a low stylus force of merely 0.75g to 1.25g. The cartridge exhibited the usual Shure bass qualities while performing smoothly across an extensive frequency range from 10 Hz to 25,000 Hz. Sadly, the original Shure stylus was too worn out on our model, so that I had to look for a suitable replacement. My first impulse was to take the plunge on a Jico SAS stylus with boron cantilever; however, an indefinite delivery impasse from Jico forced me to settle for a Tonar Shibata stylus instead. Shibata needles were originally developed for use with quadrophonic recordings, reached deeply into the record groove, and, similar to Jico’s SAS styli, were capable of great nuance. However, listening to the two styli in direct comparison, it was hard not to favour the worn-out Super-Track-Plus for its amount of delicacy.
I also decided that I was going to improve the plinth of the turntable to isolate any physical vibrations from the floating chassis, as the thin plastic vat did not seem sufficient for the job. You will find a full article on the project in the 'Explorations' section of this blog. The result was a solid wood plinth that held the original structure suspended whilst silencing any vibrations to the plastic through the use of rubber foam. I used tri-ball absorbers to further isolate the plinth from potential vibrations caused by steps, slamming doors, or the other Hi-Fi units in the rack. The result was a tonally rich, precise, and undisturbed sound, just as one would expect from one of Dual’s top players.
Next to its precise and quiet motor, rigid tonearm, and legendary Shure cartridge, the CS 721 offered a host of adjustable settings that were class-leading at its time. Like all Duals of this period, it offered three transport screws to clamp down the chassis during transport. I always loved this feature on the Dual decks, as I had to spend lots of time transporting them in the car. Even the dust cover lift could be adjusted on the CS 721 just in case the spring should soften with age. The tonearm had a 2-fold dampened, adjustable counterweight and could additionally be altered in lateral length to perfectly accommodate most cartridge weights.
The vertical tracking of the CS 721 tonearm could be calibrated via a lever. Most other turntables only offered socket screws for the purpose. In a similar way, one could adjust the lift angle and the precise touchdown position of the stylus on the record groove. The touchdown speed could be adjusted to suit the weight of the cartridge. It was interesting to note that the manual lift function was not affected by adjustments to the lift height, as this, too, was set via a separate control. When playing back records, the CS 721 could be set from single to infinity mode, by which it would repeat playing a record until it was manually interrupted. When taking a closer look at the headshell, I was surprised to find that the cartridge was clamped into position and additionally secured by two screws. I learned that there had been two headshells sold of which only one could be adjusted. So I ended up purchasing an additional TK-24 headshell to have more freedom in my settings.
While the tonearm was adjusted by changing the lateral length of the arm and then via the knurled ring of the counterweight, a further adjustment ring was available to set the stylus down force. In combination, this was one of the most sophisticated settings I had ever seen. Anti-skating could be adjusted to suit conical and bi-radial styli. It was conceivable that the CS 721’s vast combination of settings would have been more confusing than helpful to some owners. On the other hand, listening to records had always been similar to fly fishing, with lots of time, skills, and effort needed to achieve a somewhat short-lived result. In other words, the Dual was anything but plug-and-play. All the more, it was gratifying to own and listen to, once the perfect setting was achieved, especially with its new walnut plinth.
Related Articles:
< Constructing the Plinth | Dust Cover Restoration >
Dual Company History
Christian and Joseph Steidinger started out as a manufacturer of clockwork and gramophone in the German Back Forest town of St. Georgen in 1907. The original company simply bore the family name, until they rebranded as Dual in 1927. The new company name was chosen in reference to their signature “dual-mode” power supplies in which they were true pioneers. Gramophones featuring these supplies, could either be powered by electricity or wound up for playback. Given their early success as a parts supplier, the Steidinger brothers began designing their own turntables.
During the German economic recovery that followed World War II, Dual became the largest producer of turntables in Europe. The German economy still enjoyed a price advantage over the rest of Europe and became known for high-quality once again. The Steidinger brothers had to hire up to 3,000 factory staff in order to keep up with the growing demand in entertainment devices in the world. Although Dual stretched the brand into other consumer electronics items, their turntables have remained iconic to this day.
The original Dual company went bankrupt in the early 1980s, following a decade of fierce competition from cheap and sophisticated imports from Japan. It was sold to the French electronics group Thomson SA. In 1988, the German company Schneider Rundfunkwerke AG bought Dual and then spun off the ‘Dual Phono GmbH’ to Alfred Fehrenbacher in 1993. Fehrenbacher produces Dual turntables 'Made in Germany', in the Black Forest town of St. Georgen, based on Dual’s original product lines until this very day.
Specifications
- Turntable type: Fully automatic
- Motor: direct drive, electronically controlled
- Motor type: Dual EDS 1000-2
- Speeds: 33.33 and 45rpm
- Platter weight: 1.5 kg, aluminum die cast
- Platter weight with rotor: 3.0 kg
- Platter size: 305mm, dynamically balanced
- Pitch control: +/- 10%
- Wow and flutter: < 0.03%
- Rumble: > 70dB
- Tonearm: extended tubular, 2x damping
- Tonearm effective length: 222mm, height adjustable
- Cartridge: Shure V15 III (1973 - 1987)
- Stylus pressure: 0.75 to 1.25g (1.0g)
- Stylus type: Microline, elliptical diamond
- Channel separation: 28dB @1kHz
- Frequency range: 10 - 25,000 Hz
- Cartridge inductance: 500 mH
- DC resistance: 1,350 Ohms
- Resistance: 47 kOhms
- Output: 3,5 mV @1kHz
- Cartridge weight: 6.0 g
- Turntable Weight: 7.8 kg
- Dimensions: (W) 424 mm x (H) 150 x (D) 368 mm
- Country of manufacture: Germany
- Year(s): 1976 - 1979
Lenco L75

Published: 31/05/2020
Manufacturing date: 1967
Author: Karsten Hein
Category: Gear & Review
Tag(s): Turntables
Fritz and Marie Laeng founded the Lenco turntable company in Burgdorf, Switzerland in 1946. The name Lenco was derived from the Laeng’s family name, largely due to Marie’s initiative. In the time before turntable production in Burgdorf, the Laeng couple had already been fascinated with audio technology and had been running an electrical business since 1925. The Laeng’s genuine enthusiasm for sound reproduction resulted in reliable quality products and excellent service for the few units that were returned to the factory for reworking. Lots of passion, high quality, and excellent service proved to be a solid foundation for success, and the company soon opened a second factory in Italy to satisfy the growing demand.
Lenco partnered with specialist companies in the production of accessories that they could not easily produce themselves. Komet was a specialist for tube amplifiers and supported Lenco in producing turntable & amplifier combinations. Another, perhaps more famous, partner was Goldring, a specialist manufacturer of phono cartridges. Some Lenco turntables were marketed bearing the Goldring logo. In doing so, the lesser known Lenco of Switzerland was able to benefit from Goldring’s established sales network, a circumstance that made it easier for Lenco to reach out to customers around the globe. Within just a couple of years, Lenco was able to generate sales in more than 80 countries.
Sadly, Marie Laeng died at a particularly vulnerable time for the company, during the oil crisis of 1974. She had been the heart and soul of the operations, and the business was now simultaneously hit from at least two directions: a declining global economy and the loss of their chief motivator. A third hit was then caused by the influx of cheaper priced electronics from newly rising Asian countries that turned out to be the winner of Europe’s new price driven economy. Lenco AG Burgdorf declared bankruptcy in 1977, with the newly formed Lenco Audio AG taking over existing service agreements and completing what was to be the final generation of Lenco products.
The Lenco L75 was built from the early 1970s and designed to meet the challenges of a price driven market. Just affordable enough to be purchased by university students, it was designed with the intention of bringing audiophile sound quality made in Switzerland to a young consumer group. Despite the ever so slight rumble coming from the sturdy idler wheel drive construction, the woodcased Lenco included some welcome features, such as a floating cabinet, a newly designed tone arm with visible anti skating weight, and four playing speeds ranging from 78 RPM all the way down to 16 RPM. Available accessories included a strobe speed control disk for fine adjustment, a record sweeper with fixture on the deck, and record clamps to reduce vibrations. Today, the L75 ranks among the best idler turntables ever made. Especially audiophile listeners hold the L75 in high esteem, knowing well that even the considerable success of the L75 in the end was not enough to save the failing company from extinction.
< Tri-Ball Absorbers | Vinyl-Singles Puck >
Specifications
- Drive: Idler drive
- Motor: 4-pole synchronous with conical axis
- Speeds: 78, 45, 33-⅓, 16-2/3
- Wow and Flutter: ±0,08% / ±0,4%
- Rumble: 36 dB (unweighted); 60 dB (weighted)
- Plater: 306 mm, 3,7 kg, Zinc-alloy
- Tone-arm length: 227 mm
- Overhang: 17 mm (adjustable)
- Offset Angle: 23°12' (±0,8° max.)
- Material: Tubular Aluminium
- Stylus pressure: 0,5 g
- Dimensions: 445 x 335 x 150 mm
- Weight: 10,5 kg
- Country of Manufacture: Switzerland, Italy
- Year(s): 1967 - 1985
Philips 22 GA 212 Electronic

Published: 19/05/2020
Manufacturing date: 1972
Author: Karsten Hein
Category: Gear & Review
Tag(s): Turntables
Built from 1971 to 1976, the Philips 22 GA 212 Electronic turntable is still considered to be among the best Philips turntables ever made. Better known as Philips 212, the unit has achieved somewhat of a cult status among vinyl fans and vintage collectors. Key features include a floating suspension of the platter and sub chassis that provides excellent shock protection and capacitive touch keys featuring green backlights. The unit shown here was built in 1972 and, with some maintenance, is still running smoothly without any audible noise coming from the bearings or motor.
The floating sub chassis results in a very low rumble value, and the light weight aluminum platter works quite well and does provide an interesting alternative to the more common approach of providing more mass to the platter and chassis. Playing speeds are set at 30 and 45 RPM and pitch can be independently (!) adjusted for both speeds. The Philips 212 came fitted with Philips’ own GP400 cartridge which was durable but little adapted to audiophile needs. The company’s own upgrade was the GP401 which offered greater sonic accuracy and detail.
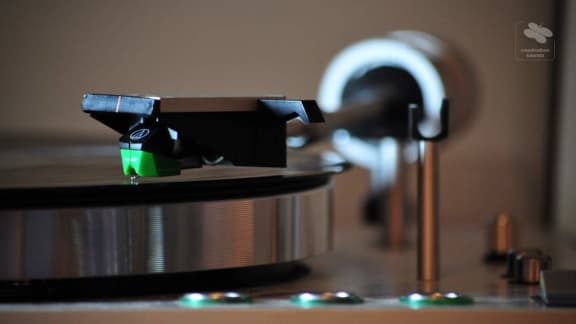
On the unit shown here, the GP400 was replaced by an Audio-Technica at-VM 95 E pickup. The Philips 22 GA 212 headshell can easily be removed by pulling it out forwardly from underneath the tonearm bracket along with the wiring. A welcome feature, for owners who wish to have multiple cartridges at hand. The modern Audio-Technica easily outperforms both the GP400 and GP401. It provides an honest well-detailed and lavish sound, perhaps with a slight tendency to sounding unrefined. There are better cartridges in the Audio-Technica range, all of them being quite affordable, but considering the lightweight tonearm’s limitations of adjustment and control the VM 95 E is certainly a risk free choice. The original 5-pin DIN plug on this unit was replaced with Neutrik cinch/RCA connectors.
Specifications
- Speeds: 33 and 45 RPM
- Automatic speed control: internal strobe light
- Manual speed adjustment: +/-3%
- Rumble: < -62 dB (DIN B)
- Wow and flutter: <0.1%
- Tonearm length (axis to stylus): 221 mm
- Cartridge: Super M 400
- Optional phono preamplifier: GH 905
- Voltage rating: 240 V AC switchable, 5 W, 50 Hz
- Dimensions: 39x14x34 cm
- Weight: 7 kg
- Country of manufacture: Germany
- Year(s): 1972 - 1975
Sansui SR-525
Published: 02/02/2021
Manufacturing date: 1976
Author: Karsten Hein
Category: Gear & Review
Tag(s): Turntables
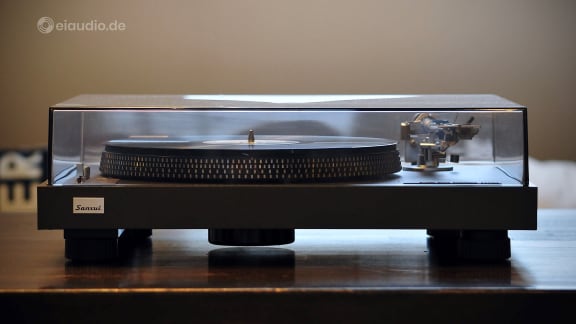
Following the sale of our Tannoy DC6t speakers to a fellow audiophile in northern Germany, I again had some money to spend on explorations. Looking for improvements to make on our HiFi setup, I decided that much could be gained from upgrading the record player on our main system. While our Philips GA 212 still put out a solid performance, its tonearm and chassis did have some limitations in terms of cartridge upgrades, etc. For vinyl to sound even better, it was high time to change to a more sophisticated concept altogether.
I scanned the web for vintage offers and asked friends for suggestions. Among our choices were the typical Dual, Thorens, Denon, Technics and Micro Seiki brands, all offering well-known classics in their own right, but none of the more affordable ones looked attractive to me, until I came across an unlikely contender in the upper mid-market segment, the Sansui SR-525 DD. Based on a similar chassis and tonearm design as Sansui’s SR-323 belt-driven turntable, the SR-525 offers some significant upgrades, such as the quietest direct drive motor of its time and a quartz speed control with built-in strobe light. The technology is state of the art, especially for a 1976 machine, and I have read nothing but praise about this player.
This is no surprise, really. The Sansui Electric Company was founded by Kosaku Kikuchi in Tokyo, Japan in 1947. Similar to many of his contemporaries, Kosaku cut his teeth in the industry by manufacturing transformers and simple radio parts, until he realised that fluctuation in the quality of components was making it difficult for manufacturers to consistently assemble high quality devices. Kosaku therefore determined that Sansui should prioritise product quality over manufacturing cost. Later, as Sansui diversified into more complex products, this focus on quality proved to be beneficial to the reputation of the brand.
By 1954, Sansui was manufacturing preamplifiers and amplifiers that were sold both as kit for home assembly and as finished product. Although the first units were based on mono tube designs, stereo tube systems were introduced in 1958. By the mid-60s, Sansui’s internal and external design choices had earned the company a solid reputation for high quality audio products. It was at this time that the company started producing its iconic black-faced AU-series amplifiers. Among these were to be found many units that can well be classified as ‘High End’ and remain much sought after by audio enthusiasts until this day. The company produced its first turntable in 1967, a full nine years before the SR-525 came to life.
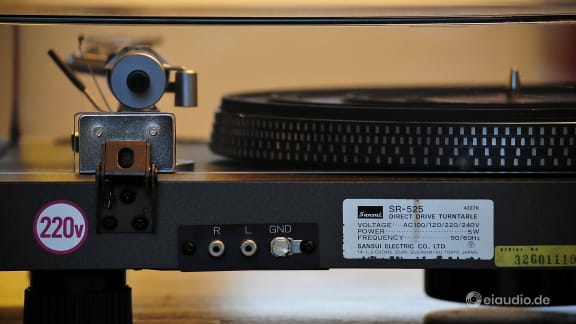
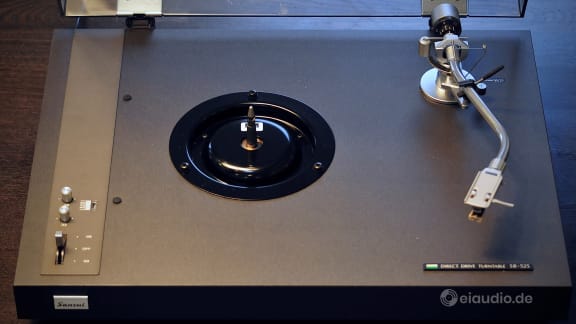
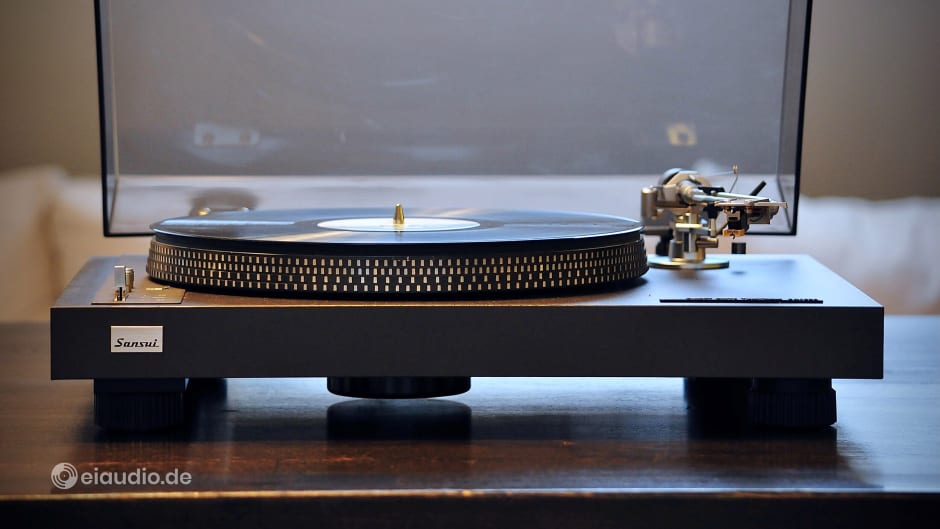
I found our SR-525 at a vintage HiFi dealer in Mannheim called ‘Goldladen’, combining the family name of its owner with the German word for shop. And although I had to pay a little extra for buying from a proper retailer, I liked the idea that I could drive there and inspect it, before making a purchase. Upon arriving at the shop, I found the Sansui to be in absolutely mint condition. With the platter raised, it was impossible to tell, if the motor had ever run, and there were hardly any scratches on the cover either. Standing in front of the SR-525, there is very little in its design, touch, and feel that makes it out to be a vintage player. In its simplicity and dark grey paint coat, it rather resembles the players around the turn of the century. The only item that gives it away are the clunky rubber feet, perhaps. But they do a fabulous job in keeping the record from skipping.
The tonearm is of sophisticated design with a suspended anti-skating weight and an additional lateral weight to keep resonances at bay. Its S-shape assures that the stylus angle is nearly perfect over most of the record’s surface. The Sansui’s total weight of nearly 10kg provides a solid base to absorb vibrations of any kind. At its original German sales price of 865,00 DM, it was nearly 200 DM more expensive than the belt-driven Philips, and this really shows. Other models in the SR series were the belt driven 323, the similar but wood finished 626, and the higher specced 929.
Do you have some personal experience with Sansui turntables? Please feel free to share your thoughts in the comments section below. Your perspective will be highly appreciated.
Specifications
- Type: manual direct drive turntable
- Platter: 310mm, die-cast aluminium alloy, 1,4kg
- Motor: 20-pole, 30-slot DC brushless
- Speeds: 33 and 45 RPM, servo-controlled
- Wow and flutter: < 0.03% WRMS
- Signal to noise ratio: > 64dB
- Rumble: > 72dB
- Tonearm: statically balanced, s-shaped, resonance-free, adjustable height
- Effective length: 220mm
- Overhang: 17,5mm
- Cartridge weight: 4 to 11g
- Dimensions: 46,9 x 15,0 x 37,5cm
- Weight: 9.5kg
- Year(s): 1976 - 1978
Purchased at:
www.goldladen-mannheim.de
Laurentiusstraße 26
68167 Mannheim
Tel.: 0151 241 643 55
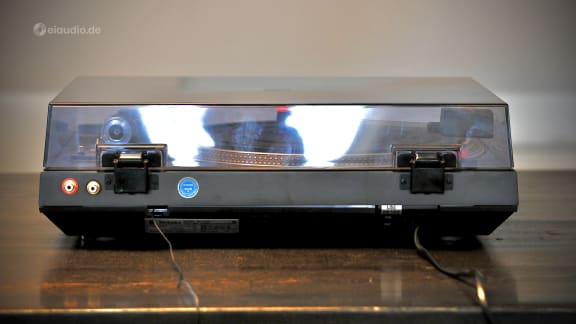
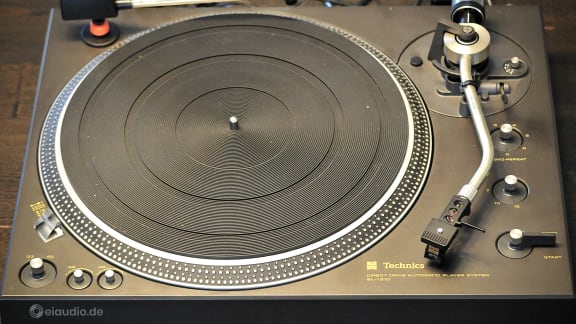
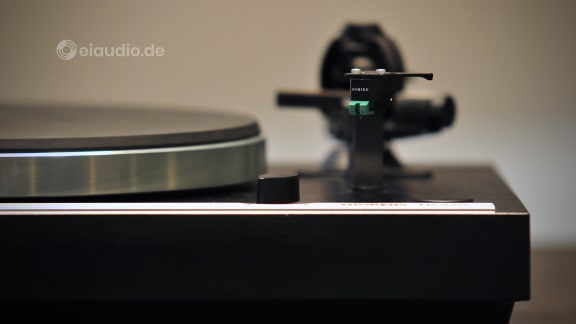
Technics SL-1310
Published: 25/04/2021
Manufacturing date: 1975
Author: Karsten Hein
Category: Gear & Review
Tag(s): Turntables
Following the stellar performance of our 1977 Sansui SR-525 direct drive turntable, I began scanning the web for other direct drive contenders from the 70s. And, since Technics had been the company to invent the direct drive concept, I was curious to learn how their turntables compared against the formidable standard set by our Sansui. By the 1970s and 80s, Technics decks had earned a reputation for being at the cutting edge of turntable technology. In addition to introducing and refining the direct drive, a design by which the motor shaft itself serves as the axis of the turntable platter, Technics was also credited with being among the first manufacturers to bring the sophisticated S-shaped tonearm to the mass market. I therefore decided that a Technics deck would be a worthy contender for exploration.
The brand’s most iconic turntable is arguably the SL-1200. To my knowledge, it is also the longest turntable in production. It first came out in October 1972, just one month after I was born, and continued to be in production until 2010. After a six-year break during the vinyl crisis, production resumed in 2016. Although primarily intended as a high fidelity consumer record player, the SL-1200’s superb build quality and high torque motor made it an instant success with radio stations and club disk jockeys. To date, more than 3 million units of this player have been sold. And, considering that it is back in production, we are still counting. Perhaps it is no surprise then, that an SL-1210 turntable is on display at the London Science Museum, as one of the icons that have shaped our modern world.
Since so much had been said and written about the SL-1200, prices for them used were quite high at my time of searching. This was even true for specimens that were in relatively poor shape and had been dragged around clubs, etc. Regardless of the condition, the name alone seemed to validate a higher price. I therefore decided to look for Technics turntables that offered a similarly sophisticated design but were missed by mainstream attention. I soon learned that the Technics 1310 offered much of the same technology that is found on its famous sibling, but this at a far lower price tag. And, due to its mostly domestic use, chances of this player having been dragged from club to club were rather slim. It appeared to me that the major differences between the two decks rested on their ability to absorb chassis resonances, to maintain exact speed in the event of physical force against the platter, and in the stress resistance of their lower chassis. In all these disciplines, the SL-1200 clearly had the upper hand.
And still, the SL-1310 can rightfully be considered an audiophile record player, even if it was not built to be carried around as a professional DJ or radio player. For my intended usage in our domestic environment, the SL-1310 had all the relevant features without the high price tag of its sturdier sibling. I began to narrow my search to the SL-1310 and noticed that cracked lower chassis were the norm rather than the exception. It seemed to me that the combined weight of the aluminium top casing and platter were simply too much weight for the lower plastic chassis to carry, especially when the Technics was moved carelessly. Other specimens had ugly scratches along the front or showed some discolouration of the body paint where they were mostly touched. Some had missing or broken dust covers, faulty mechanisms, or were simply missing the cartridge or stylus. On the positive side, most of these symptoms were relatively easy to spot. I therefore decided that I would focus on SL-1310s that were visually intact and would then see to it that functionality was properly restored.
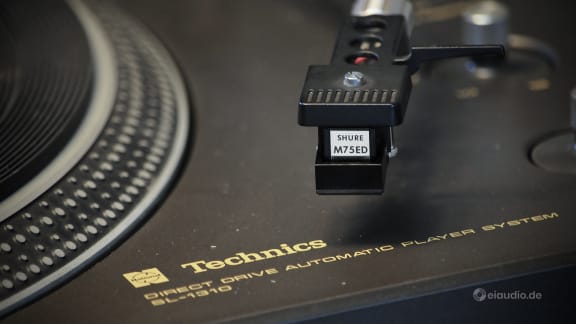
The specimen that I ended up buying seemed to offer both. Its body and cover were in excellent condition with just a tiny hairline scratch at the front. It was still fitted with the original Shure M75 cartridge and ED stylus, a clear indication that this player had not been used much. There was no damage to the lower plastic body. The price still was relatively high, considering that the player was nearly half a century old, however, I decided to be open-minded during my visit to the owner. If the condition was as described, perhaps the higher price was justified.
Upon arrival, I found the player set up in the basement. It was connected to power but without an audio signal connection. I was informed that the owner had sold all his original HiFi components and moved on to more convenient Bluetooth devices. The SL-1310 was the last remaining item from the glory days of high fidelity. And although he remembered his turntable to have been in working condition when he had stowed it away some seven years earlier, we found that many of the original functions were no longer intact. The automatic cueing did not meet the start of the record. Instead, the stylus landed somewhere between songs, regardless of the disc diameter setting. We managed to set the speed for 33 rpm correctly, but all attempts failed when trying to stabilise the record speed for 45 rpm. A little confused by the number of issues, we estimated the price of repair, and he offered to deduct these costs from the offer price. Under these circumstances, I was happy to agree to the deal.
Upon connecting the Technics at home, I discovered that the player’s left audio channel failed after a few minutes of playing. I managed turn it back on by re-connecting the cinch cable, but shortly after, the left channel failed again. Unlike our Sansui SR-525, all Technics decks of the period came equipped with non-detachable cinch/RCA interconnects, a factor that made it difficult to locate the left channel’s contact issue and also seemed a hindrance to upgrading the sonic ability of the player. I therefore made a list of all defects and added to this the need for proper cinch/RCA sockets to be installed. Luckily, our trusted mechanic for such audio matters had some time available, and I drove by for a visit the next day.
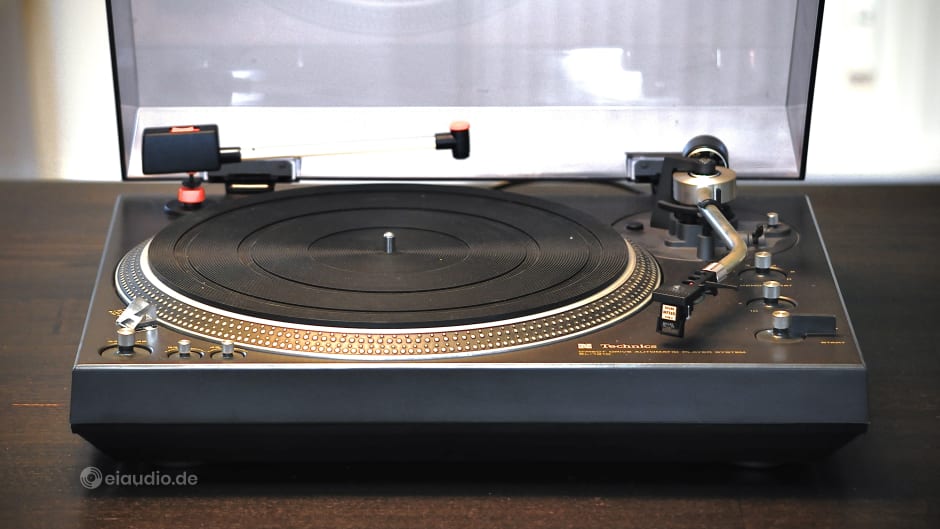
In terms of product innovation, the SL-1310 carried the direct drive concept one step further than the original designs. While most record players of the time, including the Sansui, had their large motors sitting centrally under the platter, a concept that required a certain minimum height, the revised Technics design used the platter itself as rotor and the player’s chassis as the stator. The turntable could therefore have a lower silhouette, used fewer parts, dissipated less heat, lowered electricity consumption to less than 0,1 watts, and decreased resonances. Speed-accuracy was class-leading at the time, at just 0.1% error over 30 min playing time. It is often said that disc-cutting lathes of the time were less accurate than this. Due to the slow-revolving motor, rumble was found mostly outside the relevant frequency band, namely from 20 - 35 Hz. The two peaks measured are at around 22 and 34 Hz. And of course, the iconic Technics platter showed a wide tapered rim with strobe markings for 33-1/3 and 45 rpm synchronisation at 50 or 60 Hz, i.e. four dotted lines in total.
As it turned out, our SL-1310 was mostly suffering from corrosion to the switches that had accumulated over the years. This was most likely facilitated by moisture while being stored in the basement. We discovered that most switches could be taken apart to be serviced. Only one of them, the one to set the record size, was beyond repair and needed replacement. Two holes were bored into the back of the turntable to hold the new cinch/RCA sockets. This step enabled me to use my own interconnects with this player, a seemingly small improvement but with a major impact on sound. The faulty left channel turned out to be caused by a loose connection inside the Shure cartridge itself. It was decided that we would heat the relevant pin with a soldering iron, until we could push the pin a few millimetres into the cartridge housing. The trick worked, and both channels played music again.
Back at home, I connected the Technics SL-1310 to our office system and was very pleased with the way it performed and handled. I set the 'Memo-Repeat' dial to 'three (3)' and the platter started spinning silently. I then pulled the lever downwards to the 'Start' position. The player reacted by gently lifting the tonearm and setting it down at the start of the first title. I noticed that the placing of the needle could have been a bit gentler, perhaps. However, the small thump it produced was still within reasonable limits. The Shure M75 with elliptical stylus used to be a mid-market cartridge back in the day and could not rival the Shure V15 that was found as standard on German-made High End Dual turntables. However, in typical Shure fashion, the M75 ED put forth a warm and delicate sound with long-trailing decay. It may not have exhibited the bass-slam of the Shure 6S, but it did play accurately and endearingly. It seemed to me that upgrading to the V15 cartridge, perhaps with a Jico replacement stylus would be a welcome but costly alternative for a later day.
The Technics SL-1310 itself could certainly do with some additional decoupling of the chassis. Right from the start, I noticed that any touching of the rack had a similar popping effect as the touching of a microphone. This effect vanished completely, after I placed the Technics on four Oehlbach isolation pads. Since the player is rather heavy with its aluminium platter and aluminium top-chassis, it remains wonderfully stable, despite the inherent softness of the pads. Among the features that I enjoy most about this player are its automatic functions that keep me from having to crawl into the small space under the slope of the roof where our system stands, and its life-like three-dimensional presentation of the music. Paired with our Hafler XL-280 power amp and Tannoy speakers, a deep holographic image of the stage is projected into the room right in front of me. Not bad at all, especially for a deck that is nearly half a century old.
Specifications
-
Type: fully automatic direct drive turntable
-
Platter: 312 mm aluminium diecast
-
Speeds: 33 and 45 rpm
-
Motor: ultra-low speed, brushless DC
-
Motor Power Consumption: < 0,1 Watts
-
Wow and flutter: < 0.03% WRMS
-
Rumble: - 70 dB
-
Tonearm: S-shaped, tubular, 4-pin connector
-
Effective length: 230 mm
-
Effective mass: 23g (incl. 6g cartridge)
-
Effective length: 230 mm
-
Tracking force adjustment: 0,25 to 3g by 0.1g
-
Cartridge weight range: 4,5 - 9g
-
Dimensions: (W) 430 x (H) 130 x (D) 375 mm
-
Power consumption: 8,0 Watts
-
Power Supply: AC 110 - 240V, 50/60 Hz
-
Weight: 9,4 kg
-
Year(s): 1975 - 1977

-
Thorens TD320
Published: 10/03/2022
Manufacturing date: 1986
Author: Karsten Hein
Category: Gear & Review
Tag(s): Turntables
For many years, the Thorens DT 320 headed my list of most desirable affordable turntables, as it already boasted some audiophile features that would only find their way into modern 'High-End' designs much later. When it was first released to the public in 1984, the TD 320 was the top of the Thorens 300-series and was also more generally considered to be top-of-its-class. Early models came equipped with the TP16 MK-III tonearm. Later, this was succeeded by the MK-IV tonearm which was also featured on the model shown here. This places our specimen in the model years from 1986 to 1988. The 300-series was among Thorens’s most successful model ranges and was later extended with some new and revised versions: the TD 325, TD 2001, and the TD 3001.
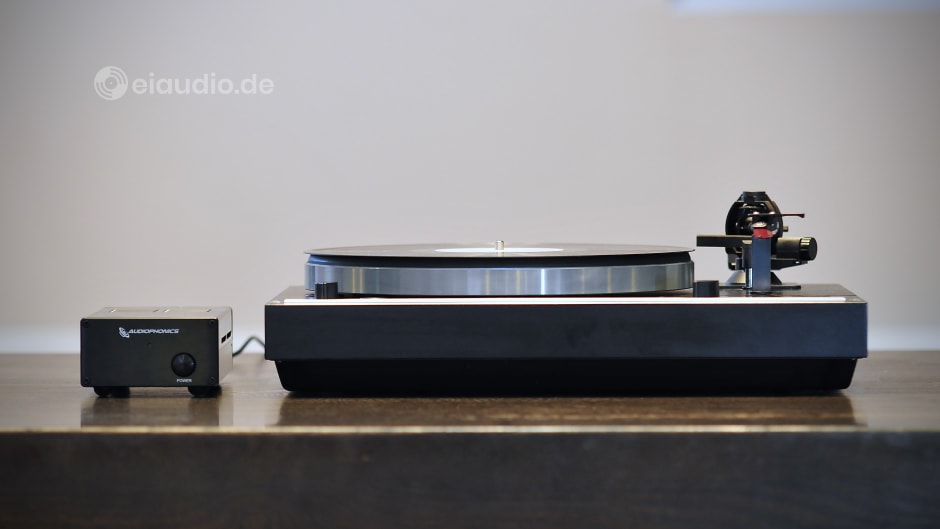
The TD 320 featured a suspended sub-chassis hinged on 3-point leaf springs that held the tonearm and platter separated from the vibrations of the motor. The use of leaf springs proved to be beneficial when compared to earlier coil spring designs, as they limited wobble on the horizontal axis. To eliminate the effect of transformer vibrations, the TD 320 came with a separate power supply. And although the original Thorens supply was simply built into the AC plug, power supply upgrades were among the first and most viable tuning choices for the TD 320. The power supply that is shown here was sold by the French audio distributer 'Audiophonics'. It is of linear low-noise design and has dedicated EMI and RFI filters. Its output is rated at 1.25 A and 16 V. Placing the power supply on a separate shelf-board will effectively eliminate power supply vibrations from the music signal.
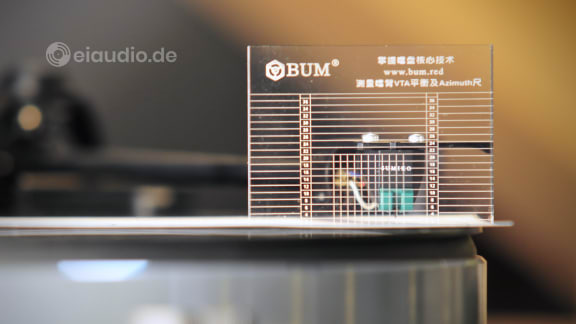
The Thorens TP16 MK-IV tonearm featured adjustable horizontal and vertical bearings to keep the amount of arm play to a minimum. The black dust cap on top of the pivot could be removed to allow easy access to the top bearing. Unlike many of its foreign contemporaries, the MK-IV tonearm came with a fixed headshell that could not easily be swapped around. Its sleve wrapped around the arm’s aluminum tube and was fixed with a single screw. The vertical tracking angle (VTA) of the cartridge and stylus combination could be adjusted by loosening the screw and twisting the headshell into position. There were, however, some flaws with this crude system. For one thing, twisting the headshell on the arm could have a negative or even damaging effect on the fragile tonearm bearings. Second, removing the arm from the overly tight tonearm clamp on a regular basis could negatively affect the VTA setting. And, third, tightening the headshell screw almost inevitably altered the vertical tracking angle again in an unpredictable manner. On the other hand, the arm’s no-frills, anti-skating mechanism could also be conveniently set via a single screw. This affected the position of permanent magnets and actually worked quite well.
When I picked up our TD 320 from a private seller in the Taunus region near Frankfurt, it was in arguably poor condition. Its wood veneer had lost most of its lustre, its dust cover had been deeply scratched. The 3-point suspension had come loose on the inside, and the platter was lopsided and scraping over the plinth with each turn. The drive belt was loose and needed replacement, and the original yellow Linn-branded pickup (made by Audio Technica) had a badly-worn stylus. I placed the Thorens on the back seat of our car and wondered how much time and effort it would take to restore this once great turntable to its original splendour.
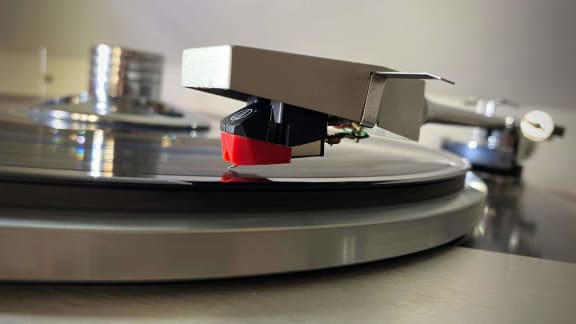
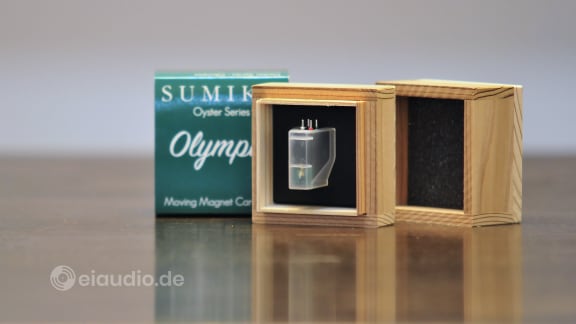
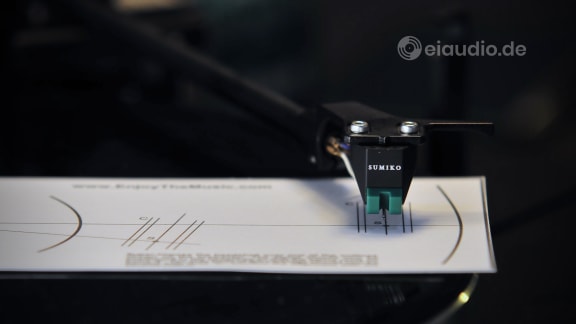
I bought a new drive belt from Thakker.eu, fixed and adjusted the 3-point suspension until it held the arm-board at the correct height and level again. I used furniture polish to restore the original wooden shine of the plinth. Following a short interlude with a Sumiko Olympia cartridge (which I ended up sending back to Thakker), I installed our Audio Technica VM95 ML cartridge with a very positive result. Since both the Sumiko and the Audio Technica had a lower body than the original cartridge, I also needed to adjust the tonearm-height for the arm to be level with the record during playback. I replaced the original power supply with the one from Audiophonics and removed the original felt pads under the plinth to replace them with height-adjustable copper spikes. Determined to restore the dust cover, I showed it to my friend Thomas who is an expert on car body work and paint jobs. He offered to sand it down and polish it for me. When he returned it to me one week later, the scratched, old cover looked as though it had come fresh from the shop.
Listening to music on the TD 320 with an Audio Technica VM95 ML cartridge produced a warm, balanced and natural sound. Background noise was low, and channel separation was great. There was a sense of elegant delicacy that was embedded in believable tonality and excellent musical flow. The VM95 ML was a superb tracker and worked well with the TP16 MK-IV tonearm. The Sumiko, on the other hand, had seemed more bottom heavy and much less refined with continuous distortion and sibilance, especially towards the inner groove of records, which was also the reason for me sending it back to the shop. I found that the TD 320 in combination with the Audio Technica VM95 ML lent itself to classical music and Jazz and to those seeking a laid back and insightful sound rather than in-your-face attack. It was perhaps not the most enthralling combination, and I sometimes wondered how a louder and more boisterous Ortofon 2M Bronze cartridge might perform in the balance of things.
There are still some design flaws to the TD 320 which I might address at a later stage. For example, a look under the hood revealed that the audio signals were in fact running in parallel with some of the power and switching electronics, a circumstance I intend to change for greater dynamics and transparency. There was also the questionable quality of the interconnects themselves that had come pre-installed on the turntable. One could possibly get a better result by changing to a silver solid-core interconnect from our trusted HBS series. Both the platter and the plinth floor might benefit from additional damping matts being applied. The sub-chassis might be re-adjusted to allow for the use of an additional record weight, etc. However, for the time being, I was indeed very happy to have given new life to one of the all-time legends in the world of turntable designs. I understood that there was a lot more fun to be had with the TD 320 than with any of the sleek and modern direct-drive decks from Japan. Although, the Thorens was more complicated to deal with on a daily basis and screamed: Caution, handle with care!
Thorens Company History
Thorens was originally founded in the town of Sainte-Croix, Switzerland, in 1883. Similar to the German Dual, Thorens started out as a specialist for clock movements before producing phonographs from 1903. The company’s first turntables date back as early as 1928. This makes Thorens one of the oldest existing producers of turntables in the world.
During the 1950s and 1960s, Thorens produced a range of sophisticated turntables for private and professional use that continue to be regarded as audiophile High-End equipment. The TD150 MK II was produced for the private market from 1965-1972, and the heavy-built TD 124 was found among audiophiles and studios alike. It was produced from 1957 to 1965.
Following its insolvency of 1999, the newly formed 'Suisse Thorens Export Company' took over the Thorens assets and continued to produce and sell Thorens turntables under the leadership of Heinz Roher. In May 2018, Gunter Kürten took over the company and moved its headquarters to Bergisch Gladbach in Germany. Current models include the TD 124 DD, the TD 1500 with TP 150 tonearm and SME headshell, and the similarly equipped TD 403 DD.
Specifications
- Drive method: one step belt drive
- Motor: 16-pole synchronous motor, 16V
- Platter speed: 33 and 45rpm
- Speed control: 2-phase generator
- Platter: 3.1kg, 300mm, zinc alloy, dynamically balanced
- Wow and flutter: 0.035%
- Rumble: > -72B
- Tonearm: TP16 MK IV
- Tonearm length: 232mm
- Pivot to spindle: 215.6mm
- Effective mass: 12.5g
- Overhang: 16.4mm
- Offset angle: 23 degrees
- Dimensions: 440 x 350 x 170mm
- Weight: 11kg (plus power supply)
- Power supply: Audiophonics LPSU25 (China)
- Supply type: 25VA, linear regulated, EMI RFI filters
- Country of manufacture: Germany
- Year(s): 1986-1988
Let's explore together

Get in touch with me
If you happen to live within reach of 25709 Marne in northern Germany and own vintage Hi-Fi Stereo classics waiting to be explored and written about, I would be honoured to hear from you!
Your contact details
All reviews are free of charge, and your personal data will strictly be used to organise the reviewing process with you. Your gear will be returned to you within two weeks, and you are most welcome to take part in the listening process. Gear owners can choose to remain anonymous or be mentioned in the review as they wish.
Thank you for supporting the eiaudio project.
Audiophile greetings,
Karsten


Phono Preamps
Tuners
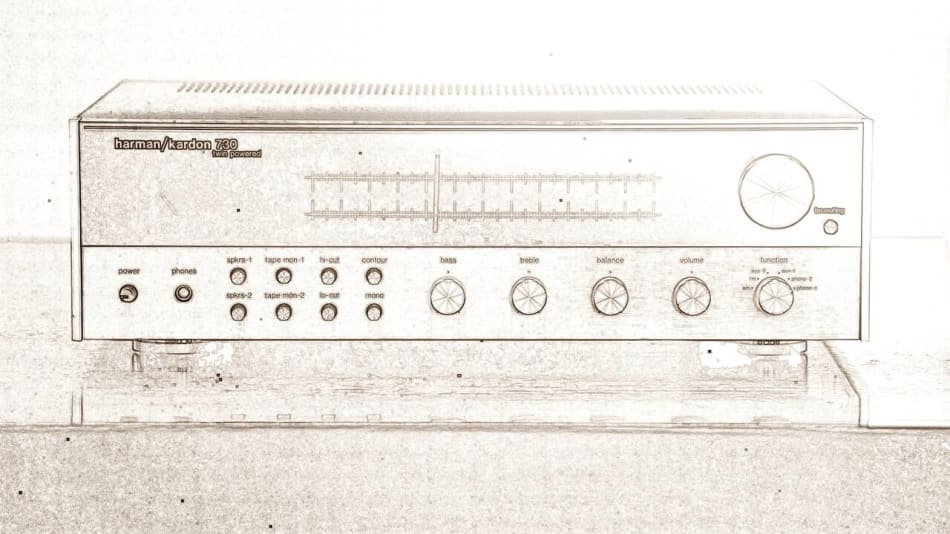
Some people will argue that the time of analog radio tuners is over and that there are better ways of receiving signals and processing these into sound. Yet, despite many announcements that analog radio will be phased out from our public broadcasts, analog radio is still the norm rather than the exception. This may have to do with the long signal reach into remote areas that are not yet covered by the digital network, it may have to do with the number of analog radios still out there, and it may also be a strange form of nostalgia.
Be that as it may, it is probably fair to say that the people who support analog radio for the sake of its sonic abilities are few and far between, although they may have a valid point here that should be more relevant than the others. On clear nights, analog sound still has its soft and special charme, simply because there is no translation into digital involved. And because of this, there is an element of a sweet caress to the ears that is more than romanticism in that it satisfied a longing that is very human indeed.
Nikko FAM 600

Published: 20/05/2020
Manufacturing date: 1975
Author: Karsten Hein
Category: Gear & Review
Tag(s): Tuners
Nikko Audio was a division of the Japanese electronics company Nikko Electric Industry Co, which was formed in 1933 in Kanagawa. The company's audio components earned a good reputation, however the brand only reached a limited distribution and during a general decline in the market in the 90's, the division was forced to close.
The history of the Nikko Audio company reads like a rollercoaster ride between a genuine interest in high quality products and inexplicable failure in managing to sell these to the world. The original ‚Nikko Electric Works‘ was re-founded shortly after WW2 as a designer, manufacturer and installer of communication technology and electrical equipment in Japan. In those early years, Nikko mostly manufactured fuses for the Japanese National Railroad - until the daughter of the boss married a young audiophile lad who allegedly had "golden ears" and persuaded his father-in-law to put on a range of HiFi products, a process that began in the late 1960s. The son-in-law understood about good sound, but he was only marginally interested in the marketing of his products, so that he initially developed devices that were very good, but also very expensive and therefore difficult to sell.
With the Audio Division hardly generating enough income for itself in the 1970s, Nikko was forced to revise its strategy and spin off into various foreign subsidiaries. The product range was streamlined and most of the early High End gear was removed in favour of less expensive and therefore more marketable equipment. Although the product quality was easily able to keep up with the competition, they did not perform in terms of sales, which was mainly due to their overly conservative appearance. In contrast to Sony or other big names with their brushed aluminium fronts, Nikko designers could not (or did not want to) follow this trend and therefore had a hard time holding their own in the market.
A later reorganisation of the product range saw the launch of compact equipment in the lower and medium price range. Nikko also entered the German market with these products, among others; they were introduced via various importers and then sold preferably via department store chains or mail order (i.e. the low-cost segment). Soon, a name and products that were still relatively unknown but that had been poised for greatness sold out to the market and the company finally closed business following the general market slump after the Asian flu at the end of the 90s.
The FAM 600 tuner shown here is of elegant design, not only from the outside, but also in terms of the simplicity found within. It came pre-equipped with outputs for quatrophonic users (the big idea at the time) and feels great in the choice of materials. The company’s High End origins still shine through on this device. Although there are better tuners e.g. in the higher Sansui price ranges, this unit offers a great way to experience analog radio at its best. As analog listeners will know, there is radio weather - and then there are those other times, when something is just not right in the universe. On good listening nights, the analog experience, if done right, has all the magic it takes for us to lose ourselves over and over again. connectors.
Specifications
- Manufacturer: Nikko Electric Manufacturing Co., Ltd.; Tokyo
- Product launch: 1975
- Category: stereo broadcast receiver, past WW2 Tuner
- Main principle: Superheterodyne
- Body: Copper chassis, brushed aluminum front, wood case
- Dimensions: 380 x 130 x 300 mm
- Weight: 5kg
Picture description:
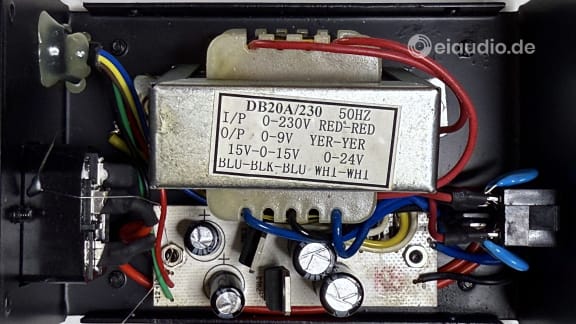
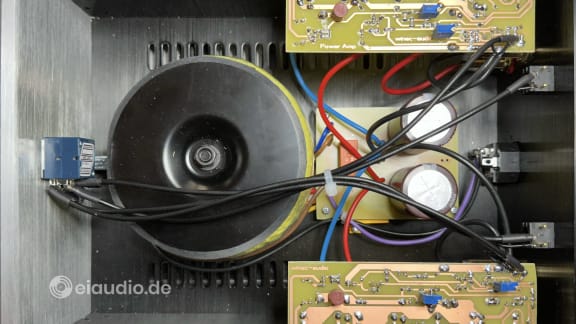
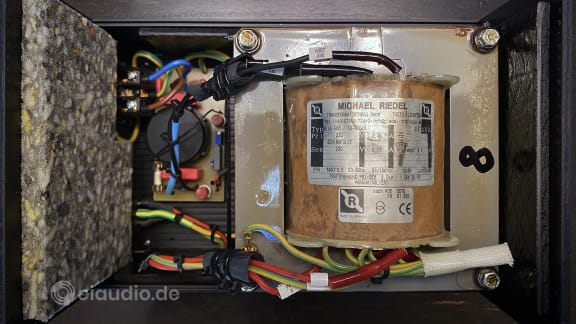
Moving clockwise from top center we can identify the back of the operating panel, the transformer and, below this, the circuit board of the customer made power supply. The 5-pin DIN is located in the bottom right corner, inconveniently just above the power cord. Antenna inputs are in the lower left corner and above these is the tuner's main board. The large tuning rotary capacitor is in the top left of the board. A copper sandwich floor protects the underside of the board from electrical interference with all the internal wiring remaining hidden from view.
CD-Players

The CD offers decent quality music in a compact digital format. It offers a 44.1kHz sampling rate at a depth of 16 bits per sample. The parameters were chosen to cover the full span of human hearing from 20Hz to 20kHz. While this should be enough to replicate most musical information in bits and bytes, in recent times, it is often produced using downsampling and/or bitrate reduction - e.g. when the master file is recorded at 192kHz sampling rate and a depth of 24bit, as is common in Jazz and Classical music. Attempts have since been made to increase the sampling rate and bit depths in formats such as SACD and BlueRay Audio, but these failed to reach a market that had already abandoned the high quality audio sector for high convenience audio, such as MP3 and music on demand services.
It is not surprising then, that sales of vinyl records have recently again surpassed those of CD, the first time in a quarter of a century. With audiophile listeners flocking to fashionable high-res streaming services, ownership has become a rare privilege and is best celebrated and contrasted by the meticulous ritual of playing and storing vinyl. Yet, in midst of all this, there is still lots of fun to be had with CD players, as there is more to setting them up and extracting an audiophile experience from them than may first meet the eye.
To have the most options, make sure that your CD player comes with a digital coax output in addition to the more common Toslink connector, as well as RCA/cinch, of course.
Denon DCD 1500 II

Published: 12/04/2021
Manufacturing date: 1986
Author: Karsten Hein
Category: Gear & Review
Tag(s): CD-Players
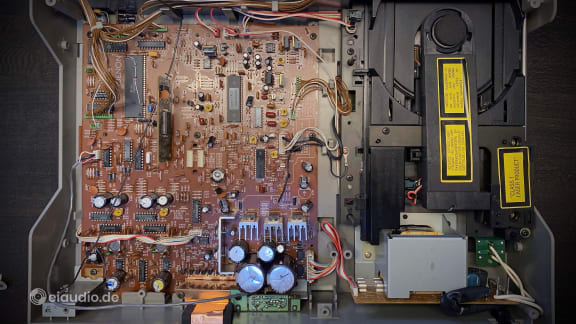
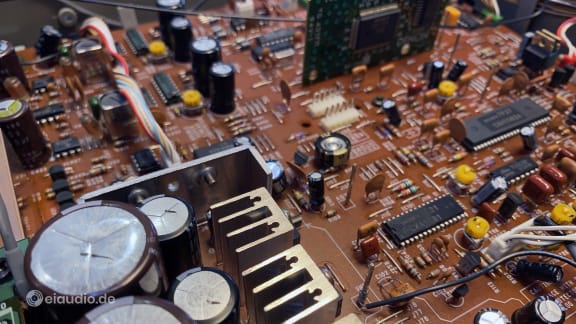
Having owned the smaller brother, a Denon DCD-1420, for some time now, a look under the hood revealed larger placement markings around the smallish capacitors that showed the dimensions of the parts used on ‘the real thing’, namely, the larger DCD-1500 unit. And, although the DCD-1420 is a reliable middle-class player, even after four decades, I have often asked myself, what I would be hearing, had I bought the fully equipped unit instead.
Therefore, when Luigi showed me two CD-players and asked me which of the two to get, I had a strong leaning towards the Denon DCD-1500 II. The photos we saw showed it in good used condition, but they were far from impressive. Both the Denon’s size and design did not give away its exceptional build quality and internal merits. To me, it looked like just another CD player. This impression changed, when I visited Luigi and saw the player, with its display turned on, perched on a proper HiFi rack. Although its size had not changed and its design was still an understatement, there now was a cleaned-up seriousness about it that made me curious at an instant. This was certainly a whole other beast from my 1420.
Luigi played me a few songs on the Denon DCD-1500 II before he switched to vinyl. While I usually cherish the transition from digital to analog, I noticed that I was a little sad to stop listening to the 1500 so soon. Perhaps this was because the player’s cleaned-up looks had been wonderfully present in the music as well. While the player had not sounded spectacular by any means, the music simply had this air of dependability to it that made it endearing to my ears. I had instantly trusted this player to sound pleasant. The lack of this quality is often an issue with CD players; actually, when audiophiles describe devices as sounding analog or warm, it is sonic dependability rather than spectacle that they are referring to.
Luigi suggested I should take the Denon home with me, explore it further and, perhaps, write a review on it, to which I gladly consented. When I was ready to leave and picked the Denon up from the rack, I was surprised by its weight. For a moment, it felt as if it had been glued to the boards. This aspect of the player is so well hidden, it struck me by surprise, despite having read in the advertisement that it was close to 10kg. Coming from a larger and higher built amplifier, the weight would not have surprised me, but from a standard-looking Japanese consumer device, I was positively surprised.
When I came home, I placed the Denon on our conference table and opened the chassis to look under the hood. While the top cover was made of the same bent metal as is custom on today’s units, I did find a 4mm sheet of lead glued to the inside of the cover. This certainly helps to keep the typical drive and chassis resonances at bay and also increases the player’s resilience in case of resonances coming from the outside. I guess anyone could glue a sheet of lead under the cover of their CD players to the same effect, but thinking of my DCD-1420, I could see how pointless that would be, considering that it was not even made of Denon’s full-size parts.
While performing the first operations on the DCD-1500 II placed in our rack, I noticed that some of the buttons on the front were actually made of metal. This has some advantages when it comes to durability. On our silver 1420 for instance, some of the more frequently used buttons have already lost their silver shine. This was not the case on the 1500. Like many of Denon’s players, the 1500 features both a fixed and a variable output which can be convenient in some cases. For any listening test, I used the fixed output to leave out any unnecessary augmentation to the sound. The CD transport is of excellent quality, and the drawer opens promptly and quickly.
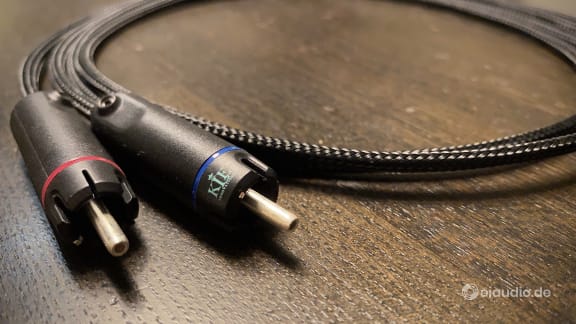
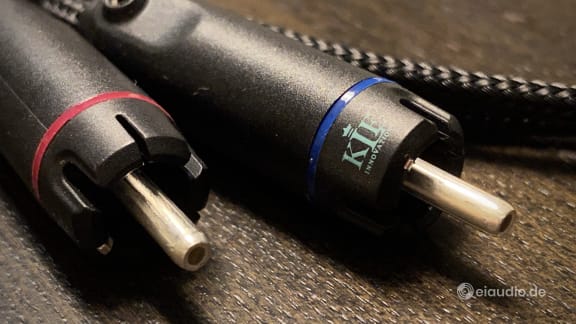
In our living room setup, the 1500 had to compete with the 16-years younger 3.7kg lightweight Rega Planet 2000 CD-player, which was our standard choice for CDs. The interconnect used on both devices was a new type of silver solid core with KLE Innovations silver plugs that had been custom made for eiaudio.de and had not been completely run in. This is to say that bass extension had not completely evolved after two weeks of playing. Since this was our best interconnect at the time, I decided that I would stick with this cable despite this small flaw in the setup. The song played was “No Moon at All” on Diana Krall’s ‘Turn up the Quiet’ album.
The Rega came first and played this song with realistic dimension and tonality. I found that timing could at times have been better, with the player showing a slight tendency of dragging its feet, but overall it was an accurate representation with lots of warmth, musical detail, size, and natural space around the instruments. The DCD-1500 II came next and, in comparison, played slightly darker and fuller with a striking three-dimensional richness in Diana Krall’s voice. It did not present the same amount of detail; however, its timing was more accurate with slightly more drive and consistency to it. The Denon came across as slightly more controlled and dryer with individual notes being stopped earlier. The Rega in comparison appeared to be less predictable, was able to present more of the disc’s nuances, gave a fruitier performance and allowed the music more space to perform.
Both players sounded very pleasing, are excellent companions for extended late night listening sessions and renowned for their warm and analog sound. The Denon is surely the mechanically more sophisticated player, whereas the Rega wins its points on the basis of modern DAC circuitry, a more detailed presentation, and lots of musical charm. Considering that the Rega has a 16-year edge over the Denon, the DCD-1500 II a still very good and worthwhile CD-player, indeed. Its build quality, touch and feel, general usability, and its excellent remote control position it well ahead of today’s mid-market competition.
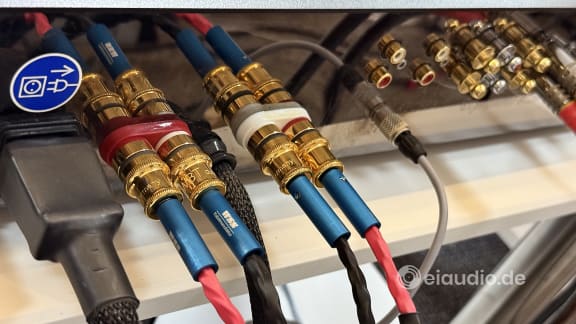
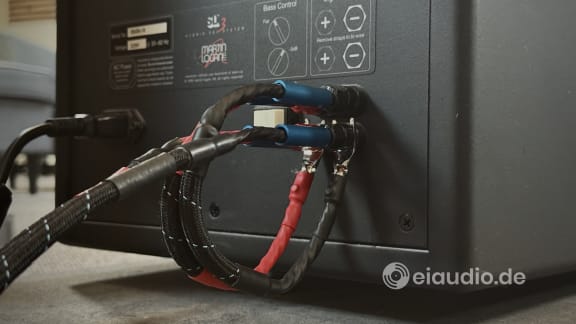
Testing environment: Denon DCD-1500 II (via HBPS pure silver solid core interconnects to) DB Systems DB1 preamplifier; (via Audiocrast OCC and Silver interconnect to) B&K ST140 power amplifier; (via Belden 9497 speaker cables in bi-wiring to) Martin Logan SL3 electrostatic speakers
Specifications
- Digital Converter: 2 x Burr-Brown PCM56P-J
- CD mechanism: KSS-151A / FG-610
- Frequency response: 2 Hz to 20 kHz
- Dynamic range: 96 dB
- Signal-to-noise ratio (1kHz): 103 dB
- Channel separation: 100 dB
- Total harmonic distortion (1kHz): 0.003%
- Wow and flutter: below measurable
- Power Consumption: 17 W
- Line output (fixed / variable): 2 V (max.)
- Headphones: variable output volume
- Extras: RC 202 remote control, variable line output
- Dimensions: 434 x 107 x 324 mm
- Weight: 9.3 kg
- Country of manufacture: Japan
- Year: 1988
Denon DCD-1420

Published: 29/05/2020
Manufacturing date: 1988
Author: Karsten Hein
Category: Gear & Review
Tag(s): CD-Players
Frederick Whitney Horn, an American entrepreneur, started the Nippon Denki Onkyo Kabushikigaisha in 1910 as a subsidiary of the Japanese Recorders Corp. Even before record players, cylinder recorders were common, and Denki Onkyo produced both the media and the players for them. Following mergers with other companies, the name was shortened to DEN-ON which later became Denon. The company was, next to Philips and Sony, a front runner in the development of digital technology and has made a name for itself as manufacturer of professional studio machines as well as HiFi products for the private user market.
The Denon track record of providing new ideas in music reproduction to the world is quite immense. In 1939, Denon manufactured the first (analog) disc recorder for use in the broadcast industry. In 1951, the company played a major role in selling the first long play records to the Japanese population. Two years later, Denon launched a well received line of reel to reel recorders for the broadcast industry. The first Denon HiFi components were launched in 1971. Among them were turntables, amplifiers, tuners, and speakers. In 1999, Denon produced the world's first THX-EX home theater system, in collaboration with Dolby Laboratories. Over the years, Denon has won many prizes for its outstanding contribution to the industry. Recent trends are up to 13-channel multi-channel and wireless multi room systems. Although the company has also produced some outstanding High End components, the bread and butter business has always been divided between their professional line and HiFi products for the broader consumer market.
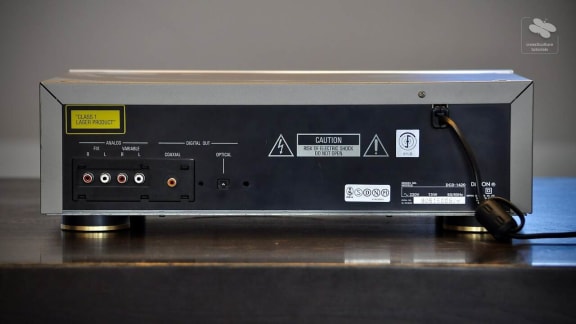
Some of Denon’s outstanding consumer to High End products were, among many others: the TU 400 Stereo Tuner (1977): the rather peculiar two-coloured PMA 850 amplifier (1977); the DCD-1800 CD player (1985); the by any standard enormous POA-S1 mono power amplifiers (1996), and the Denon DL-103R Shibata cartridge for vinyl fans. The DCD-1420 that is shown here is not listed in the Denon Hall of Fame, as even at that time, there was the more sophisticated (10 Kg) DCD-1520 with better specifications. Despite its non-cult status, I decided to include it here, as it is a great player to begin your explorations in audio. It is well constructed, relatively easy to repair, nearly all parts for the laser drive can still be bought, and the usability is simply excellent. I love the fact that I automatically starts playing when I turn it on and that I can use the numeric keys on the unit to jump straight to the title, even if I do not have the remote at hand. The large display is dimmable and adaptable in content, which is useful for nightly sessions.
Going through the player’s internal DAC, the sound is detailed and leaning towards refined, but it feels a bit light and is lacking the stamina and tonal balance of higher priced units. Since the DCD-1420 has a digital coax connector, one can connect an external DAC, and this is where the fun begins. Putting the player on a base with absorbers and placing a ferrite clamp on the power cord inside the unit as well as outside, have greatly contributed to the musicality of the player + DAC combo. I might be a little biased, however, having owned three of these players over the years. All of them should still be playing just fine, I would assume.
Specifications
- Digital converter: 2 x PCM54HP
- CD Mechanism: KSS-150A / KSS-210A
- Frequency response: 2Hz to 20kHz
- Dynamic range: 97dB
- Signal to Noise Ratio: 108dB
- Channel separation: 102dB
- Total harmonic distortion: 0.003%
- Line output: 2V
- Digital outputs: coaxial, optical
- Dimensions: 434 x 135 x 310mm
- Weight: 6.3kg
- Country of manufacture: Japan
- Year(s): 1988 - 1990
Denon DCD-660
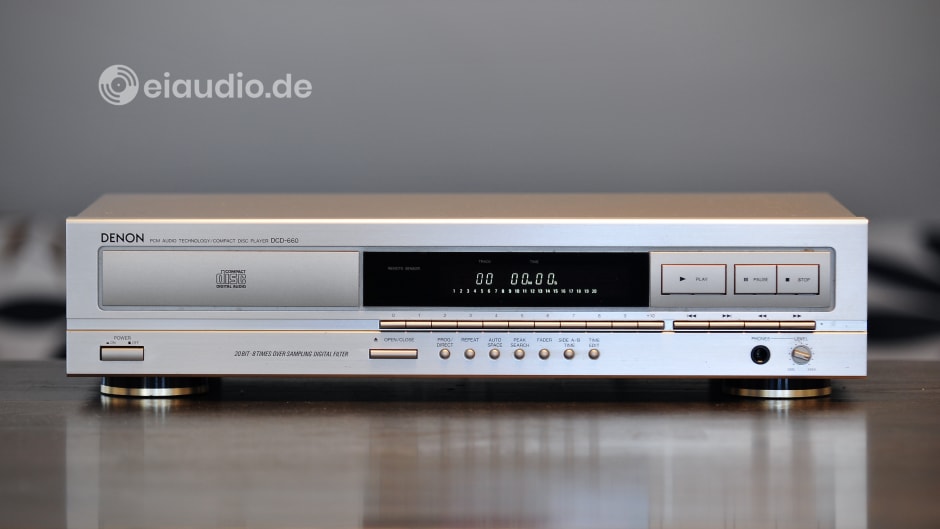
Published: 28/01/2023
Manufacturing date: 1991
Author: Karsten Hein
Category: Gear & Review
Tag(s): CD-Players
Let’s face it: There have been some outstanding CD player designs since the dawn of the medium through a joint venture of Sony and Philips in 1982. The Meridian MCD of 1985, for example, that took the housing for a Philips CD 100 and gave it a complete hauling over in terms of the output stage and error correction, similar to the German Roman Gross modifications that came much later. Cambridge followed in the subsequent year with their CD1 that already boasted a separate stack-on-top DAC unit. Arcam, Naim, and Quad all came out with excellent machines that got the HiFi press interested. So did Cyrus and Chord in more recent times, and this list only includes some of the British makers of CD players. However, these renditions all cost a fortune and remained out of reach for all but the most hardcore enthusiasts.
The real bread-and-butter business of the industry were low-priced machines such as the Denon DCD-660 that is the subject of this report. While the Cambridge CD 1 may have changed what was possible with the medium, the Denon DCD-660 affected what was accessible to the households of the average consumers. The Denon answered the question of how many (and what quality of) parts it took to satisfy the prevailing needs of shoppers at this price level. And, as this particular DCD-660 had been handed down to my daughter from her recently deceased great aunt, I wanted to take the opportunity for a quick exploration of its capabilities before installing it in her room. One of the other devices that my daughter had received was a Dual CV 1260 Class-A amplifier, which I enjoyed listening to quite a lot and dreaded having to surrender.
The CV 1260 was connected to our Epicure 3.0 loudspeakers via a pair of unterminated Belden 9497 speaker cables in single wiring. I used our larger and more elaborate Denon DCD 1420 as benchmark and took Diana Krall’s Album All for You as music material for my listening explorations. This album sounded really satisfying on the DCD 1420, and I could not have said that I was missing anything in the music. This in itself was a surprising realisation given the relatively small Dual amplifier driving the large Epicure tower speakers. On the other hand, 44 watts idle power on the side of the Dual suggested that it possessed a sufficient amount of Class-A amplification, as its name suggested.
Opening the DCD-660’s sliding tray for the first time, I noticed that it had some difficulties overcoming the first 1-2 centimetres of its journey. I helped the process by tugging it out gently with my fingers. I repeated the procedure a few times and noticed that it worked better with each application. When CD players remained unused for a long time, the rubber belts that were driving loading mechanism could at times permanently assume the oval shape they were last left in. If the tray had not recovered from my moving it by hand, I would have probably had to change the belt, which could turn out to be a little tricky, depending on the model. On the positive side, I found that the DCD-1420's remote control also worked on the DCD-660.
Right after start-up, the small Denon still sounded a bit harsh and grainy; however, this effect subsided as the machine reached operating temperature. Perhaps this was another indication of the unit having been sitting around unused over a long period of time. I noticed that the tonality was the same between the two Denon players. I would have liked to turn the LCD display off via the remote control to achieve that extra-clean sound, but I found that this function was missing on the DCD-660. The resulting soundstage, therefore, was not quite as clean cut and three dimensional, although I did have the feeling that the larger player sounded even hazier with the display turned on and consequently also benefitted from the display-off feature more. In direct comparison, ultra-low bass seemed a bit more profound on the DCD 1420, but not to the point where I would have minded much.
System integration was not great on the DCD-660, though. It was missing the separate variable Cinch/RCA output sockets of its larger sibling, did not have a digital S/PDIF output to connect an external DAC, and was also missing an optical output for integration in systems with grounding issues. As these criteria had become more and more important to me over the years, I would not have chosen the DCD-660 for myself. However, listeners who exclusively used the direct analog cinch/RCA output anyways, did get a capable CD player with natural tonality and a decent soundstage for a budget price. And, since switching the LCD display off in order to achieve an enhanced soundstage experience is only common in audiophile circles anyway, most owners of the Denon DCD-660 would have had every reason to be happy with and proud of their new device.
Specifications
- Digital converter: PCM61P
- CD Mechanism: KSS-210A (linear tracking)
- Frequency response: 2 Hz - 20,000 Hz
- Dynamic range: 95 dB
- Signal to noise ratio: 103 dB
- Channel separation: 99 dB
- Total harmonic distortion: 0.004%
- Filters: 20 bit / 8-times oversampling
- Line output: 2V (cinch/RCA)
- Variable line output: none
- Digital S/PDIF output: none
- Optical output: none
- Features: 1/3-headphones jack, volume poti
- Accessories: RC-226 remote control
- Dimensions: 434 x 105 x 280mm
- Weight: 3.8 kg
- Country of manufacture: Japan
- Year: 1991
Marantz CD-17

Published: 22/05/2020
Manufacturing date: 1995
Author: Karsten Hein
Category: Gear & Review
Tag(s): CD-Players
Saul Marantz built his first audio product, the ‘Consolette’ preamp in Kew Gardens, New York. Although the Marantz Corporation today have their headquarters in Kanagawa, Japan, the Marantz success story began in America and reached its biggest relative success in the 1970s. Throughout its lifetime, the company formed joint ventures and changed owners many times. With the emergence of CD technology in the 80s, for example, Marantz partnered with Philips to manufacture CD players under the Marantz brand that were generally well received. Ownership was only transferred to Japan in 2001, when Marantz Japan bought the brand from Philips and, in the following year, merged with Denon to form the D&M Holdings Inc. After 28 years of partnership, Philips sold the remaining stakes it held in Marantz in 2008, and the Holding is today owned by Sound United LLC.
Among the company’s most noteworthy products are the Marantz 2325 and 2600 receivers, the CD63 and, more generally, the Ken Ishiwata signature product series, such as the Marantz PM-KI Ruby and the Marantz CD17-KI which is shown here. When it was released to the public at the end of the 1990s, the DC17 was already well-received by the audio world. With plenty of detail in treble, a clear and full mid range and Marantz-typical bass extension, the sound was described as ‘analog’ and attracted vinyl fans all over the world. However, there was also another aspect to the CD17 that was troubling audiophiles, as it also marked the departure from the fabled Philips swing-arm laser as well as other former brand features, such as diecast chassis and metal loaders. At the turn of the century, sales of high priced audio products were on the decline and cost driven choices became the new norm all around.
The CD17 Ken Ishiwata signature, 1997, is Marantz’s attempt to re-imagine a world in which cost cutting had not taken place. The ‘money-no-object’ approach did not mean a return to the swing-arm laser or diecast chassis, but it did introduce some interesting features, such as an upgrade to the drive unit, a full copper shielding of the interior, a toroidal transformer, upgrades to the analog stage, improvements on current noise cancellation, etc. The result is a super silent player with a sophisticated sound stage. Similar to the outer design of the unit, there is not much splendour or extravagance to the music, but if you prefer to be caressed rather than impressed, the Marantz CD17-KI is not a bad choice at all.
Listening Test (on YouTube):
Marantz CD17-KI
Specifications
- Frequency range: 5Hz-20kHz
- Dynamic range: > 98 dB
- S/N ratio (WTD): > 103 dB
- Channel separation (1 kHz): >100 dB
- THD (1 kHz): 0.0015 % Analog output
- Output level (cinch JACKS): 2.2 V RMS
- Output impedance: 250 ohms
- Dimensions: 458 mm x 83 mm x 313 mm
- Weight: 7.8 kg
- Country of manufacture: Japan
- Year(s): 1995 - 1998
Philips CD 104

Published: 09/02/2021
Manufacturing date: 1984
Author: Karsten Hein
Category: Gear & Review
Tag(s): CD-Players
I first came across the Philips CD 104 in the early 1990s, when a school buddy of mine was looking to buy a used CD player and asked me for support. Since he was a ‘Philips man’, we checked the journals for budget offers from this company and ended up visiting a CD 104 owner to audition his player. At the time, I was used to the soothing amber glow and sleek modern design of JVC players, and the Philips struck me as being smallish in size and particularly ugly. The buttons seemed oddly out of place. And yet—against my advice—my friend ended up buying the unit and seemed rather happy with his purchase. The player was 8 years old at the time, and I must have been around twenty.
Back then, I was still unaware that Philips had been the company to introduce the CD player to the world, alongside Sony, in 1982, or that the CD 104 had only been the company’s second model. And since my friend had carried the player out of the house by himself, I was also left unaware of the seven kilograms in weight that the compact design so cleverly concealed. As far as I could see, my friend had simply paid too much for outdated junk. All the more, I was surprised to see a rather beaten up looking CD 104 perched on a CREACTIV HiFi-rack at a fellow audiophile’s house—in fact, as the only CD player among some famous turntables and amps. “If done well, the 104 has the potential for greatness.” my friend insisted. I was highly sceptical. This was in 2015, the player was 31 years old, and I was around forty-three.
A few weeks after my visit to the audiophile friend, our 5-year-old Marantz SA 7003 CD player quit working for the second time. The first time had been due to belt failure, and this time the laser had settled and could no longer read any medium. I was furious, and we decided that we would sell it broken, fully prepared to take a hefty 500 EUR loss. To us, the Marantz was not worth repairing, as its transport had been rather loud from the very beginning, with the servo correction being constantly in action. Experiencing such poor quality from a well-known brand destroyed my trust in the achievements of modern HiFi. How was it possible, that a more than 30-year old player could read CDs completely without servo noise and access individual titles faster than a 2010 state-of-the-art Super Audio player? How could the old player run for a great number of years without service, while the new unit seemed to break down every two and a half years?
I did some research on CD players and found that modern machines, even High End ones, are of modular construction with standardised and highly integrated circuits. Manufacturers essentially purchase and combine finished modules, box them in some uniform housing and stamp their name on the units. Sadly, this is done without the manufacturer having much influence on the quality of the parts, nor on the unit’s abilities in terms of sound reproduction. For example, I found that the laser on the broken Marantz player had been built by Pioneer and that many products using this type of SACD laser ended up having the same issues. What is the point of buying a Marantz, one might wonder, if the essential parts in the machine come from other manufacturers and are destined to fail? To make matters worse, modular construction often means that items such as transport and control, D/A converter, S/PDIF decoder, clock and perhaps even the output stage are combined into a single module. This scenario does not leave much room for the manufacturer to intervene, augment and improve the sound.
In the late 70s, when Philips set out to build the CD 104, things were quite different. Because the technology was new, Philips had to take full control and responsibility over the whole process. The new technology still had to prove itself to audiophiles with the money to spend. For the offer price of over 2,000 DM, and with few discs available on the market, the vinyl record player was still hard to beat in terms of sound. Philips had to give their new creation all the love and attention they possibly could. The CD 104 has a full metal chassis and includes the CDM-1 transport that Philips developed by themselves. The basis of this is a cast-iron form which holds a sophisticated swing-arm laser paired with six Rodenstock glass-lenses. In terms of musicality, the CDM-1 is considered to be the best transport ever made. Following the audiophile rule of “garbage in = garbage out”, a flawless reading of the source material is the basis for musicality.
While Philips engineers included everything they understood about transport construction to get their first players right, the focus of later players was to make the technology more accessible to the average consumer, and this meant bringing costs down. Iron, metal and glass gave way to plastic. And, since software and electronics are cheaper in production than precision optics, modern CD players will correct the tolerance of mediocre transport optics by using their servo motors and error correction at full capacity. Since these features are on board anyway, they might as well have a job to do, right? Before customers notice the handicap, and before their players fail, the warranty period will have expired. This explains why we could hear the servo motors on our Marantz SA 7003 CD player from the very beginning, and perhaps also why the player failed after a short five years.
When the Philips CD 104 tray opens, the sound, speed, and grace is similar to that of a bank volt opening. I catch myself holding my breath each time, hoping that it will once again make the full journey, just as it has so dutifully done for four decades. The player that Luigi brought by our house for testing has been skilfully reworked and upgraded to combine the physical assets of the eighties with the electronic insights of today. And although we are not quite certain to which extent the upgrade was made, typical improvements include making full use of the CDM-1 transport and the player’s two legendary TDA1540 mono multi-bit DACs by eliminating the digital oversampling and the analog filter in the output stage. Eliminating S/PDIF and jitter, and correcting channel delay. Further upgrades may include replacing the analog output amp from the original 35 transistors version to just two high quality FETs per channel, improving internal shielding, wiring, etc. German mods are currently available from Roman Groß ‘New Perspectives on Sound’ and from ‘KR High End Laboratory’.
From the outside, our unit shows gold-plated RCA/cinch sockets in place of the formerly fixed cable and plugs, as well as a three-prong power socket to allow the connection of a higher quality cord. The finished player not only surpasses its original setup in terms of sound performance, it also beats most of today’s players in terms of tonality, nuance, soundstage, and musicality. If the 14-bit DAC was ever considered to be a handicap by hasty customers, I can assure you that no handicap is audible at all. In fact, the later Philips 16-bit TDA1541 DACs (corrected 31.05.2021: see below) were used in Sony’s High End players well into the 1990s, which says a lot about what Sony thought of the Philips DACs.
Although I was quite sceptical at first, just a few seconds of listening made it clear to me that this vintage player performs well above the level that I was used to from our Marantz CD-17, an audiophile legend in its own right. CD never sounded this good in our house. If Marantz’s CD-17 is best described as sounding ‘analog’ and ‘warm’, I would not even know how to attribute special character to the Philips CD 104 NOS modification, except to say that it sounds —real.
At the time of writing this, the player is 37 years old. And just last night, I showed it to my seven-year-old daughter, and she ended up dancing to an Alin Coen CD.
Specifications
- Digital converter: 2 x TDA1540P
- CD transport: CDM-1
- Frequency response: 20Hz to 20kHz
- Signal to Noise Ratio: 90dB
- Channel separation: 86dB
- Total harmonic distortion: 0.005%
- Line output: 2V
- Dimensions: 320 x 86 x 300mm
- Weight: 7kg
- Year: 1984
NOS Modification
- No oversampling
- No analog filter
- No S/PDIF format
- No Jitter
- Channel Sync
- FET output amp
Pioneer PD-S604
Published: 13/04/2024
Manufacturing date: 1995
Author: Karsten Hein
Category: Gear & Review
Tag(s): CD-Players
I came across our specimen of Pioneer’s 1995 budget CD player PD-S604 while looking for an affordable replacement for our trusted Sony CDP-502ES on which the original laser unit had begun to fail. Replacement lasers for the 30-year-old Sony had been out of production for some time, and the sources I was aware of had either sold their last stock or had since become ridiculously expensive. The Pioneer was by no means on the same technical level as the Sony, however, it did have a 10-year advantage as far as our understanding of laser technology is concerned, and, like the Sony, it was built at a time when decent HiFi still mattered. The PD-S604 ranked between the lower PD-S504 and the higher-specced PD-S904 in Pioneer’s price-conscious consumer range. As such, it was no match for the fully-specced PD-S06 that came out in 1997 and weighed around 10kg, however, at just over three kilograms, the PD-S604 already offered much of the same technology.
What attracted me to the Pioneer players of this time was their patented Stable Platter mechanism which firmly holds the CD in upside-down position on a revolving platter. In this constellation, the laser reads the disc from above, finding a nearly perfect focus plane each time. On most rival mechanisms, the CD will unavoidably wobble slightly, thereby requiring constant focus and error corrections from the mechanism itself and from the software. A further benefit of the laser positioned above the disc was the superior dust protection of the optical lens. Dust particles in the room are less likely to ‘settle’ under a suspended laser than they are on a laser that sits beneath the disk. Following the old HiFi principle of “garbage in, garbage out”, the output quality greatly depends on the integrity of the early signals in the chain. Having spent years of critical listening, I have become more aware of the audible effects on music shortly before a laser starts to skip. Thinning bass output and increased sharpness of the treble are the most obvious side effects.
There is a fine line between consciously detectable noise and the kind of subconscious noise that simply makes us think less favourably of a product without the reasons being quite clear to us. The PD-S604 promised to eliminate such noise on at least two levels: Via the Stable Platter drive mechanism described above and via an upsampling feature called Legato Link. The CD’s Red Book standard supports 2-channel stereo at 16 Bit & 44.1 kHz allowing for frequencies up to 20,000 Hz. While this is also considered to be the upper end of human hearing, the sound spectrum of natural music does not end there. Vinyl LPs allow turntables to naturally attenuate higher frequencies through the limiting physical properties of the needle, thus creating a smoother fade-out. CD players, however, cut off the upper spectrum by means of filters. This way of handling the high frequencies is said to give CDs a sharper and less tonally pleasant top-end. This circumstance is often quoted among the reasons for some audiophiles to prefer turntables.
Legato Link promised to process high frequency information in a more delicate manner by using spline interpolation to recalculate the missing original waveform. Pioneer’s Legato Link was among the first digital filters using spline interpolation to pass through superior transient information, however, this did not come without side-effects and could at times leave behind some unpleasant modulation at higher frequencies. It has sometimes been said that on well recorded CDs Legato Link did work its magic, but on some recordings, the algorithm seemed to be at a loss and added information that more resembled distortion than music material. I had to find out for myself how these claims would play out in real life and decided that the PD-S604 offered the best value for money of the range. Both the PD-S904 and the PD-S06 offered a digital cinch/RCA output which the PD-S604 did not have. However, since I wanted to listen to the player by itself without the use of an external DAC, I could live with its existing features.
The original owner of the PD-S604 reported that he had been more than happy with the player’s features and sound as well. He said that it sounded superior to all the players he had owned since and that his reason for selling had more to do with the family’s sleek new audio rack that offered room for a single combined CD/DVD unit only. Upon my arrival, I found the Pioneer perched on the dining room table with some old headphones attached for demonstration. The resulting sound was mediocre at best, and so I could only test if the player was basically functional and decided I would give it a more thorough inspection at home. When I left the house of the seller, I promised that I would make his player famous by presenting it on the eiaudio blog and invited him for a visit if he should ever be in Marne. When I arrived home that night, I gave our Sony CDP-502ES one final listen and then set up the Pioneer in its place. I would test my luck with having the Sony repaired once again, but I understood that this would take some months.
With its functional but not exactly audiophile power cord connected, the PD-S604 instantly went into standby. This was a welcome feature for me, because it meant that I could rouse it from its sleep via remote control. In fact, CD players were often the only audio devices in my setups to offer the luxury of remote operation at all. OK, to offer true luxury, the layout of the remote control (CU-PD045) might have been better arranged. The Power button, the Numeric Keys for the title selection, and the Play, Pause, and Stop buttons were all of equal size and integrated within a uniform grid of buttons. This made nighttime operation a real nightmare. And the controls on the front of the player were not without quirks, either. While Numeric Keys on the front of the player made it easy to begin playback from a given title, the placement of controls here was also quite counterintuitive. The Stop button, for instance, was placed in a different row than Play & Pause, which were positioned next to the button to Open/Close the tray. I wonder how many times this player has been opened by mistake in an effort to stop the CD from playing.
On some CD players using a single power supply for the digital and analog section (e.g. Denon DCD-1420) turning off the display will lead to a cleaner sound by removing some of the digital haze. However, turning off the LCD display on the PD-S604 simply turns on a red LCD display message saying that the CD display is currently turned off. Therefore, perhaps unsurprisingly, I was unable to detect an acoustic benefit in turning the display off. Perhaps another such quirk is that the motor-driven headphones volume attenuator also affects the variable line-out volume. In audiophile listening, we attempt to reduce the number of controls and attenuators in the signal path and mostly give preference to the fixed line output. However, users who prefer the variable option may well find it a nuisance to have the two features connected. The headphone amplifier itself is a bit weak and will only sound decent with low impedance headphones made for laptops or other portable devices. Audiophile 300 Ohms would quickly drive this headphone amplifier to its limits.
I connected the Pioneer to our upgraded Rotel preamplifier with Becker ST-200 MOSFET amplifier using HBS2 silver solid core wires. The Rotel-Becker combination is generally more musical than analytical, it sounds rather enjoyable and is tonally rich rather than bland sounding. When paired with our Epicure EPI 500 loudspeakers, the combo is ideal for relaxed nighttime cruises and a great companion for hours of effortless listening. I found the PD-S604 to blend in well here. The Becker amplifier provides a good sense of order with most music choices, and the Pioneer enhanced this impression adding even more depth to the soundstage. On many occasions, I felt that the music was positioned in a perfect round circle spanning from my ears to the speakers and beyond. I appreciated the fact that with the PD-S604 the music did not lose any of the intimacy that I was used to from this amplifier to speaker combo.
Reading the disc with great accuracy and refining the top-end with Legato Link proved to be beneficial to most recordings of natural instruments as they are found in Jazz, Blues, Singer-Songwriter, Classical Music, and other handmade materials. One some recordings, however, it seemed that the high-frequency algorithm had some difficulty discerning music content from distortion and served to amplify this noise in a manner that I had not heard from other players. These artefacts could span from pure pink noise distortion to genuine background occurrences that remained hidden on other players. On one instance, the music material repeatedly changed from muffled to transparent as if the player could not make up its mind how to best handle the high frequency roll off. On the other hand, I must confess that I have not yet heard a CD player on which all recordings sound equally well. Suffice it to say that on some recordings the treble could be more accurate and better integrated.
There is one small upgrade I could not stop myself from adding: While taking the photos for the website, I noticed how unusually light the player felt. With its disk platter ejected, one might worry that it might fall over. I therefore added a sheet of anti-resonant coating to the inside of the cabinet (see last photo). Doing so added some 500 grams to the unit and served to reduce drive vibrations on the chassis which in turn led to an even more ordered sound. I once saw this method applied from factory on the Denon DCD 1500 II and rather liked the idea as a quick fix to mechanic issues. CD-players greatly benefit from a firm stand and lots of body weight to quiet their moving parts. A small tweak with audible effect.
Adding the anti-resonant coating, I noticed another small issue with the player. On some recordings there seemed to be a slight lack of forward drive. The player could sound a bit slow on occasion, especially when the music got faster. It is well possible that this effect was further highlighted in combination with the Becker amp that would at times display a similar tendency. The impression never stayed for long, but it was noteworthy enough for me to mention it here. Fans of faster music might want to take this into consideration or at least test the player with their material to first see if it works for them. On the music that I listen to, the occasional loss of momentum never troubled me a bit.
In its current state, I am indeed very satisfied with my purchase and enjoy the warm and pleasant sound of the PD-S604. There is sufficient bass presence to make instruments sound real and well-rounded. The Pioneer’s superior sense of order and its generous spacing of instruments are attractive features for the recreation of natural instrument recordings. In my experience, the musical benefits of Legato Link far outweigh the few instances in which it does not work so well. All in all, the PD-S604 has grown on me more than our Sony ever had. The better the music material is recorded, the better this player can show what it can do.
What experiences have you encountered with this player? At the time of writing this, there was not much information on this Pioneer player to be found on the web. Click on the header picture to activate commenting and be sure to share your personal experience with us.
Specifications:
- Type: Stable Patter mechanism CD player
- Power requirements: AC 220 - 240 V, 50/60 Hz
- Digital converter: PD2029A
- CD Mechanism: PEA1179
- Frequency response: 2 Hz - 20,000 Hz
- Signal to noise ratio: > 108 dB
- Dynamic range: > 96 dB
- Total harmonic distortion: < 0.0028%
- Line output voltage (max.): 2 V
- Wow and flutter: < 0.001% (below measurable)
- Number of channels: 2-channel (stereo)
- Variable line output (stereo): 1x cinch/RCA
- Fixed line output (stereo): 1x cinch/RCA
- Digital output (stereo): 1x optical
- Accessory jack: CD-Deck synchro to tape
- Headphone jack: motor drive volume control
- Accessories: remote control unit
- Remote batteries: 2x AAA
- Power consumption: 15 Watts
- Operating temperature: +5 to + 35 C
- Dimensions: (W) 420mm, (D) 286mm, (H) 110mm
- Product weight: 3.9 kg
- Country of Manufacture: Japan
- Year(s): 1995 - 1996
Pioneer PD-S705
Published: 02/09/2024
Manufacturing date: 1996
Author: Karsten Hein
Category: Gear & Review
Tag(s): CD-Players
Pioneer’s PD-S 705 CD player came out in 1996 and was the top-of-the-range model of the new x05 series. Just above it, was the popular PD-S 904, which had been released in the previous year. Arriving shortly after its famous siblings, the PD-S 705 bridged the gap between them and was an attractive choice for consumers seeking the technology of the PD-S 904 at a more affordable price. The main drawback of the PD-S 705 was that, like the PD-S 604 and the other entry-level players, it lacked a coaxial digital output for proper connection to an external digital-to-analogue converter (DAC) or to the digital input of a preamplifier or amplifier. For most people of the time, however, this compromise in versatility would not have mattered much, because CD players were predominantly the only digital HiFi equipment in their home.
In April 2024 I wrote an article about the smaller PD-S 604, in which I highlighted the benefits of Pioneer's Stable Platter mechanism for critical and audiophile listening. The platter is an integral part of the player's drive unit and supports the disc in its full dimension from underneath, rather than just gripping it in the middle. This greatly reduces disc wobble and allows the source material to be read with great accuracy. Since the purpose of any hi-fi system is to amplify and attenuate this initial signal, its integrity is of paramount importance. The PD-S 705 uses the same technology, but with a more advanced drive unit (PEA1291 instead of PEA1179). The improvements over the PD-S 604 are noticeable in the smoother opening and closing of the mechanism, as well as an even smoother disc rotation, resulting in ultra-fast initialisation of the disc when the tray is closed.
My article then went on to discuss the benefits of Legato Link, which does not abruptly cut off the high frequency content of the CD, as most CD players do, but instead uses spline interpolation to create a softer and more natural or 'analogue' sounding top end. Whereas on the PD-S 604 this technology could sometimes emphasise treble content in an undesirable way - as if to create artefacts on some recordings - the effect was much less pronounced on the PD-S 705, if it was detectable at all. I am thinking of a 2007 Sony & BMG 'Kuschel Jazz' CD, on which some songs produced an ultra-wide and three-dimensional soundstage at the cost of occasional inaccuracies in the top end. Jazzy interpretations such as Joel Harrison & Norah Jones' 'I Walk the Line' may also sound a little sharp on the PD-S 705, but I could not detect any digital errors, anomalies, or artefacts.
Although it uses the same digital-to-analogue converter (PD2029A), the PD-S 705 offers a +2db improved signal-to-noise ratio of 110dB. To achieve this, the PD-S 705 sacrifices some of the features found on the PD-S 604. For example, there is no variable line output, which would allow the output signal to be attenuated towards the amplifier. There is no headphone socket on the front panel, and consequently no motorised volume control. Whereas the 1980s still saw elaborate control panels with lots of functions and buttons, the late 1990s brought about a return to the essentials, with a simpler design philosophy focusing only on sound. The latter is probably the reason why the PD-S 705 has an off switch for the LCD display. Personally, I was delighted to find this feature on board, as I know that most audio equipment only reaches its full sonic potential when the display is switched off. Stray currents from the display can all too easily introduce audible noise into the music signal.
On the PD-S 705, the audio output paths are switchable, allowing the user to activate and deactivate both the digital optical output and the analogue output separately, depending on the application, in order to reduce interference. The PD-S 705 reduces Total Harmonic Distortion from an already low 0.0028% to 0.0026%, which is significant when combined with the improved signal-to-noise ratio. Next to being 1.5cm taller, the PD-S 705 is also 300 grams heavier than the PD-S 604, which gives it a more stable base and compensates for the heavier disc tray. On the other hand, the cabinet is still made from the same cheap bent sheet metal found on most hi-fi equipment to this day.
With the PD-S 604, I learned that adding some anti-resonant foil to the inside of the cabinet helped to make the sound more assured. As I had bought my PD-S 705 in refurbished condition from a professional German up-cycler, complete with a limited one-year warranty, I did not dare break the paper seal. I like the concept of repairing and reselling older electronics, giving them a second life. With this in mind, I was delighted to find Positron-e GmbH of 85368 Moosburg in Germany, who sell their refurbished and approved products on eBay. For the time being, however, the warranty means that I will have to live with the standard metal cover for a while, and I cannot show you any photos of the inside of the player just yet. This, and the slightly higher price, were small concessions to having the security of a professional service centre at my disposal, just in case there were any technical problems down the line.
In general, Pioneer's PD-S players are well-built audio machines that will give you many years of trouble-free service. In my experience, they benefit from interconnects that are quick and revealing to keep the player from sounding dull. I use unshielded silver solid core cables in twisted pairs. These cables work very well and allow the Pioneer to integrate seamlessly with high-end amplifiers such as the Symphonic Line RG9 MK3 and the newer Symphonic Line RG9 MK5. Compared to similarly priced NAD players, the Pioneer's soundstage was a little less sharp, instruments were not quite as three-dimensional, but speed and rhythm were more engaging and seemed more lifelike. The PD-S 705 may not be the most spectacular player, but its faithful reproduction of musical events and pleasant, analogue-sounding top end make it a great all-rounder and perfectly suitable for audiophile listening sessions.
< Pioneer PD-S 604 | Symphonic Line RG9 MK3 >
Specifications:
- Type: Stable Patter mechanism CD player
- Power requirements: AC 220 - 240 V, 50/60 Hz
- Digital converter: PD2029A
- CD Mechanism: PEA1291
- Frequency response: 2 Hz - 20,000 Hz
- Signal to noise ratio: > 110 dB
- Dynamic range: > 96 dB
- Total harmonic distortion: < 0.0026%
- Line output voltage (max.): 2 V
- Wow and flutter: < 0.001% (below measurable)
- Number of channels: 2-channel (stereo)
- Variable line output (stereo): not included
- Fixed line output (stereo): 1x cinch/RCA
- Digital output (stereo): 1x optical only
- Accessory jack: CD-Deck synchro to tape
- Headphone jack: not included
- Accessories: remote control unit
- Display options: on / off / time / program
- Remote batteries: 2x AAA
- Power consumption: 14 Watts
- Operating temperature: +5 to + 35 C
- Dimensions: (W) 420mm, (D) 283mm, (H) 125mm
- Product weight: 4.2 kg
- Country of Manufacture: Japan
- Year(s): 1996 - 1998

Rega Planet 2000

Published: 10/03/2021
Manufacturing date: 2000
Author: Karsten Hein
Category: Gear & Review
Tag(s): CD-Players
It is sometimes suggested that the CD today is an outdated medium, and that its prescribed 16-bit, 44.1 kHz Red Book standard places it well below the musical abilities of other analog and digital devices. This is no wonder, of course, as today’s audiophile competition comes in form of high-resolution formats from digital streaming services and from the analog revival that, after decades of stagnation, has once again led to rising vinyl sales. In addition to this, the CD is sidelined by audio formats of lesser significance, such as Super-Audio CDs, DVD-Audio, reel-to-reel, etc.
And yet, the medium has a lot going for itself. For one thing, it is tangible. Touch is something that a subscription to Tidal or Amazon HD is sorely lacking. While it is true that many CDs are sitting on our shelves never to be heard again, there are currently around ten CDs in our home collection—mostly Jazz and vocal Jazz albums—that are getting all the attention they could ever ask for. And then there is the pride of ownership, of course, as the hunter-gatherer in me is enjoying the fruits of said labor. And—since the laser does not physically touch the track while reading—there is no immediate worry about deterioration either. In obvious contrast to vinyl, CDs do not suffer as much from the effects of repeat play.
Similar to records, audiophile CD players read the information straight from the disk and shy away from unnecessary storage or modulation of sound. They will expose the shortcomings of both the medium and the recording, important factors in providing a reassuring sense of realism and dimension. In contrast to vinyl, however, the CD itself does not contribute its own material resonances that would make it sound organic and therefore familiar to the human ear. Instead, CD data is likely to be affected by resonances emanating from the drive motor, the laser’s queuing mechanism, vibrations from the built-in transformer, and from other units in the rack. It can be said that all electronics and mechanics around the music information on a CD are larger, louder, and prepared to spoil the listening fun. And since the resulting effects are unfamiliar to the human ear, they can be deemed unpleasant. Still, the CDs biggest sonic advantages over modern streaming services are that it is both tangible and local. Its data stream does not depend on the integrity of various relay servers along the way to reaching our ears.
The first Rega Plant CD player came out in 1997, a time when the CD was at the height of its popularity, and four long years before the first mp3 players came to the market. Rega was already a familiar brand in the audiophile community. Founded in 1973, the British ‘Rega Research Ltd.’ had been known as a notable manufacturer of audiophile amplifiers, loudspeakers, and—most significantly—turntables long before they ever considered making a CD player. The famously affordable Planar 3 turntable had won Rega international recognition among vinyl enthusiasts and become a bedrock for analog playback. In addition to selling under their own brand name, Rega had also been asked to supply turntables, tonearms, and related parts to other brands, such as NAD and Rotel.
For a vinyl specialist to enter the CD player market, the company needed to come up with a convincing argument for its followers. The original Planet was marketed as offering true ‘vinyl-like’ sound made by a company that normally hated the sound of CD players. This created some curiosity, and the original Planet sold well, despite its quirky industrial look. It favoured musical flow over detail and achieved a soft top-end despite sounding a bit bland and crude, as some reviewers of the player have observed. Especially the lack of detail on the Rega's customised Burr Brown 16-bit DAC has sometimes been criticised as being outdated in more recent reviews.
The Planet 2000 brought about a major facelift to the original Planet. Instead of plastic, it is housed in a custom-built extruded aluminium case with a central top-loading lid. The 2000 uses similar circuit topology as the original Planet but features an improved DAC (Wolfson 24-bit, Sigma Delta IC40), power supply and coupling capacitors. Instead of a conventional iron core transformer, the 2000 version has a toroidal transformer with separate windings for the display and audio stages. Display and controls were also given a makeover, giving the Planet 2000 a better performance, look, and feel in comparison with its predecessor. However, while many things have been improved, the player does have some surprising quirks that make it difficult to compare the Rega design with more conventional front-loading players.
For one thing, the top-loading mechanism means that the Rega 2000 requires at least 20cm of rack space height for the lid to fully open. Due to some necessary adjustments made for the Rega, my rack only offers 17cm which makes changing CDs less than convenient. The drive itself sits in a plastic tray at the centre of the player’s aluminium case. Where it has not been painted, the plastic has become tobacco-coloured from UV radiation on one side. Both the front and rear panel are made of plastic. While the front panel has been painted in cabinet colour, the rear has been left unpainted and also shows discolouration. Although we hardly come in contact with the front or the back of the player during operation, the use of plastic on the front has proven to be somewhat disappointing.
The Planet’s CD drive holds the CD in a peculiar way. Similar to a turntable, there is a central prong surrounded by a cone-shaped centre that is sitting on a spring. The CD is placed on the cone and continues to wobble. Pushing the lid down then lowers a magnet onto the centre of the CD and pushes down the cone with the CD exactly centred, or at least this is the theory. In reality, CDs are sometimes slightly off axis, resulting in a wobble of the disk and the magnet on top. And since the top of the magnet is visible though the lid from the outside, one cannot help but wonder how long this will continue to go on well. While the Rega’s custom made Sony transport is surprisingly resilient in reading despite disk wobble, it is at times possible to hear the wobble in the music though strangely elongated, followed by compressed, passages. When the disk does skip, the jump is quite brutal and can misplace the laser by as much as half a song. To be fair, most CDs play with only a tiny amount of wobble, and of those that exhibit wobble, side effects will be minimal. But the player is far less forgiving than any CD player I have ever had. Playing a CD becomes as delicate a ritual as playing a vinyl record.
Due to the excessive weight of the magnet, the Planet 2000 is quite demanding in terms of proper placement in the rack. The drive is in the centre of the extruded aluminium case that channels vibrations along its curved sides down to the four rubber feet. In contrast to our other CD players, the Rega requires just the right amount of support to keep it still. My first attempt was to place it in our rack without the support a base, but this made the player sound harsh and agitated. I then brought in a base placed on Oehlbach spiked absorbers. The player sounded soft but exhibited serious timing issues that made me look for the quirks rather than listen to the music. I swapped the absorbers for Harder Oehlbach pucks which helped to improve timing but somehow resulted in a lack of bass. I finally placed the base directly on the rack and was surprised that this by far sounded the best.
I love the fact that the Planet 2000 allows us to connect a dedicated power cord. Sadly though, the central position of the socket makes it more challenging to avoid the touching of cables behind the rack, especially, since dedicated cords, such as Lapp Ölflex are quite stiff. Turning the player on and off is possible while preamp and power amplifier are turned on without any trace of popping. This excellent muting of the player during operational changes is definitely noteworthy and very practical. SPDIF, Toslink, and RCA/cinch sockets are available to allow for all kind of applications, however, the plugs are slightly recessed into the rear panel, which might render them inconvenient in combination with some types of plugs. They could also feel a little sturdier, perhaps. Although the display has its own source of energy from the toroidal transformer, the sonic effects of having the display switched on are still audible in a slightly compressed and hazy soundstage. The display-off function allows the display to be turned off during playback with a positive effect on the sound. And since one can hear the difference, with a system and ears so inclined, it makes sense to use the display-off feature. When this function is engaged, however, the display will only light up briefly to acknowledge remote commands. While this is quite convenient, the on-time is a little too short for me to read the title. The display itself is red and relatively dark when turned on. This makes it difficult to read over long distances.
For optimum performance, the Planet 2000 needs to be paired with an excellent interconnect. In my experience, simple copper cables will not be able to show its full potential and could be a reason for some private reviewers reporting a lack of detail. I have tested the player with different types of RCE/cinch-type interconnects, from solid core copper, via silver coated multi-stand copper, to solid core silver, and I can report that the ladder surpassed all other choices by far. Using the silver solid core HBS2, the 2000 is sufficiently forward sounding and creates a wide open sound stage with an broad and accurate phantom centre image. I have no complaints about the amount of detail. If a disc should wobble, this can be heard mostly through timing issues and alternating channel imbalances.
If the recording permits, the Planet 2000 offers a smooth flow of music with a refined top-end. It is not quite as lush as the Philips CD 104 (NOS mod.) player, nor does it bring the music forward with such ferocity. It does, however, offer sufficient bass if properly placed on the rack. The music it produces is tonality accurate on piano, voice, percussion. The overall impression is laid-back with a sufficient amount of entertainment to keep me interested during longer listening sessions.
The biggest downside to the Rega Planet 2000 appears to be the magnet that holds down the disc. Rega have physically decoupled the toroidal transformer from the main board and the CD transport. They have asked Sony to aid them in the development of a unique transport mechanism, and yet, a wobbly magnet brings a new uncertainty into the equation. Since the whole CD transport can be replaced in the form of a low-cost kit that is screwed under the loading mechanism, I will attempt to fix the issue with a new drive. But if the magnet itself is to blame for the wobble, this matter will need further attention. All said, attempting to fully restore the Planet 2000 is a worthwhile activity, as the player itself performs far better than the typical mid-priced CD player found on the market today. In keeping with the tradition of other British audio brands, this player offers a gutsy and unique design approach that merits further exploration and therefore fits well with our website motto.
Specifications
- Laser type: semiconductor
- Wavelength: 780nm
- Transport: Sony, top-loading
- DAC: Wolfson, 24-bit Sigma Delta IC40
- Filtering: 3-stage linear FIR, 16x oversampling
- Connections: line (unbalanced), S/PDIF (coaxial), Toslink
- Line output (max.): 2V
- Output impedance: 930 ohms
- Digital output: 0.5V
- Load impedance (min.): 75 Ohms
- Power consumption (max.): 10 Watts
- Formats: CD, CD-R, MP3, WMA, WAV, AIFF
- Extras: 'Solar Wind' remote control, CD text display
- Dimensions: 43.5cm (w) x 10.0cm (h) x 27.0cm (d)
- Required Space: 43.5cm (w) x 18.0cm (h) x 31.5cm (d)
- Weight: 3.65kg
- Year: 2000
Sony CDP-502ES

Published: 25/03/2023
Manufacturing date: 1984
Author: Karsten Hein
Category: Gear & Review
Tag(s): CD-Players
The CDP 502 ES was one of the early Sony CD players. It stemmed from a time in which engineers were given enormous budgets to derive what was humanly possible from their new digital audio medium. And, although Sony’s CDP 101 had been the first CD player to enter the world market, in early 1982, the company knew that they were not alone in the race. To share R&D costs and spread the risk, Sony had developed the technology in a joint venture with Philips, who were the first to launch their CD-100 in Europe in that same year. Marantz, Denon, and other manufacturers were soon to follow, and Sony had to innovate quickly in order to stay abreast of the competition. Launched in 1984, just two years after the CDP 101, the CDP 502 ES already showed many improvements over the company's first designs.
I received my test specimen from Luigi, who had purchased it from a collector along with some other audio devices. At first glance, there were no clues to betray the CDP 502 ES’s exceptionally high quality. To me, it looked like yet another CD player of the early 1980s. Black-box design with front-loading tray, lots of square buttons, an inconspicuous display, new infrared remote sensor, and headphone/output volume control. There really was nothing special in the design, until I tried lifting the Sony off the table where Luigi had placed it. Not only was it much heavier than the standard gear sold, it also seemed more rigid in its construction. I wondered if Sony had also glued lead sheets under the unit’s top plate, as I had previously seen on the Denon DCD 1500 II; however, a swift look under the hood revealed more substantial reasons for CDP 502 ES’s weight.
The front-loading drive mechanism was constructed out of machined metal blocks, instead of the already more common plastic. There was a large transformer with separate outputs for the digital and analog audio sections, as well as for the front display, and the drive and loading section. The stabilising power supply capacitors looked large enough even to serve a small amplifier. There was a copper-plated metal sheet to separate the drive unit and power supply from the audio signal section, and another sheet to separate the digital processing unit from the analog output stage. Although this was not instantly visible from the outside, the Sony engineers had taken many precautions to take audio performance to the next level. Due to its massive components and quality loading mechanism, the CDP 502 ES had the touch-and-feel of professional studio gear.
Although it was difficult for any CD player to compete with the cast-iron transport of the Philips CD 104 with sophisticated swing-arm laser paired with Rodenstock glass lenses, I must say that I preferred the smoother and more elegant feel of this Sony tray. The simple act of placing the disc on the tray felt very reassuring. I could also see how the understated design might have even highlighted this effect. There was no detectable time lag in closing the tray, and the unit offered ultra-fast pre-scan and disc access. Button commands were prompted by instant relay-switching feedback that was still audible from as far as 4 meters (!) distance. When the CDP 502 ES was in operation, one of three back-lit buttons served to indicate the play mode (Program, Shuffle, and Continuous).
The Sony offered two chinch/RCA outputs, of which one was variable via the Line Out/Headphone volume control. This feature allowed for the CD player to be integrated in a system with components of various audio output levels. I would have liked to see a digital S/PDIF output socket for added versatility and also welcomed a display-off function for additional noise reduction. However, as I had not been given the remote control along with the player, I remained unsure, if the display-off function had at all been available there. The headphone jack was of the larger 3/4-inch type, which was also my personal preference. Playback accuracy was said to be excellent due to the use of a new unilinear converter system that performed all digital signal processing in synchronisation with a single clock.
Sony proclaimed the CDP 502 ES to stand for a new generation of reference machines, and audiophiles have commented on the player’s ability to reproduce lots of musical detail while preserving the tonal warmth that was often associated with analogue equipment. Sony were also pioneers in the development of phase-correct analog and digital filters, as well as in advanced error correction that were all incorporated in the 502 design. The analog stage and output amplifiers were of a double-mono design and used Sony’s newly developed OP-amps. In many ways, the CDP 502 ES incorporated the best of CD player technology that was available at the time, and I was eager to find out how the 40-year-old unit would perform.
I hooked the CDP 502 ES up to our main system consisting of a Dynaco PAS-4 tube preamplifier and Hafler 280 XL Linear MOSFET power amplifier. The speakers were a pair of Martin Logan SL-3. The Martin Logans’s electrostatic panels were capable of reproducing even the most subtle nuances, and the Dynaco preamplifier served to assure that the overall impression was tonally rich and not overly analytical. The Hafler amp offered approximately 250 watts per channel into a 4 Ohms load and showed great low-resistance capabilities down to 1-Ohm loads. It was also known for its ultra-flat amplification well beyond the audible spectrum. Our usual CD player in this position was a Rega Planet 2000, of which it was also said that it offered an analogue-like sound.
For my listening tests, I used an assortment of Jazz and Vocal Jazz CDs, Rock, and even some Hip Hop. I wanted to find out how the CDP 502 ES would perform over a wide range of styles. From what I had seen on its circuit boards, I could imagine that the Sony would pack a punch, and I was not disappointed: The music was fast and loud with slight upper-bass emphasis. Using the fixed output cinch/RCA sockets, there was massive gain right from the very first second, and the music seemed so punchy that it bordered on overly potent. And yet, there was also an element of tight-fisted control that somehow reminded me of Denon’s DCD 1500 II, a CD player that had come out two years later.
Both the Denon and the Sony were High End players in their time, and both weighed around 9kg. A lot had been done to reign in high-frequency distortion on both of them. As a result, both machines seemed to march through the songs rather than swing though them. The resulting sound felt a little lifeless at times, and I would have wished for more freedom for the music to unfold and for individual notes to be allowed to simmer longer. The strong upper-bass presence could serve to give vocals a little more substance, which was a welcome effect. On the other hand, faster passages could at times sound a bit cluttered or congested because of it.
Piano keys did not simmer as long or resonate as low as they did on our 30-years younger Rega CD player. Low-bass extension was generally good on the Sony but not great. Despite Sony’s lead in error correction, the CDP 502 ES did not perform too well on dirty or scratched CDs. For the music to sound at its best, the discs needed to be in excellent condition. I could confirm that the 1984 Sony provided an analog and non-analytical sound experience on our system. The CDP 502 ES sounded fuller, richer, and darker than many of its competitors. Due to excessive filtering, however, some of the intrinsic flow and musicality of the performance was lost, which also took away from the believability of the music event.
Finally, I could not help but wonder, if there were available modifications for this player that would remove some of the analog and digital filter stages to uncover the beauty and power of the diamond underneath. Considering what Roman Groß ‘New Perspectives on Sound’ and ‘KR High End Laboratory’ had accomplished with the Philips CD 104, it was only fair to assume that the CDP 502 ES also had the potential of blowing most modern CD players out of the water, simply because of the impressive components that were used inside.
Specifications
- Type: Compact Disk player
- Laser principle: GaAlAs double hetero diode
- Disk revolutions per minute: 500 ~ 200 (CLV)
- Paying speed: 1.2 - 1.4 m/s
- Error correction: Sony Super Strategy
- DAC compound: 16-bit, straight line
- Frequency range: 2 - 20,000 Hz (+/- 0.3 dB)
- Harmonic distortion: < 0.0025% (1 kHz)
- Dynamic range: < 96 dB
- Wow and flutter: below measurable limits
- Line output: 2 Volts
- Headphone output: 28 mw (32 Ohms)
- Power consumption: 16 watts
- Dimensions: (W) 430mm x (H) 80mm x (D) 335mm
- Weight: 8.5 kg
- Accessories: Wireless Remote, RM-D502
- Country of manufacture: Japan
- Year(s): 1984-1987
DACs

A DAC is needed to convert digital signals coming from a CD player, a streamer, a laptop or a PC, and possibly many other sources, into an analog signal that can be processed by an analog preamplifier or similar device. As the digital signal is an approximation of an analog signal, there are some calculations involved. Finally, there is some foresight and sonic calibration necessary in the analog segment of the DAC to match the DAC’s output stage with the receiving device.
The magic comes into play, when we hook up our DAC to a high-quality CD player. Because in this setup both the bit depth and sampling rate of the medium are given facts. The question at hand being: Will the external DAC outperform the CD player’s internal DAC, and in which way? Granted, you probably have to be an audiophile nutter to enjoy this sort of challenge. But, boys will be boys, and that is arguably good as it is. Other people sit for hours to pull fish out of the water, only to throw them back in.
Cambridge DacMagic 100

Published: 18/05/2020
Manufacturing date: 2012
Author: Karsten Hein
Category: Gear & Review
Tag(s): DACs
Cambridge Audio have long since made a name for themselves, offering very decent sounding gear at entry level prices. Perfectly fine for beginner audiophiles, as long as we do not insist on impressive build quality. Having said this, the tiny ‘DacMagic 100’ is certainly in keeping with this tradition. Similarly equipped as its larger brother, the ‘DacMagic Plus’, the unit offers a single 8742 Wolfson chip that can easily be found in higher priced digital to analog converters made by Rega and similar brands. Its USB 1.0 port might sound a little outdated, but it will handle data at rates of up to 192 kHz. In addition to the USB port, it features two S/PDIF inputs and one Toslink optical input. Outputs are RCA/cinch only, an inadequacy for some users that it does not share with its larger and better equipped stablemate.
Ken Rockwell has written an extensive review of both Cambridge DACs and in his measurements concludes that especially the USB signal processing is of unquestionable quality. In my own listening tests I have found that the DacMagic 100 performs very well over the whole bandwidth without any instantly recognisable imbalances. The stage impression is both wide and deep with plenty of space between the instruments. Voices come across in a life-like fashion with perhaps a slight tendency of too much transparency. Although bass performance was lean and fast from the start, it did not have the fullness of some pricier components. Understandably in this price range, the product’s weakness lies in its power supply. Adding a more potent power supply than the cheap plastic switching device, however, really made the bass open up and has left nothing to wish for ever since.
The DacMagic 100 is a great entry level DAC for audiophiles on a budget who shy away from the initial purchase price. Adding in a power supply at a later stage is nearly a must, although this will at least double the price of the unit. For buyers who can live with this two step process, the DAC really offers quality. On the other hand, if you are willing to invest the whole sum right from the start, you might as well get a DAC that has a decent power supply to begin with.
Specifications
- Digital to analog converter: Wolfson WM8742 24-bit DAC
- frequency response: 20Hz to 20kHz (±0.1dB)
- THD @ 1kHz 0dBFS <0.0025% 24-bit
- THD @ 1kHz -10dBFS <0.0025% 24-bit
- THD @ 20KHZ 0DBFS <0.0025%
- Signal to noise ratio: -113dBr
- Jitter <130pS
- Crosstalk: @ 1KHZ < -130dB
- Crosstalk: @ 20KHZ < -112dB
- Output impedance: <50 ohms
- Output level unbalanced: 2.3V rms
- Digital input width: 16-24bit
- Digital input frequencies: 32kHz, 44.1kHz, 48kHz, 88.2kHz, 96kHz, 192kHz
- Power consumption: 5W
- Dimensions: 106 x 46 x 130 mm
- Country of Manufacture: China
- Year(s): 2012 -
Picture description
Picture Description Seen from above, we can identify three separate sections, the internal power supply section (bottom third), the unit's operating and switching section located around the main processor (center), as well as the digital to analog processing section (top third). The top third can be divided into the digital section featuring three clocks and the Wolfson 8742 DAC chip (right) and the analog output section with one operating amp chip per channel and a set of capacitors (left).
Phono Cartridges

Magnetic phono cartridges —or ‘pickups', as they are sometimes called— are the means by which the sonic information that is pressed into the record groove is translated into an electric current that can then be processed by the pre-amplifier, power-amplifier, and finally the loudspeakers. The technical accuracy and tonal balance of this tiny electromechanical device will easily make or break the sonic integrity of our stereo system when playing records. A fact that is perfectly in keeping with the well-known audio rule of ‘garbage in = garbage out’. In other words: whatever sonic information the stylus misses will not be heard by the listener, and whatever signature it adds of its own faulty making shall be the signature of the music we hear. It therefore makes great sense to choose our cartridge well.
For vinyl newbies, including myself until recently, it is difficult to understand why one should spend lots of money on an item that is so tiny. After all, spending our money on a phono cartridge is difficult to explain to our spouse and most of our friends alike. However, a few cartridges down the line, I am still perplexed by the ever increasing amount of musical information that can be wrenched from that seemingly outdated vinyl disk. Depending on the quality and mixture of components used on the cartridge (stylus, cantilever, engine or body) the difference between two cartridges will be enormous. I have therefore decided to discuss phono cartridges in their own separate section, simply to give them the attention that they deserve.
AT VM540 ML
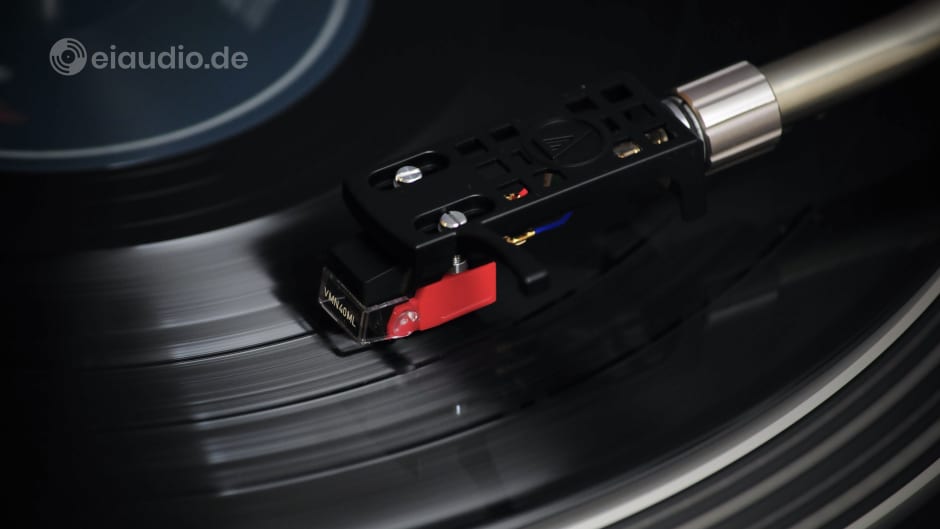
Published: 28/10/2021
Manufacturing date: 2020
Author: Karsten Hein
Category: Gear & Review
Tag(s): Phono Cartridges
As some of you might remember from my review of our Technics SL1310 turntable, this had moved in with us equipped with its original Shure M75 cartridge and ED stylus (elliptical diamond) from the late 1970s. In order to assure that the worn cartridge would not destroy our records, I had first checked the stylus under a microscope and found it fit to perform. There were some initial electric issues on the left channel, which our trusted technician solved by pushing a faulty pin into the cartridge with his soldering iron. He had thereby re-established the connection, and the turntable did perform well, until recently, when the left channel failed once again. It was high time to make a change.
Upon inspecting the tonearm of the Technics, I was reminded that this table already featured the practical half-inch headshell mount. Therefore, if I was going to invest in a new cartridge, I could also easily exchange the headshell and wiring along with it. And, since the headshell held both the cartridge and connectors, its resonances and the quality of its wiring would have some influence on sound quality. I checked the web for possible cartridge and stylus combinations and shortlisted three rather affordable MM (moving magnet) models among the more audiophile specimen that were all designed for medium-compliance tonearms: the Ortofon 2M Silver, the Nagaoka MP-150 - which is actually an MI (moving iron) cartridge and thereby similar to an MM - and the Audio Technica VM 540 ML.
Among the tree cartridges, the Audio Technica had the most sophisticated stylus, and, since we were still very happy with our previous purchase of the Audio Technica VM 95 ML for our Sansui SR-525, I was curious to explore the differences between the two cartridges of the same manufacturer, that were both equipped with micro-linear styli, with the specifications of the 500 series being slightly superior to those of the 95. To confirm the result of my musings, I discussed my considerations with a gentleman at thakker.eu, who confirmed that the sophistication of its stylus placed the ML version ahead of the competition at the given price point. For the 500 series, the total choices of styli were as follows:
Stylus Choices
- AT-VM510 CB = Conical - Bonded Round Shank
- AT-VM520 EB = Elliptical - Bonded Round Shank
- AT-VM530 EN = Elliptical - Nude Round Shank
- AT-VM540 ML = Microlinear - Nude Square Shank
- AT-VM550 SH = Shibata - Nude Square Shank
- AT-VM560 SLC = 0.28 x 1.5 Mil Special Line Contact
Except for the VM560 SLC, which was more than double the price of the VM540 ML (and at that time Audio Technica’s most expensive MM cartridge ever), the micro-linear version was considered to be the most versatile performer among the choices. Although the 500 series would still be deemed an entry-level cartridge by some, the stylus's micro-linear cut in combination with the nude mounting on a square shank made the ML very capable of extracting the tiniest nuances from the record groove. Similar to the 95, the 500 series cartridge used dual magnets that were arranged in the shape of a ‘V’ to resemble the shape of the cutter-head. The design was to assure maximum amplitude and improved channel separation. The cartridge had been laid out to work equally well on most low and medium mass tonearms. In its VM540 ML/H version, it came pre-mounted on Audio Technica’s HS-10 headshell, and I decided that this was the most practical solution for our SL1310.
When the cartridge arrived, I was pleasantly surprised by the easy way in which I could twist the headshell out of its socket in the packaging and decided that I would use this same box to securely store our old headshell. As I had already been warned by the vendor, the cartridge first needed to be aligned to fit the specific layout of the SL1310. I used my old alignment protractor, on which the inner groove position can be aligned with the device staying in place, and was pleasantly surprised that the VM540 ML’s fold-down stylus cover also served in setting the correct angle and overhang. It produced a straight line on the protractor which made it easier to perform the setting. I also noticed that the new VM540 ML/H was lighter than our original setup, which meant that I had to dial back the tonearm weight quite substantially. I set the overhang and adjusted the tracking force to the recommended 2.0 grams using our digital tracking force scale.
One thing that took me a little by surprise, was the fact that I had to disconnect the SL1310 from the wall socket in order to perform these settings, as I could not shift the tonearm sideways without activating the built-in autostart. The platter jumped into action each time the tonearm was brought near to it, and, although this was quite clearly a feature of the automatic drive, it took me a moment to appreciate that there was no way around physically pulling the plug. Perhaps this is just me, but for some reason pulling the plug seemed rather crude to me, and I could not shake the feeling that I had overlooked some detail, like an on/off-switch perhaps.
When I finally did sit down to listen, I could hardly believe the improvement I was hearing over the previously mounted Shure M75 ED. There was simply more of everything. Listening to Carmen Lundy’s album “Soul to Soul”, I first noticed the superior exactness of the micro-linear stylus. And even though I had already experienced this effect in transitioning to the ML cartridge on our Sansui SR-525 turntable, I was deeply impressed once again. I had become so familiar with the little inaccuracies of our vintage Shure cartridge that hearing the album without them brought a whole new sensation to the medium. The VM540 ML produced a very low noise floor, showed no sibilance at all, and was capable of providing a highly accurate impression of the original musical event. And while it presented lots of musical detail, it did so in great harmonic coherence with no aspect being accentuated. I found this to be enjoyable, engaging, and superbly balanced at the same time.
The Audio Technica made our Tannoy XT8F loudspeakers sound larger and more intense than I was previously used to. The soundstage was excellent, with Lundy’s voice positioned smack center stage and all instruments arranged spaciously around her. This effect was aided by the long-trailing decay of individual tones. Transients had always been a special strength of the ML styli. In Lundy’s “Sardegna”, the xylophone appeared to be almost three-dimensional with individual notes appearing as vividly as bubbles in a glass of champagne. Trumpets and higher piano notes reached deeply into the room, whereas percussions remained slightly recessed. Bass notes were present but not as pronounced as they had been on the Shure. This impression stayed the same, even after I changed to Ted Poor’s album “You Already Know” that has much stronger bass lines. Instead of being boomy or overly extended, bass remained nuanced and controlled at all times. Bass enthusiasts would probably do well to increase tracking force to 2.2 or 2.5 grams, but I usually prefer stellar transients over mighty bass roar.
The Helge Lien Trio’s “Guzu Guzu” was more densely arranged than the previous two albums and gave the VM540 ML cartridge opportunity to show that it could also stay accurate in more volatile and cluttered situations, in which a multitude of natural sounds from acoustic instruments overlap. To my great satisfaction it also played this album effortlessly and smoothely to the last groove, accurately tracing each nuance without loosing itself in the detail. When compared to the VM 95 ML of the same company, I found that the two are very similar, but that the VM540 ML plays vocals with a softer and more balanced top end. This could be due to its extended frequency range or superior channel separation, but it could just as well be attributed to the periphery used. Technics decs are said to be very well engineered turntables. At this point, I can only say for certain that the VM540 ML was much easier to align with the built-in stylus protector folded down. If you are thinking about upgrading a vintage turntable with low or medium mass tonearm, Audio Technica’s 500 series is certainly worth considering.
Specifications
- Sound: Silent on the record, balanced and highly nuanced, warm with silky vocals, controlled and well-contoured bass
- Type: dual moving magnet
- Frequency Response: 20-27.000 kHz
- Channel Separation at 1KHz: 28 dB
- Input Load: 47,000 Ohm
- Output at 1KHz 5cm/sec.: 4mV
- Recommended Tracking Force: 2.0 g
- Stylus Type: Nude Micro Linear Square Shank
- Inductance: 550 mH
- Resistance: 485 Ω
- Weight: 6.4 g
- Height: 17,3 mm
- Year: 2020 -
- OSP: EUR 246,00 (Germany)
- Stylus Replacement: VMN40ML
Sound impressions based on the following system: Technics SL1310 record player, Dynaco PAS4 preamplifier, Hafler XL 280 power amplifier, Tannoy XT8F loudspeakers.
-->
AT VM95 E
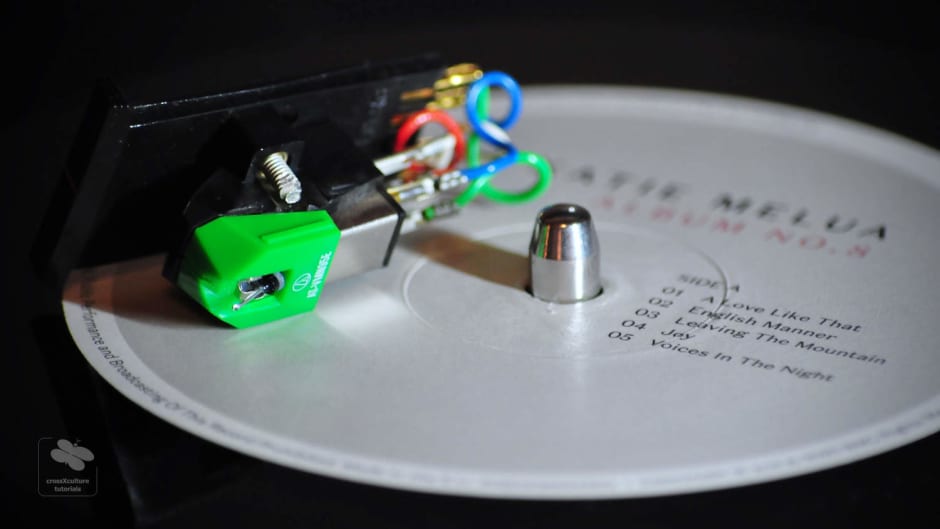
Published: 13/11/2020
Manufacturing date: 2019
Author: Karsten Hein
Category: Gear & Review
Tag(s): Phono Cartridges
Audio Technica’s VM95 E is an entry-level moving magnet cartridge that succeeded the widely known AT95 E in 2019. The new design includes improvements to the elliptical stylus, which is now thinner, as well as a higher output voltage. The new VM95 engine supports a whole range of compatible styluses, which should make upgrades a little cheaper and more convenient, compared with having to replace the whole cartridge. The available styluses range in 6 steps from simple conical design to complex 'shibata' (patented cut). While the lower-range styluses are bonded to the shaft using a type of solder, the higher-range ones are joined directly, i.e. ’nude’.
Stylus Choices
- AT-VM95 C = Conical - Bonded Round Shank
- AT-VM95 E = Elliptical - Bonded Round Shank
- AT-VM95 SP = Conical SP - Bonded Round Shank (shellack)
- AT-VM95 EN = Elliptical - Nude Round Shank
- AT-VM95 ML = Microlinear - Nude Square Shank
- AT-VM95 SH = Shibata - Nude Square Shank
The VM95 E is equiped with the second possible entry-level stylus and already shows some marked improvements to the discontinued AT95 E, although it maintains some of the typical traits that are to be expected from an elliptical bonded design. Especially when coming from the more sophisticated styluses such as the micro-linear or the shibata, the AT95 E lacks some of the clarity and nuance that the higher up versions are capable of. On Katie Melua’s 2020 “Album No. 8”, for instance, the music appears to be more compressed. A general lack of sonic detail makes her voice seem less revealing and therefore not as intimate as we are used to from the micro-linear stylus.
While there is still sufficient space between the instruments, poorer recordings will more easily sound muffled and restrained. Voices are portrayed in a tonally balanced and full-bodied fashion, however, which is certainly a strength. I feel the VM95 E plays voices tonally more accurate than some of the higher versions, as there is no trace of nasal effects. On the down-side, the elliptical stylus can produce sibilant vocals, as is the case on my not-so-great pressing of Norah Jones’s “Come Away with Me” album, which is still fun on the ML stylus and only just bearable on the E version.
While bass performance is accurate and certainly fuller and more present than on the former AT95 E, bass nuance, extension, and detail is sometimes missing, especially in direct comparison with the higher-priced versions. And this is arguably the aspect that makes it the most difficult for the entry-level AT95 E: the stylus competition that is based on the same engine. When we started our explorations with the AT95 E two years earlier, I did not think I would mind the lack of detail for as long as the music was tonally balanced. Coming from the more recent and more capable ML version on our other system, however, now makes it less enjoyable to listen to AT95 E. Not because it puts up a poor performance, but simply because I have meanwhile come to enjoy the more sophisticated sound, which, sadly, is a well-known audiophile's dilemma: "Once you have heard it, there is no going back."
Specifications
Character: a solid tracker with occasional sibilance, semi-revealing of musical detail, full-bodied, warm and leaning towards neutral, musically balanced
- Frequency Response: 20-22.000 kHz
- Channel Separation at 1KHz: 20 dB
- Input Load: 47 kOhms
- Output at 1KHz 5CM/sec.: 4.0 mV
- Recommended Tracking Force: 2.0 g
- Stylus Type: elliptical stylus, bonded fixture
- Inductance: 550 mH
- Resistance: 485 Ω
- Weight: 6.1 g
- Year: 2019 -
- OSP: EUR 46,00 (Germany)
- Stylus Replacement: Original, EUR 28,00
Audio Technica
Technica House
Unit 5, Millennium Way
Leeds
United Kingdom
LS11 5AL
AT VM95 ML

Published: 11/11/2020
Manufacturing date: 2019
Author: Karsten Hein
Category: Gear & Review
Tag(s): Phono Cartridges
The Audio-Technica Corporation is a Japanese manufacturer of phono cartridges, turntables, headphones and professional microphones. The company has its headquarters in Tokyo and launched its first products, the AT-1 and AT-3 MM phono cartridges, in 1962. Its most notable devices include a long list of headphones, a portable record player, and also some phone cartridges. Among the latter was to be found the entry level AT-95 E which became renowned for its outstanding quality-to-price ratio and was therefore predestined as an entry-drug to audiophile listening.
The now discontinued AT-95 E set itself apart from the competition by featuring a more sophisticated elliptical stylus while its price competitors were still equipped with simpler conical or spherical styluses. The elliptical shape of the stylus allowed for more detail to be picked up from the record and made for excellent treble performance. The midrange was sometimes perceived to run a little thin and nasal. Bass performance on the other hand was tight, full-bodied, but not overly heavy or particularly noteworthy. The AT-95 E’s in-house competition came from the more expensive AT100E, which outperformed the entry level cartridge in most aspects.
With their new AT VM95 cartridge, Audio Technica have given the AT95 a long needed overhaul. The full cartridge name is comprised of the company acronym ‘AT’, the body or engine type ‘VM95’ and the type of stylus attached. On the AT VM95 ML, the final two letters stand for ‘Micro-Linear’, which is one of five possible stylus choices for the new VM95 engine. The ‘ML’ version is a dual moving magnet stylus construction with nude needle attachment and a micro-linear cut. ‘Nude’ means that the needle is attached directly, instead of being soldered onto the shaft.
Stylus Choices
- AT-VM95 C = Conical - Bonded Round Shank
- AT-VM95 E = Elliptical - Bonded Round Shank
- AT-VM95 SP = Conical SP - Bonded Round Shank (shellack)
- AT-VM95 EN = Elliptical - Nude Round Shank
- AT-VM95 ML = Microlinear - Nude Square Shank
- AT-VM95 SH = Shibata - Nude Square Shank
From our own listening experience it can be said that the VM95 is a no-frills entry to mid-level engine with sufficient dynamic potential and average channel separation. It appears that the sound has been optimised for modern listening preferences in that it is balanced, detailed and forward sounding with all stylus combinations.
Paired with the ML stylus, the VM95 manages to present lots of detail from the record that simply remains hidden from the simpler stylus versions. The sonic impression is that the frequency band is extended, revealing even the tiniest nuances in the music. With the ML stylus, cymbals sound more delicate and ring much longer than on the lower cartridge versions, and no two drum beats sound the same. There is more insight into the various playing styles of other instruments as well: piano keys sound a little softer, and there now is a marked difference of duration and force on each one.
Voices sound full and warm with no traceable bias to my ears. Female solo artists appear to have more air in their lungs and to carry notes longer and with greater accuracy than I have ever heard on any other medium, such as CD or streaming. Despite this amount of delicacy and detail in the presentation, we could detect hardly any mechanical noise coming from the record itself. Instead, the record remained ultra silent with only the music in the listener’s focus.
With the ML stylus it is easy to hear right through poor recordings. Although I have found both new and old recordings to play well, the ML stylus sounds best with more recent productions that also take into consideration the more revealing nature of today’s equipment. Listening to Bob Seger’s “Greatest Hits” album for instance, the ML stylus made the limitations of the original recording far more obvious than the elliptical ‘E’ stylus would have done. On Katie Melua’s newly released “Album No. 8” the voice comes across in a strange combination of purity and a silvery overtone that seems to stem from the studio microphone design. One needs to at least be aware that opting for the micro-linear or Shibata stylus versions for the VM95 engine will bring a great deal of detail to the music that may become a blessing or a nuisance depending on the quality of your gear and the quality of the recording.
The AT VM95 ML is also capable in terms of bass notes. While bass can certainly swell and become both loud and full, this is never coincidental and always with good measure. Instead of sloppy bass, the cartridge sheds as much light on bass notes as it does on the highs and the midrange. There is lots of bass contour and very little else to be desired for. The music easily manages to free itself from the loudspeakers and becomes a true performance. There is always sufficient flow with plenty of dynamics, although the AT VM95 ML to my ears could be slightly less academic and more engaging perhaps. However, due to its ability to present lots of musical detail, the ML version will bring even rather boring performances back to life.
Specifications
Sound: Silent on the record, revealing and highly nuanced, warm and leaning towards neutral, controlled and well-contoured bass
- Frequency Response: 20-25.000 kHz
- Channel Separation at 1KHz: 23 dB
- Input Load: 47K
- Output at 1KHz 5CM/sec.: 3.5mV
- Recommended Tracking Force: 2.0 g
- Stylus Type: Nude Micro Linear Square Shank
- Inductance: 550 mH
- Resistance: 485 Ω
- Weight: 6.1 g
- Year: 2019 -
- OSP: EUR 146,00 (Germany)
- Stylus Replacement: Original, EUR 129,00
Audio Technica
Technica House
Unit 5, Millennium Way
Leeds
United Kingdom
LS11 5ALSound impressions based on the following system: Lenco L75 record player, Restek V1 preamplifier, Hafler XL 280 power amplifier, Tannoy XZ8F loudspeakers.
Sumiko Olympia
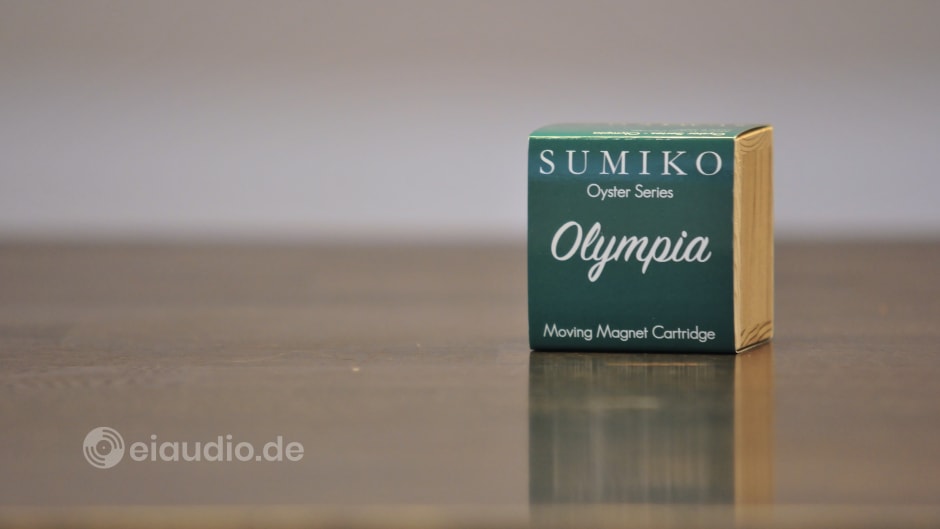
Published: 22/02/2022
Manufacturing date: 2018
Author: Karsten Hein
Category: Gear & Review
Tag(s): Phono Cartridges
I stumbled upon the Sumiko range of phono cartridges while I was looking for a suitable pickup to complement our Thorens TD320 semi-automatic turntable. The TD320 came equipped with a TP16 MK IV tonearm, at a mass of 12.5 grams, which theoretically made it compatible with a wide selection of medium-compliance cartridges. Among the possible choices were MM (moving magnet) cartridges from Audio Technica, Grado, Ortofon, Nagaoka, and Sumiko. However, since I had already presented two Audio Technica cartridges in this blog and found the Grado Gold rather pricy, I narrowed it down to the Ortofon M2 Blue and the Sumiko Olympia, which ranked similarly in specs and performance.
In the end, my vote fell on the Olympia, as its dimensions and colour scheme worked well with the black and silver Thorens design. I had read that it sounded less analytical than the Ortofon, which I thought might compliment our fairly open sounding electrostatic speakers. My first impression when the cartridge arrived seemed to suggest that I had made a good decision. Taking it out of its wooden box was a lovely ritual that highlighted the company’s high-quality “handcrafted in Japan” mission statement. When mounted on the TP16, the sleek black body with clean white lettering looked absolutely stunning. I took special care to properly adjust all parameters, and the pictures below show part of this process before completion.
The first record I put on was Stacey Kent’s album “I Know I Dream” which happened to be of an acceptable pressing and worked quite well, until inner-groove sibilance increased on the final two tracks to such an extent that I was happy for the record to be over. Since I was still unfamiliar with the Thorens, I re-checked the VTA on the seamlessly adjustable shell and also tightened the vertical and horizontal tonearm bearings, thinking that this might be the cause of the problem. When this did not eliminate the sibilance, I played with the tracking and re-adjusted the platter level. However, no matter how hard I tried, the TP16 MK IV was unable to hold the Sumiko in place sufficiently to play without sibilance and inner-groove distortion. I called support at Thakker.eu to ask for advice, and they suggested that the Thorens’ arm might not be rigid enough for the Sumiko to perform well.
I ran some more tests with other settings and recordings and found that Katie Melua’s “Album No 8” was distorted from start to finish with the Sumiko, while it tracked well with both our Audio Technica cartridges equipped with micro-linear styli. I was feeling quite shattered at first, but then I decided to test the Sumiko on our Technics SL-1310 turntable in the other listening room. While inner-groove distortion remained an issue here, the Sumiko did produce a pleasant, super-wide, and solid soundstage that was so impressive, I could see myself having trouble returning the cartridge to the vendor without feeling regret.
I decided to check the stylus under a microscope and saw that the diamond was hidden under a thin cloak of residue that made the surface look grainy. I was familiar with this look from NOS styli made during the 70s. How could this be the case on the factory-fitted stylus of a brand new 2021 model cartridge, I wondered. Perhaps it was just a matter of wearing down the residue until the stylus’ diamond could once again shine through? I was starting to feel some regret that my records would have to go through this unhealthy treatment. Perhaps ambient moisture or seawater had played a role in corroding the stylus? After all, I had read somewhere that Sumiko cartridges were made in a town located close to the sea. This was confirmed on the company website.
Sumiko Company History
Sumiko was co-founded by former U.C. Berkeley experimental physicist David Fletcher in 1972. Fletcher made a name for himself in analogue music design and later went on to become the co-founder of SOTA turntables, another well-known brand that is still in business today. During the 1970s and 80s, Sumiko grew to be a leading importer of cartridges and tonearms of various brands to the USA. Some of Sumiko’s milestones were: the MDC-800 tonearm (1980); the Talisman high output MC cartridges (1982); and a series of “Premier” tonearms (1983-1988).
According to the company website, Sumiko’s Oyster series cartridges were hand-crafted in Yokohama. The factory was in fact located “near the waters where our namesake Oysters dwell”. The website goes on to describe how each cartridge was rigorously assembled and checked by expert cartridge makers before it was packaged and despatched. This, however, made it difficult for me to understand how my residue-covered and sibilant stylus could have escaped Sumiko’s rigourous inspections. Unless, of course, the fitting of the styli was not part of this process.
Determined to wear down the residue, I played Bob Seger’s “Greatest Hits” album on repeat for the next few hours. The Sumiko Olympia, however, continued to produce more noise and sibilance than I was used to, and it dawned on me that I was probably spoiled by the excellent tracking and low noise of our micro-linear styli from Audio Technica. For final proof of my suspicion, I decided to send the Olympia back to Thakker.eu who ran some tests on their own Technics deck and could not find anything wrong with either the cartridge or stylus. Sensing my disappointment, they offered to refund my investment that I could try my luck with a different cartridge.
In the end, I may have been unlucky with my combinations of arm and stylus or with the manufacturing tolerance of the cartridge itself. I greatly enjoyed the sound but could not relax while listening, because I always feared the next noise or sibilance to pierce through. For those of us used to listening to higher grade styli, the Sumiko Moonstone should be the minimum consideration. I am, however, hesitant to try the next level Sumiko stylus because of my utter disappointment with the Olympia.
Specifications
- Cartridge: high output, moving magnet
- Stylus type: 0.3 x 0.7mil Elliptical
- Cantilever type: Aluminum Pipe
- Induction coils: High-Purity Copper
- Internal impedance: 1,130Ω
- Load impedance: 47kΩ
- Frequency response: 12Hz – 30,000Hz
- Output level: 4.0mV
- Channel separation: >30dB @ 1kHz
- Channel balance: >1.5dB @ 1kHz
- Compliance: 12×10-6cm/dyn @ 100Hz
- Capacitance: 100pF – 200pF
- Vertical tracking angle: 25°
- Tracking force range: 1.8g – 2.2g
- Recommended tracking force: 2.0g
- Effective mass: 6.5g
- Dimensions: (W) 17.2 x (H) 18.8 x (D) 29mm
- Stylus compatibility: RS Rainier (lower), RS Moonstone (higher), Wellfleet (highest)
- Year(s): 2018
Pre-Amplifiers
A pre-amplifier can well be considered the heart of our system. Since many pre-amps will feature a built-in phono stage, for MM, MC, or both, there is some amplification involved, however, the term describes more its position before the amplifier than its calling. Pre-amps generally serve as a hub to rout music signals from multiple sources to a single power amplifier. All preamps add a sonic signature, and, because of their central position, this signature will make or break a good system.
It therefore makes sense to choose our preamp well, and there are some pointers to look out for: 1. Signal integrity may be corrupted when running though potentiometers, hence, audiophile units will rarely feature bass, treble, and other attenuators. 2. Power supplies may inject interference into the signal. Many units therefore place the power supply in a separate housing. 3. Thin conductor tracks on the circuit board may cost speed and dynamics. 4. 2D circuit board layouts may pick up interference. High End units will often have a greater degree of direct wiring.
Audio Research SP-6
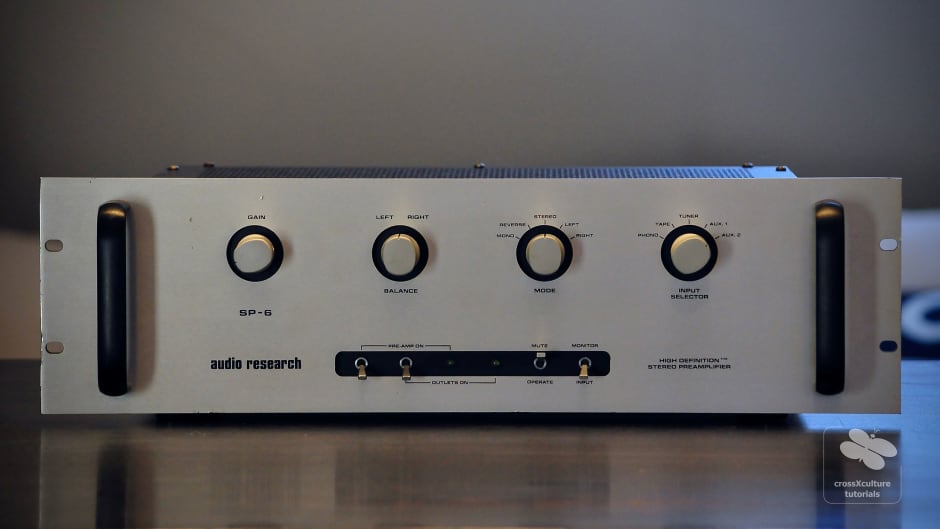
Published: 05/12/2020
Manufacturing date: 1980
Author: Karsten Hein
Category: Gear & Review
Tag(s): Pre-Amplifiers
High Definition Stereo Preamplifier
As the vacuum tube was phased out in home audio appliances during the late 1960s, for the sake of cheaper production and more versatile equipment, some music lovers believed that the industry was heading in the wrong direction. While transistors outperformed tubes in terms of size and heat dissipation, their musical performance was not yet great.
Among the transistor sceptics was a man called William Zane Johnson. Bill had been running his own specialty audio store in south Minneapolis, out of which had he designed sophisticated amplifiers for those who cared deeply about accuracy and musicality in sound reproduction since 1951.
In 1970, following a failed attempt of developing his existing store model, he decided to start a company that would do justice to his designs, patents, as well as to himself. He named it ‘Audio Research’, and from the beginning it was clear that this company would put its focus on vacuum tubes for music reproduction.
While Bill held fast in the belief that vacuum tubes could convey a more realistic, and therefore convincing, sonic picture, there was still some work to be done for tubes to match transistors in terms of agility and control. The challenge was to marry the accuracy in sound reproduction that is typical of the tube with the ability to present detail in music that is common with the transistor.
The successful marriage of these properties Bill Johnson named ‘High Definition’ audio, now a well-known trademark and mission statement that has been stamped on Audio Research products ever since. While his tube designs were at times perceived to be a disruption to the progress of the industry, Audio Research proved to be well ahead of the competition during the tube revival that followed in the 1980s.
The success of the Audio Research Corporation was also helped by the fact that it was declared the official benchmark of sound by some of the most influential audio magazines of the time, such as ‘The Absolute Sound’ and ‘Stereophile’. Audio Research is today the oldest existing manufacturer of high-end audio products and is considered to have given rise to the very notion of high-end audio. Their SP-3 High Definition preamplifier was said to be the best preamplifier on the market over a period of many years.
The unit discussed here, the Audio Research SP-6 High Definition preamplifier, was built from 1978 to 1982 in only slightly deviating versions (models A-E), with the exception of the SP-6F version which has been stated to be the SP-8 MK II with a different face plate. The unit shown here is the SP-6B of 1980 fitted with Russian 12AX7 Tung-Sol tubes. For a preamplifier, the cabinet is quite tall at 13.4cm, and at 10kg also quite heavy. Although general power consumption is at a relatively low 50 watts, the internal tubes do get quite hot, so that there should be 5 cm of ventilation space kept free above the unit.
The turning knobs are of excellent touch and feel with a stepped volume attenuator. The row of switches could perhaps be a bit more refined. The muting switch can especially give an occasional plop when turned on or off. All great preamplifiers play loud, and so does the SP-6. This can make it a little difficult to set subtle volume differences for night-time listening, especially when playing from a loud CD player, DAC, or streamer as source, and when powering high decibel speakers. Due to this, we have often ended up playing our music a little louder than we would otherwise have done.
Bringing the SP-6 to operating temperature after turning it on takes about four minutes. The unit is fully warmed up when the power LED stops flashing. However, its full sonic capacity is reached only after about thirty minutes. This is when the preamplifier begins to sound the most musical. And, no surprise, what we get when the SP-6 is fully warmed up is very pleasing, indeed. Compared to our DB Systems DB1, the Audio Research preamplifier sounds wonderfully voluptuous, but it does not do so at the expense of focus. Voices simply take up more space in the virtual center. Singers are accurately allowed their own realistic dimension. Where the DB 1 can make voices sound frail at times, the SP-6 makes them sound lush and solid. Accurate tonal color and realistic musical detail are present at all times.
Similar to our DB1, the SP-6 builds a realistic and three-dimensional sound stage. Both preamplifiers play accurately and provide a warm and pleasing signature to the system; however, the SP-6 provides more bass slam and dynamic drive than the DB1. On our main system consisting of a B&K ST140 amp and Martin Logan SL3 speakers, the SP-6 offers the most balanced, musical, and entertaining performance of any preamplifier we have had the pleasure of exploring here to date.
Note: In the end I was relieved to find that returning to our DB Systems preamplifier with satisfaction was still possible after this tour of exploration. While the two preamps accentuate different aspects of the music, they both provide an endearing and convincing performance at a very high level.
Specifications:
- Frequency response: 10 Hz to 30 kHz
- Total harmonic distortion: 0.01%
- Gain: 50dB 60dB (MM), 26dB (line)
- Signal to noise ratio: 66dB (MM), 90dB (line)
- Output: 5V (Pre out), 60V (Pre out Max)
- Valve complement: 6 x ECC83 (6 x 12AX7 Tung-Sol)
- Dimensions: 480 x 134 x 260mm
- Weight: 10kg
- Country of Manufacture: U.S.A.
- Year: 1980
DB Systems DB1 + DB2

Published: 30/05/2020
Manufacturing date: 1977
Author: Karsten Hein
Category: Gear & Review
Tag(s): Pre-Amplifiers
David Hadaway established DB Systems in Ridge, New Hampshire in 1975 and has been quietly manufacturing world class home audio equipment ever since. Similar to many manufacturers of audiophile gems, DB Systems has been flying under the radar of mainstream HiFi discourse and has gradually and meticulously developed its line of exceptional designs for a small group of followers. The DB-1 preamplifier was among DB Systems’s first products and was well ahead of the competition at the time of its debut. To this day, the company offers revisions and updates to all their products, and the DB-1 can well hold its own in the audiophile market.
DB’s line of audio products includes preamplifiers, power amplifiers, electronic crossovers, tone controls, phase inverters, and accessories. All products are designed and hand made in the U.S.A. using selected parts. The DB-1 comes with the DB-2 linear power supply and includes the DB-designed MM phono stage, the DB-5 precision tone control and the DB-4 MC head amp. When new, the complete preamplifier setup sells for 2,200 dollars. Used versions of the preamp can be found at very competitive prices.
The DB-1 shown here arrived in very a poor state despite being advertised as ‘in mint condition’. The phono stage was dead on both channels and suffering from multiple contact-related issues. The power supply was also dysfunctional due to a faulty DIY job and fitted additional capacitors that had come loose during transport. After a few weeks of care and attention, we were able to restore the unit’s original design and functionality. The time and effort was well worth it, as there are not many preamplifiers around that can measure up to the DB-1’s performance.
For a transistor preamplifier device, the DB-1 offers a surprisingly homogeneous and ‘analog’ sound. Its sound stage is both wide and deep, and separation of instruments is commendable. The phono stage is among the best in the market with an extremely low noise floor and superb RIA compensation. Paired with the right cartridge, it is detailed, dynamic, and extended.
Specifications
- Total harmonic distortion: < 0.0008%
- Intermodulation distortion: < 0.001%
- Noise separation (Phono): > 89 dB
- Freq. resp. (Phono, -1 dB): 2 Hz to 50 kHz
- Freq. resp. (Phono, -0.25 dB), 10 Hz to 20 kHz
- Inputs: Phono, Tuner, Aux 1, Aux 2, Tape
- Outputs: 2x Tape, 2x Amplifier
- Dimensions, preamp: 22 cm x 8.4 cm x 23 cm
- Dimensions, power supply: 16.61 cm x 11 cm
- Country of manufacture: U.S.A.
- Year(s): 1977 -
Dynaco PAS-4

Published: 06/06/2021
Manufacturing date: 1993
Author: Karsten Hein
Category: Gear & Review
Tag(s): Pre-Amplifiers
In audiophile circles, the name Dynaco is reminiscent of the famous budget assembly kits that would hold up against some of the most exquisit audio products on the HiFi market during the 1960s and 70s. Originally founded by David Hafler and Ed Laurent in Philadelphia in 1955, the company’s first products were the 50 and 60 watts mono amplifiers Dynaco Mark II and III and the preamplifier PAM-1. But it was not until the launch of the Dynaco ST-70, a 2x35 watts tube amplifier design in 1959 that the company made its entry to the audiophile mass market.
Dynaco went on to manufacture other tube and solid state amplifiers, preamplifiers, radio tuners, and bookshelf speakers. Their most powerful amplifier was the solid state Dynaco ST-400 which was launched in 1972 and offered 2x200 watts of continuous output power with sophisticated speaker protection. By this time, the formerly independent Dynaco had already become a subsidiary of Tyco, Inc. with David Hafler still active until 1974, when he finally left the company to join Ortofon in 1974 and then went on to start his own Hafler Company in 1977.
The original Dynaco was liquidated in 1980 and lay dormant until the Pan Orient Corporation acquired the trademark in 1993 and began marketing audio components under the Dynaco brand. Pan Orient soon shortened its name to ‘Panor’ and began launching updated versions of Dynaco classics as well as some new designs. Among these were the ST-70 successor ‘Stereo 70 II’ and the more powerful ‘Stereo 160’, a 2x70 watts all-tube power amplifier that was packed with audiophile features, such as switchable pentode/triode modes and adjustable tube bias.
When it comes to the Dynaco PAS-4, vintage audio fans will be quick to point out that this preamplifier design is a Dynaco in name only, because it was produced and sold by Panor during the early 90s. However, the Dynaco brand name was not chosen without reason, as Panor was serious about improving the original Dynaco/Hafler designs and was set on once again producing affordable audiophile gear for the average consumer with a medium-sized budget. Visible proof of this mission are the PAS-4’s no-frills industrial cabinet and design choices, as well as its selection of audiophile components.
The PAS-4 was developed under the direction of John Nunez, a former developer with the high-priced tube equipment specialist Moore Franklin Associates (MFA). John knew that, if he wanted to convince audiophile consumers of the PAS-4’s merits, he needed to get vinyl reproduction right. He therefore took good care to make the phono stage of the PAS-4 outstanding. Manufacturing quality was also intended to be excellent, with all units sold being designed and manufactured in the USA. Sadly, however, Panor had to make some concessions to meet the relatively low price point which hindered some of the PAS-4’s audiophile potential and frustrated some of the early customers.
Despite its outstanding design, the PAS-4 was sold fitted with the cheapest tubes available and came equipped with switches that were given to fail. It also offered additional circuits for improved usability that were not in keeping with the audiophile tradition of reducing the circuitry to the bare essentials. The first customer reviews of the new preamplifier reflected these shortcomings, and resulted in only a few thousand units of the PAS-4 being sold, thus making it a rare find on today’s vintage market.
The unit shown here is a completely different beast from the version sold by Panor. It is closer to the original audiophile design and includes most of the recommended updates and modifications that have been found beneficial over the nearly three decades of its existence. Of course, it helped that the original basis was excellent: 1/8” thick circuit boards, high quality tube sockets, excellent trace layout with star grounding, and each tube with its own voltage regulator. Changes and updates to our PAS-4 include changing to an improved hum-free 230V transformer, adding a high-quality rotary Elma switch for source selection, bypassing the tape monitor and tape dubbing circuitry, eliminating the channel balance attenuator, and bringing in an audiophile grade Noble volume attenuator.
The original tubes were replaced with Russian Tung-Sol 12AX7 SC803S and SOVTEK type 6922 for the 2-stage phono section, as well as a pair of Genalex 20 03 for the hybrid line stage. The capacitors were updated to Mundorf Supreme EVO Silver Gold Oil. The aim of the updates was to minimise internal and external noise and distortion and to increase transparency, responsiveness, and dynamics. Configured in this way, the PAS-4 becomes a worthy audiophile contender in true Dynaco tradition. And, while the original preamp cost around 1,000 dollars new, following these updates, it can easily compete with preamplifiers costing 2-3 times this amount. Hafler trusted in the craftsmanship of the DIY home builder, and, apparently, so did Panor. While it took some expertise to unravel the PAS-4’s genuine character and potential, the good news is that it was possible by simply building on the superb infrastructure that was already present.
Setting up the PAS-4 in our household for the first time, I noticed that tube gear is a little more difficult to set up than solitary state equipment. My preference was to fit the PAS-4 in our main system where it was to replace our DB1 preamplifier and to play with our B&K ST-140 amplifier into Martin Logan electrostatic speakers. In this position, however, the PAS-4 was lacking the upper frequency band in a way that most of the transients were lost and that the music sounded stale. It sounded as if the tubes had reached the end of their life expectancy, or as if there was some other major problem with this preamplifier. After 2 days of trying different cable combinations I gave up and took the PAS-4 to our other system.
In its new position, the PAS-4 was to replace our Restek V1 preamp and to play with our Hafler XL-280 amp into Tannoy XT8F speakers. Here it immediately showed that the Panor/Dynaco is a Hafler derivative. The PAS-4 pre and Hafler XL-280 amp turned out to be a match made in heaven. In retrospect, this is perhaps not surprising, given the PAS-4’s pedigree, but to me it came as a revelation at the time. I simply could not understand how the same preamplifier could perform so differently in combination with two amps that it sounded broken in the one position and absolutely brilliant in the other. For the first time, the Tannoys’s sonic character also matched their physical appearance. The XT8F are not exactly small speakers, but somehow the Restek V1 in combination with the Hafler had made them sound overly precise and academic, instead of musical and dynamic.
The PAS-4 is able to build a huge stage from left to right that extends far beyond the speakers. Instruments position themselves freely with plenty of dark spaces around them. I have found that treble highlights are fewer than in combination with the Restek V1 but more pronounced when they occur. Transients are fully present and sounds linger in realistic fashion. Similar to most tube equipment, the PAS-4 can introduce interference, which will result in humming or hissing when something is not right in the setup. In my first attempt to pair it with our Hafler amp, I had not noticed that its power cord was touching that of the Hafler amp. This resulted in audible hissing on both amp channels. In fact, noise was a complaint that I had also read in some owner reviews. When everything is set up properly, however, the PAS-4 is nearly as silent as the Restek V1. One would have to hold the ear directly to the tweeter section of the speakers to hear the remaining noise.
As is the case with most serious HiFi gear, the PAS-4 will reveal the difference between a standard power cord and one that has been designed specifically for use in audio applications. On our own system, we have paired the PAS-4 with a Lapp Ölflex 2,5mm fitted with ferrite clamp to good result, but I suspect that one could get even better performance from this preamp with a more sophisticated cord. The difference between the standard cord and the Lapp cable was so striking that I suspect that further improvements in this position will again have a major impact.
After switching on, the PAS-4 needs about 15 minutes for the tubes to warm up. Actually, it will already play music after 45 seconds, but sound stage and dynamics do need some time to develop. Transients only sound right after some 30-40 minutes of playing. At this time, the six tubes will have reached their full operating temperature—which is actually quite hot. The slim cabinet design means that the tubes are literally touching the top of the enclosure, and I have meanwhile read that many users are leaving the lid off completely to improve ventilation. My reasons for leaving the cover on despite this are the presence of children in the household and the belief that the enclosure functions as a Pharadeic cage to protect the inner circuits from outside interference.
The PAS-4 puts out lots of power, with normal listening volumes being present at around 9 o’clock on the volume dial. Since the same is true for our DB1 and V1 preamplifiers, I suspect that this is a general tendency with audiophile grade preamplifiers. In contrast to our solid state gear, the PAS-4 strikes a more soothing balance between treble and bass notes without sacrificing transparency. Voices sound fuller and richer, double bass and lower piano notes have a greater sense of dimension and authority to them. To my ears, the PAS-4 puts out a more satisfying and realistic bass performance without the aid of a subwoofer in our system. Our Tannoys surely benefit from this and are sounding even more engaging. It is therefore not surprising to me that the PAS-4 is awarded 4.8 out of 5 stars in audioreview. For us as well, this unpretentious looking preamp is a definite keeper. If you can get your hands on a specimen in good condition and find yourself in a position to have the basic modifications done: do it. Where it fits in, the PAS-4 is going to be very hard to beat at this price point.
Specifications
Phono
- Gain: 40 dB
- RIAA accuracy: +/-0.5 dB (20 Hz-20,000 Hz)
- THD: <0,025% (@2V RMS output)
- Input impedance: 47k (shunted by 10 pF)
- Signal to noise ratio: -86dB (<10mV RMS input)
- Absolute phase: non-inverting
- Tube complement: 2ae 6DJ8/6922; 2ae 12AX7/ECC83
Line
- Gain: 18,5 dB
- Frequency response: 2 Hz-150,000 Hz (-3 dB)
- THD: <0,025% (@2V RMS output)
- Input impedance: 25k (nominal, all inputs)
- Output impedance: 40 Ohms
- Signal to noise ratio: -90dB (<10mV RMS output)
- Absolute phase: inverting
- Slew rate: 40 volts per uS
- Tube complement: 2ae 6DJ8/6922
Physical
- Power consumption: 45 Watts
- Dimensions: (W) 43.18cm x (H) 9.52cm x (D) 30.48cm
- Weight: 5,44 kg
- Country of manufacture: China
- Year: 1993
Hafler DH-110

Published: 27/05/2020
Manufacturing date: 1982
Author: Karsten Hein
Category: Gear & Review
Tag(s): Pre-Amplifiers
David Hafler was an American Audio engineer who was best known for his work on improving the Williamson amplifier design through the use of ultra-linear circuitry. His background as a producer of linear power supplies for use in audio applications lead to the founding of Dynaco, and later, in 1972, to the founding of the David Hafler Company, a manufacturer of high quality audio products at affordable prices. Under the supervision of its founder, the company produced many famous preamps, among them the DH-101 and DH-110, as well as a line of MOSFET power amps, including the DH-120, DH-200, DH-220, DH-500, and XL-280.
The Hafler DH-110 was the company’s second preamplifier design. It replaced the DH-101 and was built from the early 1980s to the early 1990s. In typical Halfer fashion, the unit came in form of a DIY kit as well as in fully pre-assembled condition. The DH-110 has a sleek and unobtrusive design and is very well equipped. The features include a headphone amplifier, a muting circuit to prevent downstream thumps, a mono and tone control defeat switch, a rumble filter, as well as an external processing loop. The body is well constructed and protected from outer interference through full copper coating, similar to the Harman / Kardon designs of that time period. With two tape loops and two phono stages, the amplifier offers great connectivity.
While this is a great preamplifier for the price and can well keep up with mid-priced modern designs in terms of tonality, there is also some criticism. For example, the headphone stage is not very loud. Therefore, if your headphones need lots of clean power, this preamp might not be the right on for you. The volume attenuator steps are quite enormous, this especially becomes and issue when listening at night when the house is asleep and the steps at low volume leave you stranded between to quiet and too loud. Another issue is that only one of the two outputs is actually run though the volume attenuator, which does not make it a great companion when bi-amping your speakers or wanting to add a subwoofer – whoever would want to do such a thing. In combination with the Hafler DH-120 amplifier, the unit produces a decent and musical sound with lots of drive forward. It is not as delicate and refined as the Restek V1 or the DB Systems DB1 preamplifiers, but then these cost 3-5 times the amount of the Hafler, and many will wonder whether it is actually worth paying the extra.
Specifications
PHONO PREAMP SECTION
- Rated Output: 3 Wms, 8 Hz-105 kHz
- Maximum Output (3.5): 12 Vrms, 20 Hz-20 kHz
- Total Harmonic Distortion: Less than 0.0006% @ 1 kHz
- RIAA Equalization Accuracy: +0, -0.1 dB, 30 Hz-15 kHz
- Full Power Bandwidth: -6 dB, 4 Hz-210 kHz
- Sensitivity (3.7): 12.5 millivolts
- Signal to Noise: 87 dB
- Slew Rate: 12 volts per microsecond
LINE AMPLIFIER SECTION
- Rated Output: 3 Vrms, 4 Hz-210 kHz
- Maximum Output (3.5): 14 Vrms, 20 Hz-20 kHz
- Total Harmonic Distortion: <0.001%, 20 Hz-20 kHz
- Signal to Noise: 90 dB
- Slew Rate: 12 volts per microsecond
- Rise Time: 2.5 microseconds maximum
- Channel Separation: > 82 dB @ 1 kHz
GENERAL SPECIFICATIONS
- Inputs: 2 Phono, Tuner, Compact Disc or Video, 2 Tape recorders, EPL Outputs: 2 Tape (buffered), 2 Line, EPL, Headphone Jack
- Controls: Volume, Balance, Bass, Treble, Input Selector, Phono l/2 Selector,
- Monitor Selector, Mono-Stereo, Filter, External Processor Loop,
- Power Consumption: 3.5 watts
- Dimensions: 17” wide x 3” high x 81⁄2” deep
- Net Weight: 5 Kg.
- Country of manufacture: U.S.A.
- Year(s): 1982 - 1992
Robert Grodinsky Research RGR Model 4

Published: 14/01/2023
Manufacturing date: 1980
Author: Karsten Hein
Category: Gear & Review
Tag(s): Pre-Amplifiers
The Model 4 was the successor of the Model 3 preamplifier and was built by the American audio engineer and former Audio Research (ARC) developer Robert Grodinsky in his newly founded company. The Robert Grodinsky Research (RGR) was based in Lincolnwood, Illinois, and built a select range of High-End audio equipment that included its own brand pre and power amplifiers, as well as processors for other companies, e.g., Audio Research, Koss, and Pioneer). Robert Grodinsky himself also offered tuning and upgrade solutions to owners of Audio Research equipment.
The Model 4 came in various sub-versions that mostly differed in the design and functions of the phono stage. The basic model came with two phono inputs on which the capacitance could be independently adjusted in three steps: 30, 130, 360 pF. It was designed in the early 1980s, when phono was still the most likely source for High-End audio listening. Having two adjustable inputs would have made the Model 4 a welcome feature for vinyl heads of the time. Early versions offered moving magnet (MM) inputs, whereas the revised Model 4-1HG featured inputs for MM and moving coil (MC) cartridges.
The renowned HiFi magazine The Absolute Sound made Robert Grodinsky Research famous by discussing the merits and shortcomings of the Model 4 at length. While the soundstage was deep and wide with an open and holographic representation of music, the Model 4 was also a departure from the slightly darker and fuller American sound. As such, the Model 4 was more similar to the High End sound familiar from Germany and Japan. The phono stage was described as outstanding in the given price range. As Robert Grodinsky continued to make adjustments to the Model 4 design throughout its 2-year history, it will be difficult to find two preamps that sound identical.
At 6.5 kg, the Model 4 was of surprisingly heavy build for a preamplifier. All controls were made of metal with the knobs being L-shaped. Volume was set via stepped attenuator. The active signal source was indicated via warm-glowing LED light. There were two buttons to set the tape dubbing direction and two buttons to activate the tape monitors which could also be used as pass-through to other components. A versatile Mode-selector allowed the user to play the left or right channel signal independently, to reverse channels, or to down-mix the output signal to mono. For those working with HiFi or PA equipment professionally, features like these could come in very handy, e.g., when trying to identify and correct an electronic or acoustic issue.
The RGR Model 4 also included knobs to adjust bass, treble, and balance to the room, as well as a subsonic filter for eliminating rumble and feedback that would typically come from playing records. It was surely a concession to the High-End purist and not the PA user that the tone controls could be fully discharged from the signal path at the touch of a button. All buttons and switches gave great haptic feedback, except for the small switches at the back of the unit that were used to adjust phono capacitance and that were sometimes described as imprecise and below expectations. Another such quirk from today’s perspective was the unusually narrow gab between the cinch/RCA sockets that allowed for standard diameter cinch/RCA plugs only. However, with the cinch terminal being bolted in with studs and the internal free wiring, it would be an easy task to upgrade the terminal to the modern standard.
The Model 4 also featured an external processor loop, a field that Robert Grodinsky was an expert in. A look inside of the unit revealed a large motherboard on which smaller modules were vertically stacked. These modules functioned as discrete operating amps and were used to produce signal gain. Perhaps it is this particular design that led to the Model 4’s non-fatiguing and airy sound that provides good sound-staging, imaging and bass. There was also a Model 5 power amplifier to accompany the preamplifier which has meanwhile become quite rare on the market. While the early Model 4 was sometimes criticised for its build quality, particularly the quality of its soldering, the Model 5 amplifier was seemed to have been under better supervision right from the start.
Robert Grodinsky Research closed its doors in the early eighties only to resurface under the name RG Dynamics shortly after. It is said that Robert Grodinsky was also the driving force behind a later company by the name of State Technology Research.
Specifications
- Type: Solid state stereo preamplifier
- Version: Mark I (without MC connectivity)
- Phono inputs: 2x moving magnet (MM)
- Phono adjustments: 30, 130, 360 pF capacitance
- Phono equalisation: RIAA +/= 0.1 dB
- Line inputs: 2x Auxiliary, 2x Monitor
- Tape record outputs: 2x cinch/RCA
- Rated output voltage: > 2.0 V
- Harmonic distortion (1 kHz): < 0.005%
- Intermodulation noise: 0.006%
- Power bandwidth: 0.5 Hz to 300 kHz
- Frequency response: 20 Hz to 20 kHz (+/- 0.05 dB)
- Signal-to-noise ratio: Phono MM/MC: > 80 dB
- Signal outputs to amplifier: 4x line/RCA
- Tone controls: Bass (20 Hz) +/-12 dB, Treble (15 kHz) +/-12 dB
- Dimensions: (W) 484mm x (H) 95mm x (D) 300mm
- Weight: 6.5 kilograms
- Country of manufacture: USA
- Year(s): 1980-1982
Rotel RC-960BX

Published: 28/05/2020
Manufacturing date: 1992
Author: Karsten Hein
Category: Gear & Review
Tag(s): Pre-Amplifiers
Rotel today has a good name in providing no-frills HiFi components, featuring what has come to be termed ‘British sound’. In this context, I was surprised to learn that Rotel is a family-owned Japanese manufacturer of audio and video equipment established in 1961. Perhaps the image of Rotel as a British manufacturer has rubbed off from the company’s 40-year strategic alliance with Bowers & Wilkins, based in Worthing, UK. But perhaps it is also due to the rather English or at least germanophone sounding company name. In the company fact files, we can read that Rotel was formed by Tomoki Tachikawa, is currently run by the nephew, Peter Kao and has had a major influence on the direction of Bowers & Wilkins, by setting up the global sales network for the loudspeaker manufacturer.
Although Rotel is primarily known for its range of High End HiFi components, including amplifiers and preamplifiers, they have always maintained a line of affordable, entry-level gear that boasted the Rotel design features and carried some of the myth of the ‘British sound’ to a new generation of audio enthusiasts. The Rotel RC-960BX is such a case in point. Paired with one or two of the RB-960BX dual-mono amplifiers, the combination of pre and amp could easily beat many of the contemporary receivers at the same price point in terms of tonal balance and punch. The wise lack of controls and the ability to bypass those that remained, paired with the separation of channels and tasks, brought something solid to the table that many other devices were lacking. Coming from a mid-priced Denon Amplifier, the Rotel combo sure was a revelation.
Although the Rotel sound can be described as sophisticated, the entry level gear shown here maintains tonal balance at the cost of providing that highly engaging musicality we have come to love from Hafler, Restek, and DB-Systems preamplifiers. The build quality shows some obvious sacrifices to careful budgeting: a plastic floor plate that broke during transportation and has since been replaced by a more solid version, plastic absorber feet that were an integral part of the broken floor plate and have also been replaced, a cheap but quite common folded sheet metal casing without copper plating, a single circuit board construction with the humming transformer placed directly on it, a balance control that is part of the volume knob and generally feels a bit iffy when trying to get the balance right. While the performance is commendable at the given price range, piano sounds do not extend into the room as well as on the other devices, separation of instruments is present but not great. The stage feels more confined than on the other devices, although there is a great center image and the mids are nice and full, features that are at once endearing.
I found the Rotel to work well with soft dome tweeters and generally speakers that would blend over occasional blunders. The RC-960BX is not a bad choice, if you are getting started in High End and need to purchase lots of gear at the same time. It usually holds its price when purchased used. Just make sure the floor plate does not get broken during transportation, because that really is a hassle to fix.
Specifications
- Frequency response (line): 4 - 100.000 Hz, -3 dB
- Frequency response (phono): 40 - 100.000 Hz, +/- 0.2 dB
- Total harmonic distortion: < 0.004%
- Signal to noise ratio (line): 95 dB
- Signal to noise ratio (phono MM): 78 dB
- Signal to noise ratio (phono MC): 64 dB
- Dimensions: 440mm x 72mm x 286mm
- Weight: 3.0 Kg (now 5.5 Kg, with new floor plate and feet)
- Country of manufacture: Japan
- Year(s): 1992 - 1997
Symphonic Line RG2-MK3

Published: 19/05/2024
Manufacturing date: 1992
Author: Karsten Hein
Category: Gear & Review
Tag(s): Pre-Amplifiers
More Room for High End
The RG2 MK3 is a preamplifier designed by Rolf Gemein and hand-crafted at Symphonic Line in Duisburg, Germany. Rolf Gemein was among the first audio designers in Germany to adopt the term ‘High End’ for his uncompromising audio products. He soon teamed up with other German developers of exceptional audio gear to form the ‘Deutsche High End Society’ and went on to initiate the High End audio fair in Munich, which has since become the largest event of its kind in the world.
The RG2 preamplifier in its third (MK3) iteration deserves to be thought of as a High End product in multiple ways. Its heavy body is made of 2mm-thick sheets of brass for superior RF protection. Its 10mm-strong face plate with turned full-metal knobs feels as though it was made for eternity; a quality impression that is underscored by its chrome-plated Aranja (or grapefruit) tinted-mirror shine. Everything about the look and feel of this preamp suggests that it is of exceptional quality. And those who have come in contact with Symphonic Line products would expect no less.
Connoisseurs of the brand will also appreciate that the RG2 MK3 is housed in the same enclosure format that already served well in its legendary integrated amplifier cousin, the RG9 MK3. In fact, the preamplifier section that works so well in the RG9 MK3 is also used in the RG2 MK3. Symphonic Line even employs the same large mumetal transformer to supply the stand-alone preamplifier section with lots of clean and fast energy. And, with the two 140 Watts per channel power amplifier boards of the RG9 missing, this transformer’s output is more than generous for the unit.
Having experienced the RG9 in our studio for a few weeks, I found myself much more at ease with the handling of the RG2’s front panel controls. While I had initially been taken aback by the power switch, input selector, and tape monitor knobs all having the same look and haptics, I meanwhile understood the principle of operating the unit from left to right: 1. turn on, 2. select source, etc. The only item that I still missed was a stepped attenuator for improved orientation when adjusting the volume.
The RG2 MK3 offers cinch/RCA input sockets for Auxiliary, Tuner, CD, and Tape. The MM/MC phono stage offers two pairs of sockets, of which one can be used with adaptors to increase input capacitance (where necessary for tonal adjustment). An oversized gold-plated turning clamp right next to the phono inputs assures that excellent phono grounding is always close at hand. When turning the unit on via the power switch, large internal relays can be heard clicking into place. A similar relay-clicking is heard when moving the toggle switch from MM to MC or back. There is one pair of cinch/RCA outputs available to connect to the external power amplifier. All cinch sockets are sufficiently far apart to accommodate all types of cinch/RCA plugs.
Without the need for internal power amplifier boards, the RG2 MK3 could potentially offer a reduced noise floor, improved dynamics, and possibly better protection from internal stray currents and rail fluctuations, which could all have a degrading effect the RG9’s preamplifier section. In other words, the stand-alone preamplifier unit had the potential to offer greater signal integrity than the combined unit. Its resulting overall performance would depend on how well it was matched with an external power amplifier, the loudspeakers, and the room, of course.
Setting the Stage
For my first listening setup, I connected the RG2 MK3 to a Dynavox VR70E-II tube amplifier using my trusted HBS1 Silver Solid Core cinch/RCA interconnects. The Dynavox amp offered 40 Watts per channel via EL34 tubes into an 8 Ohms load. The loudspeakers were a pair of Tannoy XT-8f with Tannoy's trademark dual-concentric drivers and a sensitivity rating of 91 dB at one Watt. In my initial setup, the speaker cables were Belden 9497, which tend to perform well with both vintage equipment and tube amplifiers. The Tannoys, however, were not exactly vintage speakers. I was therefore open to giving some alternative cables a chance if need be.
My music sources were a Denon DCD 1420 CD player, paired with Cambridge DAC Magic via HiViLux Reference cable,and a Sansui SR-525 turntable with Audio-Technica VM540 ML cartridge. The Cambridge DAC had a massive 100VA linear power supply at its side. As you can see, I was no stranger to the idea of oversized supplies and could appreciate Rolf Gemein’s approach in beefing up the RG2 with a high output transformer.
The DAC was connected to the RG2 by means of a twisted two-strand type of silver solid-core interconnect that had been sent to me by Marc Stager in New York for auditioning. My initial impression of the cable had been positive, and so I decided that it could stay in this first setup. As silver offers superior conductivity to copper (check out the Annealed Copper Standard Table here), the prevalent choice of silver cables on my setups has usually served to support a fast, dynamic, and engaging sound. As usual, the loudspeakers had been positioned using the room mode calculation sheets handed to me by Peter English and had then been fine-tuned by ear. The final stereo-matching was done using a laser distance measure.
There were no cables touching or crossing behind the rack as to negatively affect the tiny signals passing through them by means of induction. Sadly, it has not yet become common knowledge that this step is essential for the music signal to pass the cables uncorrupted. However, as my childhood friend Alec likes to tell from his days he was running a PA firm in Frankfurt: “We used to watch the power cords of our large QSC amplifiers dancing to the beat when they were hanging close to each other behind the PA rack.” The trouble is that our ears will notice cross-induction long before our eyes see the power cables dancing with the beat.
Construction on our 70 square meter listening room had been completed only recently. An assortment of carpets, rugs, drapes, and acoustic panels helped to reduce reverberation times to a realistic-to-live level. I was quite happy with the result. It felt bold and natural to be working on music-related subjects in this new dedicated space. And the first titles I was about to listen to were from Helge Lien’s 2008 Jazz LP “Hello Troll”.
First Impressions
Opening with ‘Gamut Warning’, I was instantly greeted by the superb depth and width of the RG2’s phono stage. Knut Aalefjoer’s drums, albeit sharply rendered, were slightly set back and smallish in the left third of the stage, whereas Frode Berg’s bass lines could be found in life-like dimension to the right. Helge Lien’s often delicate and sometimes highly dynamic piano keys were lingering freely suspended across the room, thereby holding the stage together. Although the Tannoys were connected in bridged mode (i.e. wired to the treble and jumpered to the bass driver by using the same Belden cable), I was pleasantly surprised by the amount of bass control and contour.
The RG2 MK3 presented individual instruments in a wonderfully separate and yet cohesive manner to preserve the individual playing styles of each artist. This was a Symphonic Line characteristic that I had already enjoyed immensely on the RG9. I was reminded that the Sansui SR-525 is a well-engineered direct drive turntable, even by today’s standards. It had once been far ahead of its time and could fully demonstrate its prowess in combination with the RG2. It probably also helped that the AT VM540 phono engine with ML stylus makes for an excellent-sounding MM cartridge.
There were two aspects, however, that I did not find instantly fulfilling: First, the dynamics of piano keys could have been slightly stronger to be absolutely realistic. And, second, the tonality of this HiFi system did not captivate me emotionally to the same extent as the two HiFi systems (using Epicure 500 and Martin Logan SL3 loudspeakers) in my RG9 tests had done. I suspected that the reason for the perceived lack was to be found in the wiring either between the turntable and preamplifier or perhaps between the VR70E-II tube amplifier and the Tannoy XT8 loudspeakers.
Adding Tonality to Music
Looking for a remedy, I first swapped the Belden speaker cables for original Symphonic Line Harmony HD ones that Heinz-Peter Völkel had given to me with the preamplifier for testing and added 4mm-thick solid-core copper jumpers to connect to the bass drivers. I then left the system playing random music for a while in order for the new gear to settle in. When I came back into the room, I could hear that the tonal balance had shifted towards a slightly softer treble and richer, more powerful low bass. There was still sufficient detail preserved in the music, however, the shift towards darker colours did not automatically translate to into a greater separation of tonal events as I had hoped. I noticed that the system played louder somehow, and I suspect this impression was caused by the superior conductivity of the Symphonic Line cables.
In a next step, I exchanged my HBS1 Silver Solid-Core with a Symphonic Line interconnect. The music again seemed louder and became more tangible in a general sense. There was a stronger presence of tonal colours, and it was now more easily possible to distinguish between them. I cannot say for sure that the extent of tonal nuances was on par with the listening test I had previously conducted with the RG9, however, I was definitely getting very close. I would have liked to possess a second Symphonic Line interconnect to replace the only remaining HBS1 interconnect that remained between the RG2 and the tube power amplifier, as I do suspect that this would have taken my listening adventure to the next level.
Changing over to my Denon CD player and Cambridge DAC combo with Marc Stager cinch/RCA interconnects, both tonal balance and soundstage impressions remained very similar. Even the volume appeared to be on the same level. Heinz-Peter had also sent me some of the Live||Tape recordings he had made in cooperation with the former Radio Bayern sound engineer Andreas Sandreuter. The recordings were intended to cultivate analog reel-to-reel studio sound, and the only reason he had sent them to me on digital medium was the fact that I did not yet have so much as a cassette deck in the house.
Through Heinz-Peter’s concession to my analog media shortcomings, I was able to listen to local German music highlights, such as Bad As We, the Senior Jazz Trio, Anna Boulic, the Sunday Morning Orchestra, Alexander Möckl, and others. And while I was listening, I forgot that I was listening for a review or that I was listening to HiFi components. Much rather, I was listening to the musicians and their instruments, to the rooms, to the music, and occasionally to the audience. It was perplexing to think what would happen, if I had had an even better power amp, interconnect running to it, or superior loudspeakers. The RG2 MK3, surely had the potential to eliminate the boundary between the live event and the recording even further with each new improvement.
Side Notes to History
It has sometimes been said that the Dynavox VR70E-II is a well-built tube amplifier that can keep up with equipment many times its price. And I would have tentatively agreed that this is the case from my own limited experience. However, it was not until my experiments with the RG2 phono stage in combination with the Symphonic Line interconnects and speaker cables that I personally became witness to how far this little amp was willing and able to go. The Tannoys, too, did surprisingly well in this combination, exhibiting tonal skills and dynamics that I had as yet been unaware of. Having said that, I do think it highly unlikely that many owners will ever hear these speakers in this way.
My longtime HiFi companion Luigi has a short explanation for this: Modern speakers tend to do lots of things well, have lots of bass, treble, midrange, and dynamics. And more often than not they will sound cold and lifeless despite all their wonderful skills. At the point of writing this article, the Tannoy XT8f have been in my possession for just over four years. And the RG2 MK3 with all Symphonic line cables in place has made them sound properly for the first time. We are talking about equipment that is many times more expensive than the speakers themselves. But who is going to spend that kind of money on a pair of mid-of-the-market Tannoys?
Both the Epicure EPI 500 and the Martin Logan SL3 loudspeakers delivered an excellent tonal performance based on the affordable Belden 9497 speaker cables, because they were designed to work well with small diameter cables. The same cannot be said for more modern speakers that tend to entice their owners to pay evermore for their equipment and periphery. I would therefore agree with my friend Luigi that modern HiFi love affairs tend to be rather calculated and run the risk of being unfulfilling.
While I Have You Here
Listening to Helge Lien’s album “10” has always been a treat to me. And, thus, I am still sitting here, listening to Helge’s performance on the RG2 MK3, wondering where this journey of discovery will take me next. At this moment it is difficult for me to imagine that anything could sound even more real. — Any ideas? Please feel free to share them with me in the comments section below.
< Sansui SR-525 | Symphonic Line RG9 >
Specifications
- Type: Solid State Stereo Preamplifier
- Transformer: 300 VA, toroidal with mumetal enclosure
- Phono section: MM/MC with adaptable capacitance
- Number of line inputs: 3 + Tape loop
- Country of Manufacture: Germany
- Dimensions: (W) 450mm x (H) 100mm x (D) 380mm
- Weight: 17 kg
- Year(s): 1992 -

Thorens Restek V1

Published: 21/05/2020
Manufacturing date: 1982
Author: Karsten Hein
Category: Gear & Review
Tag(s): Pre-Amplifiers
The Restek Elektronik Hugo + Elschot oHG was founded in September 1975 by two electronics engineers. In its early years, the company manufactured not only HiFi equipment, but also electric vehicles and components for industrial applications. The first HiFi components were produced at the company’s headquarters in Fuldabrück from 1977. Although each unit sold was designed and hand assembled locally, Restek partnered with the HiFi equipment manufacturer Thorens in the distribution of their products. Although Restek is best known for their exceptional FM-3003 tuner, the V1 class A preamplifier was among the company’s very first products ever produced. The label ‘High End Audio made in Germany’ has kept the company in business until this day, and one of the company two founders, Mr. Adrianus Elschot, is still heading the company today.
Restek manufactured two preamplifiers by the name of V, namely the V1 that is shown here and the V2a which offered extended functions, such as remote switching, separate headphones level adjustment and connections for two tape loops instead of just one. The V1 is perhaps the purist’s choice and does offer some very promising features. A stepped volume attenuator assures maximum contact and channel balance at each volume level, separate output level attenuators at the back of the unit allow for optimum balance setting and adjustment to the amp. For the sake of signal integrity, all unnecessary switches and attenuators have been left out, such as tone level adjustments or loudness circuitry. The Restek V1 can handle both MM and MC phono cartridges and, next to phono, has cinch/RCA connections for a tuner, a non-specified device such as a DAC, and for a reel to reel deck.
The unit is able to play back frequencies from 2 to 200.000 Hz. Linearity measured between 20 and 20.000 Hz is at a stunning +/- 0 dB (THD 0,001%) and even for phono at a mere +/- 0.2 dB (THD 0,004%). In the days when it was first released to the public, the then young German ‘Audio’ magazine even compared this unit of a relative newcomer to the established products of Burmester and other High End manufacturers of the time. Often, the extent to which a company stands behind their products can be seen by the amount of support that one can expect to receive, say, 40 years after the initial date of purchase. In the case of Restek, service can very well be regarded as excellent. Here is why:
When in 2017 the unit shown here came to show first signs of ageing, we were pleased to learn that there was not only service available, but also a complete upgrade. This included: Replacement of the relays and all electrolytic capacitors, adjustment and replacement of components that were outside the specifications, circuitry modifications according to the latest standard, and the installation of new operational amplifiers. In other words, a complete reworking of the more than 40 years old unit, to prepare it for the new millenium.
Specifications
- Type: Class A transistor preamplifier
- Frequency range: 2-200.000 Hz
- Frequency response (2-200.000 Hz): -3dB
- Frequency response (20-20.000 Hz): +/- 0 dB, phono +/- 0.2 dB
- Total harmonic distortion: 0,001%, phono 0,004%
- Ext. potential difference: 128 dB (phono)
- Channel separation: 110 dB
- Intermodulation: 0,001%
- Slew rate: 15 V/uS
- Dimensions: 360 mm x 50 mm x 190 mm
- Weight: 3,6 Kg
- Country of manufacture: Germany
- Year(s): ca. 1982
Power Amplifiers

A power amplifier takes the relatively weak electrical current coming from the pre-amp and uses it to operate a regulator that controls a high current coming from the power grid. The regulator can be in the form of a transistor or a tube, or in that of a digital switch. Both transistors and tubes radiate lots of heat during operation. Tubes mostly because of their internal heating, and transistors because of their relatively slow adjusting of a high energy source. Classic transistors are round and shiny looking, similar to tubes.
An amplifier needs a strong, low radiation transformer (often toroidal or encapsulated) that delivers both the operating and the amplification current, and lots of excess energy that is stored in the large capacitors (similar to ultrafast batteries) to provide music burst power that the power grid could not otherwise provide fast enough. It also needs one operating board and at least one transistor (or similar) per channel, usually mounted on large heat sinks for cooling.
From the combination of these parts results the amplifier’s power rating. This is usually provided in two numbers: watts & ohms. The watts is the ability to provide power into a load resistance that is rated in ohms. Theoretically, when you lower the load resistance on the side of the speaker, the ability to deliver watts on the side of the amplifier increases. There is a limit to this, however, because reduced load also means more back current to the amplifier which at some point either becomes unstable or overheats and dies, perhaps taking the speakers with it.
Audio Research D-115
Published: 09/07/2021
Manufacturing date: 1983
Author: Karsten Hein
Category: Gear & Review
Tag(s): Power Amplifiers
Ever since the revelatory experience of playing music on his Dynaco ST-70, my friend Luigi had been scanning the market for an all-tube pre and amp combination capable of delivering abundant power into even the most demanding speakers. This proved to be a difficult task, because large tube amplifiers had been well out of fashion for at least 30 years. Then, one night, he called me to say that he had made a purchase. The units he had found were an Audio Research SP6 preamplifier and a D-115 tube amplifier, both in need of a massive technical overhaul. He consequently dropped the units off at his trusted technician, and for the next few months that was the last we heard of them.
After what seemed like an eternity, I was invited to Luigi’s house for a listening session and immediately noticed the large silver face plates that are so typical for the Audio Research products of the 80s. I could not help but grin with apprehension. So, they had finally come back from the shop, fitted with new quality capacitors, boasting re-soldered connections and a brand new set of the finest matched tubes. All the dust of 40 years had been cleaned out, and lots of love and energy had been invested to make this set of tube separates one of the best of its kind on the audio market today.
As I would find out, this type of gear certainly merits the effort. Audio Research has an excellent name amongst tube enthusiasts. In fact, the company can look back on a long history of audio excellence and is today the oldest remaining manufacturer of high-end audio products. Audio Research is considered to have given rise to the very notion of High End audio, and their SP-3 High Definition preamplifier was said to be the best preamplifier on the market over a period of many years. A whole range of products manufactured by the Audio Research Corporation (ARC) were declared the official benchmark of music by some of the most influential audio magazines of the 1980s, among them ‘The Absolute Sound’ and ‘Stereophile’. Read the full history of the Audio Research Corporation in my review of the SP-6.
Instead of listening to the preamplifier and amplifier combination as a set, Luigi and I agreed that we should take a step-by-step approach in writing reviews. It would be far more interesting to learn how each component performed when playing against and among the units that we were familiar with. I therefore first took the ARC SP-6 preamplifier for testing in December 2020. Despite its advanced age, the large and heavy preamplifier gave a stellar performance, making our otherwise excellent DB Systems DB1 preamp sound a little thin and analytical in direct comparison. And—while I had no difficulty readjusting my ear to the familiar sound of our DB1 following the test—I still hold the SP-6 in very high esteem. It actually inspired me to purchase our first tube preamp a few month later.
Having returned the SP-6 preamp to Luigi, I was hesitant to take the complimentary ARC D-115 out for testing. I suspected that dealing with the amp would not be quite as easy. One reason for this suspicion was the amp’s weight. With its 3+1 large transformers and thick sandwich base plate, it weighs just above 30kg. And with the speaker terminals protruding out the back, I could not simply pick it up by the handles, either. The D-115 rather needed to be carried horizontally, like a serving tray, which all the more accentuated the fact that this was, indeed, a very heavy piece of equipment. When I finally did bring it home, I arrived at our house in the middle of the night and telephoned my wife to give me a hand in carrying the D-115 up our long flight of stairs. I remember feeling quite embarrassed about it, like someone who had bitten off more than he could chew.
But weight was not the only consideration. The second factor was its operating temperature. When switched on, the D-115 draws close to 400 watts of idle power from the grid. That’s a lot of juice for a machine that is not yet playing music, and most of this energy is simply transformed into heat. When placing the amp in our rack, I first had to make some adjustments to provide it with the ventilation it needs. This included taking out one shelf board and dismantling the front door. Just out of curiosity, I then placed one of our children’s bathing thermometers on the grill above the tubes. It soon reached 50 centigrade, which was also the end of this particular thermometer’s scale. A reminder that an all-tube power amplifier is a serious piece of gear that requires some thought and attention before first operation.
The D-115 likes to be positioned close to the floor where it is relatively cool and vibrations coming from the transformers can be channelled directly to the ground. The amp’s three rubber feet assure that it will not wobble when placed on a stable surface. Thorough mechanical decoupling from source devices is advisable for an amp of this caliber. I have sometimes read that tube amplifiers prefer to play into close to linear 8 Ohm loads or higher. On the other hand, there are some reports of the D-115 being paired with Magnepan and Martin Logan speakers with some success. For this reason, I thought it safe to begin my exploration on our SL3 electrostatic speakers via the amp’s 4 Ohm output terminals, before attempting to pair it with our 8 Ohms Tannoy system. The amp actually has separate binding posts for 16, 8, and 4 Ohm speaker loads—another indication that 4 Ohm connections are possible. Connecting to the correct terminal is important in order to protect the D-115 from undesirable levels back current.
Martin Logan SL3 (DB Systems DB1)
After about 30 minutes of the tubes heating up without music playing, I started my session with “Turn up the quiet” by Diana Krall. The album has been my personal benchmark for studio recordings for some time now. Playing the album’s familiar songs, I first noticed the D-115’s thick and fruity midrange that manifested itself around Diana Krall’s vocals. The singer’s voice carried more weight than I was used to from our B&K ST-140 class-A MOSFET amp. There was greater focus on the voice itself, with the instruments being slightly set back. The sound was darker and tonally rich, as one would expect from a live performance. Where the ST-140 had dug out even the tiniest nuances of the studio recording, the Audio Research D-115 painted a slightly more homogenous and live-sounding image.
After listening to Diana Krall for some time, I changed to “All the Little Lights” by Passenger. This used to be my favourite non-audiophile recording. As far as singer-songwriter albums go, “All the Little Lights” is a decent recording, and yet with each advancement of technology on my side, I was also beginning to hear the limitations of the studio. To my delight, the D-115’s more forgiving approach to music worked rather well with this album. The amp was revealing enough for the music to be entertaining, but it did not reach as deeply into the spaces as some of its solid state competitors will. I found listening to Passenger tonally charming and occasionally magical. The D-115 was neither technical nor overly analytical sounding. There was no trace of harshness, and the whole experience proved to be non-fatiguing.
Although the D-115 perhaps did not offer as much presence at the frequency extremes as some of its more recent cousins, it did present its music with lots of slam and rhythm. This impression was supported by the fact that it created a huge and spacious soundstage with full-bodied yet soothingly intimate vocals. And—although bass contour was slightly limited, perhaps due to its relatively low damping factor—its overall bass performance did feel natural. Tube amps are special in their ability to interact with the listening room in a way that solid state amplifiers simply cannot. The effect on voices is magical and thought to be unique to tubes. With its strong centre focus, the D-115 without fail found and caressed the singers voice at an instance. And the same magic happened when strings were playing.
The final album I listened to was “Foot Tappin’ Boogie” by Jörg Hegemann. This is still a relatively new addition to my benchmark series, and yet, I enjoy every minute of it. Since Jörg’s album is mostly instrumental, I was able to focus on the D-115’s depiction of instruments. In this context, I felt that the Audio Research slightly favoured the double-bass performance over that of the piano, specifically in combination with the SL3 loudspeakers. While the double-bass was presented fully and elaborately, especially the higher piano keys did not have the same piercing authority that I had come to enjoy from our B&K ST-140. As it turns out, the D-115 is quite sensitive to power cord issues. I was able to improve piano playback by moving the amp’s power cord away from all other cords in a way that they would neither touch nor cross. A re-play of the same song showed some improvement to piano notes, although an audible difference to the solid state amp remained.
Tannoy XT8F (Dynaco PAS-4)
Listening to the D-115 on our Tannoy system with Dynaco tube preamplifier produced a more insightful and perhaps more widely applicable result. Similar to the first scenario, the all-tube setup created a huge and mesmerising soundstage with the music being lush, agile and forward sounding. As I was sitting only two meters from the speakers, I could literally feel the D-115 throwing music at me with a vengeance. Walking around the ample space and listening in different positions, it became clear to me that this amp could fill large venues with ease, exhibiting its full dynamics in every corner, even at low volumes. While imaging may have been crisper with our solid state amps, the Audio Research excelled in giving each sound full body and life-like dimension, with excellent piano and double-bass on Diana Krall’s “No Moon at All”.
The D-115 sounded non-aggressive, exhibiting a slightly mitigated top-end. In marked difference to our solid state amps, piano notes remained non-piercing throughout. I noticed a slight sibilance on Diana Krall’s voice that might have stemmed from the simpler power cord I used and that I had not noticed on our other system with the higher quality cord. In comparison with our solid state amplifiers, the tube amp’s bass notes did not extend quite as low. Diana Krall, for example, often finishes her songs with a bass thump, and so does Jörg Hegemann in “Foot Tappin’ Boogie”. The effect is especially highlighted when playing music via our silver cables. Listening with the D-115, this final thump was audible but it was not quite as pronounced. From my early experience with Hafler, I remembered that the real merits of an amp can often be judged when listening to it play from another room with the doors left open and asking myself the question “What is playing: an amplifier or a band?” For the D-115, the answer to this question clearly leans towards the latter.
In summary, it can be said that the Audio Research D-115 is a highly musical tube amplifier for experienced audio enthusiasts who prefer to be tonally caressed rather than impressed with extended range. It prefers to drive conventional speakers with higher and more linear Ohm loads. As far as tube amps are concerned, the D-115 offers a balanced and smooth sound with a slight emphasis on vocals which it plays in a lush and full manner. Rather than impressive bass contour or treble extension, the D-115 offers a huge and spacious sound that is highly engaging and non-fatiguing to listen to. Later models of the same manufacturer are said to perform in a more extended, analytical, and less charming manner. For audiophiles who have the necessary skills and resources to set up and maintain an all-tube power amp of this caliber, the D-115 is certainly an excellent pic.
I thank Luigi for this new opportunity of exploration. It is through his passion and good ear that I have learned more about HiFi in just a few years than I otherwise could have done in a lifetime. The above is a factual account of the subjective listening events with the D-115 in our two systems around the time from 5. - 9. July 2021. As always in HiFi, alternative listening setups may lead to different results. Readers familiar with the D-115 or related all-tube designs, please feel free to leave a comment below.
Specifications:
- Power output: 100 WPC (16 Ohms, 20Hz to 20kHz < 1% THD)
- Total harmonic distortion: <005%, 1 watt
- Power bandwidth: 10 Hz to 60 kHz, -3 dB
- Input sensitivity: 1.2V RMS
- Input impedance: 75K ohms
- Output regulation: 0.4dB, 16 ohm
- Negative feedback: 20dB
- Damping factor: 20
- Slew rate: 15 V/µs
- Rise time: 5 µs
- Hum: 90dB below output
- Power supply: 1000 watts, 280 joules; 400 watts idle
- Tube complements: 4 x matched pairs KT77; 1 x 6550, 1 x 12AT7; 7 x 6DJ8/ECC88
- Dimensions: 48 cm (W) x 18 cm (H) x 42 cm (D)
- Weight: 31 kg
- Country of manufacture: U.S.A.
- Year: 1983-1989
B&K ST140

Published: 25/05/2020
Manufacturing date: 1989
Author: Karsten Hein
Category: Gear & Review
Tag(s): Power Amplifiers
B&K Components Ltd. was founded by John Beyer and Steve Keiser in Buffalo, NY, in 1981. The company evolved out of a single amplifier design that Steve Keiser had created attending electrical engineering school during his final year of college. Upon showing his amplifier to John Beyer, who was thinking about putting together a stereo system for his own use, John was so overwhelmed by the performance of the unit that he convinced Steve they should found a company together to market it. Initially, all units were built by hand and by the new owners themselves. From the time of the Chicago CES show, where the products were first shown to the greater public, John Beyer acted as sales and business director, and Steven Keiser performed all technical functions.
The first amplifier was to be called the ST-140 and was poised to become an instant success with audiophiles, due to its musicality and its relatively affordable purchasing price. The first version of the ST-140 was a 70 watts per channel into 8 ohms design using a standard iron core transformer. The model shown here is the updated version featuring a toroidal transformer and 105 watts per channel into eight ohms. Right from the beginning, the ST-140 followed a ‘less-is-more’ approach that makes it the ideal playing ground for music enthusiasts. While many things can go musically wrong with such a design, the right setup and combination of accessories will easily lead to a highly engaging because unfiltered musical experience.
Over the years, B&K have derived most of their income from Original Equipment Manufacturing (OEM) designing, engineering, and manufacturing products for other electronics companies and to be sold under their various brand names. The company has manufactured many amplifiers and other components that were sold under brand names such as Crestron, Harman / Kardon, Lexicon, and Onkyo Integra Research.
The ST-140 is a simple Dynaco inspired design that is able to perform into low ohm loads, an important criteria when driving ‘difficult’ speakers, such as electrostatic or magnetostatic designs. This is especially true for the revised 1989 version of the amp. It offers great musical balance and dynamics and in this sense can really ‘sing and breathe’ though a musical performance. When comparing a design like the ST-140 with more sophisticated amps, such as the higher powered Harman / Kardon Citation 22 (200 watts per channel into 8 ohms), the transparency and musicality of the smaller ST-140 is truly astounding.
Specifications
- Type: Solid-state stereo power amplifier
- Manufacturer: B&K Components Ltd., Buffalo, NY
- Output power (RMS, 8 ohms): 105 watts per channel
- Total harmonic distortion (5 Hz - 45 kHz): 0.09%
- Frequency response: 3 Hz - 70.000 Hz.
- Year: 1989, revised 105 watts version
B&K Sonata M-200

Published: 31/08/2020
Manufacturing date: 1987
Author: Karsten Hein
Category: Gear & Review
Tag(s): Power Amplifiers
Do you have a bucket list? I have sometimes heard and read of people who write up a personal list of experiences that they hope to have during their lifetime. I suppose, bucket lists include places to travel to and experiences to have, and—until a few days ago—I was not aware that I even had items to put on such a list. But, when I dropped by Luigi’s new apartment to listen to his current HiFi setup and he suggested that I give his B&K Sonata mono block amplifiers a try, I suddenly had a great sensation that an important item was being crossed off my list.
Ever since I first listened to an ST-140 stereo amplifier, I have been a fan of the B&K sound. Simple in their design, these relatively inexpensive amplifiers offer great musicality while being very articulate in their presentation. There is nothing careless or sloppy about their approach to music. And, if the 105 watts RMS per channel amplifier can drive even difficult speakers with ease, just imagine what the 200 watts RMS per channel M-200 mono block amplifiers can do. After all, there is something humbling in a dedicated 19.5 kg amplifier designed to power a single speaker.
Luckily, my car was not parked too far away that evening, so that carrying the equipment to it proved to be an easy enough task. Getting them up the stairs on my own later that night was another story, of course. While the amps have handles up front, the sharp cooling fins extend out the back, causing ugly marks on tables and racks. It is therefore much wiser to ignore the handles and grab the amps by the body to raise them straight up. To be honest, I actually prefer this amp design, as it supports passive cooling when the units are mounted in a rack. Since both HiFi and professional racks are usually open towards the back, having the fins in this position facilitates convection cooling.
In our living room setup, the two B&K M-200 mono blocks were to replace the ST-140 stereo amplifier by the same manufacturer and to drive our Martin Logan SL3 electrostatic speakers. This is not an easy mission at all, because of the Martin Logan’s hybrid design, featuring a conventional woofer that is matched with a Mylar foil electrostatic panel. The difficulty is the low impedance of the panel—of below 2 ohms at 20,000 Hz—but also handling woofer reactance with the panel in the signal path. The SL3s therefore need a powerful amp that will perform into low ohms and offers enough damping to steady the woofer. 105 watts are barely enough for this task, although the ST-140 does have massive reserves and with its huge caps and power supply is relatively unimpressed with the Martin Logan’s impedance curve.
As usual, I gave the ST-140 a good listen first, playing Jazz, Folk, and Gospel that I know well. The Martin Logans sounded large, relatively slow, and relaxed. As a two way system, with a low crossover frequency towards the bass, the sound is generally homogenous and smooth. The ST-140 in combination with the SL3’s closed cabinet woofer produces a full bottom end but does lack some punch in the representation of kick drums. The highs are pleasant but not too crisp. This may have to do with the felt pads that we use as spike coasters to reign in the sound for a more musical and less technical performance.
Changing over to the M-200, I first noticed improved stereo imaging. The sound was still large, but now it was more articulate and slightly more spacious. Not in the sense of wider, but here was simply more room around the instruments. The SL3s now appeared more naturally agile and more forward directed. When listening to Springsteen’s ‘London Calling’ concert, for instance, ‘Youngstown’ had that same immediacy to it that I remember so well from the live concert. Since I already know this DVD well, the ability to evoke such memories at the blink of an eye really says a lot about the quality of the amplifiers. With the M-200 mono blocks, the music found it easier to loosen itself from the speakers.
Bass performance was less boomy and more refined with slightly more punch on the kick drums. While this was still not the SL3’s strong point, I now understand that larger amps will help in blending the bass in with the panel frequencies. And there is another difference that I noticed while watching TV later that night. Namely, that cinematic effects sometimes seemed to be unnecessarily emphatic, as if the engineers had mastered the sound track for equipment that was less revealing.
I hope I will be afforded the luxury of being able to listen to these amps for a few days, before returning them to their rightful owner. Well done, B&K. The Sonatas are accurate and musical amps that manage difficult speakers with ease and have enough power to convince even the otherwise relaxed Martin Logans to step it up a notch.
Specifications
- Number of channels: 1
- Power output (8 ohms): 200 watts RMS
- Power output (4 ohms): 400 watts RMS
- Total harmonic distortion: 0.09 %
- Signal to noise ratio: 95 dB
- Damping factor (50Hz): 600
- Frequency response: 1 Hz - 100,000 Hz
- Slew rate: 25 V / uSec
- Power consumption: 800 watts max / 65 watts (idle)
- Dimensions: (w)43.18 cm, (h)14.68 cm, (d)38.70 cm
- Weight: 19.5 kg
- Country of manufacture: U.S.A.
- Year(s): 1987 - 1990
Becker ST-200

Published: 20/03/2022
Manufacturing date: 1980
Author: Karsten Hein
Category: Gear & Review
Tag(s): Power Amplifiers
Having trodden down the path of audio exploration for a number of years, I could see myself growing increasingly bored with the black box designs that held the marvels of electronics. Especially the identical-looking folded metal covers that served to house all kinds of gear, ranging from exotic streamers to run-of-the-mill multi-channel amplifiers, stood for the sordid lack of devotion of an industry increasingly sidelined by more versatile and interactive technologies. To the audiophile listener, however, this meant a lamentable loss of variety and aesthetics. In the 21st century, the general rule was that all Hi-Fi devices looked the same, unless, of course, prospective customers were willing and able to shed a few month's salary on the purchase of a single unit.
Turntables and tube amplifiers were among the few Hi-Fi devices that had largely remained untouched by the folded-metal-covers-syndrome. On these exalted units it was still possible to see and appreciate the raw technology in action and to recognise a distinct design philosophy. And perhaps this was also part of the reason for their returning popularity among a fresh new generation of listeners. For the new spawning social media generation, daily survival was about gathering tangible experiences and developing a unique and marketable personal image. Recognisable product features were an important means to underscoring and fulfilling that personal mission. Exquisite designs and mature personalities both needed to strike the fine balance between boldness and compromise.
I suspect that this longing for truth in character was also the reason why I was attracted to the Becker ST-200 amplifier in the first place: The possibility of seeing its electronics and the stunning simplicity of its design. At the time of purchasing the amplifier, I did not have any information about its specifications nor had I heard of the brand. Nevertheless, I suspected that the ST-200’s attractive features would also be supported by the choice of electronics inside. Was this a limited series amplifier perhaps, or a DIY kit similar to the Hafler and Heathkit amps? I really could not tell from looking at the amp from the outside, and my enquiries in the usual Hi-Fi forums remained without a useful lead.
I decided to play detective myself. Searching the Internet for clues, I found that the Becker ST-200 used four Hitachi J49 power MOSFET transistors, i.e., two J49 transistors per channel. With each transistor fastened to its dedicated heat sink, there was little need to worry about overheating. MOSFET transistors were silicone-based solid state devices that could run quite hot, especially if set at a high class-A level. They were said to offer tube-like performance in the sense that they produced a warmer and less technical sound. Such characteristics were usually given preference by audiophile listeners over regular transistors. I learned that one pair of these Hitachi MOSFETs per channel was capable of delivering 100 watts of output. If fully exploited, this would make the Becker a 100 watts RMS per channel amplifier into an 8 Ohm load. Not bad at all, given its relatively compact size and moderate weight.
Following the MOSFET transistors, the Coke-can-like blue capacitors attracted my attention. Rated at 61,000pF each, these powerful capacitors were able to store enough energy to offer strong peak power and drive even the most demanding speaker loads. Unfortunately, the same could not be said for the transformer that looked to be of rather moderate size, especially when considering the amplifier’s available power. Our Hafler XL-280, by comparison, housed a transformer that was at least double the size and weight. After switching on, the Becker's transformer rattled for a short while, until a relay switched the amplifier boards on in order to let the music play. Before connecting the speakers, I opened the amp to make sure that no parts had gone missing or come loose on the inside. What I found looking under the hood surprised me a little: The quality components that were on display on the outside did not seem to be matched on the inside. The amp's wiring actually seemed somewhat improvised.
I would have liked to see twisted and tinned Belden 9497 wiring leading to the speaker binding posts. Instead, I found the typical multi-stranded copper speaker cables that were household standard during the 1980s. I also observed that signal and power cables were at times laid out in close proximity to each other or even touching. This naturally had the potential of compromising the amp’s signal output integrity. To protect our speakers from an unnoticed malfunction, such as direct current output, I first measured the signal output using a multimeter. I found that the amp churned out up to 20 volts playing from a direct CD source and measured the amount of DC voltage to be zero. All the more, I was surprised that connecting our loudspeakers revealed 50HZ noise on both channels, as well as some nasty current-failing distortion during playback. It seemed that some relevant parts of the amp needed replacement, and I initially had a feeling that this just might be the large capacitors.
In my efforts to find the original designer of the amp, I had contacted Helmut Becker of AudioValve who, by his own descriptions, was known to have experimented with a wide range of design concepts before finally settling on tube amplifiers. Sadly, I learned that the owner of AudioValve had passed away in the week before my enquiry, so that my question could neither be negated nor confirmed by the company’s helpful customer service personnel. Considering the impact of AudioValve on High End tube designs, I will leave it up to the readers of this article to decide how plausible they deem the connection. In the written words of the friendly customer service agent: "Möglich wäre es."
I wanted to learn more about the exposed Bauhaus-style amp and consequently took the Becker ST-200 to be serviced by our trusted technician. By this time, I had already gathered enough items on my list of electronic bugs to justify a full service. However, to my surprise, I was handed back the amp just three days later and informed that no parts needed replacing. "These are some formidable components that have been very poorly assembled" was our technician's verdict. He had therefore repaired only the most obvious blunders and handed the amp back to me so that I had the chance to listen and decide for myself if further repairs would be worth the effort and cost.
Back in our listening room, I connected the Becker ST-200 to our Tannoy system that was controlled by a Dynaco PAS-4 tube preamplifier. After a few minutes of warming up, the music sounded huge with great tonality but also an audible noise floor in addition to the humming transformer of the amplifier. I was sure this could be done better and replaced the Dynaco with our dead-silent Restek V1 preamplifier. The noise floor dropped considerably, and even the humming transformer subsided with each hour of playing music. What I was left with sounded like pure magic to my ears. This amp produced the most naturally pleasing soundstage that I had heard on our Tannoys thus far. In combination with our affordable Belden 9497 speaker wires, the result even came close to the tonal and spacial realism I had felt when listening to the H&S Exceptional amplifier playing on the HMS Gran Finale speaker wires. In theory, there should have been no comparison at all, given the difference in price, quality, and effort.
However poorly assembled the Becker ST-200 may have been, it was certainly able to cause quite a stir with audiophile listeners like myself, simply because it was capable of reproducing that Jazz club feeling: The groovy stomping, the spacial accuracy of width and depth of the venue, the tonal appeal of real wood and metal, and even the lush and magnificent lead vocals in the stage centre. What had first looked like a promising DIY job gone south managed to produce more musical realism than some of our ultra-accurate amp classics such as the Hafler XL280. And while the Becker's specifications perhaps did not amount to much on paper, the amplifier certainly managed to capture our attention us in our listening room. I was reminded of amplifiers like the Dynaco ST-70 that, too, was capable of bringing the Jazz club atmosphere home. Therefore, when continuing our full refurbishment of the ST-200 amplifier in order to eliminate the remaining humming, we needed to pay special attention not to destroy its inherent magic.
[At the time of writing this, the ST-200 still suffers from repeated crackling and sporadic signal loss on either channel during passages of low input signal, especially coming from phono.]
(To be continued…)
Specifications
- Type: MOSFET power amplifier
- Power rating: 100 WPC (8 Ohms)
- Transistors: 4x Hitachi MOSFET J49
- Housing: 2x chromed metal sheets
- Dimensions: (W)220mm, (H)190mm, (D)345mm
- Weight without power cable: 9.5 kg
- Country of manufacture: Germany
- Year(s): 1980 (estimate)
Citation Twelve Deluxe

Published: 24/05/2020
Manufacturing date: 1976
Author: Karsten Hein
Category: Gear & Review
Tag(s): Power Amplifiers
The Citation twelve deluxe power amplifier was released to the public in 1972 and based on the 1970 Citation twelve stereophonic amplifier that had many of the same features. The facelift to the Deluxe version included a wooden case with brushed aluminum front and slightly improved specifications in terms of frequency response and distortion. Harman / Kardon’s previous amplifiers had been tube designs, and the original Citation twelve was the company’s first transistorized power amplifier. The Citation twelve’s relatively modern design was based on a design suggestion published in the RCA Solid State Handbook.
The Citation twelve deluxe features many of Harman / Kardon’s trademark design choices. On the one hand, it was one of the first truly dual-mono design amplifiers, featuring two transformers, two power supplies, as well as two separate amplifier circuits. On the other hand, Harman’s belief in the interdependencies of sound waves gave this amplifier the freedom to deliver frequencies from 1 - 100.000 Hz at +/-1 dB. In fact, not many amplifiers are given free reign to produce frequencies outside the spectrum of human hearing. According to ‘Absolute Sound’ the Harman / Kardon Citation twelve deluxe is “One of the twelve most significant amps of all time.”
Industrial grade components made sure that the amplifier would last for a long time. Harman / Kardon was so sure of this that there is very little on board to protect the amplifier from harm. There are not buttons, switches, or attenuators on the Citation that could have a negative effect on sound. In the original design there is not even a power switch to turn the amplifier off, and the standby power of 30 watts assures that the unit is always preheated and ready to play. The Citation presents its music in a straight forward, not frills fashion. It does not sound quite as robust and aggressive as a Quad 405, but it does not paint in beautiful colours like the small Hafler DH-120 either. From all the amps I have heard, I feel the Citation sounds the most accurate. Playing in combination with the Restek V1 preamplifier, the Citation manages to shine its light deeply into the room, sets an excellent soundstage and has that ever so slight touch of inviting warmth that is sometimes missing in more modern designs. The imaging and timing are smack on, and the panorama extends widely beyond the speakers. Still an absolute highlight after all these years.
On the unit shown here, changes to the original design include: a new Lapp power cord to replace the simple US version, a high quality power switch, new capacitors and gold plated cinch/RCA sockets.
Specifications
- Type: Class A/B power amplifier
- Manufacturer: Harman Kardon, New York
- Frequency response: 1 Hz – 100.000 Hz
- Total harmonic distortion: 0.2 %
- Signal to noise ratio: 100 dB
- Slew rate: < 2 US
- Damping factor: 40:1
- Phase shift: < 5 degrees at 20 Hz
- Intermodulation distortion: < 0.15
- Power rating (RMS, 8 ohms): 2 x 60 watts
- Power rating (music, 8 ohms): 2 x 100 watts
- Idle power consumption: 30 watts
- Dimensions: 430 mm x 155 mm x 370 mm
- Weight: 16.5 Kg
- Country of Manufacture: U.S.A.
- Year: 1976
Echle LF-3519
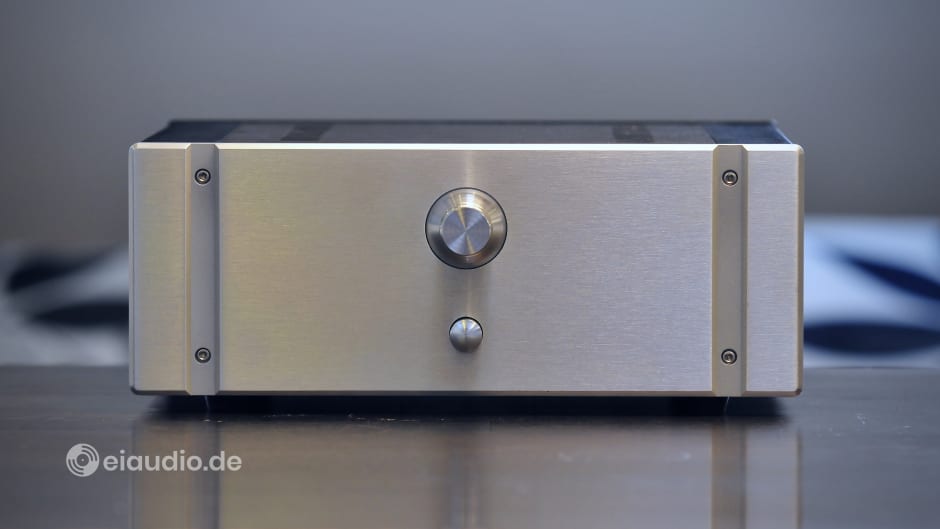
Published: 29/12/2022
Manufacturing date: 2022
Author: Karsten Hein
Category: Gear & Review
Tag(s): Power Amplifiers
When building our first signature power amplifier for eiaudio, the developer Winfried Echle and I were looking to fulfil four basic demands: First, to make minimal use of components, basically following the audiophile rule of less-is-more. Second, to assure sufficient back current stamina to power complex loads. Third, to achieve superior agility and musicality. And, finally, to create some visual understatement in the shape of a sleek and modest-sized enclosure.
eiaudio’s first dedicated power amplifier was to be designed on the basis of an earlier project that had involved four Sanken 2SC-3519A bipolar transistors per channel. To improve power handling, it was decided to increase the capacity of the supply by upgrading to a toroidal 500 VA transformer paired with two 10,000 mF capacitors instead of the original 250 VA transformer. We were aiming for the larger transformer to assure more power on demand while the fairly modest capacitors would preserve the amp’s agility.
The four Sanken 2SC3519A transistors per channel were able to handle currents of 15 A at high operating temperatures, although chances of this particular amplifier ever running hot were rather slim, since bias current was only set at 5 watts per channel output into 8 Ohms. To prevent the amplifier from producing the typical popping sound from the magnetisation of the transformer, a resistor-relay combination was put in place behind the power supply. As I later found out, this simple circuity was quite effective during the power-on phase, but it did lead to a mild popping sound about 30 seconds after the amplifier was turned off, most likely from the relay switching off.
The housing for the amplifier was sourced from the Chinese eBay-seller Douk Audio, at a time when imports from China were particularly pricey due to multiple disruptions to world trade that reached from pandemic measures to high petrol prices and border closures for political reasons. All this drove non-EU import prices up and lead to more competitive local offers, e.g., coming from the France-based electronics trader Audioholics. However, in the end, it was the list of specifications and not the more competitive pricing that led to our decision in favour of the Douk Audio amplifier enclosure.
The housing offered plenty of interior space (W) 220mm, (H) 112mm, (D) 300 mm to allow for some distance between the two amplifier boards and the power supply. This would help to reduce the likelihood of audible transformer humming to be heard on the loudspeakers. At 6.5 kg, the cabinet was sturdy enough to help further suppress mechanical vibrations on the HiFi rack. The massive aluminum face plate was of symmetrical design and featured a solid, polished aluminum knob for gain adjustment as well as a machined aluminum power switch. The sides were two massive heat sinks that would offer more than enough cooling under any circumstances.
The power switch felt firm and solid during switching. Paired with the amplifier’s soft-start circuit, it made for a high quality user experience. The same could be said for the aluminum volume control. Input gain could be continuously adjusted between 0 to 1.4 volts via an Alps Blue series attenuator. This, too, gave excellent haptic feedback. The housing needed to be assembled upon arrival which turned out to be an easy task. We used gold-plated cinch/RCA sockets for line input and gold-plated, low-mass binding posts for use with bananas or spades for the output to the speakers. We also decided to keep the small rubber feet that had come with the cabinet and to later place these on additional isolation pads for acoustic decoupling from the rack.
Winfried designed the two circuit boards (one per channel) so that they would house only the most essential amplifier parts, strictly those that were necessary to maintain and amplify the source signal in as pure a fashions as possible. And, sure enough, with the measuring equipment we had available, the amplifier showed a deviation of 0 dB across the relevant frequency spectrum from 20 - 20,000 Hz. Although Winfried had previously built amplifiers with very high damping factors, I suggested that musicality was more important to me than absolute control. Hence, the LF-3519 was designed with a relatively low feedback in mind. Signal damping was rated at 600:1, which is still low enough not to be overly analytical.
When I first heard the LF-3519 perform, I was immediately drawn into the music. Winfried had connected his revised Tang-Band W8-2314 with open-baffle dipole, and I could feel an intriguing mixture of strong command in the bass notes and softly breathing vocals. There was a pleasant fullness and warmth, a nice sense of tonal colour that I could enjoy. On that day I could not wait to take the amp home with me to test on our electrostatic system. One requirement had been for the amp to perform well on difficult loads and to have the power to drive our Martin Logan electrostatic speakers.
Upon first connecting the LF-3519 on our system at home, I heard the hissing of our Dynaco PAS-4 tube preamplifier. I then dialled the input attenuator back, until the system was near silence when standing right next to the speakers. With the LF-3519 set in this position, I saw that our regular listening volume was achieved when setting the PAS-4 volume dial between nine and twelve o’clock which was considered the ideal operating space for any attenuator. When I started listening to my familiar Jazz and Vocal Jazz albums on vinyl and CD, I heard a new firmness and agility in the music. The LF-3519 drove the Mylar diaphragms far more effortlessly into the higher frequencies than any of our previous amplifiers. Bass was quick and punchy with a swift decay. Vocals were a luring combination of rawness and softness.
When required by the music material, the LF-3519 would have the Martin Logans deliver bass runs that were astounding each time, both in volume and extension. The point being that there was usually no trace of this quality until the bass started to kick in. Although I am not that interested in bass performance, it was on these occasions that I turned to look at my wife just to confirm that she, too, had heard what I had just heard. While some of these qualities were already present a few hours after construction, proper tonality matured over the next few days and weeks.
One tendency we did notice was the amps readiness to pick up and amplify random noises from our household. And so it happened that just two days after our absolute listening bliss, the music began to sound harsh and constrained. At first I thought that something might have broken on the LF-3519 itself, or that this was perhaps an unpleasantness in character I had missed in my earlier listening. As it turned out, our LED-Christmas light transformer was emitting obnoxious waves into the grid. We eliminated the noise source, but we soon noticed other issues, for instance when our children placed their nightlights on the charger. The result usually was an unpleasant hissing and brightness resulting in listening fatigue.
Our Martin Logans are particularly sensitive in this area, because their Mylar Diaphragm has practically no weight on its own. My next exploration in audio will be to take the LF-3519 to our upstairs system and check how it does on our dynamic speakers.
Too much of a good thing?
After three weeks of listening to the new amplifier on our Martin Logan system, I noticed that I was taking a growing amount of ear ringing to bed every night. Although our listening volume was only at around 70 dB, a sensation of brute force on the ears remained. In my attempts of solving the problem, I replaced the worn out tubes from the line section of our Dynaco PAS-4 preamplifier. This helped to lower the noise floor, but the ear fatigue remained.
I found then another source for noise on our system: Our Apple TV with HDMI audio exctracor was plugged into the wall outlet at the other end of the room. When I plugged in the cinch connector, I could see a tiny spark and even feel the difference in ground potential in my hand when I touched the preamp housing and the cinch/RCA plug. When plugged in, I could hear a slight humming coming from the speakers. I consequently bought a line signal transformer to place between the HDMI audio exctracor and the preamplifier. This helped to stop the small humming and only marginally changed the sound coming from the Apple TV, but the unpleasant feeling of brute force on the ears remained.
I then carried the LF-3519 amp to our upstairs system with our Epicure EPI 500 speakers in place. The first impression was better, given the Epicure's slightly more forgiving nature, but when I changed from Jazz to Rock & Pop, the amplifier appeared to be screaming at me once again. I finally decided that we would need to look at the design again to see how we could better harness the amount of available power to produce a sweeter, more enjoyable, and less-fatiguing sound. Among the ideas that came to mind were:
- increasing transistor bias (less switching noise)
- reducing amplifier gain (less amplitude)
- eliminating the attenuator circuit (less signal noise)
- cutting ultra-high frequency response (less amplifier oscillation)
As our explorations have repeatedly shown that everything is a theory, until it has been heard in live action, it is impossible for me today to predict, if these measures will lead to the desired result. However, I will gladly report on any new development.
Beyond the Initial Frustration
(Edit: 21. Feb 2023)
In order to combat our initial frustrations of ear fatigue with this amplifier, three of the four steps described above were taken, which lead to a satisfactory and even rather pleasing result: By eliminating the attenuator circuit, humming decreased to almost inaudible levels, even with one's ear held directly in front of the tweeter. By capping ultra-high frequency response, amplifier oscillation was stopped to produce a much smoother top-end. We also increased transistor bias to the point at which the heat sinks became moderately warm under normal operation. We did not limit amplifier gain.
First listening sessions showed the amplifier to sound less raw and jumpy, although some of the initial force remained. Although the Echle LF-3519 was still a fast-sounding amplifier, it was now easier to listen to music at greater volumes without feeling overwhelmed. The LF-3519 still had the ability to cast individual notes deep into the room, however, more than before it also managed to maintain coherence. The high amount of energy and control would make the Echle LF-3519 an excellent companion for speakers that needed a little boost to sound involving. I would have loved to pair it up with somes of the larger Tannoy models, such as Windsor, Arden, etc.
Specifications
- Type: class A/B power amplifier
- Transistors: 4x Sanken 2SC3519A per channel
- Transistor type: bipolar (BJT)
- Transformer type: toroidal, 500 VA
- Power output (RMS, 8 Ohms): 145 WPC
- Power output (RMS, 4 Ohms): 230 WPC
- Frequency range: 1-100,000 Hz (+/- 3 dB)
- Signal damping: 600:1
- Input type: cinch/RCA
- Input sensitivity: 1.4 volts variable, Alps Blue
- Signal to noise ratio: 112 dB
- Total harmonic disortion: <0.01 %
- Rise time: (to be determined)
- Slew rate: (to be determined)
- Dimensions: (W) 320mm; (H) 130mm; (D) 335mm
- Weight: 10.75 kg
- Country of origin: Germany
- Year: 2022

H&S EXCEPTIONAL

Published: 17/01/2022
Manufacturing date: 1990
Author: Karsten Hein
Category: Gear & Review
Tag(s): Power Amplifiers
The H&S Exceptional is an ultra-linear MOSFET power amplifier that is capable of pumping 200 watts per channel into 8 Ohm loads and double this amount into 4 Ohms. Usually, doubling the power-rating as impedance halves works in theory, but here it also does in practice. At the heart of the amplifier is a large toroidal transformer able to extract a maximum of 1000 VA from your household grid. The amp’s sturdy body is constructed out of 2 mm steel sheets, and an additional inner steel cage serves to protect the delicate audio signals from harmful EMF that are generated by the power section. The outer cover is chromed. This mirrored-surface helps to accentuate the amp’s modest size of just 36cm in width and 16.6 cm in height. When I first chanced upon it, I had been sitting in the same room for a while and had hardly noticed the amp in the rack. However, the modest first impression was quickly forgotten, when I carried the amp for the first time. Its body felt ultra-solid, as if the unit was cut from a single block of metal. This effect was supported by the use of high-quality materials, right down to the stainless steel screws that were perfectly integrated with the chassis.
There was no popping, traceable vibration, or humming when the H&S Exceptional was switched on. Even with our periphery attached, there was no hissing or noise in the absence of signal. And, yes, even with my ear held to the speakers, the amp remained dead-silent. This did take me by surprise, because both our B&K ST-140 and Hafler XL280 amplifiers produced at least a faint amount of hissing, despite being well-made and excellent-sounding devices. My first impression therefore was that the H&S was an exceptionally well-behaved amplifier. Could this have been the reason for its ‘Exceptional’ name?
The H&S brand was originally created by the German Ortofon service technician Eugen Stöckl and his partner, first as a side-project next to their jobs and then as their main occupation. Over a period spanning more than 20 years, H&S developed and built a range of small-series Hi-Fi components for audiophile listeners. Among these products were the phono preamp H&S ‘Exact’, the ‘Iceblue’ phono cartridge, and three consecutive versions of the amplifier that is presented here. The main difference between the amp versions rested in the designs of the housing with the heaviest specimen weighing up to 38kg. Through the increase in sales of their products to audiophile customers, H&S was beginning to get noticed. When, in 2011, the leading international Hi-Fi magazine “The Absolute Sound” listed the H&S Iceblue among the world’s best phono cartridges of all time, Eugen Stöckl was able to receive this considerable honour in person, before his untimely death from a heart attack in the following year.
When reading about his sad demise on Markus Kannewischer’s website, I was reminded of the tragic fate of Peter Snell who had similarly died of a heart attack shortly after the launch of his popular C-Series loudspeakers. And, while men dying of heart failure was not unheard of, the idea of them dropping dead at the height of success did feel rather tragic to me. Hi-Fi had once again lost one of the industry’s humble contributors. Eugen Stöckl had been a staunch believer in the synergy of measuring and listening and spent lots of time doing both. His investment and stubborn diligence had paid off, and H&S was able to offer some true highlights to the audiophile community. The phono-preamp H&S Exact, for example, is considered to rank among the best of its kind until this day.
As the H&S Exceptional was a heavy amplifier, it took some 30-40 minutes warming up before displaying its full potential. With the original cost of the amp having been well in the five digits, Mr. Stöckl could be certain that the original amp owners would neither mind nor notice the increase in their electric bill while waiting for their amps to reach operating temperature, especially, as they were anticipating to experience a musical performance that would make them feel as the amp’s name suggested.
From one Solid State to another:
I began my exploration of the H&S Exceptional by hooking it up to our main system. This consisted of our Restek V1 preamplifier (previously upgraded by Restek and featuring a quality power supply by Mr. Kassel) and Martin Logan SL3 electrostatic loudspeakers. A Sansui SR-525 turntable with AT-VM95 ML cartridge and a Rega Planet 2000 CD player served as music sources. All units were interconnected with solid-core silver cables with copper-mesh shielding. I had a choice of loudspeaker cables and decided to start with our trusty Belden 9497 in bi-wiring (and connected to a single point of contact on the side of the amp for improved response). I chose a range of music and styles to focus on various aspects of performance, but will use just a few examples to highlight my findings.
Transitioning to the Exceptional from our trusty B&K ST-140 workhorse, I measured a 6 dB increase in effective volume when driving the H&S at the usual setting on the stepped Restek dial. I attributed this difference to the fact that the Exceptional had close to twice the power of our B&K but nearly the same input sensitivity. To avoid the criticism of comparing apples with pears, I made sure to set the volume at our usual listening level. Yet, even with the volume dialled back, the Exceptional sounded more focused and cleaner whilst playing stronger and more determined than our ST-140. In combination with our Martin Logan electrostatic speakers, the H&S achieved superb spatial and tonal separation of music events. The amp’s agile power output was driven by a total of 120,000 mF in supply capacitors which facilitated a rise speed of 300 V/μS. And, in combination with its formidable damping factor of 800:1, this resulted in an ultra-hard grip on the speakers. Amps like this are a valuable asset when listening to classical music and other scenarios in which many instruments play at once with multi-layered spatial and tonal character.
The Exceptional was capable of superb bass-punch and ultra-abrupt decay while holding simmering high hats suspended for eternity. In an all-solid-state setup (CD, Restek, H&S) this much command could at times sound overly dry and tight-fisted, stressing accuracy over musicality, but even exchanging one part of this signal chain could result in magic. Switching from our Planet 2000 CD player to the Sansui turntable, for instance, highlighted the amp's more musical side. Vinyl could easily benefit from a highly accurate amplifier by receiving a bit more transparency, drive, and punch than usual. Due to the relative absence of overlapping frequencies, of the kind that came from time-lag issues on the part of the loudspeaker drivers, the H&S Exceptional would not on its own be deemed as a 'warm' and soulful amplifier. It is relatively free of such effects. But, when paired with a turntable and tube preamplifier, it could well contribute to a superb mixture of musicality and detail, in addition to offering the welcome flexibility of being able to drive even the most difficult loads.
From exceptional amps to exceptional cables:
On 19 January 2022, just two days after writing the previous chapters of this review, I exchanged our standard Belden 9497 speaker cables (which work excellent on tube amps, etc.) for a pair of monsterous Madrigal Mark Levinson flat solid-core copper cables. The result was truly magical with the H&S Exceptional amplifier sounding perfectly balanced. It seems that the increase in capacitance and the uniquely crafted solid-core design of the Madrigal cable served well to bring out the amp's true merits. After all, the H&S Exceptional was targeted at owners of Krell or Mark Levinson amplifiers who were seeking to move upward. More information on this subject can be found in my Madrigal cable review.
Specifications
- Power output (RMS, 8 ohms): 2 x 200 watts
- Maximum power consumption: 1,000 watts
- Transistor Type: Power MOSFET
- Frequency response: 4 - 150,000 Hz
- Total harmonic distortion: 0,03%
- Signal to noise ratio: >100 dB
- Channel separation: 105 dB
- Input sensitivity: 1.3 Volts, max.
- Input resistance: 27 kOhm
- Damping factor: 800:1
- Rise speed: 300 V/uS
- Rise time: 0,5 uS
- Dimensions: (W)360mm; (H)165 mm; (D)310 mm
- Body: 2 mm steel casing + 2.2 mm steel shielding
- Finish: polished chrome, silver-matt faceplate
- Weight: 19,5 Kg
- Country of manufacture: Germany
- Years: 1990 - 2011 (Series 1-3)
Hafler DH-120

Published: 26/05/2020
Manufacturing date: 1984
Author: Karsten Hein
Category: Gear & Review
Tag(s): Power Amplifiers
The David Halfer Co. was founded in Pennsauken, New Jersey, in 1972, but at the time of its founding, David Hafler had already made history as one of the world's most iconic audio engineers. Born in 1919, Hafler was a graduate in mathematics from the University of Pennsylvania who served for some time as a communications specialist in the Coast Guard during World War II. In 1950, he and his friend Herbert Keroes founded Acrosound, a specialist manufacturer of audio grade linear transformers for tube amplifiers. From building transformers it was just a small step to building the tube amplifiers around them, and in 1954, David Hafler left Acrosound and partnered with an audio engineer named Ed Laurent to found the Dyna Company, a name that was later re-branded as Dynaco.
Throughout his career, David Hafler focused on engineering audiophile products at affordable prices. Acrosound had built transformers primarily for home electronics hobbyists, and Dynaco was to take the idea of DIY audio to a whole new level. Ed Laurent had designed a new type single-tube driver circuit for a power amplifier before joining Dynco, and Hafler was intent on marketing this as an affordable choice for a large number of enthusiasts. Because of the high quality of Dynaco’s tube audio designs, the name quickly became synonymous with great sound at affordable prices. During the 1950s and 60s, setting up an audio system was still considered mostly an engineering hobby with the best sounding gear being built by its owners. Dynaco’s first product was the Mk. II, a 50 watts tube power amplifier. The unit was available both as a DIY kit and as a pre-assembled unit. After 2 years of successful sales, the Mk. II was succeeded by the Mk. III which was slightly stronger and offered 60 watts of power. These ‘Dynakit’ amplifiers were assembled by hundreds of thousands of audio enthusiasts at their homes. During the 1990s, the famous Dynaco Mk. II was featured in the Smithsonian's Museum of American History in Washington as a groundbreaking piece of American communications history.
Several Dynaco products of this time are still regarded as among the best audio designs ever made. This certainly includes the Dynaco ST-70, a 35 watts per channel stereo tube amplifier with a highly efficient push-pull output circuit. In fact, the ST-70 was designed so well that it was to become the prototype for many similar products that followed from other manufacturers. More than 350,000 ST-70 amplifiers had been sold by the time production finally ceased, making the ST-70 the most popular tube power amplifier in history. Although Hafler sold Dynaco to Tyco in 1968, he remained in an advisory position until 1971. By the time that David Hafler founded the company bearing his own name in 1972, he had already exercised an enormous influence on several generations of audiophiles and music lovers. With his mission of manufacturing high quality audio products at affordable prices being unchanged, the Hafler Company's first two designs were the affordable DH-101 preamplifier, followed by the DH-200 companion power amplifier, both offering exceptional music reproduction in that price range. Another notable product was the DH-500 stereo amplifier which was rated at 255 watts per channel and found great success in home, studio, and live environments. All units were available as DIY kits and as fully assembled products.
The Hafler DH 120 is a bridgeable 60 watts per channel transistor amplifier. It is of sturdy build quality with two amplifier boards hooked up to a single transformer. The 4 Hitachi MOSFET transistors per channel are mounted on two large heat sinks that constitute the sides of the amplifier. The specifications of the amp still read excellent by today’s standards, and the high quality of components assures a long life expectancy. Due to the relatively small number of parts and the well thought out circuit design, the DH 120 is a dynamic and musical piece of equipment showing that sought after Dynaco signature. In direct listening comparison, I even preferred the smoother and more colourful sound of the DH 120 to Hafler’s larger DH 220, a 110 watts per channel amplifier. Size is not everything, certainly not when it comes to the DH 120. The amplifier has got charme and is able to power most types of speakers just fine. For electrostatic and magnetostatic setups, the amplifier’s 60 watts per channel rating is most likely not enough.
Specifications
- Power output (RMS, 8 ohms): 2 x 60 watts
- Transistor Type: Hitachi Mosfet
- Frequency response (60 watts, +/-0.5 dB): 10 - 40,000 Hz
- Frequency response (1 watt, -3 dB): 4 - 200,000 Hz
- Signal to noise ratio: >100 dB
- Damping factor: 100:1
- Crosstalk: 85 dB
- Rise time: 2 uS
- Weight: 9 Kg
- Country of manufacture: U.S.A.
- Year: 1984 - 1990
Hafler DH-220
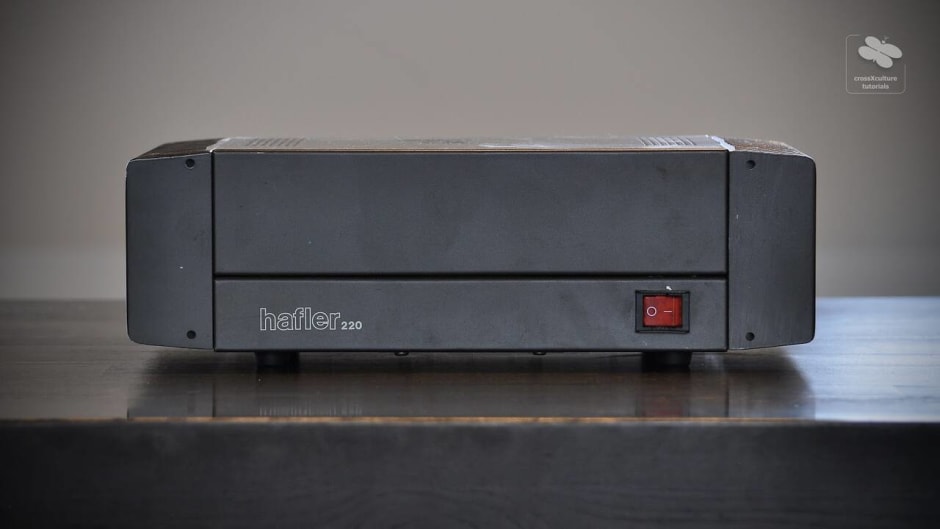
Published: 26/06/2020
Manufacturing date: 1984
Author: Karsten Hein
Category: Gear & Review
Tag(s): Power Amplifiers
There was a time when my good friend Luigi was bringing HiFi gear by our house for testing on a regular basis. And although there were lots of interesting discoveries to be made, somehow the devices did not strike a chord with us to the extent that we actually wanted to own them. One day, as I was climbing up the staircase from an evening teaching classes, I could hear music playing in the living room that sounded very realistic, even from a distance. Whatever this is, I was thinking to myself taking the last few steps, this is going stay. The system Luigi had set up for us was a Hafler combo consisting of the DH-110 preamplifier and the 60 watts DH-120 power amplifier. And its musicality was beyond anything we had heard at the time. When I later asked my wife at which point she knew that this would stay, she said that she had already heard it was very special from the kitchen - which is about thirty feet down the hall.
There are not many amplifiers capable of winning over our hearts from 30 feet away with such unanimous vote and certainly not at a price tag that most people are able to afford. Because of the obvious qualities of the Halfer, Luigi decided to purchase the 115 watts DH-220 and had it readjusted and fitted with new caps. The class-A portion of the amplifier was increased in the process, which has a positive impact on sound and leads to greater heat dispersion. I think you can literally fry an egg on this unit. At twelve kilos, the little amp feels like a solid piece of metal. The heat sinks are massive, and with this much class A-power that is probably good as it is. For an amplifier of this caliber, distortion figures are very low at any frequency. The below specs show THD at 1 kHz.
From my own experience I know that the DH-220 can be quite a princess, in the sense that it does not play with everybody. Some time ago we had borrowed it from Luigi to test it on our smaller system. In this scenario it had to play with some mediocre preamp and mid-fi speakers. The result was less than pleasing, and we soon returned the amp to look for something more appropriate. I was therefore surprised when Luigi insisted that I give this amp a second chance, now that all our other components had gradually been upgraded. In the current scenario the DH-220 was to replace the Citation Twelve Deluxe, a power amp that we have come to enjoy. And the playing partners were a Lenco L75 turntable, the Restek V1 pre, and Tannoy DC6t speakers at 8 ohms.
We gave the Citation a final listen and then hooked up the DH-220 for comparison. The improvement in this scenario was immediately audible even though the amp was still warming up. The slight dreaminess of the Citation was gone, music now had a more intense and realistic dimension to it which became especially striking when playing live recordings. Whereas the Citation had caressed the listener, the Hafler had a straightness and insistence to it that was familiar to me from some Quad amplifiers. The DH-220’s midrange is tonally very accurate and at that pleasingly broad. Its bass lines are powerful and controlled which develops into a pleasing fullness of sound. Spatial representation is highly accurate and piano notes are flung deep into the room. The Halfer played so well that we were able to remove the weights that I had placed on top of each speaker for better imaging and could pull the speakers further into the room without losing foundation. We will certainly keep this amp around for a while to enjoy the new dimension in sound. The Hafler DH-220 is well worth exploring. Wherever this amplifier fits in, it is going to be very hard to beat.
Specifications
- Power output (RMS, 8 ohms): 2 x 115 watts
- Transistor Type: Hitachi Mosfet
- Frequency response (15 watts, +/-0.5 dB): 6 - 60,000 Hz
- Frequency response (1 watt, -3 dB): 2 - 160,000 Hz
- Total harmonic distortion: 0,0025%
- Signal to noise ratio: >100 dB
- Damping factor: 300:1
- Crosstalk: 85 dB
- Rise time: 2,5 uS
- Weight: 12 Kg
- Country of manufacture: U.S.A.
- Year: 1984 - 1990
Hafler XL-280

Published: 09/07/2020
Manufacturing date: 1987
Author: Karsten Hein
Category: Gear & Review
Tag(s): Power Amplifiers
The XL-280 stereo power amplifier is arguably one of the best devices the Hafler has ever made. Offering 145 watts RMS into 8 ohms, it runs stable down to just 1 ohm and is thereby capable of driving even the most challenging speaker loads without having to fear instability, overheating, or the amplifier going into circuit protect mode and shutting itself down. The XL-280 was therefore predestined as a work horse to power the magneplanar and electrostatic speakers of the 90s, but also served more demanding conventional designs, such as some Infinity models. 145 RMS may not seem like a lot of power at first glance, however, this perception might change, if we consider that the watts nearly double as the ohms are cut in half, if the architecture and power supply permit. Thus, at 2 Ohms the XL-280 delivers 360 watts per channel, whereas many more conventional amps will simply throw in the towel.
The XL stands for Excelinear, which—according to Hafler—means that it excels in linearity. The aim was to build an amplifier that would have the linear properties of a single straight wire. The benefit of such an amplifier would be that it neither adds or takes away from the signal it receives from the audio source. Hafler writes that “In phase, amplitude, transfer characteristic and other distortions, the XL-280 sets new standards for accuracy. It is so close to perfection that for the first time you can make a meaningful comparison of this amplifier with the classic zero distortion: a straight wire. (...) An Exclinear amplifier enables the ‘golden ear’ who demands the absolute in system linearity to move one step closer to perfection.” The operating manual goes on to describe that with the addition of the XL-10 switch box, A/B comparisons in distortion differences to a straight wire are possible, and that the XL-280 offers built in controls for load adjustment to accommodate specific speaker loads. To allow for this adjustment while the amp is closed, the top panel has two small holes that are sealed by rubber plugs through which a screwdriver can be inserted.
Halfer, like Harman Kardon, believed that musical bandwidth should not be restricted for the sake of music integrity. The XL-280’s exceptionally wide bandwidth is demonstrated by the specified 1 watt output performance of ± 3dB from 0.1Hz to 500kHz. Impressively, phase shift within the conventional audio band (20Hz to 20kHz) is specified at less than 0.5°. In terms of build quality, the XL-280 is very similar to its predecessor, the DH-220, although it is actually 25mm wider. The black case consists of four construction units: 2 pressed steel sections which form the chassis and lid and 2 large anodized heat sinks—one on each side—to which the amplifier modules are attached and the 6 output transistors are screwed for passive cooling.
In their review of the Hafler XL-280, stereo-amplifier.net writes: “Set up for Quad ESL-63 loudspeakers the Hafler XL-280 gave a truly exemplary performance. The bass was absolutely firm and seemingly more extended than I am used to hearing, despite the fact that my preamplifier has a built-in LF roll-off. The treble was crystal clear and wide open sounding, with no trace of sibilant 'splash' and the overall stereo sound stage rock-solid regardless of the dynamic activity of the music used. Some of the more subtle subjective differences one hears in top-end hi-fi equipment are terribly difficult to quantify, sometimes even to express, but my overriding impression of the Haller XL-280 is that it neither adds to nor subtracts from the source material fed to it. The word that kept coming to mind as I listened over a period of weeks was 'authority' and I can't think of a power amplifier that I've used, or for that matter heard, which demonstrates that quality more convincingly.”
In my own listening so far, I can well relate to the relative authority which the amp attributes to the music. There is no halo, no trace of uncertainty in the representation of voices or piano notes. The amp rather seems to have an ultra-tight grip on the music that is truly fascinating. I cannot yet confirm the bass extension that we have come to know and enjoy from the DH-220, however, a fact that could mean that the capacitors in our unit have dried up over the years. While this would not be surprising for a unit that has been playing music since the 80s, it does mean that there is still some work ahead of us to reveal the XL-280’s full potential. Considering its fresh-from-the-shop condition, I would assume that this particular Hafler has been stowed away in the basement or attic for a long period of time, which is generally bad news for capacitors. Since we have already fallen in love with this amp, restoring it to mint condition will be well worth it.
Specifications
- Power output (RMS, 8 ohms): 2 x 145 watts
- Transistor Type: Hitachi Mosfet
- Frequency response (1 watt, -3 dB): 1 - 500,000 Hz
- Total harmonic distortion: 0,007%
- Signal to noise ratio: >100 dB
- Damping factor: 300:1
- Rise time: 0,7 uS
- Weight: 12,25 Kg
- Country of manufacture: U.S.A.
- Year: 1987 - 1990
High Output Class-D Amplifier

Published: 19/12/2022
Manufacturing date: 2015
Author: Karsten Hein
Category: Gear & Review
Tag(s): Power Amplifiers
“Have you ever tested a digital amplifier in your blog?” my favourite audio technician asked as I was leaving his shop. I stopped at the door and shook my head, grinning widely. I knew that Winfried was a seasoned developer of HiFi equipment ranging from network filters, CD-players, network players, pre and power amplifiers, all the way to loudspeakers. His more recent gear was usually packaged in inconspicuous-looking black boxes of visual understatement. And I knew that his digital amplifier designs had already been tried and tested in his own laboratory and in combination with the various HiFi gear of his customers. This particular Class-D amplifier had a higher-than-usual power output of 350 watts per channel into a 4-Ohm load.
“Will it work on the Martin Logans?” was my return question. We both knew that the Martin Logan electrostatic speakers produced some destructive dips in resistance, especially in the higher frequency spectrum. Winfried was confident that low resistance should not be problematic with his Class-D amplifier and assured me that there was built-in protection against overstraining of the circuits. I said that I would be thrilled and honoured to give his unit a try in my own testing environment. He handed me the amplifier, and, holding the little black box in just one hand, I was again reminded of the most obvious virtues of such a design: weight and size. At under 2.5 kilos, it was five to ten times lighter than a conventional 350 watts power amp would have been, even when considering some weight-stripped PA gear. I was thinking of such classics as the Dynacord PAA 880 power amplifier weighing 23 kilos.
As I had already experienced the Eichmann Bullet Plug’s advantage of equal mass ratio and also been witness to the benefits of solid-core connectors in eliminating Eddy currents, I was intrigued to learn about WBT’s 0210 CU Nextgen Plasma-protect sockets. What a positive surprise that Winfried should have chosen these plugs for the Class-D amp’s line inputs. The reassuring first impression continued when I turned the amplifier on for the first time. The integrated power switch on the IPC socket felt smoother and firmer than the many similar looking ones I had experienced before. The small black box looked sleek and sophisticated on our bamboo amplifier base, however, I could detect the slight ringing from the switching power supply that was emanating from the amplifier housing itself. It is no secret that I was no fan of trailing edge supplies and tried to eliminate them in our house wherever I could. On the other hand, I was prepared to keep an open mind towards the advances of technology.
During the warm-up phase of our equipment, the Class-D amp’s protective circuits detected a small amount of DC leakage coming from our tube preamplifier and switched the amplifier ouputs off repeatedly. This effect subsided once the Dynaco PAS-4 was at full operating bias. As our old Hafler XL-280 dinosaur had not featured such sophisticated circuitry, it had not revealed the small but not insignificant error on the side of the PAS-4. It took about 20 seconds for the Dynaco to stabilise, and the unpleasant switching noise stopped. Relieved that all was in good order, I assumed my listening position and noticed that the Class-D amplifier was itself quiet except for the small amount of familiar tube hissing coming from the Dynaco preamp.
When listening to Robby Williams’ album “The Christmas Present” on our Rega Planet CD player, I noticed that the Class-D amp played louder than our Hafler. It was quite typical for American amplifiers to have lower input sensitivity than their European counterparts. I could also hear that Winfried’s amp pushed the Martin Logans’ electrostatic panels into the higher frequency range more effortlessly. The resulting sound was accurate and smooth with great natural dynamics. The high frequencies sounded clean, and I felt that the tonality presented was natural. I was pleased with the amount of bass slam and control, and it was obvious that this amp was running stable enough to handle complex loads. Our hybrid Martin Logan speakers certainly qualified as complex loads due to their combination of panels (electronically similar to a capacitor) and dynamic bass driver. In this scenario, less able amplifiers than Winfried’s Class-D tended to struggle keeping control of the woofers.
The combination of the amp’s high damping factor 4,000:1 and its low internal resistance of less than four milliohms actually made it an excellent companion for our Martin Logans’ needs. I noticed that sonic events had their own spaces and sizes, without any apparent influence on each other. This was a great amp for analytical listening. The Hafler, on the other hand, seemed to paint with a single brush. It produced great cohesion in the music, but it could not match the Class-D’s superior bass control, extended high notes and effortlessness. While the Class-D design was able to produce growling bass that was deep and extended, the music could seem strangely disconnected at times. When playing music from digital sources, I sometimes felt a lack of emotion, a certain emptiness that was similar to the effect that is perhaps familiar from an LED cob light. While the light might be bright and also set at the specified colour temperature, there is also a sensation of emptiness when compared with a halogenic light source. And while this is just an analogy, the emmotional impact on the spectator was the same.
Playing music from an analogue source, however, was a completely different story. Here the amplifier’s additional detail and drive worked very well. The music sounded richer, fuller, and more satisfying. Phono benefited from the increase in agility coming from the Class-D design, and in contrast to digital sources, phono did not produce any feeling of emptiness. It instead sounded rhythmical, smooth, and full.
In conclusion, I could report that Winfried had built an inconspicuous-looking Class-D amp that packed many of the Class-D advantages but could not eliminate all possible design weaknesses associated with Class-D. In combination will digital devices, this particular amp could sound overly exact with some speakers and result in music information that was more interesting for the listener’s head than satisfying for the heart. In combination with analogue signal sources, however, the superior exactness had some obvious advantages. I could not help but wonder, if a linear power supply would not have resulted in an even better amp, but then this might just be my long-harboured personal suspicion of switching supplies.
Specifications
- Damping factor: 4,000
- Output power: 220 WPC (@ 8 Ohms), 350 WPC (@ 4 Ohms)
- Amp-internal resistance: 4 mOhms
- Switching power supply: 2x 600 VA
- Total harmonic distortion: <0,01 %
- Signal to noise ratio: 110 dB
- Channel separation: >115 dB
- Output impedance: 2-16 Ohm
- Line input sockets: 2x Cinch/RCA
- Input socket type: WBT 0210 CU Nextgen Plasmaprotect
- Speaker binding posts: FineTech, gold plated
- Total weight: 2.44 kg
- Dimensions: (W) 165mm; (D) 260mm; (H) 93mm
- Country of manufacture: Germany
- Year: 2015
Kenwood Basic M2 Sigma Drive

Published: 14/01/2023
Manufacturing date: 1983
Author: Karsten Hein
Category: Gear & Review
Tag(s): Power Amplifiers
Having previously reviewed the Kenwood KR-9400 receiver of the mid 1970s, with its posh-looking brushed aluminum face plate, solid aluminium buttons and switches, all housed in an assembled metal frame that had originally been flanked by wooden sides, the black box design of the Kenwood Basic M2 with its thin, bent metal enclosure of the mid 1980s, was a bit of a let-down. The M2 shared this aesthetically reduced, light-weight design with most of the competing products of its time. Where, just ten years earlier, innovation had been in the machining and assembly of parts, this next phase was mostly about experimenting with the electronics inside to eliminate the shortcomings of the earlier circuit designs.
The 1980s were also a time of increased price competition. With more companies entering the market in the lower and mid-price segment with gear that fulfilled the basic demand of the average consumer, material and shipping costs needed to also come down on some of the established brands in the market. Kenwood was such an established brand, and the M2 Basic chassis offered 100 watts per channel more than the KR-9400 receiver and, proving the point, weighed five kilos less. Five kilos of net savings in materials and shipping weight would have made a considerable difference in the cost planning of a company that could sell thousands if not millions of iterations of each product.
In terms of assessing vintage equipment, the modern mass-market approach often lead to the immediate depreciation of value once the manufacturer’s warranty period had expired. However, this did not necessarily mean that the sound quality itself was compromised or that the inner circuitry similarly reflected the mass-market approach of the chassis. In fact, the 1980s were still a time of HiFi innovation, and the M2’s Sigma Drive introduced an all-new solution to the age-old challenge of handling the dynamic back current running from the loudspeaker to the amplifier. Instead of simply offering ultra-low internal resistance and measuring signal damping at 1,000 Hz, the Sigma Drive took into account the real feedback of the loudspeakers, regardless of the frequency.
In the tradition of decent High End power amplifiers, the Basic M2 used a separate power supply for each stereo channel. This was to lower the noise floor by eliminating cross-talk between the channels. The two heavy transformers were placed to the left side of the amp, thus leading to an uneven distribution of weight within the unit. The main board holding the two large capacitors per channel was located in the centre of the unit, culminating in the power transistor section with one large heat sink and a large cooling fan to the right. In domestic operation, the cooling fan would not play much of a role, but for owners willing to drive their M2 at full capacity, the fan would provide a safety net for the survival of the transistors.
The Basic M2 employed two pairs of transistor ICs: one set of DAT1521P / DAT1521N and one set of DAT1018P / DAT1018N, all of them fast switching 5-pin power MOSFETs made by Sanken. Especially the DAT1018P/N variety saw repeated supply shortages in recent years which would have made repairs of the amplifier section more difficult. The choice of fast switching ICs would have provided the Basic M2 with greater resistance to high frequency feedback which would otherwise have exceeded the slew rate of the amplifier. The new Sigma Drive circuitry would have similarly benefitted from the choice of ICs.
The Sigma Drive was designed to integrate the physical behaviour of a dynamic driver and the resulting dynamically unpredictable back current within the circuitry of the amplifier by monitoring the resulting deviation right at the speaker terminal and converting it into a mere current variation. As amplifier output constituted a voltage surplus, the ability to maintain voltage deviation at zero, by means of adaptive damping, led to exceptionally low harmonic distortion of just 0.004% measured across all frequencies. Effective back current damping was rated at above 1000:1 beyond the audible spectrum. With the new Sigma Drive feature on board, Kenwood introduced a new dimension in noise control that had the audio press of the 1980s interested for some time.
Kenwood was not the only HiFi manufacturer attempting to improve back current handling. Yamaha introduced “RO Control” on their B-4 and A-9 amplifiers, Aurex called their version “Clean Drive”, and Fidelix referred to their concept as “Remote Sensing NFB”. However, none of these technologies went as far as that of Kenwood which included measuring the whole loudspeaker from the voice coils to the speaker cable. This would have given Kenwood the upper hand in achieving the most accurate readings, if it had not been for a few issues that involved the use of two strands of speaker wires which needed to be connected in a fashion that was somewhat counter intuitive.
For the Sigma Drive circuitry to work its magic, two sets of wires needed to be connected between the amplifier and each speaker. Next to the common red and black binding posts per channel, there were two additional binding posts on the amplifier that were labelled as Sigma Sensor. Therefore the second set of wires ran from the Sensor posts, quite counter-intuitively, to the same binding posts on the speakers. This feature was only available for the speakers A and not for the speakers B. This meant that owners of the amplifier had to study their operating manuals carefully in order not to misconnect and destroy their amp. When connecting the amp for the first time, I therefore asked my wife to look over my shoulder and assure that all instructions in the manual were followed.
When connected correctly, the rather power-hungry Basic M2 offered a spacious and clean sound that was tonally rich and slightly dark in true Kenwood fashion. Hooked up between our Dynaco PAS-4 preamplifier and Martin Logan SL-3 electrostatic speakers, the music sounded soothing and voluptuous rather than exciting or sharp. This was an amplifier for easy entertainment rather than analytical listening. For an amplifier of this size and caliber, I was surprised by the amount of control it held on the flow of the music and on the rhythm. Where the Kenwood receiver sounded overly eager to tell the whole story all at once, the Basic M2 seemed to hold back, occasionally to the point of stomping and drudging. This may have been the effect of transients being cut short, and it sometimes took the fluidity from the music event.
I was generally pleased with the Basic M2’s performance. Connected to a difficult load as the Martin Logan SL-3, the Kenwood could really show its back current handling abilities. In combination with the two sets of OFC multi-strand speaker cables that I had available to test the Sigma Drive, I would hesitate to brand it audiophile material. However, it was well possible that a different combination of wires and preamplifier would have led to a more revealing result. Tonally rich and dark, the Kenwood followed the preferred sound signature of American customers of the time and thus offered a welcome contrast to the established European brands.
Specifications
- Type: Stereo Power Amplifier
- Special features: High-damping, Sigma Drive
- Power output (8 Ohms): 2x 220 WPC
- Power output (4 Ohms): 2x 324 WPC
- Frequency response: 1Hz to 200kHz (-3 dB)
- Total harmonic distortion: < 0.004%
- Dynamic headroom: 1.5 dB (8 Ohms)
- Damping factor: 1000:1
- Transistor-ICs: Sanken DAT1521P/N, DAT1018P/N
- Transistor type: Power MOSFET (5-pin)
- Rise time: 1.8 uS
- Slew Rate: 100 V / uS
- Input sensitivity: 1.0 V / 47 kOhms
- Signal to noise ratio: > 120dB
- Speaker load impedance: 4 to 16 Ohms
- Power consumption (max.): 1.350 watts
- Dimensions: (W) 440mm x (H) 158mm x (D) 373mm
- Weight: 15.5 kg
- Country of manufacture: Japan
- Year(s): 1983-1985
Uher UMA-1000

Published: 03/07/2024
Manufacturing date: 1992
Author: Karsten Hein
Category: Gear & Review
Tag(s): Power Amplifiers
In 1993, I was 20 years old and still recovering from my family’s relocation from the city of White Plains, in the United States, to Germany’s Rhine-Main district. Despite the many re-adjustments following our move, I had managed to kindle my passion for HiFi and already purchased a DIY set of ‘transmission line’ speakers, which use a specific design to extend low-frequency response, from a now closed German manufacturer by the name of Mainhattan Acoustic in Hainburg, near Frankfurt. The owner and chief developer, Holger Müller, later went on to found ‘German Physiks’, the meanwhile world-renowned omni-directional loudspeaker company.
The ‘Fidelity 425’ was Mainhattan Acoustic’s 2nd-largest model and consisted of a 3-way bookshelf speaker that was integrated in a folded transmission line of around 2.40m length, driven by an additional 25cm paper cone woofer. Although the loudspeaker was able to produce low bass in abundance, the 4-way design’s kick bass was limited to the abilities of its 12cm midrange-to-bass driver. The foam surrounds of the two woofers, which provide flexibility but can reduce control, delivered a relatively loose interpretation of bass, rather than ultra-high accuracy, unless the speakers were driven by a very powerful amplifier.
To help me meet the speakers' power requirements, a friend of mine sold me a used Dynacord PAA 460 power amplifier with 200 Watts per channel into 8 Ohms, but the music only really picked up, when I traded this for a Dynacord PAA 880, boasting 360 Watts RMS of power output. With this beefy front end, the Fidelity 425 could make music like proper instruments. My acoustic impression of the speakers is too long ago to determine how they would compare with the audiophile standard that I am used to today, however, I do remember being asked by a neighbour, if I had invited my buddies over for a jam session the night before. An indication of how perfectly real the music had sounded to someone listening to it from the street. (Roman Groß, non-oversampling guru of the Philips CD 104, actually used to promote determining system credibility in this way.)
In our household environment, the Dynacord PA amplifier rarely needed to produce more than 5 watts of output per channel, and the aging amp soon began to develop heat-related contact issues, by which it sporadically lost output on one of the channels. The issue proved to be difficult to locate, and we ultimately decided to replace the Dynacord with a more modern HiFi amplifier. I asked around for affordable options, and a friend suggested that the American producer of audio equipment, Harman Kardon, had just started to produce a new range of affordable high-output amps bearing the brand name of Uher. The name was reminiscent of the renowned German HiFi maker of the 1950s to 1970s who by then no longer resided in Munich but had become a lingering trademark that was owned by Wolfgang Assmann GmbH in Bad Homburg.
As my friend was also interested in the new Uher design, we managed to get a 20% discount on our purchases from a local HiFi retailer. This made the already affordable amplifier even more attractive to us students. I picked up my UMA-1000 amp in Friedberg and remember being surprised by its weight. It came in at around 20kg, when boxed, which was actually not much different from weight of the professional Dynacord amplifier. I remember that it at first sounded thinner and more frail than the Dynacord had done. Little did we students know about break-in times of HiFi equipment that would have helped us make sense of the phenomenon. Therefore, I simply assumed that this was the natural consequence of moving back from professional audio to HiFi.
As the months went by, I got used to the sound of my Uher amplifier and missed the old Dynacord much less. The UMA-1000 was sounding fuller and managed to drive the Fidelity 425 quite well. In fact, the Uher became almost invisible to me. As there was nothing wrong or spectacular about it, I simply took it for granted, turning it on after school and off before going to bed. I blissfully listened to music with it, until I moved out of my parents’ house into my first student apartment in Bayreuth. On that first move, I still brought all my HiFi gear with me and asked my good friend Alexander Graham to help me carry the 35kg speakers and 18kg amp up the narrow staircase to my small 3rd floor student dorm.
When I had to move again, however, I decided that it would be easier for me to sell all my gear. And so I asked Alec, if he would be interested in buying it from me for a small price. After all, he had helped me with it so often, it was only fair to ask him first. With the Fidelity speakers and Uher amp, Alec also bought a Yamaha C4 preamp and a CD player by the same company from me. And I took the money that I received from him to Bayreuth’s ‘HiFi Point’ and reinvested it in a Denon F07 MiDi-System that came with bookshelf loudspeakers. I remember that the shop attendant looked quite sad when, during our auditioning of the system, I confessed to him that I had heard much better sound than this not long ago, when I still had my own stereo at home. This was in 1996.
After his university studies, Alec accepted a job in Hamburg and took his Yamaha, Uher, and Mainhattan Acoustic HiFi system with him. And it was not until we took our family to Marne in summer 2023 that we were living within reach of each other once again. Our first meetings were—you may have guessed it—about HiFi. While auditioning amplifiers from Symphonic Line, B&K, and Dynavox, Alec mentioned that he still had the old Uher UMA-1000 in the basement. “Good God! Bring it to me!” was my immediate reaction. A few weeks later, Alec and I were sitting on my porch cleaning the 30 year old Uher amp from layers of dust. Alec reported that he had replaced all of the speaker protection relays after they stopped responding. This was the only fault he had found with the amp over the years.
We first connected the Uher to my Tannoy system, and found that the left channel relay of ‘Speakers A’ had corroded once again and did not engage. We therefore changed the connection to ‘Speakers B’, and both channels instantly played music. The sound was tonally rich and natural, as is common for large American amps. In fact, the UMA-1000 sounded even better than I remembered it. This amplifier obviously benefitted from the meticulous setup of my system and the careful placement of the speakers. These were key factors in electro-acoustics that I had understood almost nothing about during my university years. The Uher exhibited lots of bass drive and punch, however, bass control was not on par with some of the better amps I have heard. Uher does not specify the UMA’s damping factor—the measure of an amplifier's ability to control the movement of the speaker driver—but I assume it is well below 300. Surely, a low capacitance cable, such as the Belden 9497 will help to minimise this effect.
In direct comparison with my Symphonic Line RG9 amplifier, the Uher did not sound quite as fast and agile, and some of the nuance in the treble was missing despite using my most capable of Cinch/RCA cables in the setup. Piano notes sounded slightly less piercing, and Nick Cave’s boyish charm could easily go unnoticed. However, this effect was much less pronounced than it was found on many other amplifiers, including the far more famous, elaborate, and expensive Harman Kardon ‘Citation 21’. I could not help but grin at how well I had chosen my amp so many years ago. The Uher’s dual transformers, large supply caps, and fully-symmetrical design gave it great energy reserves and made it sound large, precise, and effortless. The truth is, without comparing it directly to amplifiers costing many times its price, I could see myself once again being quite happy with this machine.
From what I can see today, Harman/Uher kept their promise of delivering a high quality product at an entry level price. The UMA-1000 was the smallest amp of the UMA series and is living proof of this philosophy. After some hours of operation at living room volumes, I checked the cabinet temperature and found that the amp had hardly run warm above its internal heat sinks. Our 8 Ohms Tannoys were an easy load to drive for the Uher's six output transistors per channel. Uher sets the minimum load requirement at 4 Ohms, which could mean that the amp will run into protection when faced with difficult loads at high volumes. From the temperature reading above the heatsinks, however, I would have no problem connecting the UMA-1000 to our Martin Logan speakers and to drive them at moderate volumes.
Listening to the Uher UMA-1000 again after all these years, I’m reminded of the simple joy it brought to my early HiFi days. Its sound isn’t perfect by today’s standards, but there’s an honesty in its delivery that modern amplifiers often lack. The UMA-1000 may not dazzle with high-tech specs, but it does something more important—it connects me to the music in a way that feels personal and timeless. This amplifier has proven that quality, in the right context, truly does endure.
Specifications
- Type: solid state stereo power amplifier
- Principle: Dual transformer, symmetrical
- Power consumption: 1,000 watts (max.)
- Power output (8 Ohms): 2x 150 Watts, RMS
- Power output (4 Ohms): 2x 220 Watts, RMS
- Dynamic output (4 Ohms): 2x 400 watts
- Frequency range: 3 - 120,000 Hz -3 dB
- Total harmonic distortion: <0.01%
- Signal to noise ratio: 110 dB
- Damping factor: N.N.
- Line input(s): 1x stereo, cinch/RCA,
- Line input sensitivity: 1 V / 50 kOhms
- Speaker terminals: 2x stereo (=A/+B)
- Dimensions: (W)435 x (H)180 x (D)410 mm
- Unit weight: 18.5 kg
- Country of manufacture: South Korea
- Year(s) 1992 - 1994
Integrated Amplifiers
Integrated amplifiers combine the preamplifier and the power amplifier stages in a single cabinet. They usually require less space in a Hi-Fi rack, have a greater wife acceptance factor (WAF), and have absolute control over the choice of wiring and ground potentials between the stages. At least in theory, integrated amplifiers have the potential to sound superior to separate units.
On the other hand, housing the preamplifier and the power amplifier stage in a single cabinet can create some problems. The large transformer(s) of the power stage will add vibration and EMF radiation to the delicate preamplification stage. The physical proximity of everything can lead to cooling issues, and one does not have the option of changing the parameters between the stages to better match the speakers. Customers of integrated amplifiers are often unwilling to pay the price of two separate units on a single device, a factor that has limited the availability of quality designs in this segment.
In practice, integrated amplifiers have been inferior to separate units, simply because they have attracted a less tech-savvy let alone audiophile crowd of customers, but this is not to say that there have not been exceptions to this rule. Indeed, have been some integrated amplifiers that have handled the natural issues involved very well by finding solutions for each one. These are the specimen we hope to focus on here.
Devialet Expert 250
Published: 12/04/2025
Manufacturing date: 2013
Author: Karsten Hein
Category: Gear & Review
Tag(s): Integrated Amplifiers
[Listening test in progress. Full review coming up.]
Sleek, slim, and beautifully enigmatic. The Devialet Expert 250 combines its timeless design with plenty of 21st century features to facilitate multi-level integration in contemporary home entertainment systems. It clearly shows that versatility and High-End sound quality need not be mutually exclusive.
Specifications
- Type: Integrated hybrid class A/D amplifier
- Power output (RMS, 6 Ohms): 250 WPC (from v7.0)
- High-current stability: 2 Ohms
- Frequency spectrum: 0.1 Hz-87,000 Hz (-3 dB)
- Total harmonic distortion: 0.001% (at power max)
- Signal to Noise Ratio: > 130 dB
- Digital features: Built-in DAC, WiFi-streamer, DSP
- DSP specifications: 400MHz, four channel, 40-bit
- Analogue inputs (RCA/cinch): 24 bit / 192kHz (up-sampling)
- MM/MC phono stage: capacitance/resistance matching
- Line-level inputs: 2x customisable
- Digital inputs (S/PDIF RCA): 4 assignable slots (max.)
- Further inputs: Toslink, AES/EBU, optical/RS232, USB, RJ45
- Wireless connectivity: built-in Devialet “AIR” WiFi
- Speaker outputs (banana/spades): 2-channel
- Subwoofer output: via line/RCA
- Digital outputs: AES/EBU and RCA
- Wireless sampling rates: 16-bit, 24-bit, 32kHz - 96kHz
- Coaxial and optical S/PDIF: 16-bit, 24-bit, 32kHz - 96kHz
- USB: 16-bit, 24-bit, 32-bit, 32kHz – 192kHz
- Dimensions: (H)4.05 cm x (W)40 cm x (D)40 cm
- Weight: 7 kg
- Country of manufacture: France
- Year(s): 2013 (based on original D-Premier)
Dual CV 1260
Published: 27/03/2023
Manufacturing date: 1983
Author: Karsten Hein
Category: Gear & Review
Tag(s): Integrated Amplifiers
This rather pretty looking Dual CV 1260 integrated amplifier was handed down to my daughter from her recently deceased great aunt. It came along with a Dual CS 630Q direct drive turntable, a Dual CT 1260 tuner that was connected via 5-DIN plug, and a Denon DCD 660 CD player. There was even a Dual C 816 tape deck that I had some trouble finding worthwhile cassettes for in these days. Two Canton GLX 100 bookshelf speakers served to wrap up the Mid-Fi ensemble. Before surrendering these new arrivals at our house to our 9-year-old daughter, I had to test them and make sure the were safe to use, of course. Any publication of these test results is purely incidental, of course.
I must confess that there was something exciting and liberating about reviewing gear at this price level. After all, unless developers were asked to add intentional flaws to their designs, there was no reason why lower-priced gear could not sound as good or even outperform higher priced contenders. Proper acoustics had very little to do with the price of the components and was more reliant on the ingenuity of its designers. The speaker manufacturers Elac and KEF had demonstrated numerous times that audiophile listening pleasures were possible even at modest price points, and examples of purposefully poor designs were not difficult to be found in the industry. Rotel, for instance, had given their RC-9608X preamplifier a plastic floor board that sacrificed the pharadeic cage that the full metal enclosure would otherwise have offered. Manufacturers need to make sure that their devices perform according to the relative position that is reserved for them.
Therefore, I did not know what to expect of Dual’s 1984 amplifier. For one thing, it had a larger brother, the CV 1460 Class-A amplifier of the same year that offered 95 watts per channel into an 8 Ohm load. And then, both devices were no longer built by Dual in Germany, but rather by the Japanese manufacturer Denon. As I unwrapped the 1260 from its protective bubble foil, I noticed how positively sturdy and heavy the unit felt. At just over seven kilos, the moderate-sized amplifier did not feel puny at all. Turning the Dual on for the first time, I was positively surprised by the elegant look of the softly illuminated output level meters. I made a mental note to capture these in my photos of the unit. I did not want to test the CV 1260 in combination with the Canton speakers, and so I hooked up our Epicure 3.0, half expecting the little amp to fail miserably.
I began my listening explorations with Carla Bruni’s 2014 live album A L’Olympia that I played on our trusted Denon DCD 1420 CD player. Our Epicure 3.0 speakers were connected via 2m runs of Belden 9497 as single wire. As both the speakers and the Denon amplifier had spring-loaded binding posts for small diameter speaker bare wire, I had to clip off my usual banana plug terminations. The idea that speaker cables need to be terminated to be of higher quality is relatively modern, of course. In reality, fewer material transitions and less mass in the signal path should have a positive effect on sound. The tinned Belden snapped into place, and, as these cables had already seen many hours of use, the resulting sound was pleasant and balanced from the very first minute. It was the instantly familiar sound signature of excellent receivers, such as the Harman Kardon 730, that surprised me most about the Dual.
In combination with the Epicure 3.0, the midrange sounded warm and alluring. The soundstage was clean and well-ordered, and there was a surprising amount of space around each music event, especially when considering the relatively moderate power of approximately 2x 90 watts into 4 Ohms. Rated at 44 watts power consumption at idle and labelled as Class-A amplifier, it was safe to assume that average household listening volumes were served by pure Class-A transistor power. This certainly showed in the music performance. While the Dual presented a realistic amount of detail, the top-end never felt detached or edgy. There was wonderful cohesion and flow in the music, although the dynamics did not quite reach the level of a Luxman L-10.
Bass performance was in balance with the rest of the music. It was not as tight-fisted as on the Luxman L-10 and also not as boomy as on the Pioneer SX 850. Complex bass sounds were better layered than on the Harman 730. The more I listened, the more I fell in love with the abilities of this integrate amplifier, and as the sun set, I started to enjoy the illuminated front with the level meters waving consistently at under 1 watt. The piano keys on Carla Bruni’s album sounded deliberate and simmered naturally, and I was once again reminded how good the Epicure speakers really were, even when powered by an inconspicuous mid-Fi Dual amplifier from the early 1980s such as this one. What a delightful discovery this was. My daughter would be spoiled from the onset by beginning her journey into music with this Dual.
Specifications
- Type: integrated solid-state amplifier
- Principle: Class-A amplification
- Output power (RMS): 2x 60 watts
- Frequency range: 10 - 45,000 Hz
- Signal-to-noise ratio (line): 88 dB
- Signal-to-noise ratio (phono MM): 68 dB
- Channel separation: input 70 dB / output 55 dB
- Signal damping: >70
- Number of audio inputs: 5
- Phono (cinch): 2.5 mV / 47 kOhm (MM)
- Tuner (cinch): 200 mV / 47 kOhm
- Tape1 (DIN): 200 mV / 47 kOhm
- Tape2 (cinch): 200 mV / 47 kOhm
- Monitor (cinch): 200 mV / 22 kOhm
- Number of audio outputs: 3
- Rec-Out Tape 1 (DIN) / Tape 2 (Cinch, Ri 470 Ohm)
- Headphone socket (jack-type): 6.3 mm
- Tone control: bass and treble (+/- 6 dB), loudness
- Bypass of the tone controls: not available
- Filter: subsonic
- Loudspeaker terminals: two (8-16 Ohm)
- Power consumption: 680 watts (max.), 44 watts idling
- Features: two combined VU meters, illuminated
- Dimensions: (W) 440mm x (H) 97mm x (D) 265mm
- Weight: 7.1 kg
- Country of manufacture: Japan (Denon)
- Year(s): 1983 - 1985
Fase Performance 1.0

Published: 05/05/2022
Manufacturing date: 1995
Author: Karsten Hein
Category: Gear & Review
Tag(s): Integrated Amplifiers
For far too long, I had harboured the suspicion that integrated amplifiers were ill-equipped to captivate our imagination to the same extent that separate units could. However, I must confess that this was mostly true in the years before I had ever heard a well-constructed integrated amplifier at work. Perhaps my misguided opinion had originated from the fact that I had mostly known integrated amplifiers from the run-of-the-mill gear sold by electronics superstores or your average online discounters. Since this had mostly been price-driven equipment of the kind that followed current market trends, audiophile pleasures had been hard to come by.
Luckily, the sleek-looking Italian amplifier that is the subject of this review had an utterly different story to tell. Instead of having been a mass-market product, the Performance 1.0 was designed and manufactured by Fase Evoluzione Audio in Italy, towards the end of the 1990s. It was, to a great extent, based on the craftsmanship and engineering philosophy of Fabio Serblin. Fabio himself was the nephew of the legendary Sonos Faber founder Franco Serblin and had previously designed the rather successful QUID amplifier for the Sonos brand. Fase Audio products, too, were created for the audiophile market, manufactured in small numbers, and of higher-than-average quality.
The Performance 1.0 was based on a simple circuit board design that was in keeping with the audiophile 'less-is-more' philosophy. The unit’s 60 watts per channel came from a decent-size, low-noise toroidal transformer and four high-quality Phillips capacitors. The pair of power transistors per channel were of the Mexican-made Motorola 'MJ15022' type. The unit's front panel featured input and recording selectors, as well as a high-quality Japanese-made Alps 'Blue Series' potentiometer for volume adjustment. The Performance 1.0 offered excellent RIAA correction for phono and was even capable of handling higher output MC cartridges. The rear panel featured solid speaker terminals for spades or bananas, a convenient IEC power socket, and a ground-lift switch that could come in handy in case of humming or similar grounding issues in connection with other equipment.
The unit’s sides were tastefully flanked by solid wood panels, a measure taken to dampen the effect of transformer humming on the electronics and housing. The overall design was of Italian understatement and crude simplicity. For example, the screws that secured the top and bottom of the cabinet were visible from all sides. Even the wooden panels themselves had visible screw heads peeking through. Perhaps this was done with the aim of highlighting a Bauhaus 'design-follows-function' philosophy, or it was simply to keep production costs down during the assembly in Italy. Even when I was not listening, I could not help but glance over to the position where the Performance 1.0 was standing from time to time, wondering what Fabio Serblin had been contemplating when he designed this unit. And so it happened: I had finally come across an integrated amplifier that did captivate my imagination.
I would have normally started my listening journeys with CD as source and then turned to phono once I had developed a feeling for the dynamics and dimensions. However, this time around, I started out by connecting our trusty Dual CS 505-3 to the Performance 1.0. The Dual, with original Ulm cartridge, had just been revised and fitted with cinch/RCA connectors, improved isolating feet, and new drive belt. I loved this simple Dual player for the no-frills attitude with which it presented music and really did not expect too much from the Performance 1.0. All the more, I was surprised how well the little amp highlighted the Dual’s inherent strengths by contributing to its clean and honest sound. If at all, the Dual seemed a little smoother than before, and it also seemed to pack more punch. Despite its modest dimensions, the Italian did not sound tiny or frail at all. It presented its music with great tonal richness. Bass was full, perhaps a little more on the thumping side than deeply extended, but nevertheless instantly amiable.
Katie Melua’s “Album No. 9” was presented with a slightly fuller voice than I was otherwise used to. This actually served to make the sometimes overly revealing and at times even harsh and sibilant recording more enjoyable. On the downside, vocals did sound less alive, realistic, and airy. Bass notes had a slight thickness to them and were more soothing to the ears and body than analytical to mind. This effect may have been accentuated and accumulated by our choice of low-capacitance silver solid-core interconnects and Belden 9497 speaker cables or by the resistance combinations of the devices. In and of themselves our Tannoy XT8f speakers and Dual CS 505-3 turntable were not known to be lacking in top-end or transients.
The impression of a mild top-end congestion, perhaps for the sake of reaching a fuller sound, remained unchanged when I made the transition from vinyl to CD. One thing struck me as particularly odd: On our current testing system, we were running a Cambridge DacMagic 100 in conjunction with a Marantz CD-17. All connections were based on solid-core silver cables. The DacMagic had an output impedance of 50 Ohms, and this simply did not match the Fase Audio’s expectations. Taking the DAC out of the equation, I was able to raise output resistance to 250 Ohms. The improvement was instantly noticeable, however, I made the mistake of also changing from our silver solid-core interconnects to an older pair of Fast Audio interconnects. For direct comparison, I should have just changed on thing at a time. Finally, changing back to our silver interconnects, I found that this created an even more natural top-end with vastly improved transients. The result was highly enjoyable, although I now noticed that the stage still seemed a little flatter and more recessed than I was used to. Such is the nature of our hobby that when one phenomenon is understood and put aside, the next one pops up from underneath, thus presenting another riddle to be solved.
However, further exploration will have to wait for another day. This particular Italian is going to play its tunes at Landon's house. Landon has been doing the proofreading for eiaudio and has been waiting for a proper amp to power his system for the longest time. Given some further exploration and clever matching, I can see the Performance 1.0 becoming the trusted heart of a passionate home Hi-Fi setup. With four line inputs and one very capable phono input, as well as lots of cross-recording functions, the elegant Italian offers the looks, power, and tonal richness that one would expect to result from a family production that has long since become royalty in Italian Hi-Fi. And although Fase Evoluzione Audio closed its doors some years ago, Fabio continues to manufacture Hi-Fi equipment under the brand of Serblin & Son. His uncle Franco of Sonos Faber died in 2013 leaving behind a flourishing loudspeaker manufacturing business. His life and achievements are commemorated by Serblin and Son’s through their current range of Hi-Fi equipment that is simply called — ‘Frankie’.
Note: Before handing the Performance 1.0 to Landon, I had the chance to test it on our newly acquired vintage Epicure EPI 500 loudspeakers. Playing in conjunction with the 4 Ohms EPIs, the Fase Audio seemed instantly more at ease and was able to drive them with superior tonal balance. The formerly punchy bass blended more seamlessly into the music. Following this experience, I would personally give preference to a 4 Ohm speaker to reach the Performance 1.0's full potential.
Specifications
- Type: integrated MOSFET amplifier
- Signal to noise ratio (line): 98 dB
- Signal to noise ratio (MM): 70 dB
- Signal to noise ratio (MC): 65 dB
- No. of input(s): 4x line; 1x phono
- Volume control: Alps ‘Blue Series’
- Outputs: 1 pair speaker terminals (bananas or spades)
- Power output (8 Ohms): 60 WPC
- Power output (4 Ohms): 100 WPC
- Features: ground lift switch
- Dimensions: (W)42.5 x (H)7,5 x (D)32 cm
- Country of manufacture: Italy
- Weight: 7.5 kg
- Year(s): 1995-1997
Luxman L-10

Published: 06/04/2022
Manufacturing date: 1976
Author: Karsten Hein
Category: Gear & Review
Tag(s): Integrated Amplifiers
Just as I found myself suspended in audiophile bliss over our Becker ST-100 amplifier, Luigi dropped by our house on a casual visit carrying a small integrated amplifier under his arm and insisted that I give it a try at that very instant. I had long since understood that Luigi’s product demonstrations were nothing short of exceptional, and yet I was feeling more than just a little sad to dismantle my blissful setup of Restek V1 + Becker ST-100 separates to make room for a smallish-looking 55 watts integrated amp.
Being a great fan of separate pre and amplifier combinations to better match the sound of a system with the loudspeakers, it was only a small consolation to me that the integrated amplifier in question had been manufactured by Luxman in Japan, a company famous for creating some very exceptional designs back in the heyday of High-Fidelity. However, my impression changed considerably when I picked the Luxman up from the table where Luigi had placed it. At a weight of 10.5 kg, and featuring visible, shielded toroidal transformers for its two separate power supplies, the look and feel did seem more promising than I had first expected.
When positioned on a shelf, little about the Luxman L-10 demanded immediate attention. This was certainly not the type of amplifier that would start a conversation with a casual visitor to the house. However, for those interested in superb sound with knowledge of the industry, the L-10 would easily be accepted as the perfect understatement. 55 watts per channel might not seem like a lot of muscle judging from the figure alone, but when this was paired with a mindful internal layout, some exceptional components, and superb high current abilities, the result had the potential to be pure magic.
The L-10 is a member of the well-received Luxman ‘Laboratory Reference Series’ and steeped in the tradition of the 5C50/5M20 and C12/M12 amplifiers. It employed a clever DC amp configuration for both its pre and power amplification stages. The power amplifier was of dual-mono design and featured shielded toroidal transformers and large caps that facilitated high-current output and low-impedance drive capability. Its original Sanken 2SC1445/2SA765 output transistors were laboratory matched and of exceptionally high quality. Factors that made the L-10 both quiet and true to the music source. At the time of writing this, the special Sanken transistors were no longer in production, which had the potential of making replacements difficult. However, I did read that NOS offers could sometimes be found online.
The Luxman L-10 featured a newly designed volume control that kept channel imbalances to a minimum, and it had some attractive features to improve usability and connectivity. For example, the built-in preamplifier could be used separately in order to feed an external power amp, but also to serve as a headphone amp via the frontal headphone jack. All amp outputs offered the option of monaural down-mixing, a convenient feature when checking for channel imbalances or playing back monaural recordings. Another convenient feature was the stereophonic reverse playback switch that could invert the left and right channel inputs.
Instead of the usual +/- 6 dB tone controls that mostly had a degrading effect on sound quality by introducing phase shifts and signal loss, the L-10’s tone compensator allowed for +2 / -2.5 dB adjustments run through a passive circuit. The idea was for the owner to be able to mitigate tonal balance variations between different recording studios without sacrificing signal integrity. The variable control frequencies for bass were 50 Hz, 200 Hz, 700 Hz; and for treble 700 Hz, 3 kHz, 10 kHz. To protect the speakers from accidental harm, the amp output featured a protective circuit that would turn the amps off in the event of DC current output.
Listening to the L-10 play our favourite Jazz albums, I was surprised how seamlessly the integrated amplifier managed to pick up where the Restek V1 + Becker ST-100 separates had left off. In fact, the L-10 had nearly the exact qualities that had attracted me to the Becker ST-100 in the first place: It was tonally rich with a strong mid-bass presence and, at a mild damping factor of 80, it allowed the system to breathe. Layering of bass provided a tonally rich sound that made listening very enjoyable from the very start. While Luigi insisted that the Luxman had a tonally neutral approach to the music, our Tannoy speakers revealed a highly musical and juicy character.
Voices were depicted accurately and in an instantly pleasing manner, much like with the Becker amp. During vocal passages I would not have been able to tell the difference between the two, they were that close. Despite the slightly bloomy mid-bass, I was not able to detect a thickening of voices. Treble was focused, delicate, and elegant, just as one would expect from a well-protected signal path. Higher piano notes managed to free themselves from the speakers and take presence in the room. I was, indeed, very pleased with the performance I was being given by an integrated amplifier.
I must confess that under normal circumstances I would not have made any comparison between some of my favourite separates and the Luxman integrated amp. However, in this special case, having listened to the two so shortly after each other, I can say that the L-10 managed to hold its own very well. The differences were more or less a matter of personal taste. Luigi, for instance, gave preference to the Luxman’s slightly more controlled and agile sound, whereas I felt more drawn to the larger spacial representation, airiness, and punch of the separates.
The highest highs and the lowest lows were just a little more present on the beafier Becker ST-100 amp. There was also slightly greater physical separation between the instruments on the larger amp. On the other hand, the L-10 brought more speed and agility to the table that gave preference to faster music. For those looking for an integrated amplifier, the Luxman L-10 is most certainly worth considering. Refurbished models, such as the one presented here, are playing in a class of their own and can even compete with separate units at an audiophile level.
Specifications
- Type: dual-powered integrated stereo amplifier
- Features: Super-Class-A(/B), Realtime Processed
- Power consumption: 230 watts, max.
- Inputs: Phono MM, Tuner, Tape 1+2, AUX, Monitor
- Power output: > 55 WPC @ 8 Ohms; 75 WPC @ 4 Ohms
- Phono response: 20 Hz to 20 kHz (< 0.2 dB)
- Filters: Subsonic (10 Hz, normal, 20 Hz)
- Line response: 0 Hz to 100 kHz (< -1 dB)
- Total harmonic distortion: < 0.015%
- Damping factor: 80 (@ 8 Ohms, 1 kHz)
- Tone controls: bass, treble (+/- 2.5 dB, passive circuit)
- Variable control frequency: Bass (50 Hz, 200 Hz, 700 Hz); Treble (700 Hz, 3 kHz, 10 kHz)
- Phono input sensitivity: 3mV (MM), 300mV (line)
- Phono input impedance: 50k Ohms
- Signal to noise ratio: > 90 dB (phono), > 100 dB (line)
- Channel separation: > 85 dB
- Output: 300mV (line), 0.3V (Pre out)
- Dimensions: (W) 438 x (D) 363 x (H) 78mm
- Weight: 10.5 kg
- Country of manufacture: Japan
- Year(s): 1976-1982
Musical Fidelity A1-X

Published: 04/07/2022
Manufacturing date: 1984
Author: Karsten Hein
Category: Gear & Review
Tag(s): Integrated Amplifiers
Following the Japanese Luxman L-10 and the Italian Fase Performance 1.0, the British Musical Fidelity A1-X was my third integrated amplifier. It was handed to me for review by my namesake Karsten from Bad Vilbel (north of Frankfurt), who had recently transitioned to a whole set of Naim components to power his Altec speakers. The A1-X had been sitting in storage, until Karsten suggested that I could take it home for review.
Looking at the power rating of 25 watts per channel, I thought it best to hook the A1-X up to our system in the main listening room, which still had the Shure 701 Pro Masters set up. Rated at 102dB, the Shures would be forgiving of a slight lack of power on the side of the amp. However, when I tried to set up the A1-X in place of our Dynaco PAS-4 tube preamp and Hafler XL280 amplifier, I realised that I would need a preamp output to provide music to the subwoofer. In keeping with most integrated amp designs of the 80s, the Musical Fidelity did not offer this connectivity feature.
When considering our second system for compatibility, I was reminded that this had only recently transitioned from the more sensitive Tannoy XT8f speakers to the Epicure EPI 500 which had a modest sensitivity of just 88dB. Would this be enough to be powered by the A1-X? Well, there was only one way to find out. And so, I carried the small Musical Fidelity amp upstairs and disconnected our Restek V1 preamp that had been running to my great delight with our Dynavox VR-70 tube amplifier.
On paper, the change from a 35 watts to a 25 watts amplifier may not seem like a big deal. And yet, 35 watts of tube power were a completely different story, especially in comparison with transistor power. I meanwhile had lots of experience listening to the Restek & Dynavox combo and especially enjoyed its ability to develop the music from the bass notes rising upwards. This is a characteristic that tube amplifiers manage to do so well. In Hi-Fi forums and reviews, I had read that the A1-X was capable of a ‘tube-like’ sound, and I was eager to find out just how much truth there was to this claim.
I began my explorations by listening to Tony Bennet & Diana Krall’s 2018 album ‘Love is here to stay’. This album’s timbre was a bit darker than was typical for Diana’s other albums (with the obvious exception of ‘Rag Doll’, which turned out to be a slip in many ways). While being rich in musical information, ‘Love is here to stay’ had a strong centre-stage focus with channel separation being of less significance. There was lots of natural bass from the instruments but also from the performer’s feet moving and stomping on the floor.
While the technical specifications of the Musical Fidelity A1-X my not seem impressive on paper: 25 watts per channel, 0.5% total harmonic distortion, 80 decibels of signal-to-noise ratio, the A1-X sounded neither weak nor distorted. On the contrary: My initial impression was that this was a perfectly clean sounding amplifier. There was lots of tight control, even when the amp was still heating up. For the first couple of minutes, I had a slight sensation of a channel imbalance and was wondering what was causing it, especially since I had taken extra care not to move the speakers. However, this imbalance disappeared after 3-5 minutes and may have had to do with the preamplifier taking power from the right channel, as was described in Mark Hennessy’s exceptional essay on the A1 and its derivatives. (Have a look for it, it is worth reading.)
Having been freshly connected to phono, the CD player, and the Epicure speakers all at the same time, the A1-X sounded a bit thin at first. Given some time to settle in, however, this impression changed. I appreciated the fact that the Musical Fidelity proved to be tonally accurate with lots of natural timbre. Where the Dynavox tube amp had laid timbre on quite thick, smothering the listener with tonal colours, the A1-X kept it strictly real. In this aspect, it was closer to the more balanced-sounding Luxman L-10 integrated than it was to vintage tube gear.
Imaging was accurate, but instruments seemed slightly more recessed and smaller with more well-defined space around them than I was used to. This tendency became more apparent when I changed over to the 2Cellos 2012 album by the name of ‘In2ition’. It was in moments that demanded superior dynamics and authority that an increase in loudspeaker sensitivity would have produced better results with this integrated amplifier.
The A1-X was the European version of the A1 and released to the public in the mid-1980s. Just like the A1, the A1-X was based on an electronic design created by Hi-Fi legend and long-time Musical Fidelity engineer Tim de Paravicini. The European version already featured the revised design with open cooling vents on both sides. At the same time, the top-cover consisted of two large heat sinks that would easily reach temperatures of exceeding 60 degrees Celsius. The front controls were designed in a way to facilitate accidental touching of the heat sink, which only served to highlight the fact that there was some robust power handling involved.
As Mark Hennessy pointed out, it has been discussed with some controversy just how much power this amp was able to produce. In conducting some measurements and applying basic mathematics, Mark arrived at the conclusion that the A1-X produced an output of 8 watts in class-A before switching to A/B operation. Some, including the designer Tim de Paravicini himself, argued that class-A power output should be calculated differently, in that it more resembled that of tubes in a push-pull design. This would have placed class-A output at closer to 16 watts per channel and served to explain the amp’s continuous power consumption of 90 watts. Another such indication was that heat sink temperatures had been reported to fall by 10 centigrade at full output capacity. Fearing for our speakers, I decided not to confirm these measurements myself.
Mark measured that the output stage was biased at around 800mA, which was quite high, and did at times lead to thermal problems, especially on the first units that were sold without side ventilation. Similar to the Fase Performance 1.0, the Music Fidelity A1-X only offered the most essential controls: an input selector, a volume control, one power and one tape-monitor switch. In this context, it is noteworthy that the A1-X’s phono stage offered enough clean amplification for MC phono cartridges. The internal preamp was able to produce 200mV in gain. An additional switch in the back of the unit allowed owners to switch between MC and MM operation. The quality of the phono stage and the ability to switch to MC would have made the A1-X an instant favourite with audiophile listeners. It was sometimes reported that the large amount of gain on the preamp could lead to unwanted noise, although I did not notice any such issues myself.
Similar to the Fase Audio, the A1 series used a toroidal transformer as power supply. Following the transformer, the amplifier was of a double-mono design, with components mirrored along the central power rails that were supporting the heat sinks. There were a number of smaller facelifts in the versions of this amp from 1984 to 1990, starting with the A1 and the A1-X, which was succeeded by the MKII. There was also a version called ‘David’ that was made (and tuned) for Germany, and a ‘Final Edition’ which featured a MOS-FET output stage. The early designs had their power supplies built inside the main amplifier housing, whereas later specimens featured external supplies that increased power output to nearly 50 watts per channel.
In his discussion of the A1 amplifier, Mark explains that this design was not made to be worked on excessively. Not only was the cabinet too small to house bulky components (the power supply caps were laid sideways to account for the limited height), the large heat sinks were also tricky to remove, with lots of fresh thermal paste being needed on repositioning the sinks. It seemed that some portion of the A1-X’s superb sound quality could be attributed to its simple amplifier design philosophy of 'less-is-more'. Although the amp used some higher quality parts, the output devices themselves were relatively standard for the time: a set of 2N3055/MJ2955. Mark suggests replacing them with more durable Motorola MJ15003 and MJ15004, if they should ever be in need of repair. Later versions of the Motorola transistors (e.g. MJ15022) could also be found on the Fase Audio Performance 1.0, if I recall correctly.
When I was first handed the A1-X for review, Karsten told me about an issue that he had experienced with the volume attenuator having become unpleasantly noisy, but on the day of my arrival, he had not been able to reproduce the phenomenon. This reminded me of a similar issue I had once had with our DB Systems DB 1 preamplifier. In the case of the DB1, there had been a slight amount of DC current running through the quality Alps attenuator during line operation. I believe this stemmed from a broken part on the side of the CD player which resulted in the current. It was quite possible that the reason for the volume control having been noisy on that occasion had been the result of a similar issue with an external device, although Mark did suggest that the A1 design also encouraged small amounts of DC current to pass though the Alps control.
In any case, the Alps Blue potentiometer that was used on the A1-X was also built into the Fase Performance 1.0 to positive affect and did have a good name in audiophile circles. The combination of internal preamp and power amp section served to create the A1-X’s specific sound characteristics. However, it was the high gain of the preamp that also led to the lower-than-average signal-to-noise ratio of 80dB. As, during my listening tests, I did not detect any noise and could appreciate the sonic characteristics of the amplifier, I would be inclined to leave the A1-X in its current configuration. The relatively large amount of class-A amplification made the A1-X an excellent companion for higher sensitivity speakers.
Musical Fidelity Company History
Musical Fidelity is a British Producer of high-end audio equipment with a long line of amplifiers, ranging from power amps via phono and headphone amplifiers to integrated amps (such as the A1), and pre-amplifiers. When the company was founded in 1982, their first product was called “The Preamp”. It already featured an MC/MM switch. The founder, Antony Michaelson, was a clarinettist and Hi-Fi enthusiast who had a knack for unconventional industrial design.
Musical Fidelity’s second product was the “Dr Thomas” power amplifier that bore the name of its designer Dr Martin Vaughan Thomas. With a formidable output of 100 watts per channel, the Dr Thomas amplifier was already quite a beast for a first design. Among the designs that followed, not few went on to become genuine Hi-Fi milestones.
The A1 and all its variants and successors were designed by Tim de Paravicini who died in December 2020. Tim had been friends with Antony Michaelson since 1978 and also through the time when Michaelson was a partner with Michaelson & Austin. In the grassroots fashion of many start-ups, Tim de Paravicini had built the prototype design for the A1 in the private workshop of his home. He was proud to show his invention to Antony Michaelson who had in turn just started Musical Fidelity. Following a difficult time of further development of the design, the A1 would become one of Musical Fidelity's highly regarded products.
Specifications
- Type: integrated stereo amplifier
- Features: high class-A output
- Power output: 2x 25 watts, 8Ω (stereo)
- Class-A output: 8-16 watts, 8Ω (stereo)
- Power consumption: 90 watts continuous
- Frequency response: 20 Hz to 20.000 Hz
- Output stage transistors: 2N3055/MJ2955
- Total harmonic distortion: 0.5%
- Volume control: Alps Blue attenuator
- Inputs: (3x) line, (1x) tape monitor, (1x) phono
- Sensitivity (phono): 0.2mV (MC), 2mV (MM),
- Sensitivity (line): 200mV
- Output terminal: 1-set (bananas/spades)
- Signal to noise ratio (phono): 55dB (MC), 60dB (MM),
- Signal to noise ratio (line) 80dB
- Surface temperature: 55-65 degrees Celsius
- Weight: 5.8 kg
- Dimensions: (W) 408mm ; (H) 68mm ; (D) 258mm
- Year: 1984 - 1992
NAD 310
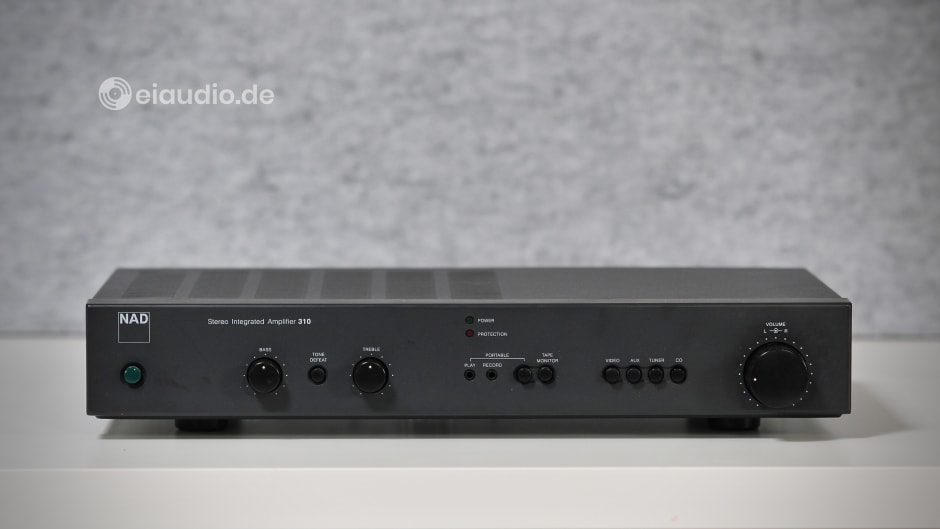
Published: 08/08/2024
Manufacturing date: 1994
Author: Karsten Hein
Category: Gear & Review
Tag(s): Integrated Amplifiers
In summer 2024, Michael and Iris contacted me to say they were contemplating spending their holidays at the German North Sea. I very much welcomed the idea of seeing them again and could not wait to give Micheal a tour of our new studio. As our two guest rooms were already occupied at the time, my wife, Sabina, offered to help them find suitable accommodation near us. Michael, a fellow audiophile, who had previously lent me his wonderful Teufel M200 loudspeakers for exploration, informed me that he would be bringing along a smallish NAD 310 amplifier for testing this time. And, although I had always felt a little put off by NAD’s over-marketed audiophile-on-a-budget claim, I was happy to hear that Michael was once again offering to show me something new.
The last time I had heard an NAD system play music was during a visit to my former English lecturer Martin von Schilling’s apartment in Bayreuth. And, although some 25 years had gone by since then, I still remembered the sonic signature of the system to be very true to music. Of course, the material we listened to in those days was quite different from the calm Jazz and classical performances I tend to play today. In fact, I have fond memories of Martin racing my Audi 80 up the A3 towards Frankfurt with G&R "Mr. Brownstone" blasting on my custom car stereo. Therefore, I could not be certain how much of my positive impression of Martin von Schilling’s home stereo system had been due to my lack of experience at the time.
When Michael and Iris arrived at the North Sea, Sabina, our kids, and I spent the first evening with them at the levee in Friedrichskoog listening to live Rock & Pop music performed by some local cover band. The musicians had to brave heavy gusts of wind, and their PA system seemed to be compensating for this circumstance with excessive volume. Having refreshed our impression of live music, we spent the rest of the evening at a local restaurant, talking about music, our recent move from Frankfurt to the North Sea, and other family affairs. The need for additional space for our family, for our language school, but also for Explorations in Audio had been among the important factors in our decision to seek our fortune away from the banking metropolis.
In our new studio in Marne, I could, for the first time, show Michael three permanent HiFi setups in a designated listening space that was outside the living quarters of our family. Within this, each loudspeaker had been set up to allow for near-linear sound reproduction in relation to the specific characteristics of the room and the listening position. There were few parallel walls, and the furnishings had been chosen to reduce reverberation times. The available space behind each system allowed for easy installation and faultless wiring. It was the kind of playing field that most audiophiles can only dream of for their hobby, and it provided the basis for my assessments of the sound quality of HiFi components.
At the time of Michael’s visit, my reference system consisted of a Thorens TD320 turntable (with AT VM95 ML cartridge and Audiophonics linear power supply), a Marantz CD-17 CD player (complete with Ken Ishiwata-styled output stage), a much heralded Symphonic Line RG9 MK3 integrated amplifier, and Martin Logan SL-3 electrostatic loudspeakers. The cables were Symphonic Line Harmonie HD interconnects (from CD) and Belden 9497 speaker cables set up in Y-bi-wiring from a single point of contact on the amp to the separate high and low terminals of the loudspeakers. A Symphonic Line power cord and a dedicated power installation—a straight line leading to the central fuse box of our house—assured the availability of clean electricity in abundance.
Although the NAD 310 could (at least in theory) have driven my Martin Logan speakers, given its extensive high feedback handling abilities, both the electrostatic panels and the dynamic woofers of the Logan’s hybrid design demanded for a higher wattage power amplifier and would have been an unfair match for the NAD’s modest 20 watts RMS per channel. My Tannoy XT8f loudspeakers, however, which were part of the adjacent system, were relatively easy to drive at 8 Ohms and a high sensitivity of 91 decibel. And it was this system that we connected the NAD 310 to.
The frontend consisted of a Pioneer PD-S705 CD player which once was famous for its platter drive mechanism and inverted disc placement. As the NAD 310 does not feature an integrated phono stage, we simply accepted the fact and did not make any attempts to connect a turntable via an external phono stage. The cables were Stager Silver Solid Core interconnects from CD and Symphonic Line Harmonie HD cables in single wiring to the speakers. We used 4mm-thick solid core copper wire jumpers to connect the Tannoy’s high and low frequency drivers. The speakers themselves were positioned on their bare spikes, which firmly held the Tannoys in place on top of immovable 38kg stone slabs. This infrastructure was surely not the typical environment for the affordable NAD 310 to perform in and therefore promised to be interesting.
Anzeige eiaudio/shop:
Michael and I began our listening session with a live performance of the German Tom Waits cover band “Bad As We” that was recorded straight onto an analogue reel-to-reel tape machine by the former Bavarian public radio sound engineer Andreas Sandreuther and the Nürnberg analog-treff founder, Heinz-Peter Völkel. Live||Tape is the name of their new (strictly analogue) label, and even when re-mastered for CD, the dynamic range and bare bones realism of the original recording are impressive. Michael and I had previously listened to the CD performed on large pre and amplifier combos and were surprised to find that, with the NAD 310, much of the original drive, tonality, and dimension remained the unchanged. This realization was especially perplexing considering the NAD’s modest size, weight, and tiny circuit boards.
There is something about hearing a performance first hand that is difficult to transport in a written report. And I confess that very little we could have read about the NAD would have prepared us for the event. With our eyes closed and at normal listening volumes, we would have easily mistaken the sound of the NAD 310 for that of a pre and amplifier combo, and a very good one at that. In direct comparison to my Restek V1 and Echle LF-3519 setup, the NAD was less forceful, occasionally lacking some of the bite of the piano notes. However, on many recordings this proved to be a good thing rather than a liability. Despite losing some of the discerning edges of a music event, the NAD 310 managed to maintain excellent tonality and homogeneity and propagated a decidedly non-fatiguing and highly musical sound.
Vocals were rendered with natural detail and recognisable timbre, and the sound stage showed similar width and depths as I was used to from my separate components. In direct comparison to the Restek V1 and Echle LF-3519 setup, however, the NAD 310 provided less space around each instrument, making each sonic event seem closer to the next in terms of time and space. This became especially clear when we listened to Helge Lien’s album “No. 10”, which superbly plays with the listener’s sense of space. Having listened to Singer-Songwriter and Jazz music with me for a while, Michael asked me, if I also had some electronic music at hand.
I first thought of some iteration of a Boris Blank album, but then I remembered that I had just stumbled upon a 1993 Culture Beat album sitting on one of the free take-away shelves along the streets in Husum. For both of us, it had been years since we last listened to a Torsten Fenslau production, and we had to smile at the improbability of this idea. Michael remembered that, on the album “serenity”, track number three “got to get it” with vocals by Tania Evans used to be quite popular. We cranked up the volume and were transported back to the dry German Disco beats of the 90s. The NAD 310 managed to handle the increase in volume very well and, to our surprise, did not seem at all strained or compressed. The Tannoy’s high sensitivity and 6dB bass accentuation probably played a part in this solid performance.
Being greatly pleased with our listening test of the NAD 310, Michael and I decided to end our session by taking the Culture Beat CD over to my Martin Logan reference system (with RG9 MK3 amplifier), thinking that we would pretty much hear more of the same music. To my relief, however, this was not the case. The Martin Logans made each sample come alive with such width, depth and sparkle that the previous performance seemed somewhat pale and lifeless in comparison. There was so much detail and dimension that even the crude Culture Beat disco album started to make sense to me now. I think Michael and I were both a little surprised by this transformation, because there really had been nothing “wrong” with the system we had listened to before. On the contrary, it had delivered an excellent performance that left very little to want for at the time.
The NAD 310 is a budget amplifier that punches well above its weight and employs some clever design choices to perform this trick. Rachel Cramond wrote an extensive review about this phenomenon for Gramophone magazine in 2012. (They let you read it a few times before erecting a pay wall). Next to the cost saving reduction of electronic parts by approximately 50%, the NAD 310 features a pure class A driver stage and a carefully matched combination of MosFET and bipolar transistors. One difference to conventional A/B amplifiers can be seen in the two large capacitors found to the right of the heat sink (see photo) on the amplifier board in addition to the power supply caps that are located next to the toroidal transformer.
The secondary capacitors assure that there is always plenty of dynamic headroom, even when the amplifier is driven near maximum volume. There are limitations in terms of slew rate and signal damping that cannot be denied on a 20 watts amplifier. It is therefore best matched with responsive electronics at the front and sensitive speakers at the back. My choice of unshielded silver cables and the Tannoy speakers worked very well in this respect.
Although the NAD 310 had been in Michael’s possession for some years already, he had never heard it perform in such a dedicated listening environment and meticulous setup and therefore was quite surprised by how much of the performance depended on the periphery. And I had never heard a piece of equipment in this affordable price bracket that could so well hold its own in such an environment. I am certainly going to look at NAD’s rather flimsy looking amplifier designs with more respect now. I can promise you this: under normal household conditions, any restrictions in musical fidelity heard in conjunction with the NAD 310 are most likely caused by how it is matched with the periphery and not by the amplifier itself.
Specifications
Power Amplifier
- Type: Integrated solid state stereo amplifier
- Transformer: 100 VA, toroidal
- Power consumption (max.): 92 Watts
- Output power (RMS, 8 Ohms): 2x 20 Watts
- Output power (RMS, 4 Ohms): 2x 30 Watts
- Output power (RMS, 2 Ohms): 2x 40 Watts
- High current stability: < 2 Ohms
- Frequency response (+0.3dB): 20 - 20,000 Hz
- Frequency response (+/-3dB): 10 - 70,000 Hz
- Harmonic distortion (@25 Watts, 8 Ohms): <0.05%
- Signal-to-noise ratio: 100 dB
- Input sensitivity (rated power @ 8 Ohms): 1V
- Signal damping (50 Hz): >100
- Slew rate: >20 V/usec
Preamplifier
- Phono section: not available
- Line inputs: CD, Video, Tuner, Tape, Auxiliary
- Input impedance: 80 kOhms + 220 pF
- Input sensitivity: 210 mV
- Input signal (max.): >10 V
- Signal to noise ratio (1 Watt): 93 dB
- Signal to noise ratio (power max.): 106 dB
- Infrasonic filter: -3 dB at 10 Hz (12 dB per octave)
- Treble attenuation: +/- 7 dB at 10 kHz
- Bass attenuation: +/-6 dB at 50 Hz
- Tone attenuation defeat: yes
General
- Country of Manufacture: Taiwan R.O.C.
- Dimensions: (W) 435mm x (H) 65mm x (D) 250mm
- Weight: 5 kg
- Year(s): 1995
Symphonic Line RG10 MK4 Reference
Published: 19/01/2025
Manufacturing date: 2019
Author: Karsten Hein
Category: Gear & Review
Tag(s): Integrated Amplifiers
The Symphonic Line RG10 MK4 Reference integrated amplifier excels in multiple ways. It builds upon the already excellent RG9, and the MK4 version further enhances the design with an external power supply for the upgraded Reference preamplifier module.
The Magic of Exactness.
It is early January 2025. A winter storm is hauling outside. And yet our listening room under the roof feels cosy and warm. I turn on the RG10 amplifier, taking note of the reassuring pong that is produced by its large mumetal transformer jumping into action. The sound is similar to that of a distant gong, ever so slight and just once, as if to acoustically confirm that clean power is now available—in abundance. I cannot help but smile, as I sit down in my favourite listening chair.
When the music starts playing, however, I notice my mistake: Instead of playing Diana Krall's album “Glad Rag Doll”, as I had intended, our Thorens TD320 turntable still has the old “Winter Wonderland” sampler from our eiaudio Christmas session on. And this begins with Dean Martin’s rendition of “Let it snow”. For a moment, I am tempted to get up and change the record, but then I find myself transfixed by the pure and honest sound that is forming between our Martin Logan SL3 electrostatic speakers.
“Winter Wonderland” is a collection of songs from the 1940s through the 1960s, many of which were not yet recorded in stereo. Such old-school recordings have some charm, of course. And with the RG10 MK4 Reference amplifier driving our Martin Logan speakers, the SL3 turn into holographic projectors through which a pulsating and almost tangible phantom centre is created. The image is so clean and beautiful that I am strangely reminded of the old Marantz amplifier oscilloscopes, which were able to derive flower-like visual images from the music signal by wrapping the linear wave form around a circle (see Marantz Model 2600 from 1977). I found myself glued to the chair, unable to change the record, because I was mesmerised by its raw beauty for the first time.
Your Ears See More.
Although it is easy to notice the limitations of the original recordings in such a revealing setup, the tonality and transparency of the system is such that it transcends these limitations, even makes them fun to listen to, and thereby renders them as charming. By laying bare the individual aspects of each recording—timing, transients, dynamics, timbre, tonality, and decay—we are able to comprehend the recording and mastering decisions in all their dimensions and are provided with a larger and more sober view of what was possible and available to the sound engineers and their equipment at that specific time.
When tonal events are presented in defined order, with each having a precise start and finish, the listener is empowered to look beyond the scope of the recording into the vast available spaces that remain unfulfilled by it. The impression is similar to that of looking into a room in which some objects have been positioned. If sufficient lighting and sharpness are given, we can see each object individually with its defined size, shape, texture, and tonal colour, and we can recognise the composition and purpose of the objects taken together. From this, we derive one feeling for the shape and arrangement of the objects and another feeling for the room itself. If a HiFi system provides sufficient order (acoustic properties similar to light and sharpness), it becomes obvious to the ears that the recording and the system potential are two different things.
Original or Imitation?
Following up on my original intension of listening to Diana Krall’s album “Glad Rag Doll”, her song by the same name greeted me with a high noise floor in the form of a constant hissing sound on both channels. This made the position of the loudspeakers visible to the ears and came as a surprise to me, because I had not noticed its presence so clearly in my previous listening sessions with this album. The guitar and Diana’s vocals were both positioned along the phantom center and in an overlapping fashion. This I would have expected from a mono recording of the 1950s or 60s, however, here the music sounded loud and condensed at the same time, as is the fashion today. I was confused by the disparate associations this blend of styles produced.
On “A little mixed up”, the piano appeared tiny in relation to Diana’s vocals. The two guitars were confined to the exact positions of each of the two speakers, a mastering choice I remembered from songs of Elvis and the Beatles, which seemed a bit out of place on a modern record. With “Prairie Lullaby” offering more of the same, it became clear to me that the artistic choices made in the production of this album were somewhat different from Diana Krall’s more audiophile releases. And, while I could accept the album as an attempt to replicate the nostalgia of a long-gone era, the RG10 MK4 Reference HD paired with Martin Logan SL3 speakers exposed the album as being unauthentic and insincere.
It is usually more fun to listen to a poor recording on a great system than it is to listen to a great recording on system that performs poorly. Just as it is more fun to drive slowly in a vehicle with a powerful engine than it is to drive fast in a car that is not made for speed. “Glad Rag Doll” is the exception, however, because it parades as a poor recording by choice. Just like shabby chic furniture will never be classics, the Krall album falls short in a similar way once it is exposed. And, as most audiophiles will agree, once we have heard something, it is impossible to unhear it.
The RG10 MK 4 Reference is an ultra-revealing and superbly crafted amplifier that can easily drive complex speakers. Due to its high current ability, it remains undeterred by the frequency dependant loads of our Martin Logan electrostatic panels. Its two large toroidal transformers offer a combined continuous throughput of 750 watts, and the eight power amplifier capacitors alone provide a staggering 104.000 μF of ultra-fast reserves. This is enough juice to drive complex loads at impressive volumes, something that might not be obvious from looking at the specifications alone.
Keeping Things Together.
Moving on to the album “Adele 30”, I am reminded how beautiful even Pop music can sound if the system is up to the task. Adele’s song “Hold on” gradually builds from tender vocals to full instrumentation. The RG10 MK IV Reference renders this faithfully throughout and reveals a recording that has been made with great care. In “To be loved”, the initial piano keys sound wonderfully rich and alluring. It is easy for me to forget my system and to be immersed in the music. Only occasionally, a click or pop sends a reminder that the record is still spinning, and that the loudspeakers are still there. I am also reminded that this particular album was a gift to my daughter, who tends to leave her records resting on the turntable after playing them. It is the combined effect of dust and moisture that is difficult to remove with a record brush alone.
I like the accomplished look of the RG10 Reference amplifier on the top shelf of our rack. Its separate power supply for the preamplifier sits on the shelf underneath. The four large knobs on the RG10’s dark front visually allude to the sense of superior acoustic order that is so commonly associated with Symphonic Line gear. The RG10 MK4 builds on the original RG9 with each iteration offering refinements over previous models. Founder and chief developer, Rolf Gemein, prioritizes phase linearity, combining it with stringent circuit resonance management. To achieve this, high-quality, industrial-grade components are hand-selected, matched, and assembled by his team in Duisburg, Germany. Each unit undergoes a thorough auditory evaluation and is fine-tuned by Rolf Gemein himself to ensure optimal performance.
Made for Vinyl.
The result of this philosophy is audible. The phono stage of the RG10 Reference amplifier is accomplished to such an extent that I found myself listening to 70% vinyl and 30% CD, which is the exact opposite of my usual listening behaviour. From an audiophile perspective, therefore, I have no complaints. The few aspects that still bother me have to do with the practical handling of the unit, such as night time operation and moving the amplifier around.
As I do most of my listing in the evenings when all the noise around me has subsided, I use only minimal lighting to calm down from a day's work, soothe my nerves, and focus more intently on the music. In this scenario, I often find it difficult to switch between the input sources with assurance. The indentations on the knobs are simply too small for me to determine their current positions. Given their substantial weight, the amplifier and power supply sit too low, making it easy to pinch my fingers when handling them. Higher feet under each device or even a small cavity for the fingers along the sides would improve handling.
The RG10 MK4 Reference HD is a highly accomplished amplifier that measures well and sounds superb. The externally housed Reference power supply for the preamplifier at first may seem like overkill, but in reality, it enhances realism in each recording. The resulting performance is tonally balanced and incredibly revealing, offering a palpable space to the music that extends beyond the music recording itself. For optimum listening conditions, the RG10 MK4 should be connected with excellent cables and be further protected from HF noise infiltrating the system through the power mains and from other sources. For those of us willing to spend the necessary time and money on their setup, the RG10 MK4 Reference offers first-hand insights to recordings that are precious and otherwise hard to come by.
List of test components:
Turntable: Thorens TD320 with AT-540 ML cartridge and external Audiophonics power supply; turntable base: sand-filled wood with Concertmeister Basotec absorbers made by Klaus Finnern; Power cord: Symphonic Line Music Electrical Cable (2021); speaker cables: WSS Platin Line LS4 (hand-crafted by Jochen Bareiß in Nürtingen, Germany in 2024);
Listening Test (on YouTube):
RG10 MK4 Reference
Find out more:
< Symphonic Line RG9 MK3 | Rolf Gemein & High End Society >
Specifications
- Type: Integrated amplifier
- Features: external preamp power supply
- Power output (RMS, 8 Ohms): 120 WPC
- Power output (RMS, 4 Ohms): 190 WPC
- Power when idle: 107 watts
- Phono inputs: 1x MM/MC
- Line inputs: Aux, Tuner, CD, Tape loop
- Line outputs: 1x Pre out, 1x Speakers out
- Speaker binding posts: WBT-0705 CU Nextgen
- Dimensions: (W)450mm x (H)100mm x (D)410mm
- Headphone jack: 3,35mm
- Extras: Infrared remote control + box
- Weight amplifier: 17 kg
- Weight power supply: 8 kg
- Country of manufacture: Germany
- Year(s): 2015

Symphonic Line RG9 MK3

Published: 16/04/2024
Manufacturing date: 1994
Author: Karsten Hein
Category: Gear & Review
Tag(s): Integrated Amplifiers
Introduction to High End
I would like to begin this journey of discovery with a simple question: “What is High End?” In recent years, the term has become quite inflationary in the context of audio equipment, with private sellers and shops offering ‘High End’ products both at the budget and at the luxury end of the audio market. Perhaps such claims are valid, and perhaps they are not. But who is to decide this if we are still unsure of the definition? Perhaps one way of answering the initial question is to look at the origin of the term in HiFi and at what it meant to the people who coined it and first used it for their products.
In America, it was the Audio Research Corporation (ARC) who especially referred to their large tube power amplifiers as High End products. And in Germany, the term was first taken up by Rolf Gemein (formerly of Vernissage Laboratory), Dieter Burmester who ran the now internationally renowned audio company by that same name, and ten other audio manufacturers. Together, they founded the ‘High End Society’ and were among the initiators of the High End trade fair in Munich, which is the largest High End audio fair in the world today. Both Gemein and Burmester set out to create audio devices that were originally not geared for the mass market (a competitive environment in which their products would be scrutinised in terms of shipping and production costs for the sake of profitability) but instead focused on creating the highest quality circuits and combining the best possible components to reach the maximum in terms of sound.
When you pair long development times with exceptional engineering skills and high quality components, this inevitably becomes costly. And most manufacturers are worried that they will not be able to generate enough demand for their products in this high price range. In consequence, most products are designed to perform at their best within a given price bracket. I was once part of a discussion in which the engineering team of a TV manufacturer had just finished designing the audio section of a new television model. The internal purchase price for the components was quoted at 35 EUR. Upon this, the team was informed that they had a budget of 7.50 EUR and was asked to rework the design and talk to their suppliers. Such choices are in fact very real, and, in the described scenario, the acoustic components were to be designed for a television set in the higher-priced premium segment and not some cheap entry-level product.
While most successful companies see their development and production departments as part of their costs and are trying hard to keep these as small as possible, both Rolf Gemein and Dieter Burmester gave their product philosophy priority over all other considerations, thus creating a utopia in which the forces of the market—forces that apply to everyone else—appeared to have no effect. In this sense, High End means true devotion to the cause from the side of the manufacturer, until the product is completed. And finally, primarily due to their higher price tag, High End products can only exist where enthusiasts recognise the extra effort and are willing to pay the higher price.
Having said that, not everything that has a high price tag can also be considered High End. This makes it difficult for customers to determine where exactly High End starts (and is actually worth the investment) and where it is just a term used to pedal HiFi gear for the sake of higher profit margins. Therefore, when a friend (and invaluable supporter during the building phase of our listening room) suggested that I contact Heinz-Peter Völkel and ask him to send me some Symphonic Line products for testing, I was unsure of what to expect. After all, I had set up my HiFi systems with great care using selected industry classics. I had just finished construction on our listening room and had installed new acoustic absorbers. I was indeed very happy with the resulting sound. What more could I possibly say about Symphonic Line products other than simply reiterating the fact that they, too, sounded great?
Seeing that I was not yet convinced, Heinz-Peter suggested that we should meet at the Norddeutsche HiFi Tage trade fair in Hamburg where Symphonic Line had booked an unpretentiously small room on the third floor. As I walked in, I found Heinz-Peter and Rolf Gemein taking turns at presenting the Symphonic Line products with various music. Having spent some hours at the fair listening to different HiFi setups, I found the choice of music at their booth refreshing and the Symphonic Line setup sober and sophisticated. This was more than many of the other booths had been able to deliver, and, for the first time, I had the very real sensation that this company’s products could indeed be worth exploring. Later that week, Heinz-Peter and I talked about where to best start our journey of exploration. We soon agreed that it could be educational for the blog to get to know the products from the start. And thus, we begin or story with an RG9 MK3 from around 1994.
An Elusive Beast
It seems chrome-plated Aranja (or grape fruit) was among the most fashionable colours on High End products back in the day, and the RG9 boasts this shiny surface on a chassis made of a bent brass alloy that is 2mm thick and has a 10mm face plate. In other words, this amplifier feels very solid and is quite heavy. In the household environment, its surface will act as a tinted mirror, giving the RG9 a chameleon-like presence that makes it more visible from some angles and less visible from others. In the studio, however, I attempted to minimise all reflections in order to better show its exact features and dimensions. In doing so, I also revealed some of the stains and wounds that it had collected over its 30-year lifetime. During daily operation, these would hardly be noticeable because you would hardly ever see past the mirror effect. Except for these photos, the body of the RG9 in Aranja is hard to catch.
The Symphonic Line logo, the RG9 MKIII model name, and the labels of the controls are all engraved on the face plate. As a first-time user, I sometimes found these labels difficult to read, especially when operating the unit in low-light conditions. I also noticed that the position of the rotary knobs is not easy to determine. With three rotary knobs of equal size, colour, and design, it was probably best to memorise the functions of each control until one could use them intuitively. Moving from left to right, the first knob is actually a rotary switch that turns the RG9 on and off without any audible switching noise on the speakers. The next button to the right is the input selector that changes between sources, again without audible noise. The third knob switches between the Tape Monitor and the Line signal.
The volume control is the fourth and final knob in this row and sets itself apart due to its superior size. Upon first turning it, I was a little disappointed that this was not a stepped attenuator and that it was instead smooth and easy to move. I have since read that it is a double-mono design and of high quality, however, I personally prefer stepped attenuators, because they help me remember listening volumes in increments. For instance, I usually turn the volume down by two steps when changing from Phono to CD on my Restek V1 preamplifier. Such helpful points of reference are missing on the RG9 dial. On the positive side, the rear panel of the RG9 is far easier to access than on the Restek. All Chinch/RCA sockets are easy to reach and have sufficient space between them to accommodate most HiFi and High End cables.
There are two pairs of Chinch/RCA sockets available for phono, of which one pair can be used to increase the input capacitance by means of adaptor plugs. There is also a switch on the back panel to accommodate for MM and MC cartridges. This switch had me worried for a moment, as, upon first trying, it did not want to activate the setting for MM. It seems the RG9 had been used exclusively with MC cartridges for many years and the circuit had become stuck in this position. This is a common issue with relays that are left unused over longer periods of time, no matter how well they are built. However, I was not about to give up easily. After some further attempts of toggling the switch, the internal relay audibly clicked into position with MM engaged.
The rotary clamp to connect the ground wire is sufficiently large and near the phono input. That is indeed practical when pairing the RG9 with vintage turntables that have a fixed phono cable and ground wire. There is one stereo set of WBT terminals available for connecting the amplifier with the loudspeakers. They take banana plugs as well as bare wire or spades. All inputs and outputs, including the rotary clamp for the ground wire, are 24K gold-plated. As on our Restek, the back wall of the RG9 bends inward ever so slightly in combination with very tight-sitting plugs. I do not really like this impression on either occasion and would have preferred the otherwise sturdy rear panel to find some support on the amplifier’s top lid.
Although it might not look as monumental when perched on a HiFi rack, moving the amplifier around is a reminder of the high quality materials that went into its production. At a round 18kg, the task of simply setting it down on a table or in a rack proves to be a small challenge. As can be seen on the photos, the original feet are not very tall. This makes it difficult to squeeze the fingers underneath the amplifier for lifting and again a challenge when setting it back down. I would have wished for the feet to be at least high enough in order not to get my fingers pinched while rearranging the system. I have sometimes heard it said that High End audio products and the concept of convenience tend to be mutually exclusive, and I think I have by now gathered sufficient evidence in this report to prove that this is not an unfounded observation. But then sports cars are not really convenient either, but very, very sexy.
Down to Earth Listening
For the start of my listening explorations, I had four HiFi setups to choose from. I weighed the pros and cons of each of them and ultimately decided to get to know the RG9 on the least complex system of them all. On this, the music sources were a Philips GA 212 turntable fitted with an entry level AT VM95 E cartridge, as well as a Pioneer PD-S604 CD player that recently had been upgraded with an anti-resonant coating on the inside of its enclosure as to further stabilise the already quite remarkable drive unit. Both devices were rather musical for their class but they were by no means High End. They were connected to the RG9 by means of Silver Solid-Core chinch/RCA interconnects of the HBS4-Type shown in this forum.
The loudspeakers were American built Epicure EPI 500 with 10-inch woofers and two 12-inch passive radiators per speaker. They, too, were rather musical despite showing a measurable dip between the woofer and the passive diaphragms. Ground potential between the devices had been harmonised and the speakers had been positioned in the large studio as to present the most possible linear performance. As usual, I used the acoustic calculation sheets handed to me by Peter Englisch to determine their basic positions and then proceeded to set up the remaining centimetres by hand, or rather, by ear. Finally, the exact matching of the stereo channels had been conducted using a laser distance gauge. No signal wires or power cables were crossing or even touching behind the rack. The electric mains was fed from the fuse box straight to the system for extra low interference.
Based on my standard components, a small Rotel preamp with improved Faraday cage (not a difficult upgrade, if you take into account that the original floor plate was made of plastic) and Becker MOSFET amp, I already had spot-on centre stage imaging, seamless panning from left to right, tonal accuracy and believability. In short, there was little on my original setup that troubled my ears, stuck out to me or was obviously missing. The Becker amp’s strengths were its enormous capacitors of 64,000 mF each and its four Hitachi MOSFET J49 output transistors. Its weaknesses were pretty much everywhere else, from its flimsy transformer to its haphazard wiring, and it sometimes amazed me that I could find such deep affection for this little hand-made amplifier at all.
Switching over to the RG9 MK3, I kept our Audioplan PowerCord S and the Belden 9497 speaker wires in place. I knew the PowerCord S to be a well-engineered cord of symmetrical anti-resonant design, and the Belden cables had repeatedly proven themselves to be an excellent match for vintage speakers. My reason for doing so was not to introduce more than one new component at the time. I powered up the system, put on a CD and left the room for the next 30 minutes. When I walked back in later, I was greeted by a calm and sophisticated sound. I sat down in my armchair to listen and was deeply impressed with this system’s tonally warm storytelling. I especially enjoyed the breadth and width of tonal colours that are capable of connecting music with memories.
Gone were the few ramaining traces of static flicker, sibilance, and haze of the Rotel Becker combo. In their place, there was ample room for the nuances of piano, strings, and wind instruments. In addition to a more distinct separation of tonal events, the RG9’s superior power per channel held a tighter grip on the EPI 500’s bass lines. In this combo, there were simply more bass nuances and more texture. The presentation was brought forth with great assurance. Like an artist painting with a big brush, it was at once insightful and bold. This is not to say that the RG9 would show its audiophile qualities on every single record. Where the recordings had their limits, the system still showed this quite clearly. In this sense, the music did not seem ‘sounded’ in any way. Instead, each music event was presented with good measure and in a down-to-earth manner.
Real-World Impressions
Till Brönner’s song “A distant Episode” highlighted the impressively precise 3D imaging of the Pioneer CD player’s platter drive mechanism in combination with Legato Link. Patrick Kelly’s live concert performance of “A Litte Faith” revealed formidable lower bass extension and quick rise times of the amplifier. The same cannot be said of his song “Land of Bliss” that did not undergo the same positive transformation. Peggy Lee’s “Fever” showed splendid attack and decay paired with a formidable differentiation between drum materials, tensions, techniques, and dynamics. Cristin Claas’s song “In the Shadow Of Your Words” served to reveal the multiple tonal colours of vocals, nylon and steel strings, and of the synthesiser. Although the music events often coincided, the RG9 managed to keep them separate and in good order and proportion throughout the performance.
Sean Heel’s album “A Dry Scary Blue” can be superbly insightful with occasional moments of unpleasant clipping. However, on the RG9, it sounded a bit more compact and less airy than I was used to. Then again, Jörg Hegemann’s much praised album “High End Boogie Woogie” sounded full and engaging. On Jörg’s album, Paul G. Ulrich’s double bass was rendered razor sharp and wonderfully separate from the piano. Gurgling low bass notes maintained more refinement than usual with a discernible metallic ringing and rasping to them. I had never before experienced the Steinway grandpiano’s nuances so separately, for instance on the song “When you and I were young, Maggie”. And I do remember it well from standing next to it during parts of the recording.
Switching to phono, the Helge Lien Trio’s album “Badgers and Other Beings” sounded spacious and open and at the same time intimate and warm. In addition to the usual panning from left to right, the stage felt more seamless and deeper. In my setup the phono section was of very low noise and tonally insightful. Instrument separation was maintained during fast, loud, and crowded passages. Having spent some time listening, I could sense that the only limiting factors were the speakers and the entry-level Audio-Technika cartridge. I was eager to find out how the RG9 would perform in combination more translucent gear that was positioned higher up in the food chain.
Higher Up the Food Chain
Our second test environment consisted of a Marantz CD-17 CD player, a Thorens TD 320 turntable paired with Audio-Technica VM95 ML cartridge, both connected via Silver-Solid Core to the RG9-MK3, and Martin Logan SL3 electrostatic speakers that were connected to the amplifier in the from of Y-wiring. On hybrid speakers, this way of wiring had the advantage that both the electrostatic panel and the dynamic bass driver of the SL3 could be addressed separately for improved back-current handling but found a uniform point of contact on the side of the amplifier to preserve homogeneity.
In this new position, the RG9 MK3 was to replace an RGR Model 4 preamplifier that was paired with a B&K ST140 solid state amplifier. This was a decent-sounding combo capable of delicate tunes and insightful presentations. With its still rather modest 105 Watts per channel, the ST140 was at times a little weak in the chest for the SL3 despite its high current-handling capabilities.
I began listening via the Marantz CD-17 and immediately noticed that the music sounded more seamless and the soundstage more consolidated. As electrostatic speakers radiate both towards the front and to the back, perfect timing is essential for the speakers to disappear in the room. In my usual RGR/B&K setup, stage imaging often did not feel quite right in the transition zone between the left speaker and the left section of the stage so that some instruments or notes would jump forward in an unnatural fashion. This effect reduced by a large portion, with the music wrapping around the speakers from the far left to the far right. Woofer integration was also improved and made faster music more fun to listen to.
Switching over to phono, I was pleasantly surprised not to experience the drop in dynamics that is all too often the case. In this system I was using the original Symphonic Line power chord and was impressed with its contribution to the performance, especially in comparison with our cheaper Lapp Ölflex that I had quickly replaced after just a few minutes of listening. The ability of a power cord to make or break a system still amazes me each time I hear it.
After listening to the Helge Lien Trio’s album “Guzuguzu” which portrayed lots of musical insights as well as dynamics, I changed over to Manu Katché’s album “Neighbourhood”. On his song Katché’s “Rose”, in particular, I was perplexed by the fact that I had never before been able to identify the two separate saxes performing the chorus side by side as distinctly as with the RG9.
The Pain of Parting
I am not sure if you remember moments from your early adulthood when the party at your house was over, and as you were watching your guests leave, it slowly dawned on you that the house would again be empty and that you were left to deal with the emotional and physical aftermath on your own? At such moments, it suddenly became painfully obvious that adjusting back to life as usual would require some time and effort. The head still buzzing from all-new impressions, I had to think of my HiFi friend Luigi’s words: “Once you have heard it, going back won’t feel the same.”
Changing back to our Rotel & Becker combo, much of the tonal width and fullness that I had since come to accept as normal was gone. The sound became lighter and sharper, displaying slightly compressed mids. What had not troubled me at all and initially seemed to be little more than an upgrade had since become an essential property of the music to me. In my impression, not enough has been said about the weight of tonal width in music. While most HiFi talk still fusses about dynamics, bass performance, or high resolution files, etc., the one element that addresses our emotions and has the power to lead us back in memory is correct tonality. And, according to my short experience, Rolf Gemein understands how to play that card well.
Find out more:
< High End Society | Symphonic Line RG2-RG3 >
Specifications
- Type: Integrated solid state stereo amplifier
- Transformer: 430 VA, toroidal with mumetal enclosure
- Output power (RMS, 8 Ohms): 2x 140 Watts
- Output power (RMS, 4 Ohms): 2x 250 Watts
- High current stability: > 2 Ohms
- Phono section: MM/MC with adaptable capacitance
- Number of line inputs: 3 + Tape loop
- Country of Manufacture: Germany
- Dimensions: (W) 450mm x (H) 100mm x (D) 380mm
- Weight: 18kg
- Year(s): 1994 - 1998
Receivers

Receivers are those strange and hybrid creatures that combine the properties and functions of a tuner, a preamplifier, and a power amplifier in a single cabinet, an attempt that has often produced major compromises in all categories with a devastating effect on sound quality. While receivers generally offer great ‘bang for the buck’ performance and convenience, the ‘bang’ aspect has never really been defined as a musical virtue.
While separate units allow for greater freedom for both the engineer and the owner, a compact receiver unit is not without merits. For one thing, the designer theoretically has ultimate control over all internal connections. This is a benefit to the designer of separate units who cannot be sure what the other components of the chain will be. Well-designed receivers will therefore not be much cheaper than their separate cousins, but they will not look nearly as impressive. Perhaps this explains why there are not all too many notable receivers around.
HK 730 Twin Powered
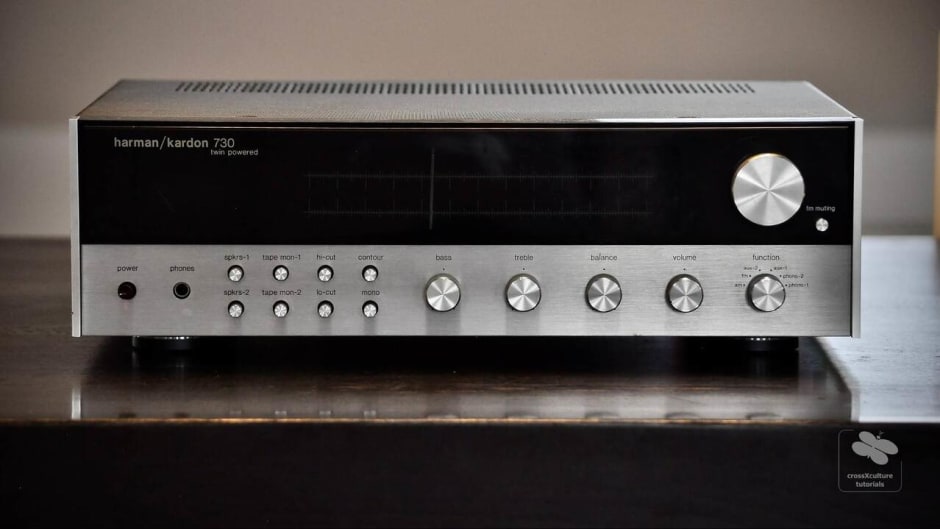
Published: 23/05/2020
Manufacturing date: 1975
Author: Karsten Hein
Category: Gear & Review
Tag(s): Receivers
The story has it that Sidney Harman and Bernard Kardon were co-workers in the higher levels of David Bogen & Co., a telegraph and communications specialist, before they both resigned to form Harman / Kardon in Stamford, Connecticut, in 1953. From the very start, the company focused on designing integrated receivers that would merit the definition ‘high fidelity’. The first Harman / Kardon high fidelity receiver, the Festival D1000, was among the world’s first AM/FM compact receivers and already featured what would later become HK trademarks, such as a copper plated chassis. Although Bernard Kardon soon after retired, in 1953, he sold his interests in the company to Sidney Harman, who consequently named his company Harman International. Perhaps out of respect for his retired colleague, but perhaps also because he did not want to again change a brand name that customers had just gotten used to, the company has continued to carry the double name Harman / Kardon on all their receivers, tuners, and amplifiers to this day.
The company’s strategy of building the highest quality product at any price level sometimes meant the omission of nice-to-have features for the sake of clarity and for the sake of being able to afford higher grade components, which may have alienated some customers in the shops. On the other hand, it has been this focus on the essential that has helped the company build a strong base of followers to keep it alive over the years where many others have failed. The iconic HK 330 receiver was introduced to the public in 1968. It is an excellent example of the Harman design philosophy and was very well received. The HK 730 shown here was the most powerful model of that product range and was built from 1975 - 1978. Its solid 50 watts per channel into 8 ohms may seem relatively unimpressive by today’s standards, however, one needs to consider that this unit was built before the receiver wars, in other words, before high watts figures were considered to be an asset. Instead, the unit was engineered for sonic performance, and the components were chosen to perform musically and effortlessly at common listening volumes. On the basis of the components used, higher output ratings would easily have been possible, if this had been the intention.
Harman / Kardon believed that limiting frequency response outside of human hearing would negatively influence the harmonics found in frequencies within the scope of human hearing. Hence the HK 730 attempts a linear performance from 4 Hz to 40.000 Hz. As is the case with all of Harman’s twin powered receivers, the unit features a double-mono amplification unit, each side with its independent power supply, as well as a third power supply for the preamplifier. Both the preamplifier and the power amplifier can be used separately, by removing the bridge at the back of the unit. All frontal elements are made of solid metal and have been placed on high quality switches and attenuators. Given Harman’s attention to detail, it is a little surprising that the treble and bass controls cannot be cut from the signal path. A small blunder that is easily forgiven once you hear the unit sing. The tuner and phono stage are truly excellent. The copper plated body helps to keep away interference, and the components are well chosen and well placed.
The unit shown here needed some re-soldering. Especially the cinch/RCA connectors on the back can come loose with time. The original US power cord has been replaced with a high quality Lapp cable, and the clamps for the two sets of speakers have been replaced with banana jacks for convenience and to be able to attach larger diameters of speaker wire. The sonic performance is life-like and natural with plenty of control over the speakers. Its quality, features, and performance make the HK 730 one of the best classic receivers ever built.
Specifications
- Type: Post World War 2 AM/FM receiver
- Tuning range: FM, MW
- Power output: 50 watts per channel into 8Ω (stereo)
- Frequency response: 4 Hz to 130 kHz
- Total harmonic distortion: 0.1%
- Damping factor: 30
- 2x Phono inputs: 2.5 mV, 47 kOhms
- Auxilliary and tape inputs: 150 mV, 30 kOhms
- Input sensitivity: 2.5mV (MM), 150mV (line)
- Signal to noise ratio: 72dB (MM), 77dB (line)
- Dimensions: (W) 432 mm x (D) 368 mm x (H) 140 mm
- Weight: 13.7kg
- Country of manufacture: U.S.A.
- Year(s): 1975 - 1978
Kenwood KR-9400
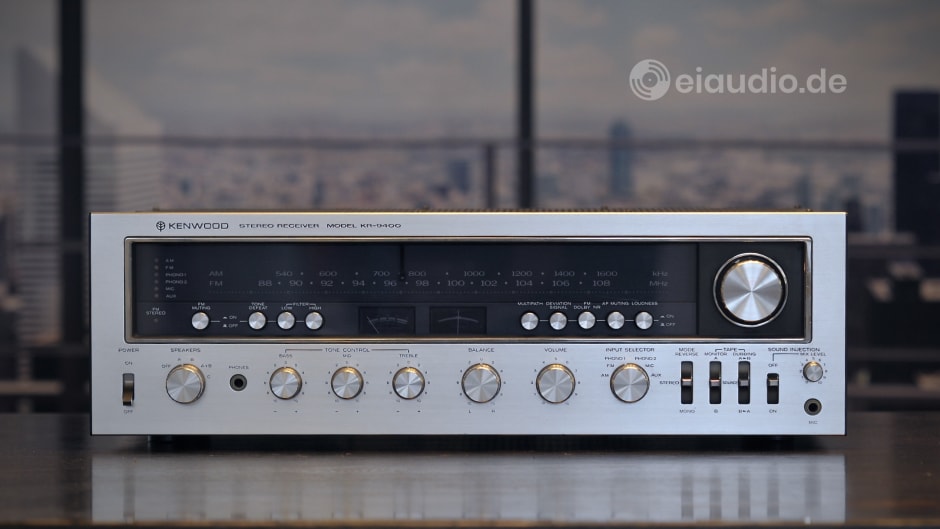
Published: 07/07/2022
Manufacturing date: 1974
Author: Karsten Hein
Category: Gear & Review
Tag(s): Receivers
The Kenwood KR-9400 was the third receiver presented in this blog. It was given to me for testing by Luigi, who had previously purchased it from a collector in Berlin. At the time it was handed to me, the Kenwood had already been fully serviced and technically restored where necessary. Due to some obscure event, however, this receiver had lost its original wooden sides. The wood applications would not only have looked nicer and potentially prevented children from reaching inside, but they would also have served to absorb some of the mechanical vibrations, e.g., from the extra-large transformer. Rebuilding the unit's American walnut flanks at first seemed like an attractive idea, but I soon found that it would take some professional support because of the sheer size of each of the two surfaces. After all, the Kenwood KR-9400 was a very large receiver, a fact that partly remained concealed because the overall proportions seemed natural enough.
Taking a first glance under the hood, I could see that some effort had gone into designing the power supply. Where Harman Kardon had taken the path of separate power supplies (one for each channel of their HK 630 and 730 receivers) both the Pioneer SX 850 and the Kenwood KR-9400 had to draw their energy from a single supply. On the Kenwood, the transformer and filter capacitors were of impressive size in order to allow for an effortless flow in music, even when playing in combination with more challenging speakers. And, in true power amplifier fashion, the two amplifier circuit boards were placed upright, directly to the left and to the right of the large power supply. Two over-sized heat sinks successfully kept the four NEC 2SD287 bi-polar transistors per channel cool through all operating conditions. NEC 2SD287-type transistors were considered run-of-the-mill power transistors and would ensure long performance and serviceability.
Similar to Hafler amp designs, the KR-9400 did not use coupling capacitors that would prevent direct current from reaching the output stage. This sort of concept could potentially kill speakers, but audiophiles tended to describe direct-coupled amplifiers as sounding more direct and revealing, possibly due to having one less part in the signal path. Given the time of its production, this Kenwood receiver did produce a relatively low level of total harmonic distortion and was rated at less than 0.1%. Its output power was class-leading and unrivalled in the world of receivers until 1974. In fact, its sheer power is sometimes said to have spawned the Receiver Wars. After all, 120 watts RMS per channel into an 8 Ohm load, and 150 WPC into 4 Ohms made this receiver a truly versatile companion to power most available speaker concepts and a rival even to separate pre and amplifier combos.
The KR-9400 was the most powerful receiver of Kenwood’s 400 range. Beginning from the pretty KR-1400, Kenwood's lowest-powered receiver with 10 WPC at 8 Ohms, the company counted up the first digit of their receiver names to reach the model that is presented here. I did find references to all the receiver models from one to nine online, with the exception of the KR-8400, which seemed to have been sold in small numbers to customers in North America only and had since become rare. But the number scheme did not only pertain to amplifier power. Higher numbers also stood for increased connectivity, along with lots of useful features. This might come as a surprise to audiophile listeners today, who are so used to being sold little more than the bare necessities at the higher echelons of the market. By modern theory, musicality and purity are sacrificed when there is more than a power button and volume control on board. But, after listening to the Kenwood KR-9400 extensively, I was starting to have my doubts about the validity of such claims.
I set the KR-9400 up in our upstairs listening room, where it was to compete with a duet consisting of Restek V1 preamplifier and Dynavox VR-70 tube amplifier. The speakers were still our formidable Epicure EPI 500, of 4 Ohms resistance and built from 1973 to 1981. It was not unlikely that the paths of these two legends should have previously crossed in some Higher-Fi household. I liked the idea of making this encounter possible once again. In our summer-heated upstairs apartment, most amplifiers had a tendency of overheating. — Not so the KR-9400. Even after hours of performing at higher or lower volume, the unit's surface temperature never rose above 40 degrees. This was not bad at all, especially for a combined unit that had lots of clean power to offer. Heat could be an issue with MOSFET and tube amplifiers, and the KR-9400 was neither.
The most obvious strength of the Kenwood was its ability to produce natural bass and not the intellectual bass that we had all come to accept as linear, truthful, etc. No, it was rather the kind of bass that was present in all natural events but that microphones and studios were unable to capture well. And this is not to say that the KR-9400's bass was in any way too much, overpowering, imprecise, or smothering. A fact that was hard to believe, as I had been taught to distrust the engulfing presence of bass. Supposedly, it was not 'linear' or unfit for audiophile listening. And reading these lines in an article by another blogger, I might still have my doubts. But with the KR-9400, bass was an asset and did not come across as fake or nonlinear at all. This impression was aided by a sufficient amount of layering and exceptional speed.
When I listened to the Kenwood play music for the first time, I wrote to Luigi that I could not believe the speed with which it presented the music. It almost felt overly eager to tell the whole story, as if it all had to come out at once. After a few minutes of listening, this early impression of shock changed into genuine admiration for a machine that obviously had great potential in terms of dynamics, rhythm, and speed. Although I first began with Jazz albums, as usual, I soon found myself exploring different genres to see how the increased speed would affect the music. I was pleasantly surprised by the agility of our EPI 500 speakers that now seemed to be more nimble on their feet than was usual with our other equipment. In Hi-Fi listening, bass-slam and speed were often mutually exclusive. This was not at all the case on the KR-9400 that made bass and speed appear to be natural and effortless occurrences.
And yet, there was another contradiction that the top-of-the-line Kenwood managed to overcome. In Hi-Fi, we naturally assumed that excessive bass would negatively affect our ability to detect nuances in the mid-band or treble. Since humans only had a single eardrum to handle all frequencies of music, greater excitement of the lower frequencies had the potential of smothering over the more delicate upper frequencies via the single diaphragm. Yet, somehow, this did not seem to be an issue while listening to the KR-9400. I admit that this positive impression may have been supported by our spacious listening room, in which our actual listening set-up occupied less than one fourth of the available space. Since there were no parallel walls, reflections were naturally kept to a minimum. In this scenario, bass frequencies were not at all in conflict with those produced by the midrange or treble. In a boxy room, on the other hand, the amount of bass attack might have led to a different assessment.
The KR-9400 offered two Phono inputs for MM cartridges with excellent sensitivity and highly accurate RIAA correction. The phono inputs shared a single ground screw which could make changing the connections a bit iffy. The AM/FM tuner section was of excellent quality and considered to be above the Marantz models of the period. There was one Auxiliary input to connect a CD-player or streamer, as well as a 6.3mm Microphone jack that was located on the front panel. Microphone input could be added to the music source by turning on the 'Sound Injection' function, and the microphone level could be adjusted to suit the general volume level. Two tape loops were available via separate switches. Recording from one tape to another was possible even while listening to a different music source in the process.
There were separate connectors for a Dolby Noise Reduction unit called the Kenwood KF-8011 'De-Noiser' and for an oscillator unit called the Kenwood KC-6060 A. Another convenient feature was the 6.3mm Headphone jack. Tone controls for Bass, Midrange, and Treble allowed for basic room correction, and a Tone Defeat button made sure that the signal path stayed untouched by such obstacles to the signal if needed. Additional High and Low Filters as well as a button for Loudness served to complete the extensive control package. All controls and switches were of very high quality with volume attenuator offering 40 steps that clicked into place on each turn. Everything about this receiver showed that cost considerations were last on Kenwood's list when building their flagship model.
The active signal source was indicated by an LED light on the left side of the large tuner scale, and another LED served to indicate if Stereo reception was possible. The LEDs made it possible to check basic settings from a distance. I did not so much appreciate the fact that the volume control was of the same design and perched between the Balance and the Input Selector. This would make it more difficult for casual users to operate the receiver with confidence, especially in low light conditions. As was typical for receivers of this period, playing music from a (high output) CD source made the volume attenuator very sensitive. Even with our EPI 500 speakers that were rated at 88dB, full listening volume was reached with the attenuator set in 9 o'clock position.
To close off my listening sessions, I put on Boris Blank's album 'Convergence'. First released in 2014, and with its strong focus on collected samples and computer generated sounds, the album was quite different from the albums found in the 1970s. To my delight, the KR-9400 presented Mr Blank's songs in a joyful, harmonically rich, and forward-sounding fashion with a lush midrange, full bass, and a slightly grainy but sweet-sounding treble. Kenwood clearly had produced a powerful and lively sounding receiver that would work well with many genres of music. Although the KR-9400 did not put its main focus on presenting the subtleties of music, there was still plenty of nuance to satisfy that end of the market. Instead, it excelled in speed and bass-slam. This certainly brought the aspect of joy back into the music. I could easily see myself listening to this receiver for hours on end and would personally give it preference over the two models I had previously tested.
Specifications
- Type: Post-WW2 AM/FM-receiver
- Tuning range: AM, FM
- Power output (8 Ohms): 2x 120 watts
- Power output (4 Ohms): 2x 150 watts
- Frequency response: 5 Hz to 40.000 Hz
- Total harmonic distortion: > 0.1%
- Damping factor: > 50 (8 Ohms)
- Speaker impedance: 4 to 16 Ohms
- Inputs: 2x Phono, 2x Tape, 1x Aux, 1x Mic, 1x Dolby NR
- Input sensitivity, line: 150mV
- Mic sensitivity: 2.5mV
- Phono sensitivity: 2.5mV for MM
- DIN sensitivity: 150mV
- Signal to noise ratios: 65dB (mic), 70dB (mm), 93dB (line/DIN)
- Tone controls (+/-10dB): 100 Hz, 800 Hz, 10.000 Hz
- Loudness (+5/+8 dB): 100 Hz, 10.000 Hz
- High filter (-5 dB): 10.000 Hz
- Low filter (-8 dB): 100 Hz
- Tone control bypass: bypass-defeat
- Outputs: 2x Tape, FM quad radial, 6.3mm headphone jack
- Line Output: 150mV (line), 30mV (din)
- Power consumption: 750 watts (max.)
- Dimensions: (W) 557 x (H) 166 x (D) 395 mm
- Weight: 20.6 kg
- Country of manufacture: Japan
- Year: 1974-1976
Accessories
- Oscilator: Kenwood KC-6060 A
- Noise reduction: Kenwood KF-8011 (de-noiser)
NAD M-10 Streaming Amplifier

Published: 10/12/2022
Manufacturing date: 2019
Author: Karsten Hein
Category: Gear & Review
Tag(s): Receivers
When I think about audiophile listening pleasures, my first association is a meticulously set up stereo system, including at least one tube stage, with its loudspeakers carefully placed in a dedicated listening room. I imagine the listening position to form an equilateral triangle with the speakers and a high-floor carpet to counterbalance a high ceiling. I see myself in this position alone and understand that absolute soundstage and tonality perfection can only be enjoyed by one listener at a time. And while this could be seen as a selfish vision, I can assure you that in most households, there is only one single person who cares about the subject and is willing to set up a HiFi system in this way. Audiophiles are a rare species, and achieving proper sound balance takes years of experience.
When I first met our next door neighbour Alexi, I was therefore surprised to learn that he had purchased some HiFi components that had been specifically designed to break these rules. His Duevel Planets loudspeakers, for instance, were of an omni-directional design using two metal spheres to radiate the sound full-circle into the room. This concept allowed listeners to receive a fully realistic stage impression from various listening positions in the room. My review of these speakers recognised the benefit of the Duevel Planets in the ability to share the music experience with more than one listener at a time. Because, even if the other family member did not care so much about sound stage and tonality, the ability for them to share in the experience was still an improvement.
The other component to challenge established audiophile rules was Alexi’s DAD M-10 music streaming-amplifier. First released in 2019, the compact NAD claimed to offer 100 watts per channel of continuous music output into an 8 Ohms load. Weighing around 2.5 kilos, it was equipped with a large LCD display that covered the whole front of the unit. Alexi had not yet pealed off the protective film, a measure that slightly showed on the photos. There were no visible buttons or lights, except for the illuminated NAD logo on top of the unit that signalled operation. It could not have been a sleeker and less pretentious looking device. And coming from large and heavy separate vintage components myself, I was not sure what was to be expected from such a design.
Upon my first visits to Alexi’s house, the combination of M-10 streamer-amplifier and Duevel speakers had sounded rather frail and disorganised. When I later tested the Duevels in our listening room and on our system, this frailness was gone. I felt that the NAD amplifier might be the culprit and gave Alexi our Tannoy XT 8f speakers to test. Different from the Duevels, the Tannoys sounded bass heavy and overly boomy in Alexi’s house. Looking at the listening room, and following my explorations on the subject of room modes, I understood the room dimensions to be responsible for the repeated unbalances sound. In marked contrast to our one hundred year old building with high ceilings and masonry walls, modern buildings had much lower ceilings and open plan kitchen & living room layouts with lots of hard concrete being used.
Low ceilings in spacious rooms that are paired with concrete walls make setting up proper stereo systems almost impossible, because they excite an unbecoming combination of high and low frequency room modes, creating a discordant boxy impression. We can probably all relate to this sound when we imagine speaking or clapping in an underground carpark or in the pedestrian tunnel leading underneath railroad tracks. In addition to these attributes, the necessary furniture in the room also did not allow us to freely set up the Duevels or Tannoys in their ideal positions. Without knowing it, Alexi and I had found the perfect room to explore the full potential of the NAD M-10 that came with Dirac live room correction. We decided to be serious about getting it right and made a proper appointment for the purpose of setting up his system.
On the day of our exploration, I packed my best Manfrotto tripod that would allow us to set the microphone up in the exact positions that were prescribed by the calibration software. I had meanwhile read that Dirac had started as a research project at the Signals & Systems group at Uppsala University of Sweden during the 1990s. The project objective had been to revolutionise the world of sound through digital signal processing. The researchers found that all components of a sound system contributed to a degradation of sound and that the listening room was one such component. The algorithms developed by the team had finally lead to the founding of the Dirac audio company in 2001. Dirac room correction technology can today be found in audio gear from well-known names in the industry: Arcam, Dynaudio, Emotive, Focal, Integra, JBL & Lexicon Harman, Marantz, Monoprice, NAD, Onkyo, Pioneer, Quadral, Hotel, and others.
Alexi downloaded the Dirac software to his laptop computer, and we proceeded to set up the tripod and microphone in his preferred listening position on the sofa. We started the analysis with Dirac running a few frequency sweeps. The resulting graph showed the low frequency hump at 80-90 Hz. It also showed the rest of the bass frequencies to respond unevenly, with a dip at 40 Hz and a peak at 50 Hz. A slight hump between 6-10 kHz was followed by a sharp drop from 12 kHz onwards. Our first measurements were followed by eight adjacent microphone positions that formed a three-dimensional cage around the central listening position by moving the microphone 50cm diagonally in each direction. Dirac ran a number of sweeps in each position. The Manfrotto tripod allowed us to meet each required position exactly.
Once all nine positions had been measured, Dirac suggested the optimal digital adjustment to the curve from 19 Hz to 500 Hz. The NAD M-10 could also have run the calculation for the higher frequency spectrum, however, Dirac would have required us to pay 100 EUR extra for this service. Since the Tannoys had most obviously been suffering from a boomy bass, we decided that we would first give the bass correction a listen. Alexi transferred the new curve to the M-10 and we listened to some of the same songs that we had listened to before the correction. The improvement was immediately audible. The boomy bass had given way to a well-defined, controlled, and refined bass. As a consequence, Diana Krall’s voice was louder, clearer, and tonally more accurate than before. What was left was the sensation that some significant high frequencies were missing from the music. This had the effect that the aura around instruments was missing with the music sounding slightly stale and lifeless.
Satisfied with the result, I think we both would have liked to experience the correction of the upper frequencies as well, however, we decided to leave this for a later day. Even with just the bass frequency adjustment, the NAD M-10 had been able to show the benefit of room correction in circumstances that prohibited the ideal placement of loudspeakers. I could appreciate the positive effect on bass and voice performance and for the first time would have liked to stay and listen for longer. There were some genuine qualities to the music that had been missing before. I enjoyed the deeper and tighter bass that was free of unwelcome resonances throughout the listening room.
Room correction algorithms proved to be immensely useful wherever the room and the loudspeakers were in unfavorable relation to each other. And this did happen more often than one might think, especially in private households and rooms of mixed use. The NAD M-10 and Dirac offered a, not exactly cheap but very effective, method to harmonise the HiFi system with the listening room. In this respect, the two manufacturers NAD and Dirac together offered some real-world listening comfort to many people who would otherwise have had to settle for a rather mediocre result.
Specifications
AMPLIFIER
- Continuous power output: 100W (4-8 Ohms)
- Frequency response: 20 - 20,000 Hz (±0.6 dB)
- Total harmonic distortion: <0.03 % (20 Hz – 20 kHz)
- Signal-to-noise ratio: >90 dB
- Clipping (8/4 Ohms): 130/230 W (@ 1 kHz, 0.1 % THD)
- Dynamic power (8/4 Ohms): 160/300 W
- Damping factor (8 Ohms): >190
- Treble adjustment: ±6.0 dB @ 20 kHz
- Bass adjustment: ±6.0dB @ 60 Hz
- Channel separation >75 dB (1 kHz)
- Input sensitivity line: 1.0 V
- Digital input: -6.2 %FS
- Standby power: 0.5W
DAC
- Audio formats: MP3, AAC, WMA, OGG, WMA-L, ALAC, OPUS
- High-resolution audio: MQA, DSD, FLAC, WAV, AIFF
- Sampling rate: 32 bit/192 kHz PCM max.
- Bit depths: 16 – 24
BLU-OS
- Supported operating systems: Microsoft Windows XP, 2000, Vista, 7, 8 to current Windows Operating Systems, and macOS versions
- Mobile operating system (BluOS): Free Android and iOS App
- Supported cloud services: Spotify, Amazon Music, TIDAL, Deezer, Qobuz, HDTracks, HighResAudio, Murfie, JUKE, Napster, Slacker Radio, KKBox, Bugs
- Free internet radio: TuneIn Radio, iHeartRadio, Calm Radio, Radio Paradise
- Bluetooth standard: Bluetooth aptX HD (built-in)
- Bluetooth connectivity: bi-directional, receive and headphone
- Network connectivity: Gigabit Ethernet RJ45, 802.11 b/g/n WiFi
PHYSICAL
- Dimensions: (W)215 mm (H)100 mm x (D)260 mm
- Unit weight: 2.5 kg
- Country of manufacture: N.N.
- Year(s): 2019-2020
Pioneer SX 850

Published: 26/04/2022
Manufacturing date: 1976
Author: Karsten Hein
Category: Gear & Review
Tag(s): Receivers
Paionia Kabushiki-gaisha, a Japanese company henceforth referred to as Pioneer, has evolved to be the heir of a long legacy of outstanding professional and domestic electronics. And although receivers made up only a small fraction of the company’s success story, they did serve to promote the Pioneer brand in Europe and the USA. Pioneer is sometimes said to have spawned the infamous ‘Receiver Wars’ during the Golden Age of audio in the decade spanning from 1971 to 1981.
The ‘Golden Age’ of audio is sometimes referred to as such, because consumers in this era were willing to spend a considerable portion of their income on advances in Hi-Fi, thereby giving manufacturers the financial resources to incorporate long-lasting quality components, and the freedom to conduct intensive research in order to build the best devices they possibly could. In those days, the market was still dominated by privately owned and research-driven companies that were fighting for pole position in the newly emerging Hi-Fi magazines.
Pioneer was a case in point. Owned and operated by the Matsumoto family, the company already had a thirty-year history in manufacturing audio electronics by they launched the SX 850. The concept of an all-in-one control unit that included tuner, preamp, and power amplifier had originally been invented by the American Harman Kardon corporation during the 50s. However, Japanese manufacturers, such as Marantz, Sansui, and Pioneer, followed suit and soon rivalled Harman Kardon in terms of quality, performance, and especially cost.
Despite having established a strong manufacturing base in Japan, Hi-Fi receivers continued to be mostly manufactured for and sold in the United States and Europe, as Japanese audio enthusiasts preferred the sound and versatility of separate units over the combined package. Customers in western countries, on the other hand, enjoyed the fact that they could get very close to the performance of separate units while having to put up with less than half the fuss. It may have also helped sales that most receivers featured large illuminated scales and fancy looking front-panel designs that increased the wife-acceptance-factor.
On the downside, receivers usually offered less power than separate amplifiers. Or at least this was the case before Pioneer, staying true to their name, released the world’s first genuine 100 watts per channel receiver. This was even certified by the United States Federal Trade Commission (FTC) that had started to regulate the audio market, due to an increase in false promises on the side of manufacturers. Released in 1974, the SX-1010 was Pioneer’s (then) flagship receiver and out-performed the competition by almost 40 watts per channel. Unfortunately, the glory turned out to be short-lived. In August of that same year, the Japanese Marantz corporation followed suit with their legendary 2325 model that boasted 125 watts per channel. The receiver wars had officially begun, with each manufacturer aiming to out-perform the competition in terms of sound quality and power output.
Although the SX 850 fell into this time period, its moderate 65 WPC into 8 Ohms indicated that it was not a contender in the on-going war effort. This, however, could just as well be seen as a plus, because not all monster receivers turned out to be well-equipped for audiophile usage or were in it for the long-haul. In a real-world scenario, 65 honest watts into eight Ohms (and 85 watts into four Ohms) were perfectly capable of driving most conventional 2-way or 3-way speakers on the market. And, while the Receiver Wars did go on to produce true monsters capable of powering even electrostatic speakers and other unruly designs, the SX 850 was most fitting for dynamic speakers of medium to high sensitivity from 4-8 Ohms.
The specimen shown here had been restored to its original splendour in the weeks prior to our listening tests. Its switches had been cleaned in an ultrasound bath, the capacitors had been checked and replaced where necessary. The relays had been cleaned, and the offset calibrated according to factory standard. The original lamps (that were prone to failing) had been replaced with longer lasting LED lights. The real-wood case had been freed from scratches and re-polished to its original shine. To improve connectivity, an IEC socket had been installed that replaced the original US cord, and four banana/spade terminals had been added in position of speaker output “A”. The SX 850 had been restored to better than NOS condition. Its look and feel made it seem as if no time had passed since 1976.
The SX 850’s impressive width and weight would have served to give it a noticeably prominent position on any Hi-Fi rack or piece of furniture. And working on the buttons and switches felt more like operating the control panel of a submarine than those of a common household radio. In fact, I was so surprised by the Pioneer’s weight and haptics that I felt compelled to open the unit in order to see where this impression originated from. However, in my explorations I could neither confirm the large transformer nor the wooden casing or chassis to be the sole cause of its weight and solid feel. It was rather the sum of all quality choices that in the end led to this unit’s close to 20 kilograms of weight and its superb rigidity. The 850 was seven impressive kilos heavier than even the twin-powered Harman Kardon 730.
Recently refurbished units often had a tendency of sounding a bit stale until the new components had been sufficiently run-in to become part of the greater scheme. And it was difficult for me to say in which phase of the running-in process our specimen really was and how much of my sonic impression was affected by this condition. However, having been present during the break-in of many devices, I felt sufficiently knowledgeable to identify areas of potential. If some units will feel a bit light-footed and short-winded during the first couple of weeks, this particular receiver greeted me with a huge sound stage spanning from far left to far right, a solid and dependable center image, and a thick and musky sound. It was as if it was painting with a broad brush.
Even coming from our Restek V1 and Becker ST-200 separates, I could not help but be drawn in by the SX 850’s colourful and engaging sound. Similar to the Becker, the Pioneer was more about the sensation of listening to musicians playing their instruments live than it was about being present in the highly accurate mastering room of a recording studio, especially during passages of instrumental Jazz. Brushes sounded convincingly metallic and still had a pleasant softness about them. I enjoyed this quality a lot on Tony Bennett & Diana Krall’s album “Love is here to stay”. Similarly, both nylon and steel guitars had a natural timbre with a pleasantly soft top-end, as I experienced listening to José González album “Local Valley”.
The SX 850 certainly understood about music and, in connection with our silver solid core interconnects and Belden speaker wires, offered the stomping and airy bass presence of a live venue. While bass was perhaps not nuanced, multi-layered, or controlled, I personally preferred this type of 'musical' bass to the sterile impression left by some more recent amp designs with damping factors well above 200. In its current state, the Pioneer was perfectly suitable for extended listening sessions, even for listeners who have high expectations regarding their choice of audio entertainment.
Both male and female vocals sounded lush and full-bodied with an aura of slight restraint. There was just not as much air and space around the singers as I was used to from our Restek & Becker combination. When it came to vocals, I could not shake the feeling that I was sitting in a recording studio. This is not to say that there was anything unpleasant in the way vocals were depicted, they simply sounded less live and had less of a physical aura than (strangely enough) the instruments did. It seems that the mid-band was not able to breathe as freely (yet) as some of the higher and lower spectrum. This may have been a result of the still ongoing running-in phase, but it could also have been caused by the unit's design. In the end it does not matter too much, because, if we consider that my benchmark was my favoured combination of separate audiophile units, the SX 850 already put up a formidable performance.
For audiophiles in search of a classic solution for their second or third system who do not shy away from the cost of a (by now necessary) refurbishment, Pioneer sure has some worthwhile receivers from the Golden Age to consider. And the SX 850 was certainly a specimen that I could personally grow attached to. Its colourful and engaging sound, its superb musicality and impressive stage width made it an endearing companion for long and joyful audio sessions any day. Equipped with two MM phono inputs with excellent RIAA correction, two tape monitors, a microphone input and headphone output jack, it is well suitable for most applications. It even features a very convenient -20dB muting switch by which the volume dial can be adjusted to accomodate high input devices, high sensitivity speakers, or both.
Pioneer Company History
The world famous electronics company was founded by the Japanese inventor and entrepreneur Nozomu Matsumoto. Born in 1905, the son of a Kobe missionary family showed an early interest in electronics and was among the first to recognise the potential of recorded music in the context of addressing people’s emotions and felt that this could aid the promotion of the Christian faith.
Therefore, in 1936, he started what was to be the precursor to Pioneer, the “Fukui Denki Shokai Seisakusho”, which translates into the “Gospel Electric Works” in English. His small company took up operations in his hometown Osaka and specialised in the research and development of dynamic loudspeakers.
Matsumoto’s inspiration had come from western companies that still held the lead in entertainment electronics and shipped them over to Japan. However, Matsumoto had a vision of making this a Japanese technology and, in 1937, his early experiments came to fruition with the introduction of the A-8. It was the company’s first large series speaker driver and Matsumoto referred to it as the “Pioneer”. This speaker was the first to feature the ‘omega sign and tuning fork’ that were later to become the company’s trademark.
In 1938, Fukui Denki Shokai Seisakusho moved its operations from Osaka to Tokyo where the growing family business specialised in the construction and repair of loudspeakers. Nozomu Matsumoto made sure to involve his family in the operations and was fully supported in this by his wife Chiyo and his two sons Seiya and Kanya. Following his university studies, Seiya took over Marketing and Sales and went on to become the president of Pioneer in 1982.
The company with the long and difficult Japanese name changed its brand to “Pioneer” in 1962 in an effort to create stronger international brand awareness and went on to become one of the world’s leading developers of first audio and later also video equipment. Pioneer made major contributions in the research and development of loudspeakers, was the driving force behind the development of the laser disk, and next to Sony and Marantz, was one of the first companies to manufacture CD players.
Pioneer stayed true to Matsumoto’s initial mission statement which had been to develop and manufacture audio products that would speak to and captivate people’s emotions. Perhaps it was this deep focus on the true essence of listening that has earned the company a loyal base of followers until this day.
Specifications
- Type: Post WWII AM/FM receiver
- Tuning range: FM, MW, AM
- Power output into 8 Ohms: 65 WPC
- Power output into 4 Ohms: 85 WPC
- Frequency response: 10 Hz to 50.000 Hz (+0 dB, -1 dB)
- Total harmonic distortion: 0.1% @ 8 Ohms
- Damping factor: 25
- 2 Phono inputs: 2.5 mV, 50 kOhms (MM)
- Input sensitivity: 150mV, 100 kOhms (line)
- Microphone sensitivity: 6.5mV
- Signal to noise ratio: 70dB (MM), 90dB (line)
- Signal output: 150mV (line), 30mV (DIN), 1V (Pre out)
- Bass control (100 Hz): ±10 dB
- Treble control (10 kHz): ±10 dB
- Speaker load impedance: 4 Ohms (minimum)
- Semiconductors: 3 x FET, 3 x IC, 56 x transistors, 36 x diodes
- Dimensions: (W) 52.7 cm x (H) 17.3 cm x (D) 41.15 cm
- Weight: 19.1 kg
- Accessories: FM T-type antenna
- Country of manufacture: Japan
- Year(s): 1976
Loudspeakers

It is probably fair to say that there has been a fascination with loudspeakers right from the very start. Not so much with the technology behind them, but simply due to the fact that they can reproduce sounds of familiar things without being the thing themselves. For example, a loudspeaker may reproduce the sound of breaking glass, without being made of glass or shattering in the process. It may reproduce the clanging of hard metal, without being made of metal or clanging against anything itself. And, most importantly, it can mimic the sound of voices and instruments, a discipline in which human ears are especially sensitive and therefore critical. Even on people with emerging hearing disabilities, the voice level frequencies are usually among the last to go.
While attempting to sound natural and accurate in their reproduction of music, most types of loudspeaker are first and foremost entertainment devices, and as such, they need to be able to survive on the entertainment market. As our understanding of this market and our behaviour as consumers changes, so do the design choices made by the manufacturers. Loudspeakers today look rather different from those made in the seventies. While modern designs tend to be tall, slender and cool looking, their older cousins were often wider and stubbier with warm looking wood finishes. However, these are just the visible features and would be alright, if it was not for another trend, namely that of the infamous target group analysis.
Let’s face it. Well-engineered speakers, and the electronics needed around them, are by no means cheap. Manufacturers are therefore facing a rather mature customer group that has the space, time, and available income to purchase up-market loudspeakers. If income tends to improve with age, sadly our hearing often does not. It could well be argued that the two curves are diametrically opposed. Hearing loss affects both our ability to discern high notes, as well as our sensitivity to low volumes. Consequently, in A/B comparisons, the speaker with the loudest high notes will, more often than not, get to enjoy the ride home. Sadly, this type of speaker will have a life-long imbalance when it comes to natural representation, an obvious weakness that all future owners will have to come to terms with.
Many things can and will go wrong at the point of sale. The speaker that sounded great in the shop, might not sound so great when placed into our own living space and hooked up to our system. The room, the furniture in it, and the electric synergy with our existing components will all affect the impression of sound. If possible, loudspeakers should therefore be tested and compared at home. Some dealers will be supportive and make such testing possible, however, there is a natural limit to this, and we might feel pressured to make a choice. The other option is buying loudspeakers used. Provided that the speakers are not broken on purchase, they will either sound great or can be sold again, usually for a similar or even higher price.
ATD Pata Acustica (Auditorium 23)

Published: 10/11/2021
Manufacturing date: 1995
Author: Karsten Hein
Category: Gear & Review
Tag(s): Loudspeakers
Music is a multi-dimensional event, and its re-creation through loudspeakers is understood to be an approximation at best. The most obvious dimension is ‘volume’, and the vast majority of listeners will be able to point out the difference in impression created by sounds played at low or high volume. The juxtaposition of silent and loud opens a space in which a listener’s associations range from soft and friendly to powerful and threatening. Human hearing is usually most comfortable when listening to music at volume levels ranging from 50dB to 80dB.
The second dimension is ‘frequency’. Most people will be able to tell the difference between a lower and a higher frequency sound. This is especially true, if the sound created is between 500Hz and 3,000Hz, where our our hearing is most sensitive. The space that is made available via the frequency spectrum offers a vast playing field to musicians and their instruments, ranging from ultra-low bass to the highest notes of the piccolo flute. Lots of engineering has been done in extending the linear frequency range of loudspeakers in an effort to capture the aspects of natural instruments and beyond.
A third dimension is timing. It describes the ability of a music source to emit its sound waves in a synchronous manner in order to capture the speed and rhythm of an original event. Accurate timing will be supported or hindered by the placement of the music source in the room. The overlapping of music frequencies bouncing back from walls and ceiling can usually best be eliminated by the listener's brain when there is sufficient time-lag between direct and reflecting waves. Loudspeaker manufacturers have developed different solutions to address the issue of timing. Tannoy and KEF, for example, have adopted coaxial designs, whereas others have pursued single driver concepts, such as electrostatic and magnetostatic diaphragms.
And, listening to the Pata Acustica, I was reminded of a fourth dimension, one that is often forgotten in comparisons between loudspeakers, especially in a country like Germany where my fellow listeners habitually rely on facts and figures and are often deeply sceptical when it comes to trusting their emotions: I am referring to tone and timbre. That is to say, the ability of a loudspeaker to stay true to the tonal colour of the physical material of an instrument. This quality is especially important when listening to Classical Music, Jazz, Folk, etc., in which the simultaneous presence of many instruments requires a space in which each can be recognised by its own individual character.
To musicians, instruments are often as recognisable as the voices of friends and lovers. They will discern and often prefer one manufacturer over another, solely on the basis of how the instrument makes them feel when playing and listening to it. Loudspeakers that are able to maintain some of this difference in character are thereby capable of opening a huge (and additional) space in which a multitude of instruments and voices can be separated by their specific tonal character. And, most likely, it was this tonal correctness that set the Pata Acustica apart from many other loudspeakers in its class and aroused the interest of the people at Auditorium 23 in promoting it to their audiophile disciples.
During the 90s, Auditorium 23 was approximately ten years into business. Its founders believed in the sonic integrity of single-ended tube amps and simple Class A designs that would feed their sweet and soft signals into horns for amplification. The Pata Acustica was obviously not a horn and as such an exception in their lineup of exquisit loudspeakers. Retailing at just under 4,000 DM, it was considerably cheaper than folded horn designs, and it was also smaller than most of the other speakers. Manufactured by ATD in Italy and rated 91dB at 1 watt, the Pata Acustica played both loud and tonally correct on smaller tube amps. And this made it a real gem in the Auditorium's special circle of listeners.
When it first came into our house for auditioning, I knew close to nothing about the Pata Acustica. As usual, I prefer to conduct my listening assessment before digging deeply into the subject, simply because I do not want to bias my exploration towards a certain result. All I had heard from Luigi was that it performed well on tube amps. If I had any bias, it was that I feared the smallish speakers would sound hopelessly lost in our spacious listening rooms. I dug out our two stands that we had constructed for the KEF iQ30s, dusted them off, and mounted them on spikes towards the hard-wood floor. I then stuck 5mm felt pads to the four corners of the stand tops and placed the Patas on them. In my previous explorations, felt pads had always proved beneficial in taking the edge off a cold electronic top-end.
Our test system was made up of a Technics SL1310 turntable with AT VM540 ML cartridge hooked up to a Dynaco PAS-4 tube preamplifier that was feeding into a Hafler XL280 power amplifier. All interconnects were made of solid-core silver, such as the HBS4, with copper mesh shielding. The speaker wires used were a pair of Belden 9497 that I had terminated with beryllium hollow bananas. At the time of listening, all connectors had been sufficiently run in to reach sonic maturity and proven themselves over the course of many months. I was familiar with this system performing with our relatively modern Tannoy XT8F tower speakers.
Switching to the Pata Acustica, I noticed that I had to dial back the volume a little. This was surprising to me, as I would have expected the larger Tannoys to play louder. I later checked and found that both speakers were rated the same 91dB at 8 Ohms. My only explanation for the Patas playing louder was that they did not extend as deeply as the Tannoys, thereby losing less energy on the fringe of the audible spectrum. And this brings me to my second immediate observation: the lack of bass extension. Since the Pata’s woofers were built into the closed cabinet of a bookshelf-size loudspeaker, they quite understandably could not compete in the discipline of bass with a ported down-firing floor-stander of nearly tripple their size. Strangely enough, this lack was only apparent on first comparison, because, soon after, other aspects gained greater importance.
Instead of the ultra-low growling of bass extension, the Patas produced the dry snarling so familiar of some wooden instruments. The result was a more grainy and wooden texture that was predestined for Classical Music, Jazz, and Folk. Katie Melua's “Album No. 8” was presented with a wonderfully large and solid phantom centre. Her voice was lush with only the slightest hint of the recording’s original metallic ringing. While the highs were not overly detailed, they were wonderfully nuanced with great timbre. It was the most enjoyable rendition of this particular album that I had heard until that point. There was great channel separation with the stage extending wide across the room. Stage depth, on the other hand, was less impressive. It suffered from the need to place the speakers close to the wall. This need can be a blessing and a course. However, I decided not to mind and rather marvelled at the warm wooden tones of concert guitar and piano. The Patas managed to highlight the sweetness inherent in the music, perhaps slightly thickened with an small and endearing mid-bass hump.
I decided to step it up a bit and put on Ted Poor’s “You already know”. The saxophone never sounded so sweet to my ears. Drums, especially kettle drums, were presented with great realism regarding their respective material composition. I noticed superb transients and great separation between tonal colours of each instrument. If I were to describe the effect, it would be: “total immersion in the music”. While there were moments in which the Pata Acustica’s small dimensions became apparent, I found myself genuinely perplexed by what these loudspeakers were capable of. I especially enjoyed the fact that I could listen to them and, while doing so, completely forget that I was listening. Walking across the room, I was pleased to find that much of the Pata's musical attraction remained. Well done!
Also see: ATD Pata Acoustica (Auditorium 23, 1995) Audio Demo
Specifications:
- Design: 2-way bookshelf, closed cabinet
- Drivers: (1x) 20 mm soft-dome tweeter, (1x) 200 mm paper cone
- Nominal impedance: 8 ohms
- Sensitivity: 91 dB
- Power handling: 6-60 watts RMS
- Terminal: originally Speakon (here: modified to banana sockets)
- Dimensions: (H) 470 mm x (W) 270 mm x (D) 250 mm
- Year: 1995
Canton GLX 100
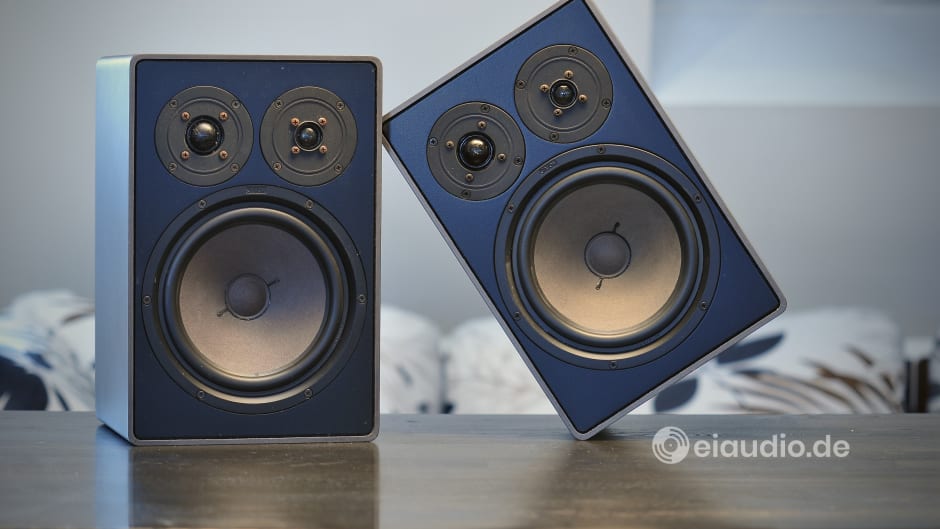
Published: 27/03/2023
Manufacturing date: 1983
Author: Karsten Hein
Category: Gear & Review
Tag(s): Loudspeakers
In 2013, not long before our daughter was born, my wife Sabina and I went out to search for a pair of loudspeakers for us to restart our journey in the appreciation of music. When it came to audiophile pleasures, we were both out of practice and felt unsure of what to aim for. Visiting some local HiFi showrooms around Frankfurt, we finally decided that we did not understand enough about loudspeakers to make a permanent decision. However, we did feel some attraction towards Canton speakers that outperformed the competition in terms of clarity. We finally settled on a pair of used Canton Vento 890 DC that we bought from a vendor in Günsburg, Bavaria, unaware that the company was actually located very close to our home in Frankfurt am Main.
Canton was our entry ticket to audiophile listening, even before we fully grasped what this might mean. The 890 DC were revealing speakers that could show the merits and flaws of a system in an instant. They led to us gradually improving our front-end from the music source, via the preamp and amplifier, to the cables connecting the devices, until we noticed a flaw in the Ventos themselves: No matter how hard we tried, we could not get those speakers to sound tonally balanced. The treble, and perhaps also the upper midrange, simply sounded too bright to be natural and did not match the otherwise commendable sophistication of the speakers. Listening to the Ventos could easily become tiring because of this effect and we ended up selling them.
Exactly ten years had passed since our original purchase, and I found myself listening to a pair of Canton speakers once again. Instead of being large floor-standers, however, the GLX 100 were small and inconspicuous bookshelf speakers. They were finished in modest anthracite rather than our Vento’s shiny silver, and the soft fabric dome tweeters made me hopeful that the resulting sound would be less harsh than I had previously experienced with or 890 DCs. And I was sure to give the GLX 100 bookshelf speakers the royal treatment by putting them on our MDF loudspeaker stands and taking good care when positioning them in the room to get the tonal balance right. The GLX 100 had been a gift to my daughter from her great aunt, and I was glad to have the opportunity of auditioning them here first.
As usual, the Cantons opened with a wide soundstage and even gave the impression of proper stage depth when placed a little deeper into the room. Their depiction of female vocals was penetratingly transparent, thus creating an instantly engaging experience that kept the ears at high alert. I also noticed a raspiness in the upper midrange that I had trouble identifying. It could be that there was some competition between the midrange and the tweeter that was causing it. Just to be sure, I removed the front metal grille which, to my ears, made matters worse. These speakers had obviously been designed for the grille to be in place. To achieve greater tonal balance, I moved the GLX 100 closer to the front wall. This gave them improved bass foundation, however, it did not lessen the energy of the treble which proved to be too much for my ears.
I reluctantly turned on the tone controls on our preamplifier and dialled back the treble by 2-3 dB. This was my last resort when speakers were obviously off balance. The silvery and over-accentuated treble subsided and revealed a pretty decent speaker underneath. Without this measure, the GLX 100 were obvious candidates for ear fatigue, if they were driven with a semi-revealing front end. Engineered for the point of sale, the Cantons would have dazzled shoppers in the 1980s and have enjoyed the ride home more often than they deserved. There was no question that Canton knew how to build great speakers for those who had the money and interest in learning about them, but I could easily see that they also knew how to sell speakers to those still new in this territory.
Specifications
- Type: 3-way bookshelf speaker
- Principle: closed, with dynamic drivers
- Frequency range: 28 - 30,000 Hz
- Crossover frequencies: 800 / 5000 Hz
- Low frequency slope: 12 dB per octave
- Midrange slope: 6 dB per octave
- Tweeter: 20 mm, fabric dome tweeter
- Midrange driver: 28 mm, fabric dome tweeter
- Woofer: 220 mm, paper cone
- Nominal impedance: 8 Ohm
- Power handling (RMS): 65 Watt
- Resonant frequency: 69 Hz
- Terminal: spring-secured for 2mm cable
- Number of terminals: single wire
- Dimensions: (W) 245mm x (H) 370mm x (D) 215 mm
- Country of manufacture: Germany
- Weight: 5.5 kg
- Year(s): 1983
Dahlquist DQ10
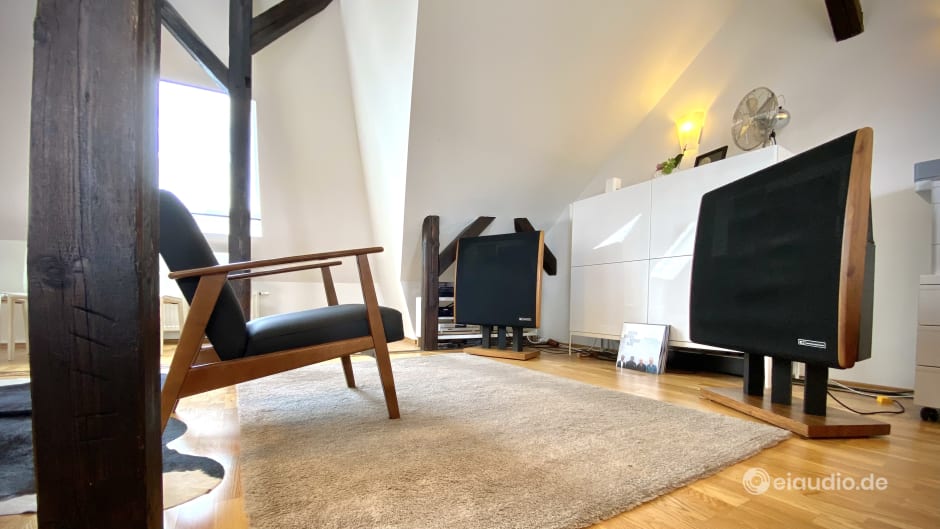
Published: 12/08/2021
Manufacturing date: 1973
Author: Karsten Hein
Category: Gear & Review
Tag(s): Loudspeakers
Married audiophiles will confirm that you can tell you are onto something special, when your wife comes home and—without prior talk on the subject—leaves you baffled with a congratulatory comment regarding your new loudspeakers. I cannot remember the exact words, but they were something along the lines of: “By the way, I saw the new speakers. They look absolutely fabulous! Are they here to stay?” With us, the latter is a valid question. Because, more often than not, the speakers are only with us for testing, before they are given back to their owners.
The loudspeakers on display were a pair of Dahlquist DQ10, and they were given to me for sampling by my friend and fellow audiophile Luigi. This is nothing unusual, and those who have followed my reviews will know that I have tested much of Luigi's HiFi equipment over recent months. And—to my surprise—my wife was not the only female showing instant affection regarding the Dahlquists. My sister in law, someone who is aware of my hobby but does not stop by our house on a regular basis, marvelled at the new speakers when she noticed them in the room. I think you will agree that this is not something that women usually do, regardless of how much money you have spent. It is pretty much the equivalent of a guy commenting on the beauty of a girl’s makeup or shoes. Normally that doesn’t happen, right? And yet, with the Dahlquists, it happened twice within a very short timeframe.
The Dahlquist DQ10 was the first loudspeaker manufactured by the Dahlquist company, then based in Hauppauge New York. Among the company’s founders were some famous names in audio, such as Jon Dahlquist and Saul Marantz, Irving M. Fried and Werner Eymann. The DQ10's design was first exhibited at a New York audio show in 1972. It was revolutionary, because it parted with the traditional boxy shape of conventional speakers. Dahlquist had instead constructed a cabinet that suspended its drivers freely in an open array and in correct phase alignment. From the DQ10 onwards, the term 'Phased Array' became the Dahlquist trademark.
The design idea was loosely based on the popular Quad electrostatic speakers of the 60s and, among Dahlquist enthusiasts, is said to have successfully achieved a marriage between the powerful bass slam of conventional cone drivers with the low refraction, high transparency, and phase accuracy to be expected from electrostatic speakers. The resulting loudspeaker had a square and convex frontal face that was covered in dark cloth and flanked by slim sides of natural wood. To play at ear level, the speakers were then positioned on slender stands that, at their base, matched the wood colour of the speaker sides and held each unit suspended on three black columns or pillars.
In combination with the speaker stands, the DQ10 looked light and non-technical from the front and slim from the side. It arguably held greater resemblance to a radiator than a loudspeaker, an aspect that made it both stand out as a design element and an understatement in terms of technology. Strangely enough, its appearance fits into a modern household just as well as it did back in the seventies. It is not surprising, therefore, that close to 60,000 pairs of Dahlquist DG10s were sold between 1973 and the end of its production in 1988. And the Dahlquist remains popular among audio enthusiasts until this day, reaching 4.8 out of 5.0 stars on audio-review. With more and more units going out of service due to their advanced age, used prices of this speaker have been on the rise over the past 15 years.
The DQ10 featured a closed bass cabinet with angled sides and an asymmetrically positioned 10” cone driver. It had a dedicated 5” mid-bass driver to support the woofer and provide the Dahlquist’s legendary mid-bass punch. The midrange was produced by a 1.75" soft dome driver, much like the tweeter, which was of 0.75" dome design. A super tweeter served to extend the upper frequency band using piezo technology. With the exception of the woofer, all drivers were held freely suspended by metal brackets and radiated both towards the front and the speaker's open back. A 5-way crossover made sure that each driver only played a limited frequency band and cut off from mid-bass to super tweeter at 400, 1000, 6000, 12000Hz, respectively. The crossover components played such an important part in the Dahlquist’s overall performance that there were many specialists in the market offering upgrades.
The Dahlquist was rated at 8 Ohms and appeared to be easy to drive, and yet, the phased array design required lots of clean power from the amplifier to sound at its best. 150-200 watts paired with high-current ability went down well with the DQ10. In many ways, its demand for power and its overall performance were similar to Martin Logan, Magnepan, etc. speakers that were of electrostatic or magnetostatic design. The positive aspect was that the DQ10 was also able to compete in this range and that the investment into a decent amp was poised to be rewarding. I hooked the Dahlquist up to our Hafler XL-280 power amplifier to satisfactory result, however, Luigi was quick to assure me that the large Audio Research D-115 tube amplifier (which I had already returned to him) would have been able to bring out even greater effortlessness and transparency in the DQ10. This was well possible, as the Dahlquist liked to be driven a little harder to achieve greater musical coherence.
Although the speaker was positioned relatively low for many seating arrangements, its height became less of an issue when sitting further away from the speakers. Generous distance to the speakers was essential to minimise phase differences resulting from the spacious array design. In our less than perfect listening room under the roof, I was sitting just two meters from the speakers with a huge space opening behind me. I was positively surprised by how full and consistently lush they sounded, both in my listening position and when walking across the room. The DQ10 produced a spacious, intense, and full soundstage that was in many ways similar to a live-event. The thumping of the mid-bass, the space between instruments, and its timbre when playing Jazz and Vocal Jazz resembled the sensation of being at a dingy small-club concert. The speakers produced the most realistic audience clapping that I had ever heard coming from a two-way system. The highs were detailed and spread out as you would expect from an electrostatic speaker and they were non-aggressive at all times. Voices were affectionate and full with a slight leaning towards throaty.
Also see: Dahlquist DQ10 Audio Demo
If you like your music to sound lush with rich harmonics, and if you enjoy full-bodied vocals and a live-feel when playing music from acoustic instruments to be found in Jazz, Folk, Singer-Songwriter, etc., and if you own a beefy high-current amp to pair them with, the Dahlquist DQ10s just might be the right speakers for you. Give them a bit of time to settle in and some space to breathe on all sides, and they will make music for you like few other loudspeakers today. And let's not forget the wife acceptance factor, of course.
Specifications
- Type: 5-way phased array, open baffle
- Frequency response: 35 Hz — 27,000 Hz
- Recommended amplification: 150 to 200 Watts
- Crossover frequencies: 400, 1000, 6000, 12000 Hz
- Nominal impedance: 8 Ohms
- Bass: 1 x 25,4cm (cone)
- Mid-bass: 1 x 12,7cm (cone)
- Midrange: 1 x 4,45cm (soft dome)
- Tweeter: 1 x 1,9cm dome
- Super Tweeter: 1 x piezoelectric
- Dimensions: (h) 99cm x (w) 77cm x (d) 33cm
- Weight: 22,7 kg
- Years: 1973-1988
Duevel Bella Luna

Published: 08/05/2023
Manufacturing date: 1999
Author: Karsten Hein
Category: Gear & Review
Tag(s): Loudspeakers
As human beings, we are natural collectors of information and ultimately become the medium through which this information is digested and passed on. This is especially true for those of us who, against all odds, have nurtured the childhood urge to explore. The reward is often little more than a brief and fleeting moment of enlightenment, a story to tell and perhaps a few bruises to heal. And the exploration is always incidental. Just when we think we have it figured out, it lights up, jumps sideways and makes its way across the paddock. Imagination, which is exploration, is an ever-elusive beast, and what is to be gained can therefore be little more than a relative aspect of truth. After all, who knows what will come next.
My background in sound exploration had brought me into contact with Alexi, who was eager to have his omni-directional Duevel Planet speakers reviewed. Pleased with my article, Alexi's colleague Michael asked me to review his Teufel M200 loudspeakers. On the day I returned the Teufels to Michael, I was introduced to Matthias, who had brought along his Devialet amplifier for a listening test. Looking at the way Matthias connected the amplifier to his MIT speaker cables and experiencing the sonic improvement the amplifier brought to the equation that is music, I was curious to see what else Matthias had in store. It turned out that he owned a pair of Duevel Bella Luna Diamante speakers. Now... Alexi had already told me about them.
The four of us made an appointment to test Matthias’ setup at his house a few weeks later. As it turned out, the Duevels were mostly stored in some private room most of the time and had to be brought out into the living room for the occasion. As setting up loudspeakers properly can be quite tricky, Matthias asked for some time to complete the project. In the meantime, I was looking forward to experiencing the combination of the large and lush-sounding Devialet amplifier with the majestic Bella Lunas. I was therefore prepared to accept that good things come to those who put in the time. Waiting, by the way, is an important skill for any explorer.
On the day we were summoned for the audition, we found the Bella Lunas positioned down the long walls of a deep and narrow living room. Three chairs were placed near the centre of the room with the speakers forming an equilateral triangle with the listening position, roughly in the lower third of the room. This meant there was plenty of space behind the speakers. The HiFi rack and system had been set up to one side behind the loudspeakers with the MIT Terminator 5 cables of 3.60m length easily reaching both channels and forming a long-sweeping curve towards the farther of the two speakers. I could see that Matthias had given some thought to the decoupling of his Bella Lunas and had decided on a combination of 3cm thick 40x40cm wide granite slabs coupled with dedicated speaker coasters made of high-grade steel and acoustic beads for a solid stand and effective vibration cancellation.
The latter had obviously also played a role in Matthias’ choice of audio rack. Finite Elemente of Brilon, Germany, had designed their legendary ‘Spider’, a versatile rack system that could be adjusted to accommodate many sizes of HiFi equipment and provided excellent cancellation of mechanical vibrations, both from the floor of the room and from the other devices inside the rack. The Spider rack housed (from top to bottom) a Thorens TD 320 MK II turntable with Ortofon Vero MC cartridge and an improved linear power supply, and a Pro-Ject CD Box RS transport paired with one Power Box RS Uni 1-way supply. A shiny silver Devialet D-Premier served as DAC and power amplifier. Matthias explained that this Devialet D-Premier, the first amplifier ever made by Devialet, had been technically upgraded to the specs of an Expert 250.
All cables presented were of carefully selected audio quality. For example, a Mogami Neglex 2549 microphone cable was used between the turntable and the Devialet, and a 110 Ohms Inakustik Exzellenz XLR cable was used for the CD transport. Matthias also used a MacBook Air M1 running Audirvana and Qobuz to stream music to the amplifier. It was obvious that this system had been set up with great care, and during the listening tests that followed, it never occurred to me that there was anything amiss that the use of a different cable or a more capable rack could have fixed.
As we began with our listening exploration, Alexi and Michael were kind enough to offer me the chair that was in the centre of the room and in the musical sweet spot. Michael sat on the opposite side of the room, behind the speakers and facing us. I closed my eyes to better concentrate on the music. Right from the start, I could hear that there were, indeed, large speakers playing in the room. They confirmed the tonal balance I had already enjoyed on Alexi’s Planets. Duevel speakers do not just hint at bass, they fully execute it, with attack and decay just like an instrument would. The Devialet Expert 250 added an extra layer of control to the music that, on lesser speakers and in smaller rooms, had sometimes been described as too much. However, in the few setups I have heard the Devialet, I have always found it to be one of the best-performing amplifiers I have ever heard.
After about two minutes of listening, I noticed a slight horn-like curvature in the midrange which surprised me. Could the open horn design of the Duevels produce some characteristic compression of the midrange, or was it perhaps the specific distance from the walls that produced this effect? As my eyes were scanning the room, I noticed that the MIT loudspeaker cable of the rear channel was laid out to cross itself and one of the power cables. There were also two power cables crossing behind the rack. I asked Matthias to help me free the cables and was relieved to find that the initial compression had disappeared and did not reappear for the rest of our session. It was yet another reminder of the absolutely sensitivity of the music signals passing between the components of a system.
Given the choice between the Pro-Ject CD transport and the MacBook M1, I surprisingly preferred the MacBook with Audirvana and Qobuz. The Pro-Ject had a much sharper top end and seemed less balanced and musical. It is possible that this verdict was the result of the pairing of two powerful and analytical components. However, the exact reason for the harshness was difficult for me to judge in the time available. To my ears, the Thorens TD 320 MK II turntable with Ortofon Vero MC cartridge sounded more pleasing and musical and, for a turntable, was extremely well-behaved. I would have expected nothing less from Matthias. On the other hand, vinyl did not offer the impressive dynamics of the M1 laptop. Hence, we decided to play mostly music from the Mac that afternoon.
Paired with a capable amplifier, such as the Devialet Expert 250, the Duevel Bella Luna had the potential to amaze. Although the room layout and furnishings were less than ideal, and only one of us could sit in the sweet spot at a time, the speakers offered a high degree of lifelike imaging and balanced tonality throughout. The levels of bass, midrange, and treble seemed just right for the occasion. Their ability to present plenty of musical detail quickly exposed the Devialet amplifier's digital SAM speaker optimisation software. Although SAM was said to correct bass performance right up to 150 Hz, it also took some of the realism of the vocal frequencies, leaving us hungry for the ugly truth rather than the artificially flattened curve. The timbre of instruments and the occasional traces of hesitation in vocals were naturally preserved by the Duevels, making for an entertaining and engaging listening experience throughout the afternoon.
With the possible exception of our Martin Logan electrostatic speakers and the elusive Snell C4, perhaps, the Duevels played more flawlessly than most of the loudspeakers I had heard, and they were able to do so without sacrificing homogeneity for the sake of detail where the source material allowed. Like all good speakers, the Bella Luna benefited from careful positioning in the room and from impeccable source material and amplification. When paired with aggressive sounding equipment or material, they were only too happy to follow suit. Given their size, they benefited from larger rooms and some distance from the walls. And although omnidirectional speakers were more forgiving with respect to the listening position, the apex of the stereo triangle remained by far the best spot for listening.
To preserve the afternoon’s exploration for posterity, Alexi, Michael, and Matthias allowed me to make a recording of the setup. The material chosen for the recording was Seal’s CD album Best 1991 - 2004 and the acoustic version of ‘Killer’.
< Horn Milling Process | Audio Test Sample >
Specifications
- Type: floor-standing 2-way loudspeaker
- Design: omnidirectional, vented cabinet
- Frequency response (±3dB): 40 Hz - 23,000 Hz
- Power handling (RMS): 150 watts
- High-frequency driver: 4,4cm titanium dome tweeter, horn-loaded
- Midrange-to-bass driver: 22cm dynamic, kevlar diaphragm
- Woofer specifics: die-cast chassis, M-roll surround
- Diameter of horn diffusors: 280mm
- Gap between diffusors: 47mm
- Crossover frequency: N.N.
- Crossover design: phase-linear
- Power sensitivity (SPL): 91 dB
- Nominal impedance: 6 Ohms
- Dimensions: (H) 1050mm x (W) 325mm x (D) 325mm
- Weight: 30 kg
- Country of manufacture: Germany
- Year(s): 1999 - 2023
Duevel Jupiter, Series-1
Published: 12/05/2024
Manufacturing date: 1998
Author: Karsten Hein
Category: Gear & Review
Tag(s): Loudspeakers
A Personal Journey
Matthias was not the one to take decisions lightly. His background in electronic engineering, paired with extensive reading and long-time experience in setting up HiFi equipment, had granted him a sophisticated setup, and his exploration of new devices seemed complete for the time being. Instead, he had once again shifted his focus towards the music itself and was happily listening on his Devialet Expert 250 amplifier paired with Duevel Bella Luna loudspeakers. The Devialet was a modern and hybrid device with internal DAC, built-in room correction, versatile connectivity, and a cleverly designed 250 Watts per channel output stage that was fed from a digital power supply, capable of producing bursts of up to 4000 Watts, all at generally very low noise levels. This amplifier made the Bella Lunas present all kinds of music with great ease. And such was also my very positive verdict following my visit to Matthias’ house back in May 2023.
In Spring 2024, less than a year after my visit, Matthias informed me that he was contemplating upgrading from his accustomed Bella Luna loudspeakers to Duevel’s flagship of that period, the Jupiter. He explained that these speakers had once been completely unaffordable and that they had dropped in price over a 25-year period, thereby becoming quite attractive. And although used specimens of these speakers were rarely found, a pair of Jupiters was being offered within comfortable reach. Matthias was facing a dilemma because, on the one hand, he really was satisfied with his Bella Lunas, while the larger and more elaborate Jupiter, on the other hand, held the promise of being even more capable in every conceivable way. As I was listening to Matthias contemplating if he were to take this leap of faith, I could feel the tingling sensation that captivates me before each new exploration and has led to the birth of this blog. And so I simply told him that, if he took the plunge, I would come and write about it.
Jupiter vs. Bella Luna
Matthias auditioned the Jupiter at their seller’s house twice before making his decision. On the second occasion, he even brought his Devialet amplifier and his preferred loudspeaker cables along to see if this would bring the Jupiters to life. Happy with the result, he wrapped them in blankets and drove them back to his house with anticipation. Positioned side by side, the Jupiters dwarfed the already quite impressive Bella Lunas to an unanticipated extent. Being 22 cm taller and 10 cm wider appeared less significant on paper than in real life. The one aspect that might have given this considerable difference away was the increase in weight: from the still moderate 30kg on each Bella Luna to the impressive 70kg on each of the Jupiters. One benefit of the larger cabinet was a 10 Hertz drop in the lower cut-off frequency, down to 30 Hz. While Matthias was getting used to the Jupiters’ dimensions in his living room, he critically listened to them, until his doubts subsided and he finally put his Bella Lunas on sale.
Duevel loudspeakers are niche products and therefore not necessarily easy to sell. However, we decided to put the terms “omnidirectional” and “high end” in the advertisement header and soon managed to find a new home for them. There are fan communities for omnidirectional speakers, because some audiophiles believe that dipoles and omnidirectional speakers are the only means by which the authentic sound stage can be recreated in the listening room. Both the Bella Lunas and the Jupiters are omnidirectional 2-way speakers that have their drivers placed in horizontal position and employ wooden horn diffusers to disperse the sound in a 365-degree radius. While both speakers use an up-firing dynamic bass driver with die-cast chassis and M-roll surrounds, the Jupiters employ a high-output PA driver with paper cone that is 10 cm larger in diameter than that of the Bella Lunas.
The Listening Session
To match the performance of the larger bass driver, the tweeter section of the Jupiter needs to be much larger (10cm instead of 4.4cm) and must reach much lower as well. As a consequence, the Jupiter’s treble drops off 3,000 Hz earlier, at 20,000 Hz. And although this is already well outside most people’s hearing, the Jupiter’s treble shows greater sensitivity to subtle changes in the front end, the interconnects, and the choice of speaker cables. Both cabinets are designed to operate on the principle of a Helmholtz resonator, using one bass-reflex port calculated to the lowest cut-off frequency in each of the four cabinet corners. Strong internal bracing assures that the bass is dry and without much internal reverberation, even when the speakers are driven at high volume. The high and low frequency drivers of the Jupiter taken together contribute almost 20kg in weight to each speaker.
Matthias and I arranged a listening session for mid-May, right about the time I had first listened to the Bella Lunas one year earlier. We also invited Michael and Alexi, who had been with us on the first occasion; however, only Michael managed to free himself up for the event. Instead of two studio mics for the creation of a YouTube clip, this time, I brought along a calibrated UMIK-1 microphone and R.E.W. room analysis software on my MacBook to assist Matthias with the setup and positioning of the speakers. When I arrived in the early evening, I found the Jupiters standing at equal distance near the left and right walls of a relatively narrow but very deep living room. In this position, there was about 1/5 of space behind the speakers and about 4/5 towards the front. Their approximate position had been determined based on my calculation sheets on room modes that had been given to me by Peter English.
Quite a few things had changed since my last visit to the house: Matthias had covered the large terrace windows behind the Jupiters with drapes. The hardwood floor from the speakers towards the listening position was now covered with two rugs. The Devialet amplifier had been moved to a central position between the loudspeakers, and Matthias’ MacBook M1 (running Audirvana and Qobuz) was the only source for music. Two sets of speaker cables were running along the walls right up to the amplifier: The first cable was a DIY design braiding three solid-core CAT7 network cables AWG23 with two CAT7 multi-strands AWG26. And the second was a ready-made “White Bird - Reference” cable by Colours of Sound that was on loan from the manufacturer himself. To enhance the scope of our test, we also had an MIT “Terminator” (previously used on the Bella Lunas) and a Sommer Cable “Elephant” at our disposal.
Three chairs were positioned side by side, with the preferred listening position being the chair at the centre, and we took turns listening from all three positions and also tried kneeling in front or standing behind the central chair to get a better feel for the acoustics of the room. My personal preference would have been for the central chair to be moved a few centimetres forward, which produced greater speed and more detail, whereas Matthias preferred to keep the chairs in their current position for greater musical coherence. We started our listening session with the CAT7 network cables in place, playing Halie Loren’s title “Whiter Shade of Pale”, which was performed Live at the Cotton Club, and it quickly became clear that the Jupiters really could and were eager to move some air.
Performance and Impressions
After all, these speakers were built to handle up to 200 Watts of power coming from the amplifier, and their drivers, although quite sensitive even at one watt, were of sturdy build quality by nature. To be able to present their most linear performance, especially the dynamic bass driver required some momentum. The closer we got to realistic-to-live listening volumes, the more the speakers started to carry the sensation of live music. Their ability to faithfully play back frequencies all the way down to 30 Hz certainly enhanced this acoustic effect. The Jupiters’ omnidirectional horns created a deep soundstage that extended well beyond the speakers, right up to the front wall of the room. In our setup, the Jupiters had to be positioned quite close to the side walls which led to a mild blurriness of the phantom center. The amount of musical detail presented was sufficient but not staggering. It was just enough for the music to sound natural.
From the Planets to the Bella Luna, I have found a full and natural tonal balance to be the typical character trait of Duevel loudspeakers, and the Jupiters were no different in this respect. Due to this, it was possible to listen at higher volumes without fatigue. Further tracks included “Another Night” by Cody High and “Smoke on the water” Live in Osaka, 1972, by Deep Purple. I found that the Jupiters presented the quality of each recording well and also pointed out the limits. However, they equally served to highlight some unresolved issues in the setup and room. For one thing, the vertical motion of the woofer set the floorboards underneath the speakers in motion despite their colossal weight. This led to an unpleasant resonance in some songs. Matthias had used stone bases as a counter measure underneath the Bella Lunas. However, these proved to be too small in diameter for the Jupiters.
Matching Speakers and Cables
We also discovered that the Jupiters had not yet been set up to perform in a highly linear fashion. Measurements conducted with the UMIK-1 microphone in proximity to the listening position soon confirmed a 6dB drop in sound pressure levels between 80 and 180 Hz. While this effect might have served to enhance acoustic clarity, it also made these large speakers sound slower and less dynamic than would otherwise have been the case. I have sometimes found that larger drivers serve to accentuate room modes and resonances and demand more attention from their owners in terms of proper placement. Matthias was still getting to know his speakers, of course, and was learning how to best handle them from each new listening session.
Changing from the braided DIY CAT7 network cables over to the White Bird - Reference produced a more homogenous listening experience with a fuller bass at the cost of musical detail. Although our UMIK-1 frequency sweep measurements still showed the dip between 80 and 180 Hz, music is a complex occurrence that is difficult analyse when recording the response to a single frequency at a time. I enjoyed the increase in coherence, but I could see that Matthias remained reluctant to sacrifice the more revealing treble. Micheal agreed that the difference between these cables was so enormous that each of them presented a compromise, and so we decided to open up our test to include further cables.
Sommer Cable's “Elephant” proved to be a step back in many ways. It was less informative than both the CAT7 and the White Bird; it did not express tonal colours in a sufficiently vivid way, and transients were sorely lacking, although it did present low bass lines in a manner comparable to the White Bird. Given the sum of its character traits, Sommer’s Elephant cable could perhaps be a match for HiFi systems with an aggressive treble, however, it did feel out of place with the Jupiters. The MIT “Terminator” sounded more solid than any of the other cables. It presented the music in warm tonal colours and always with a bit of aristocratic restraint. There was a prevalent sense of order that would go well with a relaxing gala dinner or an evening in a cigar lounge. In comparison to the White Bird, it lacked some of the initial excitement, and, in comparison with the CAT7, the music seemed less forward and insightful with a reduction in stage depth and width.
Perspectives for Improvements
Further song titles we listened to in our session included “Nite Mist Blues” recorded Live at the Montreux Festival and performed by The Monty Alexander Trio; a further live recording “Empire State Express” by Richard Bargel; “Friday Smile” by Yello; “King of a Land” by Cat Stevens; and “Acoustic” by Billy Raffoul. Each song served to highlight different strengths and weaknesses of the current setup, and, in our minds, we compared the sound of the songs to the various HiFi systems we had heard before. For instance, I had listened to “Empire State Express” played on a Symphonic Line system with Görlich chassis just a few days earlier and vividly remembered the many layers of bass dynamics in this song. This effect did not show as much with the Jupiters while placed in their current position. I also remembered listening to “King of a Land” via our Martin Logan SL3 electrostatic speakers, with Cat Stevens coming alive almost “visually” right at the center of the stage, his voice felt so intimate one might think the artist was physically present in the room. Clearly, each loudspeaker has its own special field of expertise, but with the Jupiters I could sense that there was still a lot of potential waiting to be unleashed.
We all agreed that putting the speakers on stone slabs would enhance their imaging and help to reduce sub floor vibrations. These slabs would need to be of considerable size to accommodate the immense weight of the Duevels. Felt cushions underneath the stone slabs might be beneficial in further reducing the existing coupling to the ground. The speakers still needed to find their preferred position in the room, and Matthias and I agreed that it would be best to recalculate the exact distances, this time also taking into account some of the furniture in the room. Matthias also wanted to see if he could improve his DIY cable design by optimising the number of solid-core and multi-stand wires. We all liked the CAT7 cables and were eager to see how they would improve. By designing the cables himself, Matthias could learn more about the amplifier, his new speakers and the room.
The Devialet amp also offered built in SAM room compensation, however we had learned from past experience that the best sound was to be achieved if the speakers were positioned correctly in the first place. Like all great speakers, the Jupiters will force their owners to learn more about room acoustics and electronics in an effort to reach perfection. And it takes the heart of a true explorer to appreciate this challenge.
— Thank you for giving me the chance to write about it.
Specifications
- Type: floor-standing 2-way loudspeaker
- Design: omnidirectional, vented cabinet
- Frequency response (±3dB): 30 Hz - 20,000 Hz
- Power handling (RMS): 200 Watts (300 Watts, Series-2)
- High-frequency driver: 10cm titanium dome tweeter, horn-loaded
- Low-frequency driver: 32cm dynamic, paper diaphragm
- Woofer specifics: die-cast chassis, M-roll surround
- Diameter of horn diffusors: 385mm
- Gap between diffusors: 85mm
- Crossover frequency: 700 Hz
- Crossover design: phase-linear
- Power sensitivity (SPL): 92 dB (93 dB, Series-2)
- Nominal impedance: 6 Ohms
- Cabinet Dimensions: (H) 1270mm x (W) 380mm x (D) 380mm
- Base Dimensions: (W) 420mm x (D) 420mm
- Weight: 70 kg
- Country of manufacture: Germany
- Year(s): 1998 - 2008
Duevel Planets

Published: 17/11/2022
Manufacturing date: 2012
Author: Karsten Hein
Category: Gear & Review
Tag(s): Loudspeakers
When I first met Alexi, this was during our role as fathers of elementary school children. However, it did not take long before we discovered our mutual interest in home audio equipment. I was intrigued by the fact that he was a seasoned technician in electronics who had preserved the heart of an explorer and did not, on principle, object to the significance of interconnects. As I found out, he even ran a pair of single-wired Kimber cables from his NAD streamer amplifier to his speakers. From this combination, I took it that there was likely to be some room for meaningful conversation.
As it turned out, Alexi's speakers were a pair of smallish-looking omnidirectional 2-way towers with down-firing bass ports. They had the words ‘Duevel Planets’ printed on them and each cabinet held two shiny spheres suspended above its upwards-pointing drivers. The woofer-to-midrange driver featured a kevlar diaphragm, whereas the soft-dome tweeter was recessed behind a horn construction. The otherwise non-frills cabinet had a clean anthracite colour coating and was raised 40mm off the ground by four rubber absorbers. These also served as acoustic decoupling from the floor.
However, no matter how long I looked and pondered over the design, I did not have the faintest idea of what to expect from these speakers, especially, because they came from a small German manufacturer of whom I had never heard. Alexi informed me that Duevel was the founder’s family name and that the Lower-Saxony-based company specialised in building omnidirectional loudspeakers, most of which were larger and also heavier than the Planets. He further told me that the Duevel Planets had been praised as unrivalled in the sub-1,000 EUR category, and performed near the level of this manufacturer’s far more expensive models. I was hard-pressed to believe this account and fully expected their sound signature to resemble their physical appearance: small, airy, slightly metallic and tonally thin, perhaps.
When Alexi first started his convenient NAD streamer amplifier, my impression was that the music sounded a little thin and disorganised. I had trouble discerning an accurate center stage image but could also see that the distances from the speakers to the front wall and the distance between the speakers and the listening position were not the same for both channels. The speakers had clearly not been set up taking into account the specific resonance frequencies resulting from the room's dimensions. Although the NAD amplifier offered on-board software for room-adaptation as well as a microphone for calibration, this feature had not yet been fully employed. The random overlapping of frequencies and heavy smearing of running times I could have easily taken as confirmation of my suspicions towards the design.
I spoke to Alexi about my concerns regarding the positioning of his speakers in the listening room and also offered to lend him a power amplifier from my stock in order to test his speakers with this. However, we agreed to first swap loudspeakers for a few days: He would get my Tannoy XT8F, while I would audition his Duevel Planets. At the time, I thought that he was getting the better deal for sure, but I think we were both excited to get new insights and gather experience with different loudspeaker designs. As it turned out, dragging the large and heavy Tannoys over to Alexi’s house in our children’s handcart proved to be quite a challenge, whereas the eleven kilo Duevels could easily be carried and pulled over to our house. This was the Duevels' first obvious benefit.
We decided to set his Planets up in our upstairs listening room, which was of considerable size and had slanted walls that helped to deflect some of the reverberations. The Duevels were going to replace a pair of Epicure EPI 500 that had been my favourite speakers due to their natural bass and tonality for some time. We gave the Epicures a final audition, playing tracks from 2Cellos, Diana Krall, and Norah Jones and then placed Alexi’s Planets in the exact same position. We played the same tracks again and were both more than a little surprised at how tonally similar the Planets sounded. Alexi remarked that the Duevels had slightly sharper imaging than the Epicure, and I noticed a mild leaning towards analytical and technical sound on the side of the Duevels.
In this first position, the Planets were positioned directly on our hardwood floor with one meter distance kept between the bass driver's central axis and the room’s front wall. Happy with the findings of our first listening session, Alexi and I parted ways. Over the next few days, I came back to the Planets to experiment with different placement options. I noticed that bass response and depth of soundstage strongly depended on the triangular relation between the speakers, the room’s front wall, and the listening position. And although I did realise that this was the case with all speakers, the effects seemed more pronounced due to the omnidirectional nature of the design. The front wall became an integral part of the listening experience, and differences in shape, texture, and firmness of that wall would have an effect on how the music sounded.
Bass became stronger as I moved the Duevels closer to the front wall. I found that imaging stayed remarkably sharp until about 50cm distance. Whereas at one meter wall distance I had been lacking bass punch and the lower frequencies of vocals, the speakers sounded tonally richer and fuller when nearer to the wall. Of course, the wall distance will affect room resonances and bass modes relative to the seating position, and I was glad to see bass increasing again once the speakers were positioned further than one meter from the front wall. In one instance, I moved the Planets to a position half-way between myself and the listening position and was pleased with the immense depth of stage I was experiencing.
Judging from their looks alone, I would have thought that the upward thrust of the drivers paired with the two spheres would make the Planets susceptible to imbalances caused by the room dimensions. In our upstairs listening room with slanted walls, the left speaker only had about 50 cm of air above, whereas the right one had about three meters of empty space above it and also plenty of room to the right. However, my concerns were unfounded, because the spheres served as fixed points of first reflection, radiating the sound around the speaker rather than up. As a consequence, the Duevels sounded just as balanced as all the loudspeakers I had auditioned before them. If anything, the center image felt more natural.
As I was still feeling a little bothered by the Planets’ accurate and technical sound, I experimented with pads and carpets that I placed under the speakers. This helped shift the balance from listening to the character of a microphone towards hearing the voice of a human singing. I would suspect that the best option would have been to place a thick board underneath the speakers and to decouple this via felt pads. But since the Planets were not mine, I did not want to make the investment. Instead, I achieved good results by placing felt pads or floor matts underneath the four feet. Either way, the speakers benefitted from some form of additional decoupling from the hardwood floor. The floor matts had the advantage of keeping the bass reflex at the prescribed distance.
I found that the Duevels were capable of creating a naturally-sounding sound stage that was both deep and wide. This impression grew stronger with increased distance to the room wall. Given their relatively small size and shape, however, placing these speakers midway towards the listening position would make them stumbling blocks in most listening rooms, exposing them to the risk of being toppled over to one side. Their more monumental brothers and sisters, on the other hand, would present more obvious obstacles and also resist the occasional collision without the immediate risk of damage. This could be worth a consideration when deciding to make a purchase.
At the correct relative distance to the wall and seating position, the Duevels produced a tonally correct sound that was neither thin nor boomy. Vocals sounded clean, open, and realistic once the correct coupling towards the floor had been achieved. Imaging was surprisingly sharp for an omnidirectional speaker system, and the developers Annette and Markus Duevel were obviously in control of the relevant acoustic dimensions when they designed these speakers. I was surprised by the accurate phantom center despite the uneven layout of the room. And I was even more astonished by the persistent stage effect as I was walking through the room. Similar to a living room concert—and we have had some of those—the stage did not change position. It seemed as if the Jazz combo was still playing in the exact same position, no matter from where in the 70 sqm room I was listening.
From the listening impression alone, it was difficult to believe that the Planets were entry-level speakers that had been sold for under 1,000 EUR. With my eyes closed, I would have assumed that I was listening to far taller speakers with a heftier price tag. With the eyes open, there were some indicators that the price was perhaps justified. Inspecting the Planets from the floor upwards, I first stumbled over the affordable-looking rubber feet that kept the speakers suspended without the addition of a defined base plate with spikes towards the ground. The binding posts, too, were designed to only take one set of bananas or spades without the option of bi-wiring. Given the limited mass of the woofer, I did not feel that there was need for bi-wiring, however, the absence of this option did not strike me as state-of-the-art.
The cabinet itself was a simple box of medium density fibre that had been neatly colour coated. Although my wife rather liked the look, I would have preferred a more reassuring instrument-like appearance using real wood veneer. The font and style of the lettering did not exactly scream High End design, either. Instead of well-seasoned and sophisticated, these speakers looked young and cool. And this coolness-factor was further accentuated by the two seemingly cold spheres hanging suspended above the drivers. Since both of the drivers were pointing upward, keeping them clear of dust might prove to be a challenge. The mouth of the tweeter’s horn had a metal grille to protect it from children’s fingers, however dust and cleaning liquids passing the grille would remain out of reach. Non of this, however, appeared to have been an issue on my test specimens that still looked clean and in great shape. Perhaps a testament to Alexi’s good care.
In my listening tests, I enjoyed how the Planets maintained stage size and instrument location. The fact that some of the music was reflected upward gave string instruments a life-like appearance. The speakers did not betray their position nor the materials used on the cabinet or spheres. They did not sound wooden, boxy, or metallic. Even in our large listening room, playing music at volumes of between 60 and 80 dB was possible without audible compression (measured from the listening position). Duevel rated the Planets at 50 watts RMS per channel, and our Dynavox VR-70 tube amplifier had no difficulties driving them. Low-bass presentation was sufficient and even surprising given their size. I could not detect any phase issues, and their timing was excellent. Rated at 85 dB (1W / 1m), the Planets would benefit from large amplifiers despite their relatively low power tolerance.
Although I could not find any information on frequency response, the thought that anything was off or amiss never once crossed my mind while listening to them. Sonically, the Planets were close to some well-regarded classic speakers and did not follow the path of so many modern showroom squeakers. Astonishingly, this character remained largely in tact when walking though the room. On very rare occasions, I missed the piercing power and attack of piano keys, especially when the Planets were standing further away from the wall. And I did notice that the full extent of tonal balance needed at least 60 dB of volume. Below this, the treble seemed slightly dominant. This did play a role at least once when we had guests for dinner, and I was looking for some mild background entertainment. In this scenario, I would have wished for stonger bass foundation to support tonality.
I never played music at volumes where the size of the woofer seemed to matter. And after listening to Jazz albums by Diana Krall, Helge Lien Trio, and Jamie Saft (among others), I was pleasantly surprised how well the Duevels played Jörg Hegemann’s fast and furiously dynamic CD album “High End Boogie Woogie” that included some wonderful double bass runs. Due to their omnidirectional characteristics, experiencing the music with friends and sharing a similar experience, all at the same time, was possible for the first time. Audiophiles will agree that sharing the pleasure of listening is often a challenge, because, given the narrow sweet spot, we can only guess what the other person is hearing.
While a sceptic at first, I could see that omnidirectional loudspeakers such as Alexi’s Duevel Planets had a deserved place in the heart of HiFi enthusiasts. Given Annette and Markus’ command of this technology, it was fair to say that the Planets shared some highly audiophile characteristics and were fun and easy to listen to over extended periods of time. Omnidirectional speakers had the potential to create a more natural stage that maintained its realism in many positions of the room. For those of us who prefered to listen to acoustic instruments played by small combos, these speakers provided the perfect setting. As all audiophile speakers, the planets had been designed to perform best at living room volumes. Any deviation from this (be it higher or lower) would produce less-than-ideal results.
For my part, I decided to hold on to the Planets for a few more days and enjoying the music before returning them to their rightful owner. I was also looking forward to helping Alexi in calibrating his own NAD system to his listening room, first with my Tannoys and then with his Duevels. I now knew that they were well worth the fuss.
Test system: Marantz CD-17 via HiViLux Reference SP/DIF cable on Cambridge DAC Magic 100 via HBS Silver Solid-Core Interconnect on Dynavox VR-70 via Belden 9497 in Y-wiring on the loudspeakers
Specifications
- Type: floor-standing 2-way loudspeaker
- Design: omnidirectional, vented cabinet
- Frequency response: N.N.
- Power handling (RMS): 50 watts
- High-frequency driver: soft-dome tweeter, horn-loaded
- Midrange-to-bass driver: dynamic, kevlar diaphragm
- Diameter of spheres: 98mm and 58mm
- Distance between spheres: 48mm
- Crossover frequency: 4,100 Hz
- Power sensitivity: 85 dB
- Nominal impedance: 4 Ohms
- Dimensions: (H) 840mm x (W) 260mm x (D) 156 mm
- Weight: 11 kg
- Country of manufacture: Germany
- Year(s): 2012
Echle RR25-16

Published: 02/06/2023
Manufacturing date: 2002
Author: Karsten Hein
Category: Gear & Review
Tag(s): Loudspeakers
Shortly after the turn of the century, some twenty years ago, the audio technician and car-Hifi store owner, Winfried Echle, came across the review of a Dynamic 16cm bass-to-midrange driver with Kevlar diaphragm when leafing through one of the last issues ever printed of the German electronics magazine ‘Funkschau’. The chassis was made in Thailand and, as it turned out, was difficult to obtain from a German supplier. This prompted Winfried to contact the Thai embassy in Frankfurt to establish direct contact with the producer in Thailand. When he finally received a response, it was to inform him that the minimum order quantity was at 100 pieces. Winfried took a deep breath and made the purchase. “I was feeling put under pressure, but what I should have done, would have been to place an order for 200 units instead.” he told me laughingly, “How could I have foreseen how successful these little drivers would become.”
His first serious bookshelf-size loudspeaker was of a two-way design, with a front-ventilated bass port that was placed in one corner right next to the tweeter. The passive crossover cut the tweeter off at 1,500 Hz and at a 6dB slope per octave. Early models featured a 2.5cm Peerless soft-dome tweeter, which Winfried ended up replacing with a Vifa XT-300/K4 ring radiator on later models. The ring radiator did not play as loud as the soft-dome tweeter, but it introduced a new sweetness to the sound and offered a more pleasant drop-off in the treble. The crossover parts, internal wiring, and wire terminals were of a high quality, and the pass port was fine-tuned to be as linear as possible, preferring tight control to the usual 60 Hz hump. Winfried spent some time listening, measuring, and adjusting the crossover parts and bass port until he was pleased with the result.
Showing his new prototype speakers to friends and visitors to his shop, some of whom were industry specialists themselves, Winfried received excellent feedback on his design and ended up selling over one hundred of these bookshelf speakers. In fact, he sold more speakers in the given price category than the local HiFi shop did at the same time. To the owner of the HiFi shop, this did not come as much of a surprise, as Winfried’s unique price-performance ratio even impressed his friends at Hessischer Rundfunk who bought two pairs of speakers for proper installation in their broadcast vehicles. But, was this just a lucky punch, or a replicable show of skills? Listening to the story made me curious, and I just had to find out for myself.
Ever since hearing about his monitor speakers for the first time, I was tempted to take them home with me for a trial run. But it was not until our impending relocation from Frankfurt am Main to Marne, Schleswig-Holstein, and when our weekly meetings in Aschaffenburg were slowly coming to an end, he let me know that he would actually be honoured if I still found the time to write a review. Of course, I did not have to think twice about this and brought along a large Eurobox for transport, into which the pair fit perfectly. On my drive back home, I contemplated which amplifier to test them with and decided that I would go with our Dynavox VR-70 tube amplifier, unless this would prove to be problematic due to some unforseen mismatch in capacitance or resistance.
I gave our EPI 500 floor-standing speakers a good listen and then set up Echle’s bookshelf speakers in that same position. The DIY stands I used had originally been designed for our KEF iQ series speakers, and they were made of sturdy PDF boards perched on spikes with coasters that were in turn placed on felt cushions for decoupling towards the ground. The finished stands weighed about as much as the speakers themselves and gave them a firm position while preserving their ability to sufficiently free themselves from the floor not to excite ghastly resonances. With the Vifa tweeter being mounted off axis, I was puzzled for a bit whether to have the tweeters on the inside towards the listening position or to rather have them on the outside, away from the listening position with the bass port on the inside. I decided to listen to the set with the tweeters on the inside first.
The resulting musical image was accurate yet somewhat thin-sounding. The center image was super sharp, and voices seemed slightly thickened and throaty with an alluring touch. There was lots of bass texture, even if low-bass extension was not great. The speakers performed in a well-behaved manner with a sensible top-end. The midrange was insightful and homogenous. Piano keys sounded warm enough but were lacking some of the treble bite and bass punch. On occasion, I noticed a little time-smear and could sense more than the usual sibilance. Looking at my setup, with the vertical radiation axis of the speakers merging about 50cm behind my head, I could see that I had brought the tweeter coils relatively closer to my ears than the woofer coils.
Since the woofer coils were usually positioned deeper inside the speaker cabinets than the tweeter coils, swapping the left and right speakers to position the treble outward would help to correct this issue by increasing the distance between the tweeter and the ears. The result was less time-smear and sibilance and an increase in stage width. The midrange remained the strong point with accurate tonality. The initial lightness of sound had disappeared. The result was vocal credibility and a kind of no-fuss reporting of musical events. The term understatement came to mind, an impression that was even enhanced by their their ample use of build-depth rather than height or width.
From Nick Cave’s live-album ‘Idiot Prayer’ I then changed to Boris Blank’s studio album ‘Convergence’. I also turned up the volume from Cave’s natural-sounding voice to moderate disco. Boris Blank has been a long-time favourite among tech-minded people, and on its basis the speakers could show their ability to keep the separate layers of samples apart. I was impressed with the insightful positioning of bass-events from left to right and from top to bottom as well as the lack of tweeter aggressiveness I would normally have expected from smallish speakers playing loud music. I did notice, however, that the higher excursion of the woofer of +/- 8mm did lead to to a certain breathiness in the treble. I am not convinced that the Doppler effect would have been as pronounced if the bass port had not also been positioned between the tweeter and the listening position.
I enjoyed listening to these speakers being played loud, especially because their treble was a little more forgiving than on our other models. Michael Patrick Kelly’s live album “ID” came to mind, and the speakers did not disappoint in terms of speed, agility, and, to some extent, even dynamics. The kick drum sounded hard and firm. These loudspeakers would work equally well playing Rock music and Jazz, and that combination was not all too common. Rock music requires for the music to be kept together rather than taken apart, and this was certainly the case.
To round off my exploration, I put on some Norah Jones. “Feels like home” was presented with musky vocals and amber keyboard notes. It sounded at once exciting and spacious as well as refined and well-proportioned. The soft top end that had served so well when playing the speakers louder here resulted in a slight lack of crispness in piano notes. In the end it seemed as though we cannot have it all, or at least not in the still affordable price categories. I wonder, how many of us would get up to tweak the sound coming from a real live event, if we were given the power to do so. As around speakers and for serious listening Winfried’s speakers were certainly able and enjoyable tools. When it came to mixing music and discerning listening, on the other hand, the somewhat relaxed treble presentation might make problems in this area seem less dramatic than they really were. For monitoring vocals, these speaker were truly excellent.
Specifications
- Type: 2-way bookshelf speaker
- Speaker principle: vented cabinet
- Crossover 1,500 Hz (@6dB per octave)
- Application: entertainment, monitoring
- Tweeter: 25mm Vifa XT-300/K4 (Tymphany)
- Tweeter principle: ring radiator
- Bass driver: 16cm dynamic, Kevlar diaphragm
- Dimensions: (H) 320mm, (D) 350mm, (W) 210mm
- Country of manufacture: Germany
- Designer: Winfried Echle
- Year: 2002

Epicure 3.0

Published: 15/10/2022
Manufacturing date: 1978
Author: Karsten Hein
Category: Gear & Review
Tag(s): Loudspeakers
When my good friend Luigi called to say that he had come across a pair of Epicure 3.0 speakers in Berlin, I was at first a bit puzzled why he was telling me this. The German capitol was located five car hours from Frankfurt, and I could not imagine how I might transport two 30kg tower speakers over a distance of 550km in any other way than by driving to Berlin myself. Nevertheless, I thanked Luigi for keeping me posted on new opportunities and said that I might consider these Epicure speakers for review someday. In the days that followed, I did some research on the 3.0 model and became even more interested in listening to them perform. I also remembered that we had good friends in Berlin who just might be spontaneous enough to pick them up for us, until we could find a way of transporting them to Frankfurt.
In a spur of the moment decision, I contacted the seller in Berlin and bought the speakers. That same evening, I wrote to our friend Enrico in Berlin telling him about my purchase and the difficulties involved. Luckily, Enrico said he would be interested in supporting me and the eiaudio project by picking up the speakers. I was relieved to hear this, because I knew that the Epicures would be in good hands with him. As it turned out, Enrico had to drive from Berlin Bernau in the north all the way across town to Steglitz in order to pick them up. To both our surprise, the Epicure were on sale from their original owner and came with all the documents relating to the purchase. The owner himself informed Enrico that he had bought these speakers at a time when he was still a university student, long before starting his career and, later, his own business. He had simply enjoyed listening to them for the greater part of 40 years. That was a good sign, indeed.
Once the Epicure 3.0 were safely stored at Enrico’s house it took me another month or so to find a professional carrier who would pick up the speakers and deliver them to our doorstep, labelled as ‘additional cargo’ as part of a larger delivery. I had found out that the Berlin-based freight company ‘KLTransporte’ organised regular transports between Berlin and Frankfurt that made additional cargo loads possible in most weeks of the year. To assure a safe journey, Enrico wrapped each speaker in multiple layers of bubble foil and indicated the exact positions in which the speakers could be touched and carried. It was due to his mindful preparation and support that the moving company was able to take all necessary precautions and deliver the Epicure 3.0 in one piece. I was truly grateful to all involved for making this new exploration possible.
On the images I had found on the Internet, but also in the photos that Enrico had sent me, it mostly looked as if one side of the Epicures’ truncated pyramid shape was off balance somehow. I am not sure what might have caused this first impression, but unpacking them at our house provided me with affirmation that they were indeed perfectly balanced. And although I had used a folding ruler to check the speakers’ approximate size and position in our room, I was surprised by how monumental and accomplished they looked in real life. The rounded edges, the unconventional pyramid shape, but also the high-quality waxed American walnut surface on all sides suggested that these loudspeakers were not to be taken lightly.
Similar to our EPI 500, the 3.0 were decoupled from the floor by means of a wooden base. But different to the EPI 500, the base itself was decoupled from the floor by means of four scantlings, with one scantling placed in each corner. In my attempts to get the EPI 500 to sound right, I had applied the same method of raising the base with great success and was pleased to see this confirmed. As the speakers of this era were mostly designed to be placed on American living room carpets, I achieved the most natural tonality by placing them on 5x40mm felt pads, sometimes in combination with 8mm thick steel plates. The base itself served to raise the bottom of the cabinet off the floor and allowed for the binding posts to be hidden from sight underneath the speakers, thus contributing to Epicures’ clean look from all around.
For those of us conducting lots of experiments with loudspeakers, the hidden position of the binding posts could become a bit of a nuisance, and I was further surprised to find that the supposedly original G.R. plugs had been upgraded (most likely by the company itself) to more convenient wire clamps that sadly were too puny to accept the hollow beryllium-gold banana plugs of my confectioned Belden speaker cables. In search of a quick solution, I grabbed a disused run of Belden 9497 cables and simply clipped the bananas off at one end. I then slipped the tinned copper Belden wires directly into the clamps. This did the job of connecting the speakers to our Hafler XL280 power amplifier, and, as usual, the initial sound emanating from the speakers proved to be quite horrible. With the cables and speakers having been dormant for many months prior to my purchase and with one end of the cables having freshly been clipped, there was obvious need for homogenisation of materials and perhaps fluids.
Another aspect leading to the at first poor sonic impression was the positioning of the speakers in the listening room. At first, I had simply placed them at the markers that had worked well with our Martin Logan electrostatic speakers, and this was obviously not the perfect position for the Epicure 3.0. In this position, the speakers were standing too far apart, far from the room’s front wall, and toed in towards the listening position. On the Epicures, this placement led to an over-accentuation of treble and lower bass with a complete absence of bass punch. It was clear to me that the room was interacting unfavourably with the speakers, and I was reminded of an Excel spreadsheet that I had received from a fellow audiophile called Peter Englisch. This spreadsheet permitted the calculation of favourable speaker placement positions simply from entering the room dimensions. It seemed that the process of placing the Epicures would present a good opportunity for me to work with this new tool. Based on the dimensions of our main listening room, I received the following values:
Speaker-to-wall distances in centimetres:- Front Wall: 70 / 112 / 252
- Side Wall: 59 / 94 / 212
- Floor-to-Woofer: 35 / 56 / 126
The Front Wall distance was measured from the room’s front wall to the woofer-plain (near the voice coil); the Side Wall distances were measured from the left and right side walls to the centre-axis of the bass drivers, and the Floor-to-Woofer distance was measured from the room’s flooring to the centre-axis of the woofer. Speaking to Peter Englisch about how to best work with the values, I was reminded that, while the front wall distances should be identical between the left and the right channel, the side wall distances should not be the same. The need for different distances between the side walls resulted from the listening position normally being located midway between the speakers. If the speakers were also positioned symmetrically within the room’s walls, the result would be a cancellation of frequencies in the listening position.I ended up with a front wall distance of 70 centimetres (which was 10-30 cm less than I usually positioned our speakers at) and a right channel to wall distance of 94 centimetres. The floor to woofer distance was naturally at about 56 centimetres with the Epicure 3.0. On the left channel I could not quite match the prescribed value, because of a door being in the way. I added round 5mm high and 40mm wide felt pads underneath the four scantlings to decouple the speakers from our hardwood floor for more tonality. The speakers were placed in parallel to the front wall to improve channel separation and bass agility. The Epicure 3.0’s freestanding invert-dome tweeter provided linear frequency response over a super-wide dispersion angle and was said to show variations by 3dB over a 180° angle only. This resulted in the speakers sounding relatively balanced anywhere across the room and even outside the listening room. When standing right next to the speakers or grabbing a cup of coffee from the kitchen, the emanating sound remained natural and balanced, more so than we were otherwise used to.
The Epicure 3.0’s unusually wide dispersion angle and its flat frequency response over the whole bandwidth was accompanied by excellent phase linearity resulting from the front plate being slanted backwards towards the pyramid top. Earlier models of manufacturers such as Cabasse, KEF, B&W, etc., had added additional cabinet boards under the bass and midrange drivers to reach a similar effect, but Epicure’s soft edge, soft slope approach would also lessen the unpleasantness caused by sound waves hitting on sharp edges. The pyramid structure had the advantage that the reflecting surface around each driver was proportional to the driver’s size, thus minimising harsh refractions. The tweeter and the midrange driver were housed in their own separate compartments, and there was little interference between the chassis that would jeopardise acoustic integrity. This resulted in low distortion, reduced time-smear, excellent transient response, and, above all, natural tonality.
On the 3.0 model, Epicure made use of a relatively large 140mm ferrofluid damped midrange driver that was allowed to mechanically roll off at 6 dB per octave from 75 Hz towards the woofer. Its potential high frequency content was kept from interfering with the tweeter via crossover at 2,600 Hz and 18 dB per octave. The bass driver was kept clear of the midrange by sloping at 12 dB per octave. Next to the active ferrofluid damping of the tweeter and midrange drivers, the model 3.0 eliminated internal resonances through a combination of bracing and anti-resonance matts. The resulting effect was a linear frequency response from a very low 32 Hz to 10,000 Hz over an impressive 180° angle. Needless to say, shoppers today would be hard-pressed to find loudspeakers that deliver a similar performance. And measured from the sweet spot, frequency response over the whole spectrum of human hearing was quoted at 32 to 20,000 Hz with a mere 3 dB variation towards the fringes.
With their high level of resonance absorption, the Epicure 3.0 turned out to be power hungry. Sensitivity was rated at a low 83 dB, which would have made them a companion for beefy amps. I did achieve good results driving them with a 40 WPC Dynavox VR-70 tube amp and with a 145 WPC Hafler XL-280 solid state amp. Epicure actually recommended amplifiers from 30 to 500 watts, and I can confirm this to be realistic, if the lower watts amplifiers are tube driven. Ferrofluid cooling made the speakers withstand even high levels of continuous power without any immediate danger of them overheating. Their impeccably flat impedance curve at 4 Ohms made the choice of amplifier relatively easy. With the foam grills in place, especially those covering the tweeters, listening at slightly elevated volumes proved to be more rewarding. However, for greater musical detail and nuance, the grills needed to be removed. Sadly, removing the frameless frontal grills without running the risk of breaking them in the process had long since become a challenge on my specimen. Perhaps to compensate for its wide dispersion angle, the tweeter’s output could be attenuated in -3dB steps. This could be a practical feature, for instance when highly reflecting side walls contributed to the amplification of the output signal in an undesirable fashion.
In my extensive listening tests, the Epicure 3.0 played all kinds of music program, film score, and effects with ease. While their specific sonic character was not immediately noticeable and would be difficult to spot by the casual listener, these speakers certainly had the potential to surprise. Their linear response made them sound rather inconspicuous until the music program itself demanded attention. From the beginning, I was perplexed by the Epicure 3.0’s bass response and extension to which there was no warning. While other speakers would let you guess their intrinsic abilities by the sound signature they produced, the Epicure were capable of dishing out bass attacks without even the faintest hint of having this ability. And these bass moments could either be surprisingly low or astonishingly loud, depending on the music chosen. I would have expected this kind of bass from a subwoofer, perhaps, but I had never actually heard a subwoofer that was so well integrated with the music and not once seemed misplaced.
In our setup, the Epicure 3.0 performed well in terms of smoothness, balance, and natural tonality. They were not the most exciting sounding speakers in and of themselves, but they were always ready to accentuate the music when this was called for. I enjoyed the natural sound and kick of percussions and the many tonal layers by which the music was presented. In the field of tonal separation, the model 3.0 was similar if not superior to the EPI 500 series. Stereo imaging was not as wide and crisp as on the EPI 500 when sitting in the sweet spot, but it was far superior to the EPI 500 when listening from almost all other positions in the room. In my nightly sessions I noticed that the model 3.0 took the whole room into the acoustic equation which had its advantages when it came to maintaining lots of musical nuance. Some listeners had described the Epicure’s freestanding tweeters to have an ambience effect, however, this was something that I did not notice as outstanding or even care for so much.
Listening to the performance of the Epicure 3.0, it was difficult for me to imagine that these had been relatively affordable speakers at the time that could be purchased by a university student. But then again, the 70s and 80s were still about showing customers what was possible in HiFi, and the Epicure 3.0 did strech those boundaries.
Specifications
- Type: 3-way tower speaker
- Design: acoustically damped, closed-cabinet
- Bass driver: 320mm paper-cone woofer, dynamic
- Midrange driver: 140mm, paper-cone, dynamic
- High-frequency driver: 25mm, paper inverse-dome
- Ferrofluid damping: on tweeter and midrange
- Crossover frequencies: 475 Hz and 2,600 Hz
- Frequency response: 32 Hz - 20,000 Hz (+/- 3 dB)
- Tweeter level attenuation: -6 dB, -3 dB, and flat
- System resonance: 32 Hz (-3 dB)
- Nominal sensitivity rating: 83 dB (1 Watt, 1 m)
- Practical power sensitivity: 3,6 Watts (91 dB, 1 m)
- Nominal impedance: 4-Ohms
- Amplifier requirements: 30 (min) - 500 Watts (max)
- Solid-state amplifier: 100 WPC recommended
- Speaker terminal: G.R. plugs, base-plate mounted
- Grille material: acoustic foam, frameless
- Cabinet finish: hand-rubbed American walnut
- Dimensions: (H) 105,2cm; (B) 2x42cm; (T) 2x21,6cm
- Weight: 30.00 kg, each
- Country of manufacturing: United States
- Year(s): 1978-1986
Epicure EPI 500

Published: 11/05/2022
Manufacturing date: 1973
Author: Karsten Hein
Category: Gear & Review
Tag(s): Loudspeakers
Although the brand has largely been forgotten by today’s Hi-Fi enthusiasts, there are few names in vintage Hi-Fi that make the audiophile heart grow fonder than that of Epicure. The company’s focus in loudspeaker design was on providing natural tonality and imaging, and it often went to great lengths in the pursuit of this aim. Its founder, Winslow Burhoe (a former apprentice at Audio Research), had originally set out from a 2-way speaker design, which he named ‘the module’, and designed a whole range of loudspeakers around this. The Epicure 'Model 20', for instance, used two sets of 'the module', which were positioned invertedly to form a dipole and resemble live-stage characteristics. The idea was to incorporate the listening room’s front wall for acoustics effect. A similar design was also used in the EPI 'M 201' loudspeakers. These early specimen were well-received by the audio world and aimed at the higher end of the market.
The EPI 500 were among the first Epicure loudspeakers to break with the traditional module design. Instead of being based on Epicure’s tested 2-way principle, the EPI 500 were a classic 3-way tower speaker featuring specialist drivers to cover: the high notes, the critical midrange, and the bass frequencies. While essentially being of a closed-cabinet design, the EPI 500 extended their cabinet volume with the help two passive radiators, one placed on each of the speakers' side walls. These served to absorb the woofer’s inward energy and also supported it in the area of low-frequency extension. (Passive ratiators have again become attractive in modern times, in the sense that they provide considerable bass extension to Bluetooth convenience gadgets made by JBL, Bose, etc.) The Epicure's top-end was based on their signature inverted-dome gold ring tweeter. Where other high frequency drivers would have their domes facing outwards, Winslow Burhoe had made a name for himself using an inverted face-plate design, which gave the tweeter some horn-like compression characteristics. The tweeter on our specimen was of the second generation air-cushioned, oil-dampened design, a fact that would have placed the most likely construction year of our pair in the mid to late 1970s.
I purchased our EPI 500s from a private vendor in Nürnberg, who had in turn bought them a few years earlier in order to listen to his extensive vinyl collection. Having had troubles with the engine of our car on the way to Nurnberg, I arrived there in some disarray, kept wondering about my risky journey home, and therefore found it rather difficult to focus on the music. We listened to two or three songs, I held my ear on the drivers to check for potential noises that should not have been there, and concluded that they worked just fine. I did notice that one of the midrange drivers showed a slight smell of burnt coil-resin, but since I could not detect any scraping sounds emanating from it, I decided to trust the seller’s own verdict that he had not noticed any faults with the speakers himself. Epicure speakers were well known to stand the test of time, unless they had been over-driven for extended periods. The 40-something-year-old woofers looked as though they had been re-coned, and I was relieved to see that the work had been done with care.
While heaving them into the car for my ride back to Frankfurt, I noticed that—despite their modest size for tower speakers—they were surprisingly heavy, and I was grateful for the helping hand offered by their previous owner. 250 kilometres distance could seem long when seen from the perspective of a broken car that was blowing black diesel fumes out its back. As one might imagine, I made good use of my time going through different scenarios of having the car and speakers towed home that day. Luckily enough, I managed to make the journey back with the engine in its last twitches and unloaded the speakers before finally taking our vehicle to be serviced. This was commitment to the cause all the way through, of course. But then again, I was confident that the Epicures deserved no less.
When I finally returned home to further investigate the EPI 500, I noticed that they had one additional feature that I had noticed in the very beginning of my research and then somehow forgotten about: There was a wooden base screwed in place that formed a closed acoustic frame underneath the cabinet. This raised each speaker off the ground by about 8.6 cm. The base was needed to elevate the tweeter to ear-level, but it also prevented the speaker terminals from touching the ground. There may have been a number of reasons for positioning the terminals underneath the loudspeaker, e.g.: to make the back of the speakers look cleaner; to allow for the attachment of invisible sub-floor cabling; or simply to make unobstructed use of the cabinet's resonances. Holding my hand to the side and rear walls of the EPI 500, I could feel that this cabinet had been designed to naturally incorporate resonances with its sound signature, instead of bracing against internal and external vibrations in the way modern speaker designs would.
Understanding how the EPI 500 dealt with inherent resonances would be vital to finding the correct placement and integration in the room. However, with the whole cabinet and passive radiators set in motion at once, I also saw that success would not come easy. I would have to put myself in the position of the designers and imagine the most probable environment that they had envisaged for their speakers to perform in. This, of course, was likely to have looked and sounded differently from our sleek office with white high-gloss furniture and scant carpeting. Luckily, the underlying architecture of our building itself was not all too different from the typical American home of the 1970s and 80s, in the sense that our room was located under the roof of the building and of poorly insulated wooden beams that were planked with gypsum and plywood boards. This would most likely help to absorb some of the excess bass energy, if needed. I also discussed the matter with my audiophile friend Luigi who reminded me that the base had probably been designed with American highfloor carpets in mind.
The base of the EPI 500 had a small hole describing a semicircle towards the floor through which one was to run the speaker cable. To keep the base from touching the ground, some previous owners had glued small rubber pads of 1mm thickness and 20mm width into all four corners. I did not know if this had been found a good idea and decided to listen to the speakers in this condition first. Our testing system consisted of the Restek V1 preamplifier with upgraded Kassel power supply and the B&K ST-140 power amplifier. As sources, I used our Technics 1310 turntable and Marantz CD-17 player paired with Cambridge DAC. The interconnects were of solid core silver, and the speaker cable was our affordable but effective Belden 9497. This was a Hi-Fi setup that I could trust in terms of sonic integrity, having listened to each of the components in many different constellations. Naturally, I was intrigued to learn what the EPI 500 would add to or take away from the balance of sound.
Perched on the hardwood floor with the 1mm thick rubber plates in place, the speakers sounded dull and lifeless. I felt compelled to visually inspect the tweeters just to see if they had perhaps been damaged during transport. They looked fine. I also noticed that the ground in our office was not perfectly even so that the base did not manage to press down firmly enough on all sides. As I had expected, the smallish pads could neither offer a defined coupling nor decoupling from the ground. They somehow did both, and this confusion was audible. To learn more about the situation, I scraped off the pads and placed the speakers directly on the floor. With wood piled ontop of wood, the whole floor was turned into a resonator, and the resulting sound was overly wooden and muddy. To experiment with the opposite direction, I then placed our ultra-hard metal ball Aucharm absorbers underneath the base. This did serve to accentuate treble, but, consequently, the EPI 500 now sounded overly analytical and were lacking bass.
At this stage, I could already hear that the speakers had some potential, and that the optimum solution would need to provide the right mixture of dampening and stability. To make this possible, I lined the bottom of the base with felt towards the floor. This improved tonality, but I still had problems with imaging, possibly resulting from the slightly uneven floor. Thinking about how to address this issue, I added three 5mm-thick and 40mm-wide felt cushions: two on each side at the front, and one in the back. The hole for the speaker cable got in the way here, but I decided that a few centimetres off axis would not matter to the rear support. I then sat down to listen and was relieved to find that both soundstage and tonality had much improved. The EPI 500 produced a full and open sound that was also tonally rich. The double-bass on Diana Krall’s album “Turn up the quiet” now had lots of zest and dimension. I was not yet happy with the depiction of Diana's voice which was represented softer and less assertive than I was otherwise used to. Placing a second felt cushion on the other side of the speaker cable hole in the back went some way of solving issue. Possibly, the enhanced sound could be attributed to the improved balance in the support between the speaker's front and back.
In positioning the speakers, I found them to work well with the mouth of their drivers at 109cm distance to the front wall of the listening room. This was a placement that should also be possible to achieve in most listening scenarios. The speakers were placed just under two meters apart, measured from axis to axis, and my listening position was similarly at around two meters distance measured in diagonal. I found the tweeters and midrange to work best with the tweeter’s output axis crossing at least one third behind the listening position, instead of being pointed directly towards the listener. I have found this to be the most enjoyable setup with many speakers, but this might just have to do with my own listening tastes.
In this setup, I found the EPI 500 to offer a highly natural and informative mid-band. Their ability to reveal lots of nuance and layering in this tonal segment would have made them an instant darling with audiophile listeners. More generally speaking, the Epicure’s ability to incorporate their cabinet's resonances and passive radiators into the music output made them an excellent companion for natural instruments as found in Jazz, Folk, Country Music, etc. However, I found that the obvious strengths of the mid-band did not automatically translate into an outstanding depiction of voices. From my own perspective, our more modern Tannoy XT8F managed to offer the tiniest bit more in terms of believability in the midrange. I would have had to run further tests to learn if voices could be improved by adding solid steel plates inbetween the base structure and the felt pads in order to increase stability. I had a strong feeling that structural instability towards the ground might have been the culprit here.
Going through forums, I had read that some people suffering from tinitus were complaining about listening fatigue in connection with Epicure speakers. This phenomenon may have had to do with faulty coupling to the ground, with high feequency infiltration, but also with the shape of the inverted-dome tweeter itself. I noticed that this could produce a slight compression effect and thereby make the music seem quite dense in the treble. I also noticed that I tended to listen to music louder than I would have done with our other speakers. It was easy to get carried away while listening to these speakers, as I found out when putting on our 2009 pressing of Fleetwood Mac's 1977 album "Rumours". I simply enjoyed listening to the intense tonal richness that I had sometimes missed before.
In comparison to my first experiments with the EPI 500, bass performance had trippled, thus providing me with the realistically full sound and satisfying punch of an excellent tower speaker. Imaging was excellent, with a naturally wide and unconstrained center image. The music was well-spaced: from front to back and from left to right. Voices were still a touch on the sweet and soft side, but we would need to see about this aspect in the long run. From my experience, the EPI 500 should be easy to drive from a 20 watts tube amp, as well as a beefy solid state amp. They took some time in setting up properly, but the additional effort was well-worth it. Perhaps the aspect that I enjoyed most about them was their ability to provide a Jazz club atmosphere with freely breathing natural bass—but without the smell of cold cigarettes and stale beer.
Specifications
- Type: 3-way dynamic speaker
- Design: closed cabinet with passive radiators
- Impedance: 4 Ohms
- Power handling: 250 watts (max.)
- Power sensitivity: 88 dB (1 watt, 1 meter)
- Frequency range: 45 Hz - 20,000 Hz (+/-3dB)
- Tweeter: EPI gold ring (2nd generation)
- Tweeter principle: 2.6cm invert-dome, air-cushioned, oil-dampened
- Midrange driver: 10.5cm, paper cone (1st generation)
- Bass driver: 25.4cm, paper cone
- Passive radiators: 30.4cm
- Crossover freq.: 750-3,000 Hz
- Cabinet finish: walnut
- Dimensions: (H) 91.44 cm, (W) 30.48 cm, (D) 35.56 cm
- Weight: 28.12 kg (each)
- Country of manufacture: U.S.A.
- Year(s): 1973 - 1981
JBL Xtreme 2

Published: 17/07/2022
Manufacturing date: 2018
Author: Karsten Hein
Category: Gear & Review
Tag(s): Loudspeakers
It seems that from the 1950s right up to the 1990s, adventures in Hi-Fi were about exploring the limits of what was technically possible in terms of faithful sound reproduction. Size, look, and cost seemed to be of lesser concern to Hi-Fi manufacturers and the proud owners of the gear at the higher end of the market. Monstrous receivers, such as the Kenwood KR-9400 of 1974 to 1976, and loudspeakers the size of wardrobes, such as the Electro Voice Patrician 800 of the mid-70s to early 80s, all stood testimony to this fact. The primary music source of this period was the vinyl record, of which Hi-Fi enthusiasts tended to own impressive collections.
With the advent of more compact music formats, such as the CD (Sony 1982; Philips 1983), the DAT (Sony 1987), and ultimately the MP3 player (Saehan 1997), the audio market was intrigued to learn what else could be made smaller and more convenient. After years of bigger and better devices, the focus of the new millennium was about the question of how much size, weight, and cost could be sacrificed, before the magic of what once was music was lost. Mainstream Hi-Fi engineering therefore began building smaller and lighter gear. Loudspeakers became tall and slim to hide in the living spaces rather than dominate them. Consumers were attracted to smaller speakers that would offer much of the sound of their taller cousins.
Speaker cables first disappeared into the walls, before they were ultimately replaced by WiFi or Bluetooth and disappeared altogether. The KEF LS-50 and 'LS-50 wireless' of 2012 to 2022 are cases in point. The LS-50 are compact bookshelf loudspeakers that can best show their sonic virtues when positioned on proper Hi-Fi stands, taking into consideration the dimensions of the room, etc. The wireless version, which is slightly more expensive, offers the added advantage to the Hi-Fi newbie that nothing can go wrong in terms of grounding, interconnects, and loudspeaker cables. It is no surprise that, at the time of writing this article, the versatile and unobtrusive KEF LS-50 have been in production for over 10 years. And yet, the LS-50 is still a conservative home speaker design. Other manufacturers that have taken versatility to the next level.
The JBL 'Xtreme 2' were the second generation of JBL’s Xtreme Bluetooth speakers, and the pair that is on display here, was owned and given to me for testing by my long-time friend Thomas Kubalsky, who had previously helped me with a number of Hi-Fi issues. He had originally bought them that he could listen to music on his lengthy bicycle tours. To Thomas, the advantages were that the JBL’s canister-shaped body could easily be attached to his load-carrying bicycle, that they were water-proof, and that they had quick-charging batteries that would provide a playback time of up to 15 hours. Bluetooth connectivity had been a positive asset to him as well, but not an absolute must, given the close distance between cellphone and speakers when attached to his bike. By the time these photos were taken, his JBLs had already accompanied Thomas and his bicycle on numerous trips for at least 10,000 kilometres through excessive heat, dust, and rain.
On the day I decided to take the JBL Xtreme 2 home with me, they had already played a few hours of music at our children’s summer fest at the kindergarten. Thomas had shown me how to pair two Xtreme 2 speakers with my smartphone to create a small array. Although the JBLs had two sets of loudspeakers built in to each unit to allow for stereo playback, the intelligent Bluetooth profiles allowed for left and right channel allocation, when two Xtreme 2s were present. In fact, the profiles allowed for the inclusion of up to 100 loudspeakers in a single array. This amount of speakers should have been enough to power any cocktail or beach party. What really attracted me, though, was the opportunity to learn about the sound quality of such a versatile system with Bluetooth connectivity. How would this hold up in a listening comparison with some real Hi-Fi speakers?
Similar to other small cabinet designs, the JBL Xtreme 2 used passive radiators to suggest a larger cabinet volume and to improve the bass extension of the two smallish dynamic drivers. This was not a new principle but had been used on many famous speakers, such as the KEF Calinda, built from 1975 to 1976, and the Epicure EPI 500, built from 1973 to 1981. And while the Calinda had one passive radiator at its front, the EPI 500 used one radiator on each side of the cabinet, just like the JBL Xtreme models. And since I still had the EPI 500 set up in our second listening room and was perfectly happy with their sound, what better place to set up the small JBLs. To allow for quick A-B comparison, I placed the Xtremes on top of each EPI speaker with their drivers being flush with those of the EPIs.
In setting up the EPI 500 speakers, I had taken special care to achieve the perfect balance of dampening and support. By placing the Xtreme 2s directly on top of the Epicures, therefore, I was sure to benefit from that same advantage. During my listening tests, I made sure to raise or lower my ears to the level of the tweeters when switching between speakers. At the time of the test, the EPI 500s were still powered by our Kenwood KR-9400 receiver, a combo that offered an agile and forward sound with lots of natural bass slam. At the same time, the Epicures’ natural timbre was maintained, which made this combination quite enchanting, especially when it came to the playback of real-life music events. It would be interesting to learn, just how much of the original music event would be transported through the smallish JBL Bluetooth speakers. I was fully prepared to believe that this was just another convenience gadget with few other merits than being small and portable.
When comparing equipment, I tended to listen to the same albums played over and over again. Tonality, agility, transients, and natural bass were just some the characteristics I was interested in. The Epicure speakers could sound anything from muddy to sharp, depending on how they were positioned, supported for stability, and decoupled from the floor. If these aspects were in harmony, they were capable of superb tonal balance, and natural bass. Although with the Epicure bass was not extremely structured, I enjoyed that it was neither laid on too thick nor too lightly when paired with a good amplifier, such as our Becker ST-200, Dynavox VR 70, or even the Kenwood KR-9400 receiver. I put on Diana Krall's album 'Turn Up The Quiet' and listened to this via the EPI 500s first.
When I switched over to the JBL Xtreme 2s, I again had to wake the Bluetooth connection from its sleep and noticed that the unit I had paired as slave woke up only five seconds later. There was also a small amount of lagging and crackling involved, before the connection was perfectly established. At the same time, I was impressed with the palpable image that the JBLs created smack-centre between the speakers. This effect was instantly familiar to me from well-conceived wired connections. The next aspect that caught my attention was the great similarity in tonality between the EPI 500s and the Xtreme 2s. Both speakers presented Diana's voice in a highly believable fashion and with very similar timbre. The Epicure speakers did manage to separate the vocals from the upper bass a little better and therefore sounded slightly less muddy in this area. This difference, however, was much less than I would have expected.
The JBLs remained particularly faithful to the source material during slower and more organised passages of music. The louder and faster the music became, the more the speakers began to reveal their natural limitation. This is not to say that they sounded at all bad or poorly designed, it was just that some of the attack and order of the Epicures was not present when listening to the same track via the JBL speakers. To be honest, I would not have thought that portable Bluetooth speakers would even merit such a comparison, but with the JBLs, it did not seem all too far-fetched. This impression was also reflected back to me by my colleague Landon, who walked into the office smiling, saying: "Karsten, I would not have thought to see the likes of them in this office" while pointing at the Xtreme 2s. Upon giving him a demonstration, however, Landon seemed perplexed and, like me, had to confess that he would have assumed the difference between the speakers to be much greater. "So, they are really not bad, huh?" Landon said as he walked over to his desk.
When pairing the two Xtreme 2s for the first time, they were automatically set to 'Party Mode', which meant that each speaker was playing the full stereo image. This had the advantage that they could be positioned far apart, without sacrificing music information at the point of listening. To set them up in 'Stereo Mode', I had to first download the 'JBL Connect' or 'JBL Portable' app from the App Store. Switching the devices into Stereo Mode only took a few seconds, however, I did experience an issue by which I had some trouble in trusting the music information to be intact. This impression may have stemmed from sudden changes in channel volume that I consciously noticed on a few occasions. The stereo image also seemed overly emphasised at times with a strong but rather unpredictable three dimensional effect and a slightly hollow sound. [This was possibly due to a timing issue between the two channels called Hass effect. Thank you, Jens.] In consequence, there was a slight strain on my ears, which I had not experienced with the speakers set in 'Party Mode'.
Hence, I switched the speakers back into 'Party Mode' (or mono, in that case) and instantly felt much happier with their performance. In conclusion, I was able to report that the Xtreme 2 were acoustically well-engineered loudspeakers with excellent tonality, whose merits remained sadly concealed by a rather unstable Bluetooth connection. In 'Party Mode', with each speaker playing the full stereo signal, some aspects of vocal and instrument playback were similar to the better speakers of this world. In 'Stereo Mode', however, Bluetooth made the speakers lose all sense of proportion, flinging individual notes at random into the room. The occasional drop in volume, or even the disappearance of one channel altogether, put a strain on the listener and took away from the relaxing and reassuring aspect of the music. In short: A better connection would have turned these into far better speakers, because, physically, they really had a lot going for themselves.
Specifications
- Type: portable stereo loudspeaker
- Connectivity: bluetooth version: 4.2
- Features: speaker array integration
- Profiles: A2DP V1.3, AVRCP V1.6, HFP V1.6, HSP V1.2
- Tweeters: 2.0 cm x2
- Woofers: 6.99 cm x2
- Passive radiators: 800mm x2
- Rated power: 2 x 20W RMS; bi-amped
- Frequency response: 55 Hz – 20.000 Hz
- Signal-to-noise ratio: > 80 dB
- Power supply: 19V, 3A
- Battery type: Lithium-ion Polymer 36Wh
- Battery charging time: 3.5 hours
- Music playback: up to 15 hours
- Inputs: 3.5mm headphone jack
- USB output: 5V, 2A (maximum)
- Transmitter power: 0-12.5 dB/m
- Transmitter range: 2.402 – 2.480 GHz
- Dimensions: (H) 136 x (W) 288 x (D) 132mm
- Country of manufacture: China
- Weight: approximately 2.4 kg
- Year(s): 2018 - 2022
KEF iQ30
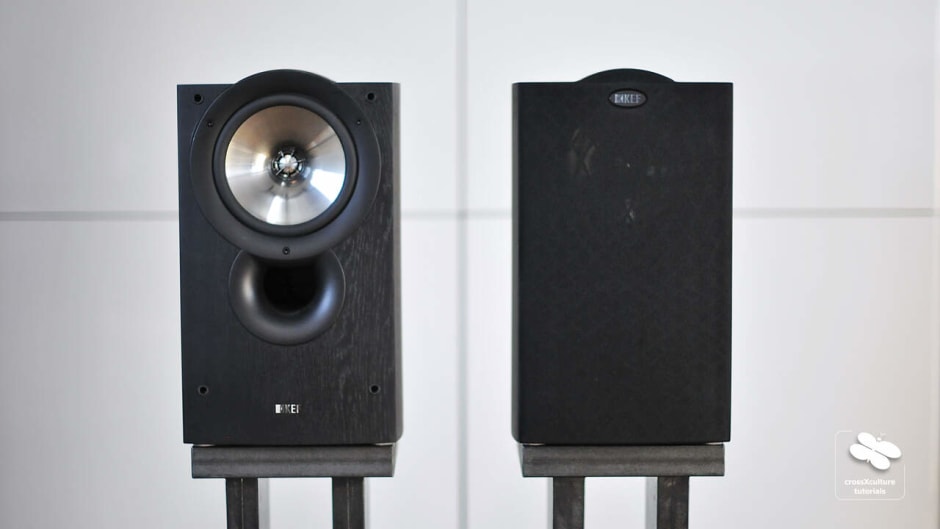
Published: 23/08/2020
Manufacturing date: 2008
Author: Karsten Hein
Category: Gear & Review
Tag(s): Loudspeakers
Where do I begin? Perhaps best with an apology. Because, up until this point, no other speakers had captivated my attention and imagination more than these little bookshelves. And, in my attribution of positive and negative qualities to these loudspeakers, I may not always have been fair. It actually took me quite some time to find this out, and, in the end, it took the whole journey to get to the truth of things.
We had originally bought the KEFs as unobtrusive bookshelf speakers to play background music in our home office. This was well before I began contemplating to set up a second audiophile system to use when the kids where blocking our main listening room. As usual,I had studied reviews on entry level bookshelves that punched above their weight, and KEFs were mentioned repeatedly in this context.
In our office they had to replace some ageing Denon bookshelves that were left over from my old F-07 midi system. Driving these was an entry level Rotel preamp and amplifier combo rated at 2x 60 watts. The match was actually pretty decent in retrospective, as the Japanese combo had been designed with the affiliated Bowers & Wilkins in mind and is said to be following the philosophy of ‘British sound’. This, to my understanding, is characterised by accuracy, tonal balance, and a warm midrange.
While the Denons with their soft dome tweeters had been forgiving of flaws and therefore easy to integrate, the KEFs immediately revealed the sonic weakness of our cheap glass and aluminium speaker stands. Hence, we replaced the stands with a simple DIY design (using 4 cm MDF boards) and immediately noticed a shift from a harsh and technical sound towards a more pleasing and natural performance.
Another aspect revealed by the KEFs was the lack in bass response from the listening room. Our office is situated under the roof of the building and has many acoustic disadvantages: slanted gypsum walls all around that absorb much of the lower frequencies, lots of hard furniture surfaces that reflect higher frequencies, and an extensive room depth of 13 meters with the listening position located at just 2.5 meters from the speakers.
In my attempt to make the KEFs sound well-balanced, I brought in a range of preamplifiers and amplifiers, spanning from Rotel, via Hafler, to Harman Kardon. But the KEFs, to various degrees, remained harsh and bright sounding. I looked at the Uni-Q driver’s sharply pointed wave guides and could not help but wonder whether KEF had somehow got them wrong. Just like I had found my earlier Canton Ventos to have accentuated highs, which, as I later read in a test, actually turned out to be true.
Unable to get the iQ30s balanced in our office, I gave them to my brother for listening and switched to Tannoy DC 6t tower speakers instead. With an additional dedicated bass driver, the Tannoys offered more direct bass punch and sounded more balanced at short distance. Yet, on listening to the new speakers for longer, I realised that they, too, were struggling with the size and structure of the room.
Last week, I received the KEFs back from my brother. And—as during their absence I had started wondering if there was not something I had missed in setting them up—this time I decided not to take them to the office upstairs but rather to hook them up in our main listening room. To be honest, my expectations were not too high, as their rivals downstairs are not some old Denon bookshelves but rather the formidable Martin Logan SL3 electrostatic speakers.
I started out by playing a few songs on the Martin Logans. Jazz and Folk that I know well and enjoy listening to. Then I switched to the iQ30s, half expecting to have a big laugh. Surprisingly, this is not at all what happened. The KEFs set in at similar volume and almost identical sonic characteristic, so that at first, I looked over at the Martin Logans in disbelief. With the tweeter on axis and the wave guides to cast the highs deeply into the room, the KEFs displayed a similar energy and authority when setting the stage.
The SL3s strength lies in the accuracy and subtlety of voices, the iQ30s play voices well, but do not reach that same level of subtlety and intimacy. And yet, they come very close. If the Tannoys love piano keys, the KEFs caress the guitar. Nils Lofgren’s playing was thrust into the room much like I am used to from listening to the Martin Logans. Notes linger a little shorter on the KEFs than on the SL3s, which is no wonder considering the exceptional lightness of the Martin Logan’s Mylar membrane.
The KEFs now sound balanced in our main listening room. None of the former harshness is still present, so that listening for long hours is now highly enjoyable. Bass is full and present and at times even punchier than on the SL3s. However, when it comes to playing very low notes, these are still present on the Martin Logans and simply missing on the KEFs. This should not come as much of a surprise, considering the 30 cm woofer size on the SL3s as opposed to a small 16 cm full range speaker on the iQ30.
The KEFs present a wonderful stage and—like the Martin Logans—can play loud as well, creating a wonderful live atmosphere. The Martin Logans can play louder, of course, but personally I never listen to music at volumes where this would really matter. Considering the size of the KEFs, their ability to fill the room is a respectable. Doing so with accuracy and authority to take on much lager and more expensive floor standing speakers is incredible. Hence, my apology. When the KEFs did not perform well at first, it was obviously not a design flaw of the speakers. It was the room.
Specifications
- Frequency response: 45 - 40000 Hz
- Sensitivity: 89 dB
- Impedance, average: 8 ohms
- Crossover frequency: 2500 Hz
- Recommended power: +15 Watts RMS
- Weight: 6.45 kg
- Dimensions: 36.5 cm x 22.0 cm x 32.7 cm
- Country of manufacture: China
- Year(s): 2008
Manger Audio p2
Published: 11/02/2025
Manufacturing date: 2023
Author: Karsten Hein
Category: Gear & Review
Tag(s): Loudspeakers
Sure, I know Manger
I was 19 years old, observing a friend of mine solder the last wires of an amplifier project. He wanted to know if I had heard of the Manger (German family name pronounced: 'maŋɐ') Bending Wave Transducer and claimed it was among the best driver principles ever devised. I told him that I had not yet heard of it, and so he went on to explain its revolutionary design to me. Although this conversation took place more than thirty years ago, my fascination with the Manger transducer remained. I was especially interested at the time, as I was constructing my own D.I.Y. loudspeakers, and the difficulties arising from multiple pistonic drivers paired with complex crossovers were quite obvious. The promise of a smoother speaker concept that worked without crossovers in the frequencies critical to the human ear was intriguing to me.
In summer 2022, my favorite audio technician, Winfried Echle, was building a set of speakers of his own and handed me a strange-looking driver as one of the possible high-to-mid frequency choices. “This is a Manger transducer!” I exclaimed happily, eager to communicate the fact that I already had the proper term for it. As it turned out, I was holding the W05 model of the bending wave transducer in my hands. It mostly consisted of machined metal components and strong magnets and was therefore very heavy. Its round front was covered with a dark, slightly textured, and rubbery-looking diaphragm, which was surrounded by a star-shaped matte. For a full-range driver that could reach ultra-high frequencies well above the human hearing, its diameter was quite enormous. And from the looks of it alone, I honestly could not imagine how it would sound.
First Encounters
Winfried ultimately decided to use a different type of full-range driver for his loudspeaker project, and I did not get the chance to listen to a Manger transducer until CEO Daniela Manger released the W06 driver and hosted a demonstration of her P2 loudspeakers at the HiFi-Auditorium shop in the German town of Münster in Westphalia. The event was scheduled for the autumn of 2024, and I managed to secure a ticket for it. Upon arrival, I began my audition by examining the design: The P2 are sleek-looking, column-shaped loudspeakers, approximately 1.15 meters tall, less than 30 centimeters wide, and just over 20 centimeters deep. Their outer finish is smooth to the touch, and the excellent paint job hides a sturdy and quite heavy aluminum cabinet underneath. Unless you have to carry them around, you would never guess from their appearance that each speaker weighs a hefty 33 kg.
Each P2 comes fitted with Manger’s latest Generation W06 transducer, which is accompanied by an agile German-made woofer of the same diameter sitting underneath. The back of the P2 cabinet holds two passive radiators and a large metal terminal with WBT Cu nextgen binding posts for bi-wiring application. The label above the connectors declares the P2 to be an 8-ohm speaker with an RMS rating of 200 watts. It also shows the production date and the serial number, as well as the company's claim “Präzision im Schall” (Precision in Sound). On this day, however, the P2 were positioned along the narrow side of the Auditorium Münster's listening room, standing relatively close to the front wall and at equal distance to the left and right side walls. With the audience chairs positioned rather centrally in the room, my ears were struggling with standing waves and reflections from all sides. Sadly, this was not the ideal environment for testing the audio quality of the system.
To make the most of my trip and still have a chance to get a more accurate impression of the P2 speakers, I asked Ms. Manger for the possibility to listen to them in our studio. She responded positively, saying that potential buyers are given the chance to test her speakers at their homes for a small transport fee of 200.00 euros. (This is true for German customers and at the time of writing this. Prices and conditions may vary or change.) And that is how I ended up taking the Manger P2 loudspeakers home with me for an audition following the Norddeutsche HiFi-Tage 2025 audio fair in Hamburg. Safely wrapped in non-scratch cloth and stored in their original boxes, the speakers were easy to load into our car. Carrying them up the multiple flights of stairs to our studio was another matter, of course.
Setting up the System
I began my explorations by placing each Manger P2 in the same location that my Martin Logan SL3 electrostatic speakers had been in before. This was a tried and tested position, determined by means of calculation and hours of listening. I used a laser gauge to confirm that the driver planes of both types of speakers (the P2 and the SL3) were absolutely identical in relation to the front wall of the room. Our listening space is quite large, roughly 9 x 7 meters, and I applied my usual room resonance calculation to set up an equilateral triangle of 2.5 meters distance between each speaker and towards my listening position. In this setup, the distance from the driver plains to the front wall measured 1.65 meters straight.
As our house was constructed in 1901 and still has the original wooden beams and floors, I place all my speakers on 40 kg concrete slabs. In fact, I first started doing so, when I learnt that simply doubling up the floor boards to 6 cm thickness and then adding a carpet on top was not enough to quiet resonances. The heavy concrete slabs have greatly helped to solve the issue since, but vibrations do play a role in less obvious positions as well. Some of them emanate from the HiFi system itself. To lessen their impact, the equipment driving the speakers is positioned on two separate racks that use steel tubes filled with silica sand. The rack on the right holds the Symphonic Line RG10 Reference HD amplifier with its two large and heavy transformers resonating at 50 Hz; and the rack on the left holds the sensitive optical and mechanical drive units of the Marantz CD player and the Thorens TD 320 turntable. Each of these devices is then further decoupled from vibrations by means of dedicated bases and absorbers.
The cables behind the system do not touch, in order to prevent cross-induction and distortion. Possible differences in ground potential have been harmonized between the devices. HF shielding from the power source is provided via shunt filter, and all power cables use simple ferrite beads to further reduce high frequency noise in the system. The Thorens turntable is fitted with an affordable Audio Technica VM95 cartridge (MM) and micro-linear stylus. Its motor is driven with a special linear power supply made by Audiophonics of France. The speaker cables are single-wired WSS Platin Line LS4 (hand-crafted by Jochen Bareiß in Nürtingen, Germany) and used in combination with the cable bridges that are originally included with the speakers. Given a choice, I would have preferred to test the bi-wiring version of the WSS cables, but they were not available to me at the time. My own bi-wiring alternative, one that was based on two strands of Belden 9497 wires, did not sound as tonally convincing in combination with the powerful Symphonic Line amp. I therefore stayed with the WSS.
The Listening Sessions
Fleetwood Mac (1970s Pop)
In order to ease my way into the listening session with some simple and familiar tunes, I put on Fleetwood Mac’s Pop album “Rumours” on the Thorens turntable and sat down in my usual chair. I listened to all songs on Side A and thereby noticed two things: The soundstage did not pan seamlessly. There was an acoustic left, the phantom centre, and a right, however, there was no connection between them. This surely was the result of the Manger P2 beam angle being slightly narrower than that of my Martin Logan SL3 speakers. I rotated the P2 inward towards the listening position, until their acoustic beams were crossing just behind my head. This successfully closed the stage for me and made the music pan from left to right more seamlessly. I also read reports in which reviewers toed in the P2 so that their beams crossed even in front of the listening position. However, being very sensitive when it comes to realistic sound direction, I did not gain much from the experience when I tried it myself.
The second thing I noticed was some inaccuracy in the sound stage itself, as if there was an extra layer of music which blurred over the first one. This can sometimes happen when reflections from the front wall of the room bounce back towards the listening position, creating time smear and acoustic fog. If this phenomenon had also been present on my Martin Logan speakers, I had not noticed it as much, due to their filling-in dipole characteristic (which entails other challenges, of course). I borrowed two large 120x60 cm absorbers from my adjacent system and stood them up against the wall behind the P2 speakers. Clarity, dynamics, and soundstage were drastically improved. In a normal household, curtains or bookshelves placed behind your speakers should give you a similarly positive effect.
I put on “Rumours” once again and enjoyed how well the changing speeds and intensities of each drum beat were captured by the 1976 recording. The quality of vocals also varied greatly between songs, and the P2 faithfully revealed the strengths and shortcomings of each one. Driven with the capable Symphonic Line Reference HD amplifier, each sound had its own space, dimension, and was clearly discernible in its temporal rise, timbre, and decay. In the title “Don’t Stop”, there was plenty of forward drive, paired with the obviously constrained dynamics of the recording equipment of the time. I felt so close to the recording event itself that I could sense the studio reels turning in Sausalito. The album was a reminder of how colourful even vintage music can be, if we have the ability to untangle it in all its facets.
Helge Lien Trio (2020s Jazz)
Following my impression of the 1970s, I was looking for a more complex, contemporary recording that would reveal multiple layers of music. I picked out the Helge Lien Trio’s Jazz album “Hello Troll”, on which Side A feels like a harmonious battle between piano, bass, and drums. On this special 2008 recording, Helge Lien’s piano extends across both channels with the high keys to the right and the low keys to the left, as is customary in modern studio Jazz recordings. Frode Berg plucks his bass in the right third of the stage, and Knut Aalefjoer beats his drums in the left third. There was a true sense of stage depth and musical order which was superior to any setup I had heard play in this position before. The music came to its full dimension in our studio without carelessly revealing the position of the speakers, and there was a natural flow and rhythm.
Next to the tonal richness of the piano, I enjoyed the taut bass, which extended surprisingly low. The first half of the title “Troozee”, which can easily seem a bit monotonous, became highly entertaining for its faithful bass rendering alone. As the song picked up momentum, the Manger P2 could show their ability to maintain micro-dynamics and transients during complex musical passages. I would say that their ability to keep sonic events separate and discernible is widely unmatched. And this does make sense, as the W06 transducer is a single-point source that is capable of rendering all frequencies from 40,000 Hz down to 150 Hz. And it does not matter at all that it is prematurely cut off at 340 Hz to increase the P2's power handling capacity to 200 watts, because all relevant directional frequencies, as well as their harmonics, originate from a single flat plain which naturally directs its waves outward in concentric circles, similar to the skin of a drum or the basal membrane of the human ear.
2Cellos (Acoustic Song Covers)
When I changed from vinyl over to my trusty Marantz CD-17 CD player, the music remained fluid and tonally rich. Having picked out the 2Cellos album “IN2ITION”, I began with the familiar Police cover “Every Breath You Take” and was surprised to find that the bass lines were actually plucked on a third instrument. Due to the combo’s name I had always assumed that I was listening to exactly this: Two cellos. However, the P2 made it strikingly obvious that there were three instruments at play in the recording. Trained musicians will probably detect this on any system, but to my more technically oriented ears, the additional order provided by the P2 speakers proved to be helpful. The titles “Supermassive Black Hole” and “Clocks” were more insightful and fun on the Manger speakers. I even dared to turn up the volume to 90 dB (a quick measurement on my phone's dB meter) and found that the P2 remained in perfect control of the event, although I could detect a subtle increase in room resonances.
Youth Lagoon (2020s Indie, Electronic Music)
My next music pick was the 2023 album “Heaven is a Junkyard” by Youth Lagoon. On this, the Boise, Idaho-based Trevor Powers put together a bunch of contemplative often melancholic songs featuring soft piano playing, gentle acoustic guitar, and subtle synths. The album creates a warm blanket of sound that is both soothing and fun to listen to. As with many modern recordings, Heaven is a Junkyard is quite compressed and sounds dense throughout. On occasion, substantial bass waves are sending tremors through the room. Power’s delicate and breathy vocals blend vulnerability with a dreamlike, almost ghostly quality, and the P2 keep this vocal quality alive, even as the background choir and heavy instrumentation set in.
Sean Keel (2020s Singer-Songwriter)
“A Dry Scary Blue” is Texan songwriter Sean Keel’s 2022 appearance in the realm of audiophile recordings. Mastered in collaboration with Gabriel Rhodes, its scarcely instrumented songs are soothing and whispering. On the P2, the album sets an acoustically spacious backdrop of piano and guitar with Sean’s vocals seeming ever so fragile and brittle. More than my Martin Logan SL3, the Manger speakers reveal both the conceptual strengths and the acoustic shortcomings of the recordings. Despite or perhaps because of this, the album is highly addictive, and I am happy for the chance to listen to it once again.
Keith Jarrett (1970s Piano Concert)
The piano on Keith Jarrett's “The Köln Concert” can easily sound overly piercing and aggressive, if the loudspeakers are prone to sounding this way. This is especially so, because the right channel not only plays the high piano keys but also carries the cries and sighs of the pianist as they were picked up by the piano mics. Keith's incidental vocal injections are therefore mostly rendered in a distorted fashion. After about two minutes, however, I began to trust the P2 to take me through the double album without ear pain and so I listened to the first LP in a single session.
My Personal Conclusion
After about 30 listening hours spread over a period of two weeks, I come to the following conclusion: The Manger P2 are thoughtfully designed loudspeakers featuring one of the most faithful drivers in the High End market today. Similar to electrostatic speaker panels, the W06 driver hardly produces a sound signature of its own and has the additional benefit of being one-directional. Manger's integration of the separate bass driver is well executed and, in my setup, appeared to be seamless without bringing unnecessary attention to itself. I also very much like the sound of passive radiators. It is a welcome feature that I have come to enjoy on my EPI 500 speakers. For lovers of natural instruments, passive radiators can lead to a more natural instrument body and sound. To my ears, the P2 are the closest you can get to the sound of very good studio headphones, and they allow you to have the soundstage in width and depth in front of you and properly feel the bass at the same time.
As all true-to-source gear that deserves the label High End, the Manger P2 will point out any flaw in your electro-acoustic signal chain, spanning from the central fuse box of your house right up to your ears. For those who want the best sound out of their speakers, it is therefore advisable to either read up on the mutual dependencies of the HiFi signal chain (see: High Fidelity) or to consult your local HiFi audio shop for advice on how to combine and properly set up your system. All speakers will benefit from thoughtful positioning in the room. The P2 will sound quite good as you walk through the room, but, due to their relatively narrow dispersion angle, they will sound spectacular from a position inside the stereo triangle. The WSS Platinum Line LS4 are excellent cables that assure great tonality and instrument separation. And, from experience, I can now say that my Symphonic Line amp worked very well with the Manger speakers.
Do you have the Manger P2 at home? I would be interested in hearing about your own experience with them. Has my article perhaps helped you to understand your speakers better? Clicking on the header photo of this article will open it as a subdomain and make the commenting section available at the bottom of this page (if it is not already open).
W06 Specifications (Driver Only)
- Type: Bending wave transducer
- Frequency response: 150 Hz - 40,000 Hz
- Power sensitivity: 91 dB
- Impedance: 8 Ohms
- Power handling (RMS): 50W,
- Peak power handling: 80W
- Diameter: 15.3 cm
- Mounting depth: 50 mm
- Country of manufacture: Germany
- Weight: 1.2 kg
Manger P2 Specifications
- Type: Passive 2-way floor-standing speaker
- Impedance: 8 Ohms
- Frequency range: 30 – 40,000 Hz
- Crossover frequency: 340 Hz
- Power sensitivity: 89 dB
- Sound pressure (max.): 112 dB
- Dimensions: (H)114 cm × (W)27,0 cm × (D)21,4 cm
- Weight: 33 kg
- Country of manufacture: Germany
- Year(s): 2018 -
Martin Logan SL3

Published: 08/06/2020
Manufacturing date: 1995
Author: Karsten Hein
Category: Gear & Review
Tag(s): Loudspeakers
Gayle Martin Sanders and Ron Logan Sutherland had been interested in developing their own electrostatic loudspeakers ever since working together in a High End music store in Lawrence, Kansas in the late 1970s. Sanders was working as the store manager and had a background in architecture and advertising, and Sutherland was an electrical engineer. Both men were convinced that electrostatic loudspeakers had the greatest potential in providing High End audio performance, despite the fact that the electrostatic speakers that existed at that time still showed very limited performance in terms of frequency response and dispersion angle. Many of them became famous as amplifier killers, due to their troubling impedance curve nearing a shorted circuit. In addition to their lack of treble and bass response and the difficulty of finding a potent enough amplifier, electrostatic speakers produced a very narrow sweet spot for listening, sounding wrong or unbalanced in most places of the room. Among the few successful models of the time were the Quad ‘ELS’, mildly mimicking the design of an electric heater, and the huge KLH ‘Model 9’. While the Quad was able to reproduce chamber music in its fine and delicate tones, the limitations of its design became apparent when listening to louder performances, such as rock or classical music. The KLH on the other hand was very capable of producing all kinds of music, but its sheer size resulted in very low sales.
Sanders and Sutherland began constructing prototypes, some of which went up in flames when driven at higher volumes, until they found the materials composition that would enable them to play their speakers without fear of destroying them. Improvements included the development of an ultra-light Mylnar diaphragm and two horizontally curved stators made of perforated steel that would allow charges of up to 10.000 volts. According to the company website, Sanders and Sutherland exhibited their speaker concept at the 1982 Consumer Electronics Show in Chicago with only a mock-up and some photographs. The design was so radically new that it became an instant hit in the industry and was honoured with a CES Design and Engineering Award. While the ideas presented at the show were still in the design phase, Sanders and Sutherland had already developed their first working electrostatic speaker based on more conventional designs. It was called the ‘Monolith’, and dealers who heard it play during product demonstrations were more than eager to sell this to the public. Given the early acceptance of their ideas, the two men felt ready to start their own business. Having to come up with a brand name, they decided to combine their middle names to MartinLogan in 1983.
Despite many initial setbacks, including the departure of Ron Logan Sutherland from the company, the manufacturer managed to secure its foothold in the High End loudspeakers market. In the 1990s, MartinLogan created many now famous classics, such as the SL3, the smaller Aerius, and the Quest. The SL3 that is featured here is said to be the ‘rockiest’ of the 1990s range. It features a tall and slender stator panel that is flanked by blond oak rails. The Mylar membrane is almost completely translucent, inviting the application of soft back lighting to the front wall for optical effect. The SL3 is a hybrid speaker in the MartinLogan ‘Sequel’ series tradition and offers a 10” paper cone woofer for bass extension. The woofer is housed in a closed cabinet that also includes the 250 Hz 12 dB crossover and the high voltage transformer needed to generate the static electricity driving the Mylar membrane. The panel is open towards the front and the back of the speaker, and it is curved at the MartinLogan typical 30 degree angle to allow for optimum high frequency dispersion. The SL3 features dual binding posts for bi-wiring, as well as a Bass Control Switch to lessen bass response by -3 dB. This can be quite convenient, if the speakers are to be placed in smaller rooms in which bass response is accentuated. Although each speaker must be connected to a power source for high voltage generation, energy consumption is very low, and the speaker switches into standby if no signal current is detected on the binding posts. A small red light at the front of the speaker indicates when the speaker is switched on.
Advert eiaudio/shop:
The MartinLogan SL3s is best driven with a strong amplifier that is built to handle high current feedback, because the impedance curve of the speaker shows some very low dips down to just 1,5 ohms at 20.000 Hz. Due to their bipolar panel design, placing the speakers can be a little more challenging than this would be the case with conventional designs. If placed well, the SL3 is perfectly capable of performing a disappearing act that is amazing to experience, in that the precise location of the speaker becomes difficult to trace and the music appears three-dimensional in the room. The sound is sonically balanced, and bass integration works very well on the hybrid design. At 0,37 sqm panel surface, the SL3 are capable of presenting a huge sound stage, both at low and high volumes. Bi-wiring is of the essence, as control over the woofer becomes sloppy when bridged. This may have to do with the hybrid design and the inherent electric characteristics of the drivers. When connected correctly, the SL3 is capable of lots of punch and a quick decay when needed. Because the panels themselves are of considerable size, listening to music at close distance can be quite overpowering. Some people have stated that they feel as if they are being grilled by them. To lessen this effect, but also to integrate the speakers more effectively into the room, the panels can be tilted backward. Overall, the SL3 provides a great basis for a high quality sound experience, as well as lots of room for experimentation.
Also see: Martin Logan SL3 Audio Demo
New 2025 Audio Demo (on YouTube):
Martin Logan SL3
Specifications
- Frequency response: 30-22.000 Hz +/3 dB
- Dispersion angle: 30 degrees
- Sensitivity: 89 dB
- Impedance, average: 4 ohms
- Crossover Frequency: 250 Hz (12 dB)
- Impedance, minimum: 1,5 ohms at 20kHz
- Power handling: 200 watts RMS
- Weight: 29,5 kg, per speaker
- Dimensions: (h) 163 cm x (w) 33 cm x (d) 36 cm
- Country of manufacture: U.S.A.
- Year(s): 1995 - 2000
Orbid Sound Pluto (kit)

Published: 30/05/2022
Manufacturing date: 1992
Author: Karsten Hein
Category: Gear & Review
Tag(s): Loudspeakers
Our family had just returned from living in the United States and was coming to terms with the adjustments of living in Germany, when a friend of mine introduced me to Mr Beyersdorffer’s infamous Orbid Sound loudspeaker company. Seeing that I had an interest in audio gear, he handed me a brochure that seemed to give away lots of secrets regarding the production and sale of loudspeakers. In this, Mr Beyersdorffer claimed that the established audio companies were ripping off their customers by packaging cheap drivers into fancy-looking boxes, hoping that enough paying customers would be attracted by their paid-for (and therefore always positive) reviews in the audio press.
Mr Beyersdorffer explained that Orbid Sound could work with superior drivers at a far lower price point than the audio establishment, since his company did not advertise in expensive magazines, and instead had built its reputation on word-of-mouth from its happy customers alone. His claims were not without truth, of course, with Hi-Fi stores selling speakers based on their high wattage figures, increasingly dubious frequency curves, and accentuated treble response—the latter being directed at affluent pensioners who were happily smiling that they could once again hear the upper ranges of the frequency spectrum. These were the days in which low-budget speaker manufacturers would paint large shiny rings around their smallish drivers in the attempt to make their speakers look more impressive through the cloth.
However, these brands—mostly from mail-order outlets and department stores—were not the primary target of Mr Beyersdorffer’s campaign. His rantings were directed at established Hi-Fi stores, and in his audience were emerging audiophiles on a tight budget. If he could convince the youth of the day that they could play with the big boys by being cleverer than the audio establishment, he would be able to earn enough money with his company to make a living for himself, and perhaps even some more. As it turned out, my friend, my younger brother, and myself ended up buying our first ‘real’ loudspeakers from Orbid Sound.
To save money, my brother and I chose assembly kits from the company. My brother’s Pluto kit came with prefabricated cabinet parts and was easy to assemble. I decided to go one step further by building the speaker cabinet from scratch. With more than 30 years having passed since then, I have forgotten what my loudspeakers were called, I just remember that they had four small woofers each, instead of one larger one. And these woofers were paired with the Pluto’s midrange driver and tweeter. Although I liked the idea of benefiting from the reduced time-lag of four smaller bass drivers and could even follow Mr Beyersdorffer’s ideas on this, I found that the concept did not work so well in practice—perhaps due to differences in timing between the drivers—and so I sold my speakers again, just a few weeks after finishing them.
My brother, on the other hand, kept his Orbid Sound Pluto kit speakers and finally left them behind at my parents’ house when he moved out in 2006. This is precisely where I found them just the other day. I called my brother to ask if I could take them home for a listening test on our system, to which he agreed. There was a moment of pause in which we both had to snicker at the improbability of running Orbid Sound speakers on a 'grown-up' stereo system. How would they compare against the high musical standards set by our vintage classics, let alone the modern Tannoy XT8f dual-concentric towers, the Epicure EPI 500, or even the Martin Logan SL-3 electrostatic speakers? We decided that we could not know until we tried, and I took the Plutos home with me later that evening.
Upon further inspection, I could see that the cabinets and drivers were still in surprisingly good shape, even if the glue of the veneer edging had become a little brittle in some corners, revealing plies of multi-ply underneath. This came as a surprise to me, as I had misremembered them to be made of cheaper pressboard. Multi-ply had the added advantage that it was not as sonically dead as the MDF board that is typically used these days. So, I whipped out a bottle of Ponal wood glue to solve the issue. The drivers themselves were still sonically sound, and I could not detected any scraping when moving them by hand.
Some people had reported that Orbid Sound designed their crossovers without using coils, simply by combining resistors. However, with the crossovers being cast in hardened resin, it was difficult for me to find out how much truth there was to this claim without breaking them. In my early youth, I had also built speakers without coils in their crossovers and learnt that such designs could actually be beneficial to phase correctness in some setups. Without the low pass function of a coil choke, the woofers were simply allowed to play lower midrange frequencies. And while this may have been an option on a two-way system, I was a little suspicious in respect to a 3-way design. Some sceptic listener had even x-rayed the crossovers and suggested in an online forum that they were in fact quite conventional. Be that as it may, in the end, I decided that it was worth finding out what Orbid Sound had cooked up thirty years ago.
Following some time listening to our Epicure EPI 500 speakers, I connected the Plutos to our Dynavox VR-70 tube amplifier, which had already been well run-in at this time. The music source was our Marantz CD-17 paired with a Cambridge DAC. I positioned the Plutos in the exact position where our EPI 500 had been, with the chassis at about 105cm distance from the room's front wall, only to find that this practically eliminated all bass frequencies from the rear-ported speakers. As intended book shelve speakers, the Orbid Sounds had been designed with the room's front wall to act as bass support. This itself was not necessarily a shortcoming in real-world applications; hence, I slowly began moving the stands closer to the room's front wall. As the chassis were approaching 62cm distance, bass notes finally began to sound right.
And yet, there was a second quirk that I had noticed right from the first minute of the speakers performing. Something was off balance in the Plutos' midrange. Female voices sounded squeakier and more compressed than I was previously used to, from our other speakers (and from real-life). At first, I had thought that this effect would lessen once the bass had locked in with the room, but sadly this was not the case, and I began to wonder what the level attenuation panel at the Pluto cabinet's rear wall was actually used for: the tweeter or the midrange? When first setting the speakers up many years ago, my brother and I had chosen to install a simple wire bridge, instead of using one of the included attenuation resistors. (I think there had initially been two, but who knew where they were now?) Listening to the Plutos today, this proved to have been a mistake. I admit that back in the 90s, we used equalisers to augment speaker performance, a practice that would be seen as an unspeakable blunder in the world of audiophile listening today.
Another phenomenon that I had noticed upon first listening to the Plutos was their eagerness to cast frequencies deeply into the room. This could have even been considered a positive effect if it had also served to create a stage impression with identifiable width and depth. For some reason, however, the Orbid Sounds did this at random and with no apparent coherence. This made only three basic stage positions discernible: left, centre, right. Snare drum, high hats, guitars, and piano notes found themselves loosely afloat in the listening room, strangely devoid of all form and position. Of the Plutos' three difficulties, this last one would probably be the most difficult to fix, as it seemed to stem from timing issues between the three chassis.
If tonality could be fixed through midrange attenuation, this might be a step in the right direction. To find out, I would first need to confirm that the attenuation clamps had actually been attached to the midrange. If they had instead been connected to the tweeters, it would probably be best to give up on these speakers. But if the midrange could be reduced in volume, this might actually reduce the midband squeakiness and create some listenable speakers. The rear terminal looked large enough to house a standard Visaton attenuator. The next morning, I unmounted the woofer to have a look inside. My findings were twofold: The midrange driver really was connected to the attenuator clamps, and, even better, it was housed in a separate internal cabinet. Feeling reassured by the results of my exploration, I ordered two Visaton attenuators, thus hoping to rein in the sqeaky midrange.
The Visaton LC57 attenuators arrived just three days later and easily slotted into the existing cabinet holes of the resistor clamps. I connected pins two and three of the L-pad, thus reaching maximum resistance (minimum midrange volume) with the attenuators turned left, as was described on the face plate. And yet, a first listen to the Orbid Sounds with the new L-pads in place reminded me of an issue from first placing the fixed resistors thirty years ago: There was hardly any difference in sound...! — But how was this even possible? Normally, one would think that taking the midrange drivers out of the sonic equation should also affect the speakers' ability to perform in this area. Were the Plutos' woofers perhaps allowed to extend into midrange frequencies after all? And what may have been the point of having dedicated midrange drivers, if their presence would be hardly detectable?
Over the course of the next few days, I experimented with various distances to the listening room's front wall and also tried different settings on the attenuator dial. Even in their most becoming position—out75/in70cm front wall distance, 2/3 midrange-volume, placed at 2m distance to form an equilateral triangle with the listening position—the Pluto (kit) speakers still sounded compressed in the midrange. And although the applied attenuation did produce a mildly positive effect in terms of tonal balance, this proved less significant than expected. Granted, the Plutos were capable of producing excessive amounts of sonic information. However, they presented this in an overly eager and in-your-face fashion that would take some getting used to. Considering their entry-level priced competition of the 1990s, the Plutos' capability to present a great wealth of musical detail may even have been a welcome feature. Their ability to radiate notes deeply into the room surely was perplexing, until it also became apparent that this mostly came at the expense of losing precise musical dimension. From their very beginning, Mr Beyersdorffer's Orbid Sound had banked on the notion of setting themselves apart from the Hi-Fi mainstream, and these speakers certainly lived up to the expectation.
Note: Martin Beyersdorffer died on 1 November 2020, just a few days before reaching his 87th birthday, and the company is currently maintained in its second generation by his son Daniel Beyersdorffer and Thomas Feil.
Specifications
- Type: 3-way dynamic ported speaker
- Features: midrange adjustment via resistor
- Frequency range: 33 Hz - 20,000 Hz
- Impedance: 4 Ohms
- Power handling: 60 watts (RMS)
- Tweeter driver: 3.0 cm, soft-dome
- Tweeter model: Peerless of Denmark, SKO10 DT
- Midrange driver: 10 cm, coated paper
- Midrange model: WDH of Germany, BMT 130/19-120
- Woofer driver: 15 cm, poly-compound
- Woofer model: Peerless, 830228 (dual voice coil)
- Cabinet: Laminated multiply wood
- Cabinet volume: 27 litres
- Dimensions: (W) 23.5 cm; (D) 24.5 cm; (H) 52.5 cm
- Country of origin: Germany (kit)
- Weight: 11 kg
- Year: 1992
Shure 701 Pro Master

Published: 21/06/2022
Manufacturing date: 1979
Author: Karsten Hein
Category: Gear & Review
Tag(s): Loudspeakers
“What on earth…!?” you might be thinking when stumbling across this article, and even more so if you have been following this blog and perhaps thought you had me pegged as a straightforward audiophile who just happened to be into vintage gear. What on earth is a pair of Shure 701 Pro Master (that was obviously built for public address) to do on an audio blog that is dedicated to the enhancement of domestic listening pleasures? Well, to be absolutely honest, I was a little surprised by this acquisition myself. I guess, some little voice had whispered to me that these anno 1979 PA speakers would be worth the effort of exploration, simply because they would yield new experiences on many levels.
For one thing, the Pro Masters featured a 15-inch paper-cone woofer that was similar to some highly relevant Tannoy and Altec classics. From experience, I had learnt that paper was a decent enough construction material to build natural sounding dynamic drivers. On the other hand, more often than not, I had been warned by my audiophile friends that 15-inch drivers would be far more difficult to integrate with the room, as their greater dimensions could more easily excite room modes that would in turn limit placement choices. I had therefore thought it best to first experiment with speaker placement on the affordable level of the Shure Pro Masters before finally taking the plunge on their more expensive domestic cousins.
In addition to the new bass experience, the Shures featured a radial horn driver with adjustable angle that would offer fresh insights into horn-loaded designs as they were found on many renowned Hi-Fi and studio loudspeakers built by Altec Lansing, JBL, TAD, Electro Voice, Fostex, among others. Horn designs offered the benefit of high sensitivity output even at the low voltages produced by small tube amplifiers. In fact, the Pro Masters’ 102dB in sound pressure (measured at one watt power input and at one meter distance from the speakers) could mostly be attributed to the horns of the high frequency drivers. While the Shures’ horn principle may not have been the most delicate on the market back in the 1970s, it would allow me to learn more about the sonic characteristics of horns in terms of minimum distance, sweet spot, room modes and reflections, and other parameters which would be difficult to judge without first-hand experience.
For the pair of 1979 Pro Masters presented here, I ended up driving all the way up to the infamous Marburg “Hinterland”. Their previous owner Micheal was an ageing audiophile and collector of loudspeakers himself and in the advertisement had described the speakers as being fully functional. Hence, I was quite optimistic when I arrived. I found the speakers set up in a furnished garden hut, in which Micheal had compiled his third or fourth system. A quick listening tests showed them to play music. However, neither the positioning on a table nor the room itself allowed for a deeper tonal analysis. There was pretty much a lack of everything, and so I decided to trust his verdict that they were still fully intact. We carried the Pro Masters to my car and spent the next few minutes listening to his current basement horn system.
Back at home, Sabina helped me carry the heavy speakers up our winding stairwell. I quickly found a spot for them, and we ended up parking them there for a few weeks to finish some other projects. When I finally came back to the Shures, I quickly set them up on two stubby stepladders. I connected them to our Dynavox VR-70 tube amplifier which was fed from our Marantz CD-17 and Cambridge DAC on Restek V1 combo. Having been fully broken in, the Dynavox VR-70 (still with original Chinese tubes) was capable of producing a tonally and spatially accurate musical image. The big question was, if the amp would be able to offer the same dexterity with the Shure Pro Masters connected instead of our EPI 500 loudspeakers. Having limited experience with PA speakers myself, I really had no idea what to expect next, but I was prepared to keep an open mind.
Our upstairs listening room was a little special in terms of dimensions. It was almost 13 meters deep, 10 meters wide, and over 4 meters high in its centre. There were no two walls running in parallel. With all this space available, it may come as a surprise that the only area reserved for listening was a unilateral triangle of about 2 meters in length with a thick piece of carpet laid out at its centre. Somehow the juxtaposition of short listening distance and the massive delay of the room made it relatively easy for the brain to filter out reflections from the music source. Hence, this was usually not a poor choice of venue for testing loudspeakers. However, when setting the Shure PA horn-loaded speakers in motion for the first time, I realised that listening at this short range would be a real challenge.
The horn’s design principle naturally caused high levels of compression at short range that could easily overstrain the ears. Luckily, some previous owner had added Visaton LC57 attenuators to dial back the horns. This worked quite well, indeed. I then started experimenting with the horns’ dispersion angles and adjusted them from formerly 120 to now 60 degrees. At short range, this made the treble sound less bloated and more musically effortless. It was possible that this observation would have been different at greater distance from the speakers or other room dimensions. To my utter surprise and delight, the Shures’ horn drivers did not only sound large and impressive but were also tonally sensitive and dimensionally accurate. The Pro Masters were capable of natural transients and even tonal nuance despite delivering the output to entertain an event.
A lot has been said (and written) on the discrepancy between the relatively small size of horns in relation to their 15-inch woofer companions, as found on many professional audio and domestic designs. This naturally takes us to the subject of bass performance. It seems that on PA loudspeakers, 15-inch drivers with rippled cone surrounds were used as 'midrange' chassis that were also capable of extending into the upper bass frequencies. This was a significant finding when it came to the expectations one might have towards such designs. Coming from domestic speakers, I would have suspected a 15-inch driver to act as a subwoofer that would only with great difficulty reach the higher crossover frequencies when coupling to the horn. However, listening to the Pro Masters perform, I quickly understood that I would have to dial down my expectations in terms of bass extension.
The Shures played an excellent treble and even created a believable midrange, perhaps as one might expect from listening to a home concert, and yet bass was more hinted than it was fully executed. This was also the moment when I started to feel confined by my up-close listening position. I wanted to have a solid back wall behind me to more fully appreciate the slapping of the large cones. In order to find out more about the Shures’ tonal balance, I would need to give them an audition in our main listening room in which my listening distance was at five meters, with the back wall about 90cm behind me. To make this happen without getting in trouble with my wife for aesthetic reasons, some dedicated stands would need to be built first. I drew up a quick design and went to buy some wood and paint from a local DIY store. On my way home with my bundle of carpenter board and solid wood beams, another question came to mind: What made these horns sound so great, and what was the crossover design for the woofer?
Back at home, I decided to first open the speakers to find out what was inside. The large woofers were held in place by eight screws that were professionally countered from the inside by threaded drive-in nuts. This would make woofer replacements an easy task, and I could already see why. As it turned out, one of the woofers had a crack in the cone and had already been taped from the inside. The crack had hardly been visible from the outside, and I had a strong sensation that Michael the pensioner and loudspeaker collector from Marburg's Hinterland had in fact sold me a damaged loudspeaker without telling me about it. In my years in Hi-Fi, I have come to understand that there is a generation of people who have learned to twist the truth in any way they like, even to the point where they start to believe it themselves.
Luckily for me, the damage did not render the bass driver useless. With a fresh strip of black tape in place, the driver could still be trusted to perform for a number of years. And, to my surprise, I saw that the woofer was attached straight to the terminal without passing any kind of crossover. While this would leave it up to the driver's cone and its spider's mass and tension to reduce unwanted high frequencies, it also lessened the likelihood of phase issues, as long as the drivers were positioned correctly to begin with. I was strangely reminded of the Orbid Sound Pluto's (kit) design, which seemed to go by the same method, even though their much smaller bass drivers had great difficulty in losing the higher frequencies and therefore contributed to a squeaking midrange.
Following the inspection of the woofer (seemingly a 15" Eminence-type with the typical square magnet and three magnet screws), I unmounted the Shure's horn driver and noticed that a number of audiophile improvements of the crossover and mounting had been made in comparison to the original design. The capacitors had been replaced with modern audiophile foil caps. In addition, a variable Monacor DSP-1 resistor had been installed to protect the horn from damage in the event of unintentional power spikes. The horn was no longer screwed onto the cabinet's rear wall. It was instead placed on a wooden support with foam cushion. This would minimise some of the back wall resonances and prevent these from afflicting the horn's diaphragm.
Some prior owner had also attached self-adhesive bitumen mats to the interior walls; however, they had already become loose in many places and had begun to slide down the sides. I decided to take them out completely in order to once again reach that warm, vintage, cabinet sound of a resonating wooden box. If the original intension had been to reduce cabinet resonances, some simple internal struts would probably have done a better job anyway. I decided to hold on to the bitumen mats just in case I would change my mind upon hearing the speakers perform.
Building the stands for the Shures was a simple enough task. We started out from two 16mm carpenter boards that would form the bottom plates of the stands (32mm in thickness) and to this attached three 360mm beams of 80x55mm in strength in a triangular position. We then screwed the top plate onto the beams, again made from two sheets of 16mm carpenter board. I was hoping that this construction would allow for more freedom on the side of the speakers which would in turn result in a more pleasant tonal representation. Three spikes would isolate the stands towards the floor. And, on the side of the speakers, I would replace the four original plastic feet with three rubber cushions made for professional music gear. I had already noticed that three supporting points often produced a better defined coupling between materials and was therefore easier to execute than four spikes or cushions on which the weight distribution could be less than ideal.
When I set up the speakers in our main listening room just a few days later, I was actually feeling hopeful that the combination of greater listening distance and better stands would also lead to superior imaging, and that the boxy shape of the room would do well to accentuate bass response. To my surprise, however, the Shures did not sound any more bass-heavy than they had done before. Unless they were used for public address, where they would be called upon to transport vocals over a great distance, these speakers needed a subwoofer in order to capture all aspects of natural instruments. My next task would be to find a sensible sub to pair with the speakers, and thus I found myself crawling even deeper down the rabbit hole. In order not to get lost on the way, I decided to see an expert on professional audio solutions, hoping that he would aid me with my difficulties.
As I found out from running a few web searches, there was an audio enthusiast by the name of Rainer Weimann who operated a part-time sales office southeast of Darmstadt in which he sold affordable audio gear to small-time local musicians, entertainers, and organisers of events. Over the years, he had established a reputation as distributer for the Chinese brand Dragon Audio. Founded in Shenzhen in 2004, Dragon Audio had grown into a major OEM producer of audio gear with over 1,400 staff working in 14 factories. I was specifically interested in an active Hi-Fi subwoofer made by DA that Rainer had listed on an auction site. The other product I had seen on sale in Reiner's shop was an active 15-inch Vonyx PA subwoofer. Vonyx was another audio company that had made a name for itself serving the lower end of the market. Ideally, it would be possible for me to listen to the two subs in direct comparison.
Upon arriving at 'ProSchall', as Rainer's shop had been named, I was given a warm welcome and invited inside. I immediately recognised some of the products I had seen offered online. The two subwoofers were standing side by side, right next to some even larger specimen. Rainer explained that the 15-inch Vonyx PA subwoofer was designed to power public venues and would sound best when driven at high levels of sound pressure. It had a rigid suspension that could handle high volume music program but would sound flat and overly dry when played at living room volume. The Dragon Audio woofer, on the other hand, had been designed to be played in a household environment. It had a softer suspension that would allow the driver to operate accurately even when played at low volume.
Seeing that I was not yet fully convinced, he quickly connected the 12-inch DA woofer for me. The sound it produced was instantly familiar from listening to Hi-Fi gear. I could imagine that this would play well with many types of speakers. Rainer then connected the 15-inch Vonyx woofer, and immediately the room sounded too small for the hard and dry bass of the woofer. The music could be physically felt in the room more than it could be heard, and it was easily conceivable that the neighbours would derive greater benefits from the output of this woofer than we could in the listening room. It was at that moment that I could quite literally feel the difference between Hi-Fi and PA speakers. Either of them would perform like a fish out of water if it was employed outside of its intended venue. I thanked Reiner for the wonderful experience and, with a deeper understanding of the matter (and one Dragon Audio subwoofer called 'The Art of Sound' in the trunk), I made my journey back to Frankfurt.
From Reiner, I had also learned that professionals often preferred to have the vocal section separate from the bass drivers, because this would reduce the load on the amplifiers, decrease the likelihood of damage to the delicate top-end, and allow for the perfect number of bass drivers in relation to the size and sonic characteristics of the venue. This made sense of course, considering how long it took me to integrate simple 3-way speaker systems in our listening rooms. PA speakers could be used for a whole range of venues, from outside gigs on which massive amounts of bass were needed, to boxed-in basements in which low frequency waves were accumulated from being reflected back from the walls. In our living room, the 12-inch DA woofer turned out to be more than sufficient for filling in the Shures' missing bass. For the first time, the tonal balance was as one would expect from speakers of this size. As you might imagine, the following movie night turned out to be a real treat for the whole family, with the Pro Masters effortlessly rising to breath-taking volume at an instant and the subwoofer giving the sound effects their palpable bass dimension.
< Watts, Sound Pressure, Decibels | Shure 701 in Public Application >
Specifications
- Type: full-range public address speaker
- Principle: 2-way, front-ported bass reflex
- High frequency section: radial horn driver
- Low frequency section: dynamic 15-inch woofer
- Special features: 60° / 120° adjustable horn
- Power handling: 150 watts RMS / 55V peak
- Sound pressure level: 102 dB (at 1W / 1m)
- Frequency response: 50 Hz to 15,000 Hz
- Crossover frequency: 2,000 Hz, 18dB
- Nominal impedance: 8 Ohms
- Horizontal sound distribution: 60° or 120°
- Vertical sound distribution: 90°
- Operating temperature: -7°C to 43°C
- Cabinet: 15.9 mm multiply wood, vinyl coated
- Original weight: 26,4 kg per speaker
- Dimensions: (H) 700mm; (W) 585mm; (D) 405 mm
- Country of manufacture: USA
- Year: 1979
Updates
- Terminals for bananas and spades
- Visaton horn volume attenuator
- Audiophile horn crossover
- Monacor DSP-1 resistor
Snell Acoustics Type C IV

Published: 30/08/2021
Manufacturing date: 1983
Author: Karsten Hein
Category: Gear & Review
Tag(s): Loudspeakers
I first heard Peter Snell’s C IV loudspeakers perform in the dining room of a Wiesbaden townhouse and was instantly taken in by the realism with which the club atmosphere of Christian McBride’s album “Live at the Village Vanguard” was recreated. The spacious room boasted a ceiling height of nearly 5 meters and was sparsely furnished, with a massive dining table and chairs dominating its centre. The speakers were positioned far away from the walls, approximately two meters from the front wall and 1.5 meters from each side. They were driven with a Dynaco ST70 tube amplifier. Everything in their sound—stage depth, width, resonances—suggested that we were were listening to the actual event, rather than a recording of it. I could literally smell the scent of stale beer and cold cigarettes.
I learned two things that day: The ultimate goal of HiFi does not lie in deeper bass or higher treble, nor in clearer sound or greater dynamics, but rather in the sum of all parts to recreate the authentic event. And second: The room and positioning of the loudspeakers play a major role in making the illusion of a performance become reality. And once we have heard it, once that vision has been installed in our minds, it is very difficult to listen to anything less. Most newbies in HiFi have been taught to dissect music rather than achieve homogeneity. Data, rather than feeling, is the message conveyed by the audio press. Hence, new arrivals to the HiFi scene will look for the right specs on their gear rather than make sure to get the right sound. One can spend a lifetime in HiFi and still have very little clue of what it is actually about.
It is probably fair to say that the Dynaco ST70 tube amplifier played a major role in the recreation of the authentic event. Neither the wattage of this amplifier nor its channel separation, damping factor, signal to noise ratio, etc. indicate the amount of realism this amplifier is capable of. Hence, it is no surprise that, in a world run on facts and figures, it took me close to 50 years and some repeated nudging from fellow audiophiles to finally be able to listen to and comprehend the merits of a performance that deserves the term ‘high fidelity’, i.e. as close to the original as possible. That day, “Live at the Village Vanguard” really felt live. It prompted me to purchase the vinyl record and write a review on it. And it also got me interested in the C IV speakers.
Snell Acoustics was founded in Haverhill Massachusetts in 1976, and the company soon made a name for itself selling audiophile loudspeakers at reasonable prices. After sales service was exceptional, as Peter Snell was a perfectionist and made sure that each of his speakers measured to spec with deviations below 0.5dB per chassis. The same was true of all the replacement parts the company sent out, often many years after the original date of purchase. Audiophiles constitute a small and intimate circle, and especially bang for buck producers often benefit from word of mouth and manage to build up longstanding relations with their thankful customers.
Launched in 1983, the Type C series was among the last loudspeakers actually designed by the company founder himself. Peter Snell died from a heart attack in his factory in the following year. Despite the absence of its original owner, the company continued to evolve and, in 1990, joined forces with Lucasfilm to design its first line of THX loudspeakers. In 2003, the by then renowned Joe D'Appolito joined Snell as chief engineer. In 2005, Snell and Boston Acoustics were purchased by D&M Holdings—which also owned Denon, Marantz, and McIntosh—and Snell would continue to build loudspeakers until 2010. Throughout its existence, the loudspeaker manufacturer stood for great customer service, tonally accurate acoustic designs, and great attention to technical detail.
The Type C IV series are said to have been heavily influenced by the methods and measuring philosophies of the National Research Council (NRC) based in Ottawa, Canada. Typical characteristics of speakers developed in conjunction with the NRC are steep crossover slopes, wide dispersion, smooth off-axis response, and special focus on a speaker’s interaction with natural listening rooms. The C IV has fourth-order crossover slopes, a very flat frequency response that varies very little off-axis. A rear tweeter was added to compensate for the front tweeter’s increasingly narrow beam at high frequencies. It can be turned off with a toggle switch to accommodate smaller listening rooms. The C IV boasts what the company called a “Zero Diffraction” grille. The idea was to wrap the removable grille’s wooden frame around the speaker front in order to minimise the distance between cloth and divers and decrease diffraction.
The additional tweeter at the rear comes in at around 6kHz with a first-order slope. It contributes to the front tweeter’s energy and helps to create a stage impression that is both wide and deep. Depending on the distance to and material of the front wall, the additional tweeter can cause some harshness. To turn the speakers to the room, the C IV’s front tweeter can be regulated. Alternatively, a switch at the back allows us to turn the rear tweeter off completely. To make full use of the C IV’s abilities, it should be placed in a large room with approximately 1,20m distance to the front wall and some distance to the sides. Set up in this way, the rear tweeter supports the illusion of the music breaking free from the source with the speakers themselves becoming invisible. Toe-in helps to correct the stage impression. I must confess that, given the peculiar shape of our room, I did find it difficult to get the stage as perfect as I had heard the speakers capable of in the Wiesbaden townhouse, but I can say that I came quite close.
With the rear tweeter switched on and the right distance to the walls, the C IV created a broad and open stage. And with the grille cloth in place, they produced a pleasantly soft treble, even at short range. For those sitting at a distance of 3 meters or more from the speakers, there is some treble fall-off, and listening without the cloth might be preferable. Despite Snell’s “Zero Diffraction” promise, the difference between open and closed operation is quite audible. In our listening room, the C IV produced an open and spacious top end and a natural and fully integrated bass. The speakers sounded tonally accurate and presented the music nice and full with great timbre on the lower piano keys. There was sufficient presence of the higher piano keys as well, however, in direct comparison they were missing some of the attack of our electrostatic speakers or even our more recent Tannoys. Male vocals sounded natural with a slight tendency of thinning when the rear tweeter was switched on (e.g. Nick Cave). Female vocals showed much of the same effect (Nora Jones, Come Away with Me), especially when playing music from digital sources.
Also see: Snell Acoustics Type C IV Audio Demo
The Snells showed convincing overall dynamics and, due to their large bass driver and ported design, they were capable of swelling in volume quickly. When set at 75dB volume, my wife reported that she felt quite overwhelmed by the music and that she would have preferred to sit farther away from the speakers. It was the first time that I had heard her comment on loudspeaker in this way. I would think that the effect was caused by a combination of the sonic impression and the speaker’s design. Standing far into the room, nearly 120cm tall and 40cm wide, with their black grille cloth in place, the physical image alone was quite intense, indeed.
Specifications:
- Type: Four-driver dynamic loudspeaker
- Drivers: 10" woofer; 5” midrange; 1” front tweeter; ¾” rear tweeter
- Crossover frequencies: 275Hz; 2.7kHz (@24dB/octave)
- Nominal impedance: 8 Ohms
- Sensitivity: 88.5dB
- Dimensions: 37cm (W); 117cm (H); 30cm (D)
- Weight: 39kg
- Year: 1983-1991
TEAC LS H255-MA

Published: 16/12/2021
Manufacturing date: 2007
Author: Karsten Hein
Category: Gear & Review
Tag(s): Loudspeakers
My explorations into the TEAC LS H255-MA bookshelf speakers was purely coincidental. A friend of ours had left them at our house having heard about my interest in audio gear. Puzzled about how to put them to good use, I decided to pass them on to a work colleague of mine who was looking into setting up his own system. The thought of passing them on came easy to me, as I had never considered them to be candidates for an audiophile listening session. When they had first arrived at our house, I had done some quick research and found out that they had originally been sold with TEAC’s CR-H240 DAB compact-HiFi system, which was known for decent entry-level performance. I could not find any indication of the H255s having being sold separately — usually not an indication of serious speakers.
The CR-H240 DAB was a combined unit with a CD drive and radio unit built into a single compact receiver. The trouble with such all-in-ones, especially at this price point, was that many concessions to sound quality had to be made on multiple levels: from the vibrations of the CD drive to the performance of the DAC, from the circuit board layout and the single power supply, right to the smallish amplifier to power the loudspeakers. In such a scenario, even the best of speakers would perform poorly and — consequently — only low-cost choices could be made in terms of speaker design. And yet, the H225s offered a robust front plate of low-resonance materials, a real wooden cabinet (made and assembled in China), a relatively large for their size 2.5 cm soft-dome tweeter, and what looked like a kevlar midrange/bass driver. After some tweaking, the sturdy screw-down binding posts on their backs were even able to take hollow banana plugs or large spades, just as one would find on far more pricy designs.
A knock on the cabinet revealed that this was still capable of some warm and woody sounding resonances, similar to the body of a guitar. That the H225s were rear-ported only highlighted this quality and made me wonder, if this type of cabinet was going to be an asset or a liability to them. Most modern manufacturers try to eliminate all cabinet resonances through MDF or HDF and strong inner bracing. Either way, nothing about the chosen materials gave away that these speakers had been carelessly designed. I therefore decided that I would hook them up to our upstairs system, which I had just fitted with an all-new Audioplan PowerCord S to very good results. I wanted my colleague to listen to the speakers perform at their best, before handing them over to him, and, quite naturally, I was also curious of what would become of my own mixed impression of the H225s.
They almost had to fall behind when compared with our speaker legends from the past, such as ATD’s Pata Acustica or the Tannoy XT8F towers. The only questions was: How much exactly? I was half expecting to have a good laugh at their miserable performance. But, we can never be sure of the performance of HiFi equipment, unless we have auditioned it ourselves and witnessed it play our favourite tunes with our own ears. In my test setup, the H225s were running on Belden 9497 cables and hooked up to our Hafler XL280 power amplifier. This in turn was powered by our Dynaco PAS-4 tube preamp fed through Audioplan’s PowerCord S. All interconnects used were of the solid-core silver type. The Audioplan cord had recently brought a sense of dimension and urgency to our system that proved to be a priceless upgrade from what we previously heard. I was therefore looking forward to learning how much of this quality would remain.
I tested the H225s with three CD albums: Diana Krall’s “Turn up the quiet”, Jörg Hegemann’s “Foot Tappin’ Boogie”, and Helge Lien’s “10”. All three albums offer outstanding recordings throughout, with excellent timbre, rhythm, and dynamics. I began with Helge Lien’s album and was surprised by the width, depth, and dimension that the H225s were capable of. Placed on our homemade MDF stands and cushioned on felt pads at about 60cm from the front wall, they immediately sounded much larger than their actual size. There was bass in abundance, much more than I had heard on the closed Pata Acustica. On the H225s the bass lines were not as well-contoured, of course. And yet, bass seemed natural and blended in well with the music. Metallic sounds from the drum-set were presented in a real and life-like fashion. Instrument separation and stage depth were still in tact, more so than on the Pata, showing the effects of the Audioplan cord even through these entry-level speakers.
On Diana Krall’s album, the impression of natural instrument colours and space remained largely the same. However, the concessions to price and size did shine through in the critical midrange discipline of female vocals. Diana’s voice was not fully in balance showing a bit of crisp harshness around the top-end that would take a little getting used to, especially coming from a more pricy system. Sibilants were a bit forceful and the natural timbre suffered a bit. Once again, I was taken in by the sense of dimension and presence that these smallish bookshelves were capable of. Just to think that these were all beautiful traits that the H225s had never received credit for, simply because their usual play friends were unable to highlight or even grasp their full potential. It was the sad old tale of a huge talent hanging out with the wrong crowd.
The TEAC LS H255-MA are solid entry-level speakers that will perform at near audiophile level when driven with powerful and precise electronics. As rear-ported speakers, they will need space to breathe and will sound convincing when placed on stands with their front plate at a minimum of 50cm distance from the front wall. The TEAC engineers deserve some credit for outperforming any Sonos and similar convenience products by a long stretch, if given proper amplification and source signal. To my colleague, I recommended that he should purchase a nice tube amp for them, as this would continue to make them sound large with great flow and musicality.
And this brings me to perhaps the most important lesson to be learnt from the H255s: the role of the source in the equation that is called music. From now on, whenever there is a debate on what is more important - the source or the speakers - my answer will be: “The source!” After all, many of today’s speakers are able to follow the source signal quite faithfully, often making differences in performance secondary and a matter of personal taste. It has often been stated that speakers cannot play correctly what the source gets wrong in the first place, and, listening to the TEACs perform on our system, has made this clearer to me than ever before.
TEAC Company History
The Japanese company that became known as TEAC had two original sources with separate founding dates: First, there was the Tokyo Television Acoustic Company, founded in August 1953 and, second, the Tokyo Electro-Acoustic Company, which was founded in 1956 and provided its name following the merger. TEAC is also the story of two brothers: Katsuma Tani, who was an engineer in aviation and aeronautics and employed by the first company, and Tomoma Tani who joined his brother in the creation of the second company in an effort to improve reel-to-reel and cassette recorders. Both brothers' ingenuity helped the company to establish a solid reputation for HighEnd reel-to-reels, cassette decks, turntables, and CD players during the 1970s and 80s. In 2013, Gibson took over the company but was forced to sell again during its bankruptcy in 2018. The TEAC company has continued to manufacture products in three categories: computer peripheral devices, professional audio products (with their brands TEAC and TASCAM), and information products that are used for in-flight entertainment, monitoring, etc.
Also see: TEAC LS-H255-MA audio demo
Specifications
- Speaker type: 2-way, rear-ported
- Frequency response: 60 Hz—22,000 kHz
- Power handling: 50 W RMS
- Impedance: 6 Ω
- Sensitivity: 86 dB
- Mid-range / Bass driver: 1x 130 mm meshed cone
- Tweeter: 1x 25 mm, soft-dome
- Finish: maple
- Dimensions: 170 x 270 x 235 mm
- Weight: 3.7 kg
- Year: 2007
Tannoy DC6T

Published: 05/06/2020
Manufacturing date: 2010
Author: Karsten Hein
Category: Gear & Review
Tag(s): Loudspeakers
It may not be immediately obvious from looking at the photos, but I had to think long and hard about how and if to present loudspeakers on this platform. For one thing, loudspeakers are vertical objects, whereas I have made a point in maintaining a 16:9 horizontal picture format in my presentations. Secondly, it was clear from the start that I would not be able to offer a look inside the speakers, for the simple reason that this might cause damage to the cabinet or drivers and thereby lower the resale value – a significant consideration, if I want to continue our Explorations in Audio on a reasonable budget. And, lastly, loudspeaker performance depends to a great extent on the environment in which the speakers are placed.
I finally decided that, due to the significant role speakers play in our systems, I would double-layer my photos based on the current listening environment that the speakers are in and to fade out the room features. My intention in doing so was to lessen the prominence of the room and to thereby give you the opportunity of imagining the same speakers placed in your own environment. The advantage is that you see the speakers at the toe-in angle and distance that is most realistic to real life.
Tannoy was founded by Guy Fountain as the Tulsemere Manufacturing Company in England in 1926 and ranks among the oldest manufacturers of loudspeakers in the world. The name is an abbreviation of ‘tantalum alloy’ a material that was used in electrolytic rectifiers that were developed by the company. The Tannoy trademark was registered in 1932. With its original headquarters in London, Tannoy soon became famous as a manufacturer of public address speakers and professional speakers for the military in World War II. Since the name was shown in bold letters on the speaker grills and thereby frequently visible to the general public, to ‘Tannoy’ an event became synonymous with providing amplification for it. In fact, older Englishmen can still be heard referring to public address systems as Tannoys, despite the fact that, more often than not, these systems today come from a wide range of manufacturers.
Following economic pressures, Tannoy moved to Coatbridge, Scotland in the 1970s, where it has remained. Today, the company belongs to the Uli Behringer MUSIC Group, that has pledged to preserve the brand and to keep the Scottish location. In recent years, with mainstream buyers turning away from High Fidelity for the sake of cheap USB & wireless gadgets, Tannoy has been struggling to keep their foothold. Tannoy did not invent coaxial driver designs, but they certainly were among the pioneers of this technology. The Tannoy signature Dual Concentric driver was invented in 1948. It boasted a design in which the tweeter was set deeply inside the center of the woofer. The on-axis position had the advantage of improved time and phase alignment and was originally intended for microphone measurements. The original pair ended up being used in Decca’s FFRR studios, and then EMI ordered some for Abbey Road (source: whathifi.com), a studio made famous by The Beatles, among others. Form there it was only a short way to stardom.
The Tannoy DC6t of 2010 comes in a slender modern design with an excellent wood finish. Despite its trapezoid shape, the overall impression is still that of a box, even if it is a relatively pretty one at that. For added stability, Tannoy has mounted the cabinets on an additional and wider floor plate. This is quite effective and has allowed me to place felt pads under the spike coasters without the speaker becoming too rocky. Connection is made via bi-wiring terminals which are quite solid and conveniently located close to the floor. A bit unusual perhaps is the polarity arrangement, with the two positive and the two negative posts being located next to each other on a horizontal line.
The tweeter has a titanium dome, and, like all hard surfaces, this can be rather unforgiving if something is not quite right. Clean energy is therefore of utmost importance to this type of speaker. An additional woofer is positioned directly underneath the 6-inch Dual Concentric driver, and the speaker does have an intensional three dB increase in bass response. The cabinet is rear ported but can be placed relatively close to the front wall of the room despite of this. The sound is very precise and the stage is both wide and deep. Instruments reach deep into the room and piano has just the right timbre and attack to be realistic.
On the 35 watts HK730 the speakers performed very well, however, only the 60 watts Citation provides the necessary boost for piano to attack. Since the DC6t are 8 ohms speakers, the amplifier power will be exactly as presented. The speakers are ideal for small to medium sized living rooms and will survive an occasional party. 6-inch woofers have their limits of course, especially when it comes to fullness of sound and punch. If you have the room and budget for it, I would suggest that you try the next larger versions DC8 and DC10.
Specifications
- Cabinet design: floor-standing, ported
- Drivers: 1x 1-inch titanium dome tweeter, 1x 6-inch paper cone midrange (dual-concentric, 1x 6″ paper cone woofer
- Freq. response: 34 Hz – 35 kHz, – 6 dB
- Nominal impedance: 8 Ohms
- Sensitivity: 89 dB
- Crossover Frequency: 1.7 kHz
- Power handling: 87 watts RMS
- Dimensions: 950 x 226 x 225mm
- Weight: 14.9 kg (each)
- Year 2010
Tannoy XT8f

Published: 20/10/2020
Manufacturing date: 2016
Author: Karsten Hein
Category: Gear & Review
Tag(s): Loudspeakers
My original intention was to sell off a pair of speakers and not so much to purchase a new one. But when a caller expressed interest in my pair of KEF iQ30 bookshelves, somehow I could not help but enquire more deeply about the reason for his interest. It turned out he had a small listening room, and that his current speakers were simply too large for the job. To my surprise, these were of the exact brand and model that I had been running a web search on for some time. We consequently agreed that he would bring his current speakers along when auditioning mine. What a strange coincidence that was.
To replace our KEF iQ30 bookshelves, I had originally purchased a slim pair of Tannoy DC6t floor-standing speakers. And, although these sounded fuller, I could not rid myself of the sensation that they, too, were lacking the muscle to fill our 70 sqm office with music. While being articulate and pleasant in their presentation, their performance mostly inhabited the space right up to the listening position (at about one-fourth of the room’s depth), rather than filling it completely. Granted, the pair of Tannoy DC6t was better suited than the KEFs for this location, but it still seemed a little light on the bass, not terribly underperforming, but not impressive either.
Replacing the DT6t with even larger speakers was not going to be easy. The trouble is, when your listening space is a sleek and modern office, this does set some limits to the possible speaker choices in terms of colours, shapes, and sizes. And since the DC6t had already been approved by the other household dwellers, I tentatively set up a web search on the next larger (and more recent) model, the Tannoy XT8f. Hence my excitement when I heard over the telephone that there now was a pair of XT8f on offer — and that this was even going to be brought to our house, instead of us having to take the trip.
As you might imagine, our double-interest in each other’s speakers created a strange scenario, in which either side had something to gain and something to lose. I could see that it would be a challenge for us not to let this get in the way of enjoyment. Upon his arrival, I helped our guest by carrying up one of his Tannoy XT8f speakers, and I immediately noticed how large and heavy they were in comparison to our present DC6t. Although they were only wrapped in thin blankets and not stuck in bulky boxes, I had to take especially good care not to scrape them along the inner walls or banister of our stairwell.
Since the original reason for his visit had been the KEF iQ30s, we decided that they should be auditioned first. I had them hooked up to our DB Systems DB1 + B&K ST140 system in our main listening room. We had a choice of vinyl, CD, as well as the possibility of streaming via Amazon Music available, but we ended up only playing CDs, some of which he had brought along as his reference. It is always fun to listen to other people’s music, and so I simply sat and listened to new sounds or enjoyed playing some of my own. The KEFs do play well in our main listening room, and there were moments in which I forgot the original purpose of our meeting and was simply taking in the music.
Without a final decision on whether he would purchase my KEFs, we proceeded to our office upstairs. Here, our Tannoy DC6Ts were still connected to the Restek V1 + Hafler XL280 combo. With everything perfectly set up from hours of listening, I asked him to sit down and listen to these first. I know how our system sounds, so I simply stood aside and let the music play. My impression was that he enjoyed what he was hearing, however, the second purpose for his coming to Frankfurt was for me to decide whether I was interested in the larger Tannoys that he had brought for me. We therefore quickly took the protective blankets off and connected the XT8Fs to our system.
My first impression was that the sound was muddled and massive, resonating far too chaotically in the large office space. Would I be able to make them blend in with the room, and what was it worth to me to find this out? After all, where the DC6T had been articulate and refined, the larger speakers now seemed disorganised and colossal. However, since this forum is called ‘Explorations in Audio’, you can probably guess my final decision, although it was not one that resulted from a positive first impression. That they already had some bumps and bruises on the finish only contributed to this sensation. What consoled me was the fact that the whole room was energised by these new speakers. And this was the one thing the smaller Tannoys had been missing. We both made our respective purchases, content with each other’s offers, and the buyer went on his way.
I have learned not to judge new gear arrivals too quickly. Some of the best devices I have ever owned, have taken me weeks, if not months to set up well. New speakers can be tricky in this way, because many factors come into play: distance to the front and side walls, width of placement and toe in angle, listening position, and system matching, to mention just a few. These factors are hardly solved within a day’s work, as even one centimetre difference will have a pronounced effect on the speaker’s ability to perform. While this is true for all speakers, larger speakers tend to be more difficult to place, especially when taking interior design considerations into account.
Given some time to experiment, I came up with a placement that allowed me to keep my accustomed listening position at about one-fourth of the room’s depth with only minor adjustments. The XT8F are positioned about 20cm further away from the front wall than the DC6T had been, and my listening position had to be moved 10cm back. This way, the toe-in could remain unchanged with both speakers directed just past my ears instead of straight at them. This has a positive effect on sound stage and reigns in the highs which are a bit overly pronounced when played on axis. During the placement I listened to Bruce Springsteen’s Song "Tougher than the Rest" from his live on-Broadway performance. This way I could be sure that there was a real stage to be recreated. In fact, I listened to it so many times in an endless loop, I have been humming it ever since.
The XT8f have a full and rich sound, in comparison with the DC6t, but also more generally speaking. At close distance, the sensation is one of bathing in music. There is plenty of good quality bass, and due to their 91dB performance at just one watt, they play loud with ease. Although they look chunky and provide plenty of tonal depth, they play voices intimately, as if listening to a cozy living room performance. This contrast of mighty roar and delicacy is highly addictive to my ears. Due to their concentric construction, the XT8f are very exact when it comes to locating instruments. Perhaps not quite as exact as the DC6t but still industry-leading at this price level. If the DC6t sounded as though one was taking part in a studio session, the XT8f invite you to the jazz club. Both speakers are insightful enough to be entertaining at all times, but if the room is right, the eights appear just a bit more rounded, especially towards the lower end. I now understand that in a smaller room this much bass can be overwhelming.
Also see: Tannoy XT8f Audio Demo
When the music is subtle, the XT8f will play this with delicacy and insightful detail, and when the orchestra swells, their excellent dynamics generated from a 50 litre corpus with down-firing bass port will thrust forward with a vengeance. I could not detect any compression when going loud, which is new to me and wonderfully pleasing. It quickly became clear that this is a completely different beast. Those who purchase the XT8f hoping for an upgrade to their DC6t might be disappointed that their room is simply too small of a playing companion. But those who have ended up with the DC6t in error, like myself, have a real chance of being very happy.
Specifications:
- Cabinet design: floor-standing, ported (down-fire)
- Drivers: 1x 1-inch titanium dome tweeter, 1x 8-inch paper cone midrange (dual-concentric), 1x 6″ paper cone woofer
- Frequency response: 34 Hz - 32 kHz, -6 dB
- Nominal impedance: 8 ohms
- Sensitivity: 91 dB
- Crossover frequencies: 250 Hz & 1.8 kHz
- Power handling: 100 watts RMS
- Dimensions: 1080 x 317 x 345mm
- Year 2016

Teufel M200 (Basic Module)

Published: 12/03/2023
Manufacturing date: 1988
Author: Karsten Hein
Category: Gear & Review
Tag(s): Loudspeakers
In November 2022, I tested a pair of Duevel Planets loudspeakers. They were of omnidirectional design and surprised me with tonal accuracy and excellent stage imaging. When their owner, Alexi, shared my test with his audiophile friend at work, Michael wondered if I might be interested in testing yet another German HiFi legend, namely, the first loudspeakers ever sold by the German loudspeaker manufacturer Teufel. Since I only knew the Teufel brand from the mid-Fi gear sold in department stores, I was a little sceptical at first. However, this changed when Michael sent me a German HiFi Vision magazine test from August 1988, in which the small Teufels were put up against massive floor-standing speakers from HiFi royalty: Cabasse (model: Brigantin VI), MB Quart (3200 S), and Pilot (Concorde MK IV). It may have helped the test a little that the M200 were played in conjunction with their 56 kilos M6000 compound-bass module. On the other hand, reaching top scores among these speaker manufacturers was more than impressive for a newcomer.
Founded by Peter Tschimmel in 1979, the Berlin-based Teufel had established a name for itself as speaker kit manufacturer, offering selected combinations of crossovers, drivers, and cabinets to its customers. The M200 Basic Module and M6000 Bass Module were the first ready-to-play loudspeakers by the young company. In them, Peter Tschimmel combined the best of what he understood about crossovers with top-of-the-line driver technology. Tschimmel knew that phase alignment and natural tonality were key criteria to be addressed in loudspeaker manufacturing. He was a relative pioneer with his idea of keeping the subwoofer separate from the Basic Module to allow for easier placement of all units in the living space. The M6000 subwoofer itself sacrificed some of its sensitivity to a new compound design that positioned one channel’s bass driver behind that of the other channel to create a pneumatic buffer between them which served to cut the output frequency in half. Due to this effect, the M6000 naturally cut in just under the rated 50 Hz drop-off frequency of the M200 Basic Module, thus extending its range down to 20 Hz.
The M200 were cleverly constructed, reducing cabinet resonances through internal bracing and still not suffocating the sound by using MDF all around. While the front plate was made of MDF, the rest of the cabinet was constructed with 22mm chipboard in support of natural tonality. The midrange-bass and sub-bass drivers were made of paper by the German components specialist Isophon which had not too long before been taken over by Bosch/Blaupunkt. Isophon was among the most innovative speaker driver manufacturers of its time, and the M200 / M6000 chassis still have a good reputation in the HiFi industry. Tschimmel's understanding of crossovers was excellent, and the M200 showed some welcome features for serious bookshelf speakers of the time: 1. proper binding posts that were able to take bananas or spades, 2. a single diameter of allen key screws to fasten all driver chassis as well as the grille, and proper loudspeaker stands to support the Teufel's High-End claim, especially to those customers who were willing to look for and experiment with the ideal room placement.
The frameless speaker grilles were made of rigid perforated sheet metal and allowed for ultra-wide dispersion. Depending on one’s listening tastes, one might find that the speakers sounded better with the grilles taken off. The act of taking the grilles off, however, could be a little tricky because of the four spacer sleeves keeping the grille from touching the speaker front. One had to be careful not to loose them while the grilles were removed and stowed away. After all, the spacer sleeves were made of simple black plastic and, especially when found out of context by some other member of the household, did not look like anything worth keeping.
When Michael and I first set up the M200 Basic Module in my listening space, I was a little confused by the fact that the familiar stage impression of a singer in the middle and the instruments placed around did not want to materialise. Instead, it sounded as if there were two singers simultaneously singing the same song. Inverting the polarity of one channel changed the impression only slightly. It was not until Michael had gone home that I opened both speakers to have a look inside. While one of them looked to be in original condition, the other seemed to have been repaired along the centric spider. The polarity had been handwritten on the magnets by Tuned Systems in Frankfurt am Main. In doing so, the service technician seemed to have confused the poles, and, since they had been given only one of the two speakers for repair, had been unable to notice their error.
I corrected the polarity and found that the sound stage had much improved. When I called Michael to tell him about my findings, he remembered the story of the repair, and we both laughed at the improbability of such a mishap from a professional speaker repair service. And, as Michael had only been running the speakers as rear channels on his surround system following their return, he had never had the chance to notice the inversion, believing that the resulting sound was part of the rear channel effects. Needless to say, the polarity inversion of one midrange-bass cone had contributed to an elimination of bass frequencies and an over-representation of treble, a fact that would have remained hidden on most surround systems that use an additional subwoofer for this job and cut low frequency output on the rear speakers.
I first hooked up the M200 Basic Module speakers to our upstairs system that consisted of a CD source, DAC, solid-state preamplifier and a tube power amplifier (see details below). The Teufel 2-way bookshelves had been given to me for testing without the M6000 subwoofer, which was deemed too heavy for transport and not worth the hassle. In fact, the original HiFi Vision testers of the Teufel system had come to the conclusion that the Basic Modules alone did a splendid job, even when playing without the bass. I did, however, receive the original Teufel stands, which should have been well-matched with the properties of the speakers. My first impression was that the stands looked a little frail to properly support loudspeakers of 14 kg with strong bass drivers. Their center column only consisted of four sheets of MDF with bent metal grilles between them on front and rear that would also act as cable duct for the speaker cables.
Resonances from the speakers could be felt along the front grille and all the way down the shaft of the stands, even when the speakers were playing at moderate volume. Michael had placed four thin rubber pads under the stands which I would have preferred to replace with spikes and coasters. I did, however, notice that the M200 could all too easily sound light and analytical if proper coupling towards the ground was not assured. Placing the M200 on our own DIY-MDF stands did not produce a desirable result, which was most likely due to the felt pads that I had placed on top if the stands. The M200 surfaces were a little too slippery to be fully stabilised by felt. Michael had installed rubber pads on top of his original stands which worked better in this position. Yet, somehow, I could not shake the feeling that improved stands and coupling towards the ground would also have produced better-sounding speakers.
The M200 were of a closed cabinet design and needed to be placed relatively close to the front wall of the listening room to assure natural tonality (without the aid of a subwoofer). When I started out in the original position of our EPI 500 speakers, the M200 sounded too airy. Moving them closer to the wall improved the bass foundation. I ended up sufficiently happy with the drivers being 70 cm from the front wall, forming an equilateral triangle of 200cm with the listening position. Although moderately rated at 87 dB, these speakers had the ability to easily entertain a large room. Measuring 9 x 11 meters, our upstairs listening room was such a large space, and the M200 sounded controlled and present in the whole room and even in the adjacent rooms downstairs. I have always been able to judge the quality of a system from outside the listening room and have presented many examples of this phenomenon in my articles. The M200 were yet another case in point, by making music sound similar to a live event when I was not in the same room with them.
Having critically listened to loudspeakers for some years, I had come to prefer Vocal Jazz for basic analysis. The human voice was an important component of music, and speakers that excelled in this discipline were usually instant favourites in audiophile circles, even if other categories were not as convincing. The M200 rendered vocals faithfully, albeit with a touch of Teutonic soberness that, at times, bordered on analytical. The Teufels were able to present a wealth of acoustic information, if soundtrack and speaker alignment permitted. However, I never had the impression that this was at the cost of musical cohesion. Whilst painting in slightly cooler tones than our Epicure speakers, the music still seemed sufficiently rich in colour.
The Teufels depicted drums and brass sounds in natural colours. When it came to double bass and string instruments, I preferred the subtler, slightly less frontal sound of our Epicure and Martin Logan speakers. Listening to live music worked great with the M200. In faster passages they could show the agility of the paper cone within a closed box. Bass was try and punchy where the music required it. Some passages would have benefitted from the Bass Module for improved realism. However, in this respect, the Teufels did not really lack in terms of bookshelf speakers. In fact, they did not sound much like bookshelves at all. With my eyes closed, I would have imagined them to be much larger and more complex. It was a real surprise to have this much vigor coming out of a relatively small speaker system.
To my ears, the M200 sounded better at greater distance than at close range. The treble appeared to be most natural with the tweeter axis directed to a spot at about 1/3 past the listener’s head. The M200 did not benefit from parallel placement with the room’s front walls and, in my setup, sounded most balanced at a slight toe-in. In terms of soundstage, I found the Teufels to play wider than I was used to from our previous speakers. While this might speak for exceptional channel separation from our system in the eyes and ears of some listeners, I was a little concerned about the obvious lack of stage depth. Although I moved the speakers around the room to try different positions, I was not able to eliminate this phenomenon. At times, the singer seemed to trail off to either side, as if there was some unforeseen bending of phase involved.
I did not listen to the speakers without the metal grilles in place, and it was possible that the lack of stage depth was somehow caused by the grilles interacting with the direct sound waves from the drivers. It was also possible that the plastic tweeter refractor ring interacted unfavourably with the tweeter’s direct energy, or that the resulting time-smear was a result of both. As the tweeters were ferro-fluid cooled, hardened ferro-fluid could have been blocking the propagation of the dome in some undesirable way. And, finally, it was possible that the stands themselves would have required better support in order for the speakers to remain still.
I decided to test the Teufels in other combinations and will report here. Michael suggested that I try a beafy solid-state amplifier with them, instead of our 2x 40 watts tube amp. Well, we shall see...
Test system (1): Marantz CD-17 CD-Player via HiViLux Reference SP/DIF cable on Cambridge DAC Magic 100 via HBS Silver Solid-Core Interconnect on Restek V1 preamplifier via HBS Silver Solid-Core Interconnect on Dynavox VR-70 tube power amplifier via Belden 9497 speaker cables in single-wiring on the loudspeakers.
My second upstairs system consisted of similar components as the first, using a CD player as source and feeding into a pre and power amplifier combination. Only, this time around, the individual units, as well as their interconnects, were of a more basic quality. In fact, the power amplifier was the only exception in the line-up, having been especially designed for eiaudio and the purpose of audiophile listening. It offered excellent signal damping, had low-Ohms capabilities, and was able to churn out 150 transistor watts per channel into 8 Ohm loads on the basis of a 500 VA power supply. I was eager to find out how changing the electronic and physical environment would affect the M200's musical performance.
Both the Rotel preamplifier and the speaker cables were more forgiving components, which worked in favor of the more analytical Echle LF-3519 transistor amplifier, which could be ruthless when it came to uncovering faults in the system. The resulting mix of properties had worked well on our Epicure 3.0 speakers which had previously played in the same position. At this end of the room, there was a sloping wall behind the speakers that made for a mild horn effect. This was arguably not the best possible placement, but the best I could do for comparison.
In this new position, the M200 could show that they were more than ordinary bookshelf speakers. I was happy to find that they managed to work nearly as well in front of a sloping wall as they had done in front of a straight one. The Echle solid state amplifier offered almost four times the power reserves of the Dynavox tube amp, and yet, the speakers still sounded very similar and recognisable. The tubes had presented the music with a little more gravitas, whereas the Echle LF-3519 amp sounded a little tighter in the bass and offered generally more bass control. The treble seemed a bit cleaner and crisper on the Echle amp, but tonal colours were more enchanting on the tube amp. Both amps made for a musical experience on the M200 speakers.
The one aspect that still troubled me, however, was the impression of mono-signals trailing off to the sides at times, thus adding a slight stereo artifact around the singers vocals. Being unused to this phenomenon, I automatically found myself turning my head towards the respective speaker each time it happened. One could shurely get used to it, and less discerning listeners might not even have noticed. However, it did affect stage depth, and it would have been interesting to find out what was causing the phenomenon. Irrespective of this, I would have liked more listening distance to the speakers to achieve a less sharp-sounding sound image. In my listening tests, the M200s became really interesting from a diagonal of 3.00 metres.
Test system (2): Denon DCD-1420 CD player via Wireworld Luna 7 on Rotel RC-960BX preamplifier via HBS Silver Solid-Core Interconnect on Echel LF-3519 power amplifier via Oehlbach standard 4mm copper speaker cables on the loudspeakers
Specifications
M200 (Basic Module)
- Type: 2-way bookshelf loudspeaker (MK-I, 1988)
- Principle: dynamic drivers in closed cabinet
- Cabinet: 22mm fine chipboard and MDF, internally braced
- Nominal impedance: 8 ohms, without M-6000 subwoofer
- Power handling: 200 watts (RMS), 500 watts (peak)
- Recommended transistor amp (min): 60 watts into 8 ohms
- Power efficiency: 87 dB
- Frequency response: 50 Hz - 22,000 Hz (-6 dB)
- Crossover frequency: 1,600 Hz
- Slope: 12 dB per octave (phase aligned)
- High-frequency driver: 25mm dome by LPG, titanium (ferrofluid cooled)
- Midrange-to-bass driver: 20cm Isophon, paper pulp
- Connection panel: single, for bananas or spades
- Dimensions: (W) 270mm; (H) 460mm; (D) 280mm
- Weight (each 2-way basic module alone): 14 kg
- Accessories: M6000 subwoofer module (< 50 Hz)
- History: first ready-made loudspeaker by Teufel
- Development and construction: Peter Tschimmel
- Country of manufacture: Germany, Berlin
- Year(s) of manufacture: MK-I 1988 - 1992 (MK-II 1992 - 1996)
M6000 (Bass Module)
- Type: stereo subwoofer in ported cabinet (MK-I, 1988)
- Principle: 2 dynamic drivers in compound position
- Cabinet: 22mm fine chipboard and MDF, internally braced
- Nominal impedance: 4 ohms, with M-200 basics
- Power handling: > 200 watts (RMS), 500 watts (peak)
- Power efficiency: 87 dB
- Frequency response: 20 Hz - 50 Hz
- Recommended transistor amp (min): 80 watts into 8 ohms
- Upper crossover frequency: 50 Hz
- Slope: 12 dB per octave (phase aligned)
- Sub-bass driver: 2x Isophon PSL 320/400, paper pulp
- Connection panel: single, for bananas or spades
- Dimensions: (W) 410mm; (H) 630mm; (D) 520mm
- Weight: 56 kg (70 kg with one basic module)
- Accessories: M200 basic module (> 50 Hz)
- History: first ready-made subwoofer by Teufel
- Development and construction: Peter Tschimmel
- Country of manufacture: Germany, Berlin
- Year(s) of manufacture: from 1988
M200 (Speaker Stands)
- Type: loudspeaker stands
- Dimensions: (W) 275mm; (H) 500mm; (D) 300mm
- Base plate: (W) 275mm; (H) 500mm; (D) 30mm (MDF)
- Top plate: (W) 220mm; (H) 2mm; (D) 220mm (metal)
- Column, hollow: (W) 100mm; (H) 46mm; (D) 100mm
- Weight (each stand): 4.4 kg
- Development and construction: Peter Tschimmel
- Country of manufacture: Germany, Berlin
- Year(s) of manufacture: 1988 - 1992
Subwoofers

A subwoofer is a dedicated loudspeaker designed to cover the lower end of the frequency spectrum. The name 'subwoofer' originally suggested that this spectrum was below, or sub, the bass drivers, or woofers, of the main speakers. Since the advent of 4.1 and 5.1 setups, however, it is no longer certain that the main speakers have a dedicated bass driver themselves. In these scenarios, the subwoofer delivers all bass frequencies, from sub to woofer, with the respective music channels being reduced to mere midrange and tweeter satellites. One famous contender of this design philosophy was the Bose Acoustimass series of 1987.
Subwoofers come in many shapes, colours, and sizes. They can be actively powered by an internal amplifier or passively powered by the HiFi system’s main amplifier, or by some other external amp. Subwoofer drivers are usually of the dynamic type, commonly ranging from 20 to 50cm in diameter. For lossless stereo-signal processing, there can be two drivers, or one driver with dual voice coil, or even some electronic form of signal merging involved. Passive subwoofers often serve as a hub to send high-level music program to the main speakers. Active subwoofers on the other hand can often be fed a choice of high-level music program from the system amplifier or low-level music program from the preamp. Satisfactory results can be reached via both options.
On front-firing subwoofers the dynamic drivers point forward, whereas down-firing subwoofers have the driver energy directed towards the floor or a floor plate. Dipole subwoofers will radiate in more than one direction. Bandpass subwoofers have their drivers mounted on an internal plane radiating their energy outward though carefully calculated bass ports. Ported subwoofers can be front, rear, and floor vented or employ specially damped vario vents. Some subwoofers compensate extensive cabinet volume through the use of passive radiators.
There has been some controversy regarding the use of subwoofers due to the difficulties involved in placing them correctly. And while perfect placement may not be as critical in the rendition of movie effects, it certainly does play an important role in audiophile music set-ups. Some systems cannot operate without subwoofers, and in some systems they may prove to be too much. — Let’s find out.
Dragon Audio Dream 2 Sub

Published: 29/09/2022
Manufacturing date: 2012
Author: Karsten Hein
Category: Gear & Review
Tag(s): Subwoofers
Born in the early 1970s, I grew up listening to music on mono and stereo Mid-Fi systems. Our Grundig TV was still black and white with an oval wide-band driver mounted to the right of the tube. And while I was looking forward to my father purchasing a colour TV, improvements in sound were the last thing on my mind. We listened to records via a Dual turntable and simple Grundig RF240 system, on which one speaker could be detached for improved stereo effect. This also had a built-in radio tuner, but I much preferred the warm and fuzzy midrange-focused sound of our Saba tube radio. It never once occurred to me that we needed more bass-slam or that our movies were lacking in cinematic effects in any way. Being visually and acoustically sensitive myself, I found that a great number of movies showed more than enough realism, even when shown in black-and-white and with mono sound.
The first HiFi systems I purchased and built for myself during the 1980s and 90s were simple stereo setups with records, cassette tapes, and CD player as source. In those days, it was common to tweak the sound with multi-band equalisers which usually involved increasing the bass and treble response of the speakers. The resulting sound curve was either V-shaped or similar to a bathtub. In 1987, Bose introduced the Acoustimass series which I heard play at a friend’s house. This featured one separate bass unit and some smallish-looking satellite speakers. The system had been ridiculously expensive, and my friend’s family was very pleased with the result, but I could not hear the benefit of this design and felt that this had been engineered to improve the visual appearance rather than the sound stage.
I continued to explore the potential of stereo listening, even when the cost of multi-channel systems using subwoofers began to fall. Whenever I did hear multi-channel systems play, I felt that something was not quite right in the integration of the subwoofer, unless they were for the purpose of listening to music score or for the enhancement of sound effects. I was surprised to find that this was even true for some professional setups using large Bowers & Wilkins loudspeakers with a front-firing subwoofer. Perhaps it was due to these early and continuous experiences that I did not consider delving into the subject more deeply, until I purchased a pair of Shure 701 Pro Master PA loudspeakers and later discovered that they had been designed as mere tops to work with a subwoofer. This meant that I suddenly had an acoustic gap to fill and that a subwoofer would be the only way to fill it.
Remembering the performance of the less-than-impressive B&W setup, I decided that I would make a list of requirements and then simply choose the subwoofer that fit my list at the most affordable price point. It needed to be actively powered and fitted with a low-level cinch/RCA input. I was also looking for a vented front-firing design with volume level control, cut-off frequency adjustment, and simple 180° phase correction. And I finally found all these features combined from a vendor in Darmstadt who had established a reputation as a distributor for the Chinese brand 'Dragon Audio'. Founded in Shenzhen back in 2004, Dragon Audio had grown to become a major OEM producer of audio gear with over 1,400 staff working in their 14 factories in China.
Their ‘Dream 2 Sub’ model came in glossy piano black lacquer and housed a front-firing 30cm woofer with soft a suspension. Two large rear ports served to minimise air noises but did demand a greater distance to the walls of the listening room, as the wall distance should be at least twice that of the total port diameter. At around 40 cubic centimetres, the outer dimensions of the Dream 2 were still considered to be about average in the world of subs. Looking at the Dream 2, one could see that the lacquer could have been applied more evenly and thicker and that the built-in amplifier could have been given a sturdier base plate and cooling socket, perhaps. However, when I factored in the low price, I was still impressed with what Dragon Audio had visually achieved. When it came to sound and overall performance, I was not yet sure what to expect.
Turning the Dream 2 Sub on for the first time, I heard a mild humming noise coming from the woofer. This noise remained for as long as the integrated amplifier was in operating mode. The noise was just bearable enough for me not to follow the impulse of returning the woofer to the vendor. Another issue I noticed was that the internal amplifier would switch into standby on quiet movie scenes. While this effect did not usually occur during music playback, it could be bothersome when watching movies late at night, especially because there was an audible popping sound on each event. I also noticed that the smallish heat sink could get quite hot during longer listening sessions. As I was otherwise happy with the subwoofer, I decided to ask my trusted service technician to have a look inside with me.
As we opened the Dream 2 Sub by taking out the amplifier board, I was pleased to find a closed wood cabinet around the amplifier that would protect it from vibration. The cabinet itself was of sturdy build quality. I was, however, a little disappointed with the amplifier itself. While it featured a conventional linear transformer, this was relatively small for the task, at around 30 watts, and placed too close to the main circuit board. The audible 50Hz humming was a natural result of this close placement and would be difficult to resolve. In addition to this, the power supply capacitors were also relatively small for the job of eliminating noise. The Dream 2 Sub’s high sensitivity of around 90 dB at 1 watt meant that the amplifier’s power would still be sufficient to enjoy music at household volumes. The sound output was generally acceptable, although we could detect a slight mismatch between the upper and the lower sine waves, especially when the unit was driven at low input volumes.
While the issues detected were not necessarily a deal breaker when purchasing an entry-level sub, the Deam 2 was just barely sophisticated enough to be the protagonist in my planned subwoofer placement explorations. I could only marvel at DA's ability to employ 1,400 factory workers based on this relatively low level of quality and performance.
Specifications
- Model: Dream 2 Sub
- Type: active Subwoofer
- Principle: front-firing, dual rear-ported
- Driver: dynamic, 12-inch
- Frequency range: 20-200 Hz
- Power handling: 100 watts RMS
- Phase adjustment: 180° inversion
- Volume control: full range on input
- Low-level input: cinch, stereo
- High-level input: speaker wire, stereo
- Amplification type: class A/B
- Sensitivity: >90 dB
- Features: automatic standby
- Finish: piano black, removable cloth grill
- Dimensions: (H) 370mm, (W) 370mm, (D) 400mm
- Weight: 11 kg
- Year: 2012
Multi-Channel Systems

Philips HTB-7590-D

Published: 09/10/2022
Manufacturing date: 2012
Author: Karsten Hein
Category: Gear & Review
Tag(s): Multi-Channel Systems
When my good friend Thomas Kubalsky suggested that I try a 5.1 set of loudspeakers and receiver that he had recently been given by his brother-in-law, I was a little hesitant at first. Being a child of the 70s, I could not help but think of the first surround sound systems by JVC and the likes that all sounded pretty terrible, regardless of whether the multi-channel function was activated or not. Somehow, I had managed to get by without hearing a proper surround system for half a century. On the other hand, I also had the sensation that my hesitation was in conflict with the spirit of this blog, which bears the importance of venturing into the unknown in its title. 'Explorations in Audio' requires us to put our ears over whatever we think we know in order to test the validity of our beliefs. — For the times they are a-changin'.
If I was going to write a review on a 5.1 setup, I wanted to first prepare for the task. This was especially so, as I was lacking experience in the placement of subwoofers. Hence, I asked Thomas to hold on to the set for me to give me some time to prepare. In the period that followed, I started the category of subwoofers and wrote my analysis on subwoofer placement. Feeling sufficiently prepared, I contacted Thomas again, and we packed our children's handcart with equipment and pulled it the two blocks from Thomas’ place to our apartment. The set consisted mostly of plastic components and, although quite bulky, weighed in at just above 10kg. When comparing this to much of the gear tested here previously, the low weight did not exactly scream quality. However, I did not want to jump to conclusions and was prepared to be surprised.
The name HTB-7590-D (see edits below) alone suggested that Philips had not intend this equipment to become the beacon of their audio engineering. It is far too long and clunky to be casually dropped at a dinner party. We might assume that the “H” stands for home and the “D” for digital, but these letters could also be internal code for some other purpose. In fact, the name was so inconspicuous that I continued searching for it long after I had found it. I simply could not imagine that this was its name. Running a web search, I could see that there were a number of similarly named Philips devices with higher and lower numbers, none of which had found much attention in the press. On the back of these HTB-7590-D units, one could read that they had been designed and engineered by Philips in Europe. However, there was no mention of a manufacturing country.
I set the system up with my four-year-old son Max, who had no trouble carrying the tower speakers into the room with me. The speaker wire was firmly installed on the side of each speaker and exceptionally thin in diameter. It was, however, sufficiently long for our 5.60m x 4.70m listening room. The rear speakers had longer wires attached to be positioned further away from the unit. Each wire was colour-coded to indicate the correct pair of clamps on the back of the receiver unit. The speakers themselves were narrow plastic satellites perched on hollow plastic tubes. The tubes became slender towards the base plates, and four rubber foam cushions were employed to couple the speakers towards the ground. The satellites consisted of two full-range drivers each. Between them was a bass port which had been designed to resemble a tweeter when seen from a distance.
The subwoofer was of side-firing, rear-vented design, and the cabinet material appeared to be simple plywood. Coming from the Dragon Audio subwoofer, the 4kg Philips looked like a toy. Of the four attached rubber foam cushions, one had already been lost. The 6.5-inch driver was stuck behind a non-removable speaker cloth. I had never come across a cheaper-looking woofer design but decided to be open-minded. Our ears do not look especially fancy either, and yet they are precision instruments capable of tremendous tasks. The Philips receiver had all the electronics necessary for processing the information and sending the amplified signal to each loudspeaker in one single box. Its power consumption of 105 watts looked rather dismal in the face of having to drive five-plus-one loudspeakers. All the more, I was surprised to find the total output power RMS rating to be at 800 Watts with all channels driven at <10% distortion.
Max and I turned the HTB-7590-D on for the first time, and I slipped in Mark Knopfler’s remastered version of the Dire Straits “Brothers in Arms” album. The room instantly sounded as if we were trapped in an underwater fish tank, and I quickly understood that many parameters had to be off at the same time in order for the performance to be so dismal. A look at the owner’s manual revealed that the front speakers had been designed to be positioned relatively close to the TV-set. When bringing them closer, I noticed that of the four existing rubber foam pads there was always one that was suspended in the air. To give all speakers a more stable stand and a well-defined coupling toward the ground, I placed each of them on three 5mm rubber pyramids. This took the remaining uncertainty out of the sonic equation and instantly resulted in a fuller more assured sound.
Since the HTB-7590-D receiver did not have a proper display, I connected an old computer monitor to it via HDMI. In the audio settings, I found that all speakers’ volumes had been raised to +6 dB. My first task was to again set this to neutral. I also found that some tonal adjustments had been made via the internal equaliser and also reset this to flat. It was only later that I also found where to turn the function ‘Audio Improvement’ off completely. The next listening test showed that the system was beginning to sound tonally more realistic. With all the superfluous emphasis turned off, it was also easier to hear the problems in timing that still existed. Luckily, the internal sound processor (DSP) offered six sliders to set the distance of each speaker towards the listening position.
I used a simple laser distance meter made for room measurements to determine the distance from my head to each speaker. To do so, I held the meter over the top of my head and pointed it on the main driver of each speaker. I set the corresponding slider to the nearest approximation and then proceeded to move the speaker to correspond with the set value. This also allowed me to perfectly align the subwoofer. In order for the subwoofer not to overly excite room modes in my listening position, I had set this up first. Although side-firing subwoofers are more forgiving to place, I preferred a more direct sound and turned the woofer with the driver pointing towards the listening position. This way, I was sure to benefit from the punchiness and agility of the woofer and get better bass layering. I had then set up the satellites to be phase-aligned with the woofer. The rear loudspeakers were set as far behind and wide away from the listening position as possible.
Following the phase alignment, the HTB-7590-D sounded pretty grown up. I was especially pleased with its bass performance, which was not only full and satisfying, but also clean, dry, and layered. To my surprise, this woofer-satellite combination worked better than our previous setup with the Dragon Audio subwoofer. This was probably the result of having more exact placement options with the smaller speakers in the room. The Shure-DA combination would have benefited from a larger room.
We decided to test the HTB-7590-D with Bruce Springsteen’s 2019 Blu-ray album “Western Stars”. I had heard much praise regarding the audio track and thought this might be a good starting point. Listening to Bruce Springsteen tell the old tale of fear, passion, and forgiveness in Dolby Surround (originally recorded for Dolby Atmos) made me feel that multi-channel sound was the ideal companion for concerts on Blu-ray. Especially the audience cheering and clapping had a wonderful effect in the room. Still, there were some moments in which I was not sure what to make of the feature. Should the strings really have played via the rear channels? Little things like these had such an effect that I snapped out of the sensation of being at the event.
On the small full-range satellites, Bruce Springsteen’s voice did not have the full depth that I was used to from listening to his songs on our usual equipment. There was generally a slight lack in tonal richness that is commonly associated with wooden materials. As Springsteen’s voice became lower in some passages of the performance, the satellites revealed inherent resonances caused by their cabinets of thin plastic. This effect was not apparent during the whole performance and only stuck out during two or three songs. Holding my hand against the speakers, I could really feel the resonance that extended nearly all the way down the shaft towards the ground. Improved internal bracing and better insulation could have lessened this effect but would surely have increased the sales price of the unit.
I would have liked to see proper buttons on the receiver’s front. The capacitive ones were poorly lit and very small which made it easy to confuse them in low-light conditions. Often, they did not immediately respond to touch commands, which at times led to a successive opening and closing of the disk-tray or to the unit switching on and then off again. The built-in LCD display was neither bright nor large enough for the information to be read from the sitting position. It also did not help that it was tilted upward. The remote control had lots of important and easy to reach functions. Sadly, the keys quite frequently failed to execute the command on the first or second push. Harder pressing of the keys resulted in bending sounds coming from the plastic housing of the remote. None of this felt very sophisticated or reliable.
No up-mixing options were presented for Auxiliary devices, which made 5.1 functions exclusive to the onboard features, HDMI or SPDIF devices and only if provided by the track. 2-channel operation of the HTB-7590-D was generally alright but not as full and tonally rich as we were used to from our previous devices. Channel separation and soundstage were reasonably good. Bass performance was generally excellent, especially considering the materials used, and the amplifier never seemed weak or unfit for the task. The full-range drivers of the satellites had their limits in terms of tonality, but also in frequencies above 20.000 Hz. This could make the music seem a bit stale occasionally. Resonances affected male vocals at times, indicating the cost-conscious build-quality of the cabinets.
All-in-all it can be said that the Philips HTB-7590-D is a worthwhile 5.1 system that is still going strong after 10 years of use. While it does not hide its concessions to the price-conscious consumer, it does deliver a solid performance, especially when listening to 5.1 recordings. It is musically solid enough to bring pleasure to most households, but only if it is set up by someone who knows what they are doing. Unfortunately, it is all too easy to get lost in the features and adjustments which will leave this particular, and actually most other 5.1 systems, sounding pretty useless. I have greatly enjoyed the opportunity to expand my horizon with a technology that was still new to me at the time, and I look forward to our next project.
Edited, 10 Oct 2022 As Landon has rightly pointed out to me upon reading this article, there is a blog entry on toenegel.net of 31 August 2012 that describes the new Philips naming scheme introduced that year. According to this, the HTB-7590-D was the best version of the mid-high-end 5.1 home theatre Blu-ray system that provided a docking station for use with iPod. — We live and learn.
- HTS = Home Theatre System
- HTD = Home Theatre DVD-System
- HTB = Home Theatre Blu-ray-System
- HTL = Home Theatre Loudspeakers
- HTM = Home Theatre Loudspeakers (with Mediaplayer)
- HT?3xxx = Series 3 (entry level)
- HT?5xxx = Series 5 (mid entry)
- HT?7xxx = Series 7 (mid-high-end)
- HT?9xxx = Series 9 (flagship models)
- HT?x1xx = 1.1-System
- HT?x2xx = 2.1-System
- HT?x5xx = 5.1-System
- HT?xx1x to HT?xx3x = “good” (of series)
- HT?xx4x to HT?xx6x = “better” (of series)
- HT?xx7x to HT?xx9x = “best” (of series)
- D = Docking Station
- K = Karaoke-Version
< Subwoofer positioning | Dragon Audio Dream 2 >
Specifications
Receiver
- Type: 5.1 DVD Blu-ray-disc receiver
- Power output (RMS): approx. 130 WPC
- Frequency range: 20 - 20,000 Hz (+/- 3dB)
- Signal-to-noise ratio (line): > 65 dB
- Analog audio input: Cinch,
- Digital audio inputs: S/PDIF (coaxial, TOSLINK)
- Radio tuner: 87,5-108 MHz (analog)
- Signal-to-noise ratio (tuner): < 50 dB
- Radio frequency range: 180 - 12.500 Hz (+/- 3dB)
- USB input: high-speed 2.0
- USB File systems: FAT16/32, NTFS
- Power supply: 110-127 Volts / 220-240 Volts
- Power consumption: 105 Watts
- Standby power consumption: 0,25 Watts
- Dimensions: (W) 435mm, (H) 56mm, (D)344mm
- Receiver unit weight: 3.3 kg
Front and rear loudspeakers
- Type: front-vented floor-standing loudspeakers
- Drivers: (2x) 3-inch full-range (7,63cm)
- Dimensions: (W) 96mm, (H) 1110mm, (D) 75mm
- Base plate: (W) 240mm, (H) 24mm, (D) 240mm
- Impedance: 5 Ohms
- Weight: 3.5 kg
Centre speaker
- Type: front-vented loudspeaker
- Drivers: (2x) 2.5-inch full-range (6,35cm)
- Dimensions: (W) 266mm, (H) 87mm, (D) 99mm
- Impedance: 3 Ohms
- Weight: 1 kg
Subwoofer
- Type: side-mounted, rear-ventilated Subwoofer
- Driver: 6.5-inch woofer (16.5cm)
- Impedance: 3 Ohms
- (W) 178mm, (H) 302mm, (D) 353mm
- Subwoofer weight: 3.9kg
Video
- Output Format: PAL/NTSC, HDMI 480i/576i, 480p-1080p24
- Output resolution: 1920 x 1080 pixels, HD (max.)
- Bitrate: 30 frames per second (max.)
- Formats: AVI, DivX, MP4/M4V, MKV, ASF/WMV, MPG/MPEG, VLF, 3GP
- Country of manufacture: China
- Year: 2012-2013
Headphones

Before the Hi-Fi-bug bit me, and long before I was able to properly set up a Hi-Fi system, I believed that my dad’s 1987 Panasonic Monitor headphones were superior in sound to any Hi-Fi setup out there. I did not give the subject much thought, of course, but if anyone had asked me, this would have been my response at the time. The Panasonics were closed-back headphones with a leathery outer and a softer inner cushion that would press my ears against my skull ever so gently. These headphones provided the sensation of having absolute control over the sound. — Or at least this is how I remember them.
The advantage of headphones was that they could conveniently function as a portable 'pop-up' Hi-Fi system, wherever we happened to be. All that was needed was a source, such as CD-player, tape deck, recorder, or a streamer equipped with a headphone jack to plug them in, and we had an instant system. And portable devices did have the additional benefit of being free from grounding issues, HF infiltration, poor choices of interconnects, power cord vibrations, etc., that were each perfectly capable of taking the magic out of our Hi-Fi system. When seen from this perspective, headphones offered a jump-start to ‘high-fidelity’ in the classic meaning of the word.
On the other hand, headphones had quite a few silly flaws when it came to re-creating an actual music event. There was the obvious proximity to the ear that always held the sensation of a 'whisper-from-up-close' which took some of the realism from the sound. Another aspect was the lack of room-interaction. Whereas closed headphones simulated a room through their closed back, this room was much smaller than the original space in which the music had taken place. The isolation of sounds from room effects often had the disadvantage of sounding more unnaturally balanced than listening to the same sounds within a living space. Very few headphones were capable of creating a realistic stage, as this would usually be expected in front of the listening position. Instead, most headphones provided a mixed sensation of the music taking place inside or just outside the listener’s head. Yet another aspect missing from listening via headphones was the effect of bass-lines on the human body, a powerful combination of physio-acoustic and psycho-acoustic effects.
Headphones had therefore long since become the instrument of choice where loudspeakers and elaborate Hi-Fi systems were impossible to set up, or where external noise needed to be drowned out. Headphones were ideal in situations in which close monitoring of sounds was necessary, and — occasionally — for enjoyment, too, as an alternative to loudspeaker sound. And while it was true that headphones had improved over the years, some of the best headphones ever made were from the pioneering days of Hi-Fi and still much sought after.
With the advent of mp3 convenience technology and the more general impression of diminishing return on investment due to seemingly ever-present technological advances, customer focus shifted from the solid and lasting to the small and expendable.
Statements such as “Not bad for Bluetooth.” or “Amazing for the size.” or “Killer for the price.” all translated into one thing: “Not really Hi-Fi quality.” and for the first time lead to a general decline in Hi-Fi sound engineering with many of the original high-quality companies feeling forced to follow the trend, ultimately going out of business or being gutted and sold off to Asian conglomerates.
AKG K702

Published: 18/12/2021
Manufacturing date: 2008
Author: Karsten Hein
Category: Gear & Review
Tag(s): Headphones
Similar to the nearly double-priced K712 Pro, the K702 were designed and engineered in Austria. But, instead of both models having been uniformly manufactured in Slovakia, the K702 were manufactured in China, which only served to highlight their low-price focus. Both headphones featured AKG’s patented flat wire voice coil for linear performance and increased responsiveness from 10 to 39.800 Hertz. Weighing in at a mere 290 grams, the K702 were 10 grams lighter than the K712 Pro — with neither model weighing the 235 grams promised on the packaging and in product reviews online. I guess nobody actually took the time to weigh them again once they were in production. The pictures show the K702 with protective plastic around their edges, because I had already decided to return them to the dealer at the time of taking the photos.
Both headphones were of the same open design and, by means of AKG’s patented two-layer diaphragm, offered extended frequency range and a spacious and airy sound. Whereas the K712 came with one spiralled and one straight orange cord, the K702 were equipped with a single straight and black cord. The mini-XLR connectors were the same on both units. This made it easier for me to change between the models during my listening tests. The colour scheme was different between them, too, with the K702 coming in (retro-)silver and black and the K712 Pro in orange and black. At first glance, I preferred the retro-silver design, as it looked more solid, but holding them in my own hands and realising that nearly all parts were of painted plastic, I found the orange to be more sincere.
It also found it interesting to read that both units came with pre-selected and matched transducers for improved performance consistency, and that each pair of headphones had been individually tested and numbered to assure for high quality following production. It seems that weighing them to assure that all parts had been included was not a part of this process at either factory location. It also seemed that the K712 Pro had been deliverd to another customer’s house for testing before coming to me, as the warranty instructions were no longer packaged in their original plastic sachet, and the protective seals around the ear pieces had already been removed. Neither pair of headphones seemed to have been designed to stand the test of time with the materials used being relatively thin and therefore seemingly fragile. AKG was no different in this respect from other companies, and yet it was never easy for me to acknowledge this trend. To prove my point, some customer reviews had already suggested online that there could be problems with individual channels loosing their connection. Another complaint had been about the sonic effect of the removable headphone plug and cord brushing over clothes. Although it was true that touching and rubbing the cable produced an unpleasant sound, I had no problems staying clear of my clothes and shoulders.
The K702 had received excellent reviews in the press for their highly revealing trans-lucid sound and excellent dynamics when they first came out at the end of 2008. Considering their entry-level price, I could easily agree with AKG that these were a pair of excellent headphones and would be useful “for precision listening, mixing, and mastering”. Their sound was light and agile, catching lots of transients and ambient noise. Perhaps this came at the cost of losing some of the lower end of the music. I had often found that it was relatively easy for equipment to sound revealing, as long as the lower aspects of the frequency band were omitted from the equation. If the eardrums were not too busy following the bass lines, there was more room for them to catch the detail at the top-end. It is a magic trick, as each one of us only has a single set of eardrums after all.
Comparing bass lines to natural instruments was not an easy feat with either one of the two headphones. The K712 Pro compensated for the natural bass-loss from their open-back design by raising lower-end frequencies by 3 dB. This was also not quite natural and correct, of course, because bass extension from loudspeakers came from room-interaction and the overlapping of frequencies, effects that were practically non-existent in the case of open headphones. However, I had some trouble with the ‘non-existing bass’ from open headphone designs being described as ‘honest’, because it was mostly the phenomenon of bass drop-off on open headphones, an issue to be addressed. From my experience with our Canton Vento 890 DC loudspeakers, many years earlier, I knew that over-accentuated highs and recessed lows - while perhaps interesting and exciting at first - could permanently spoil the listening pleasure.
And this was also the main reason for my decision to keep the more balanced K712 Pro headphones and to send back the bargain-priced K702 to the dealer. And, yes, I could also hear that the additional bass on the K712 Pro made them sound slightly less revealing and thickened singers’ vocals a little. However, I could appreciate this weightier sound as being more balanced and rounded. It certainly resembled more closely the sounds captured of all our speaker recordings and came closer to my understanding of live music. This is not to say that the K702 reproduced vocals wrongly. Singers simply sounded as if they had lost a few pounds in weight. And for listeners finding pleasure in an abundance of detail and a more penetrating presentation, the K702 will surely be the better choice.
AKG Company History
The Akustische und Kino-Geräte Gesellschaft m.b.H. was founded by Rudolf Hörige and Ernest Pless in Vienna, Austria in 1947. Rudolf was a physicist, and Ernst Pless was an engineer. The two men grouped their understanding of materials and mechanics to create loudspeakers, film projectors, and light meters. With the growing demand for media applications, AKG’s first microphone was used by Austrian radio stations, theatres, and Jazz clubs.
AKG achieved an international reputation for building excellent microphones with the launch of their D12 in 1953. This was far ahead of its time, and subsequent updates served to maintain its position. AKG also produced turntable cartridges during the 1970s and 80s.
The company established an American subsidiary in Los Angeles in 1985 and was taken over by the Harman group in 1994, which also operates Crown Audio. In 2017 the company facilities in Vienna (headquarters, manufacturing and engineering) were closed with most of Harman’s production facilities having been relocated to low-cost countries. At the time of writing this, Harman with its many brands is owned by the Korean conglomerate Samsung.
Specifications
- Driver type: patented 2-layer diaphragm, dynamic
- Design: over-ear, open
- Frequency range: 10 - 39.800 Hz
- Nominal impedance: 62 Ohms
- Sensitivity: 105 dB (1mWatt, 1.000 Hz)
- Power rating: 200 mWatts, max.
- Cables: 1x straight
- Connector: detachable via mini-XLR
- Cable length(s): 3m
- Plugs: 3.5mm + 6.3 mm jack
- Place of manufacture: China
- Weight: 290g (without cable)
- Year: 2008 - 2021
AKG K712 Pro

Published: 18/12/2021
Manufacturing date: 2021
Author: Karsten Hein
Category: Gear & Review
Tag(s): Headphones
My interest in headphones did not stem from the desire to listen for pleasure or experience superior sound quality when travelling. Nor did I need to be especially quiet when our kids were asleep. They had grown up with music playing way past their bedtime and had hardly ever had trouble sleeping - at least not because of music playing. No, my interest rather resulted from the need to monitor the audio recordings of interviews, digitised records, and - more recently - loudspeakers. My aim was to find headphones that would not colour the music and step out of the way for the original event to shine through. The audio-setup of our two Hi-Fi systems had become of such high quality that it was increasingly difficult to find headphones to accurately monitor their output. Differences in the performance of loudspeakers could be very subtle, of course.
For various reasons, I would have chosen good loudspeakers over headphones any day. A loudspeakers’ ability to excite the whole human body and interact with the dimensions of the room, but also its ability to set a real stage along with physical depth and proportion, all these aspects were missing from most headphones today. Luigi suggested that I try AKG’s K1000 electrostats which could be folded outward to create a better stage impression. But I decided that simpler more versatile headphones would be more suitable for my intended use as studio monitors. Was this perhaps again the point at which I was to wilfully ignore the expert’s advice and regret this for the days to come? Possibly, but at least I had a choice between experts now.
When purchasing the Beyerdynamic DT 990 Pro headphones some weeks earlier, I had ignored Jens’ advice on buying AKG monitors, instead. The DT 990 proved to be inadequate for my purpose, and I have since auctioned them off online. For my second attempt at finding good studio monitors, I decided to follow Jens’ lead on the AKG. Since the original model he had suggested had been on the market for a very long time, I decided to try two of the more recent models: the AKG K702 and the K712. From the reviews of both models that I found online, I was unable to make a definite decision between them. Both were open-back headphones that allowed for ambient noise and offered a somewhat unconstrained sound. However, the K712 came with stronger bass response of +3dB above the K702.
Some reviewers found the K702 to be more linear and therefore realistic in sound, whereas other reviewers had the opposite impression. Since most open designs had a natural bass-drop in comparison with their closed counterparts, I had a strong suspicion that the reviewers’ verdicts depended on their previous listening habits. Since I was looking for headphones to accurately reproduce the sound captured from our loudspeakers tests, I was going to use the loudspeakers as reference and then determine which of the two to keep, depending on their tonal proximity to the original. Since my impression would also depend on the periphery driving the headphones, I decided to use three sources: The Douk Audio T-3 Plus tube amp, our Zoom H4n Pro recorder that we had used to create the sound files, and our MacBook with its internal sound card. Both headphones had an impedance of around 60 Ohms which made them sufficiently easy to drive, even from the on-board sound card of a computer.
The K712 arrived first, and I was surprised to find that they were made almost entirely out of plastic. The drivers and the leather headband were the exception. This led to the headphones being very light-weight. AKG’s self-adjusting headband even increased this sensation by automatically exerting minimal pressure to the head. On the other hand, the plastic made them feel a little over-priced at first. The ear-pads were large, comfortable, and spacious inside. The feeling of openness increased during the first soundcheck. Whereas our Sennheiser HD 580 Precision headphones made the music sound close and intimate (with a sensation of resonances that were not completely kept at bay), the K712 gave the instruments some dimension and space to breathe. The darkness in between did not feel as artificial as it had on the DT 990 Pro, but rather natural and even elegant. There was a laid-back sensation to the music most likely coming from the lack of body resonances and the superior impression of order this produced.
On the Douk Audio T-3 Plus with GE tubes, the K712 produced a full and balanced sound. Transients and bass extension were cut a little shorter than I was used to from our loudspeakers. It was quite possible that this was caused by our Chinese headphone amp, the Denon CD player, or the non-existing break-in time of the diaphragms, headphone cable, solder joints, and the new plugs. I confess that I was a little sceptical at first when I saw that the K712 came with a detachable signal cord (two, actually) which would introduce more mass to the signal path. But seeing the benefit of changing between cords, I was inclined to accept it as an advantage, too. Having listened to the Sennheiser DH 580 and the Beyerdynamic DT 990 Pro, the K712 clearly had the upper hand in terms of clarity, sound-field, dimensions, tonal balance, etc.
Diana Krall’s song “No moon at all” showed less sibilance than I had heard on other occasions. However, the tonal colour of the piano was more accurate and relaxed than exciting. The double-bass being plucked in the beginning of the song was well-presented, but it could have been slightly more impressive, perhaps. I had heard this passage many times on speakers, often to jaw-dropping effect. The K712 remained accurate and in control with no aspect of the music falling out of place. String sounds came across as both sweet, varied, and nuanced. Via the MacBook Air sound card, I had the impression that male voices were artificially composed of their high and low aspects. However, I was not able to reproduce this effect via the dedicated headphone amp. It is no secret that one could rarely trust computers when it came audio reproduction, unless they were dedicated machines designed for the purpose of music.
Jörg Hegemann’s “Rock Me Mama”, on which Thomas Aufermann sang the lyrics, showed a little less bass-slam than I had previously been accustomed to from our loudspeakers, but they produced the vocals fully and accurately. Metallic sounds from the drum kit could have sounded a bit more shiny and aggressive, perhaps. I noticed that, even during faster sequences with many voices and multiple instruments playing simultaneously, the K712 managed to keep these separate, without them drowning each other out or overlapping. This superior sense of order was perhaps the most significant character trait of the K712. If asked, I would neither have wanted for myself nor recommended to others, headphones with less bass punch than these, as this would have taken us too far from the actual acoustic event of live music. Both physically and sonically, these modern AKGs headphones could be worn comfortably over extended periods of time without causing listening fatigue. AKG labelled them ‘Reference Studio Headphones’, and I could see that this description was accurate, as it placed order and control above sensation and excitement. These were sober headphones for a sober job, and I decided that I liked them.
AKG Company History
The Akustische und Kino-Geräte Gesellschaft m.b.H. was founded by Rudolf Hörige and Ernest Pless in Vienna, Austria in 1947. Rudolf was a physicist, and Ernst Pless was an engineer. The two men grouped their understanding of materials and mechanics to create loudspeakers, film projectors, and light meters. With the growing demand for media applications, AKG’s first microphone was used by Austrian radio stations, theatres, and Jazz clubs.
AKG achieved an international reputation for building excellent microphones with the launch of their D12 in 1953. This was far ahead of its time, and subsequent updates served to maintain its position. AKG also produced turntable cartridges during the 1970s and 80s.
The company established an American subsidiary in Los Angeles in 1985 and was taken over by the Harman group in 1994, which also operates Crown Audio. In 2017 the company facilities in Vienna (headquarters, manufacturing and engineering) were closed with most of Harman’s production facilities having been relocated to low-cost countries. At the time of writing this, Harman with its many brands is owned by Samsung.
Specifications
- Driver type: patented 2-layer diaphragm, dynamic
- Design: over-ear, open
- Frequency range: 10 - 39.800 Hz
- Nominal impedance: 62 Ohms
- Sensitivity: 105 dB (1mWatt, 1.000 Hz)
- Power rating: 200 mWats, max.
- Cables: 1x straight and 1x spiralled
- Connector: detachable via mini-XLR
- Cable length(s): 3m
- Plugs: 3.5mm + 6.3 mm jack
- Place of manufacture: Slovakia
- Weight: 300g (without cable)
- Year: 2021
Beyerdynamic DT 770 PRO
Published: 09/02/2023
Manufacturing date: 1985
Author: Karsten Hein
Category: Gear & Review
Tag(s): Headphones
I must confess that I had a relatively late start into the subject of headphones, simply because I had rarely worn them professionally, never managed to feel comfortable wearing headphones in public places, and always preferred the soundstage of our loudspeakers at home. This is not to say that I had never paid any attention to headphones. The first proper set of headphones I remember were my dad’s Panasonic studio monitors. They were of a closed-back design and had a second and softer inner ear pad that felt very comfortable. They cost some 300 dollars in the 1980s which was a lot of money back in the day, and—at least in my memory—they sounded great. My first own set of headphones had been the open back Sennheiser HD 580 Precision, and I remember being disappointed at how little they could do for me in terms of accurate bass. The Panasonics, by comparison, had bass performance so strong, they could hover over your head. Granted, this was probably an unhealthy experience to have.
The HD 580 Precision ended up sitting on the shelf for most of their existence, and it was not until late autumn 2021 that I became curious about headphones once again. A friend of mine had asked me to digitise his records for him, and I needed a good pair of headphones for monitoring and mastering. One of the people I interviewed before making my purchase decision was Jens, a part-time music producer, who recommended a set of tried and trusted AGK headphones to me, but, reading through the reviews online, I went for the 250 Ohms Beyerdynamic DT 990 PRO instead. 250 Ohms was the pro studio and audiophile standard, and I had read that, for a solid sound, decent headphones would require lots of clean power. So I bought a Douk Audio T-3 Plus tube headphone amp for them, which I soon upgraded with a wonderful set of GE tubes and a decent linear power supply.
Sadly, the Beyerdynamic DT 990 PRO turned out to be a disappointment to my ears. There was lots of bass, width, and dimension, and the highs were sufficiently articulate; however, I could not get over the fact that the highs and lows did not harmoniously connect with the midrange, which sounded rather muffled and overly dampened. The DT 990 PRO sounded far from linear on any of my music sources and were sorely lacking even when compared with the company’s higher-end gear, such as their flagship T-1 headphones. The latter was also the reason I decided to return the DT 990 PRO to the shop. A few weeks later, I found myself sending back a pair of AKG K702 headphones that were so obviously lacking in bass that just two hours of listening had prompted me to again read through the return policy.
I finally found happiness with a set of AGK 712 Pro which had a slight bass-boost to compensate for their open back construction. This made them sound tonally correct and, indeed, very similar to the tonally balanced sound that I had achieved on our audiophile stereo systems. The AGK 712 Pro were a true benchmark in their price category and had been my yardstick when comparing the sonic virtues of other headphones. Tonal correctness referred to the listener's ability to recognise the specific sound character of an instrument or a material, and it allowed music differentiation on a scale outside of volume, frequency, and rhythmic agility. For discerning listening, correct tonality played an equally important role as the other three dimensions, and this was also my reason for recommending the AGK 712 Pro to friends seeking price-conscious audiophile headphones.
All the more, I was surprised when my brother informed me that he had done some research and bought a number of Beyerdynamic headphones for the video mastering in his education programs. Jörg explained that his team needed closed back headphones that they could simply plug into their laptops and tablets without the use of additional amplifiers, and that the Beyerdynamic DT 770 Pro in their 16 or 32 Ohms version were well-equipped for the job. Without having listened to the headphones myself, I could not shake the feeling that what had alienated me from the DT 990 PRO might simply have been the Beyerdynamic ‘studio’ headphone sound. Had my brother run into the same trap that I had so readily trodded into when I first set out to purchase headphones for my mastering adventures? I sure did not hope so, and we agreed that he would lend me a pair for testing some time soon.
32 Ohms headphones—while perfectly suited for a low-output computer sound card—were not exactly ideal for a high-output tube headphone amp. And, while I was still contemplating how to set up my test in order to be fair to the Beyerdynamics, a friend from up our street mentioned that he had owned a pair of 80 Ohms DT 770 Pro for a few years, which he was still happy with, and that he would be honoured to lend to me for a test. I felt flattered by Erik’s willingness to support the eiaudio project and accepted his offer. And I was feeling even more flattered when I later learnt that Erik had fitted them with brand new silver-velour ear pads for the occasion. He had worn his DT 770 Pro for so many hours, the original silver velour colour had completely changed on his set. — And the Beyerdynamics were great when it came to parts replacements.
The original DT 770 had come out in early 1981 and had since become standard gear in many professional sound studios and for many musicians. The DT 770 PRO followed in 1985 but did not replace the DT 770 completely. People who have owned both the 81 and the 85 versions of the headphones reported that, except for the branding, there was little difference between them. Professionals in music have enjoyed the fact that Beyerdynamic headphones did not break easily and—if they should break—could be fixed cheaply and without much effort. Labelled 'hand made in Germany', the headphones used a combination of spring steel headband and forks with ear cups made of durable plastic. A simple stepped mechanism allowed the user to adjust the length of the headband in increments by pulling downward on the ear cups. Head pressure was perceived to be just right for long listening sessions. Although, on my heavily-used headphones, the adjusting mechanism had become slightly loose, the pressure on the head was still just right.
As on the DT 990 PRO, I enjoyed the generous size of the ear cups. From experience, I knew that this particular velour material could feel slightly warm and sweaty, especially when worn on hot summer days, but for the relatively modest price of the DT 770 PRO this was still more than fair. The ear cup forks were also made of spring steel and perhaps one of the reasons these Beyer’s stood the test of time. They allowed the head shells to swivel both horizontally and vertically to comfortably accommodate any head shape. Although I was wearing glasses during testing, I never felt them to be an inconvenience with these headphones.
The 80 Ohms version of the DT 770 PRO came equipped with a generous cable of just over three meters in length. While this would be sufficient for most studio applications, it could become a hindrance when using these headphones on the move. As far as non-detachable cables go, I much preferred the DT 770 PRO’s long and straight cable over the DT 990 PRO’s spiral cord. I also liked the fact that the cable felt quite sturdy being covered by lots of protective rubber. It was fitted with the typical straight 3.5mm TRS jack connector and offered threading for a 1/4-inch screw-on adapter. When it came to headphone cables, I personally preferred detachable cords as they were found on most of the headphones tested in this blog.
When I started listening to the DT 770 PRO on our tube headphone amp, I quickly understood that they were completely different from the DT 990 PRO that I had sent back in frustration one year earlier. The DT 770 PRO did not suffer from a muffled and seemingly unconnected midband, instead they sounded more compact and held the music together nicely. Our GE tubes had a sweet and harmonious top-end, and I found the Beyerdynamics to render this nicely. It was well possible that listening to these headphones with a transistor or less powerful amplifier would have produced a harsher result. Bass performance came across as slightly accentuated, especially when coming from an open-back design such as my AKGs, and yet, bass was neither boomy nor overly resonant with the ear cups.
The midband was not particularly strong but also not sharp or edgy. I had a sensation of a subtle sweetness when listening to both male and female voices on these headphones. The spacial separation between instruments was good for closed back headsets but not outstanding as far as headphones go. When switching to our 250 Ohms AGK 712 Pro, I was surprised to find that there was only a minimal difference in loudness between them. My brother had probably been well-advised to opt for the lower than 80 Ohms version for mixing on the computer, as I could see computer sound cards struggling to pump enough life into the Beyerdynamics. The DT 770 PRO did not clamp down on the ears and head as hard as the Sony MDR-7506 had done that I had tested earlier, but they also did not reach the level of tonal correctness and nuance that I was used to from the Sony and other higher-end models.
Current Headphone Ranking
- AKG K712 Pro (the most balanced and tonally accurate)
- Beyerdynamic T1 (nothing to complain about, except for the price)
- Stax New SR-3 (difficult to set up and operate, but sweeeet)
- Sony MDR-7506 (good monitor functions and natural tonality)
- Beyerdynamic DT 770 PRO (good monitor functions and cohesion)
- HiFiMAN HE-400i (balanced but a little on the bland side)
- AKG K702 (generally alright but unbalanced, leaning toward bright)
- Sennheiser HD 580 (sweet midrange, lacking precision and bass)
- Beyerdynamic DT 990 (pop-sound with muffled midrange)
While being sufficiently balanced and revealing for getting the mix right and for a joyful listening experience, the DT 770 PRO maintained a slightly closed-in soundstage and a tonal signature that was not quite on par with the more expensive models. The resulting shift could be described as transitory, perhaps. Considering how cohesively the DT 770 PRO performed on the whole, I could easily see this limitation as individual charm and would place the Beyerdynamics just under the Sony MDR-7506 from an audiophile perspective. However, if long-time wearing comfort or general studio usability also played a role in my rating, they would need to be positioned higher.
Further Reading:
< Douk Audio T-3 Plus & GE Tubes | Info on Linear Power Supplies >
Specifications
- Type: Stereo Headphones
- Design: closed back, bass reflex
- Ear coupling: Over-ear
- Frequency response (headphones): 5 - 35.000 Hz
- Nominal impedance: 80 Ohms (model tested)
- Available impedances: 16 - 250 Ohms
- Power sensitivity: 96,39 dB
- Power handling: 100 mW
- Harmonic distortion: < 0.2 dB
- Approximate pressure: 780 g
- Weight with cable: 350g
- Headphones without cable: 287g
- Cable type: single (straight), fixed
- Cable length: 315 cm
- Plug type: stereo jack, gold plated
- Plugs size(s): 3.5mm + 6.3mm jack
- Place of manufacture: Germany
- Predecessor: DT 770 (1981)
- Re-Design: DT 770 PRO X (2020)
- Year(s): 1985 - 2023
Beyerdynamic DT 990 PRO

Published: 29/11/2021
Manufacturing date: 2021
Author: Karsten Hein
Category: Gear & Review
Tag(s): Headphones
When my friend Charles asked me to digitise his record collection for him — the remaining pieces he had salvaged from the flooding in his basement — I needed a pair of headphones to oversee the process with. My last use of headphones had been so long ago that I could not remember who I had lent my Sennheiser HD580s to. Nor could I be sure that I still had them, considering they were from 1995. (I had originally written 2008, but this was not true.)
I contacted Jens, who is a composer and producer of music himself and usually quite knowledgeable about what is available on the professional studio market, to ask him for advice concerning reasonable headphones for my task. He mentioned that he was quite happy with his AKG K271 MK2 headphones. Jens referred to them as being “honest and revealing”. If I wanted even more honesty, he suggested, I might also consider the open K702. I thanked him for his prompt and knowledgeable support and bought the Beyerdynamic DT 990 PRO instead.
Do you have such moments, in which you know that you are getting excellent advice and then end up doing the exact opposite? In retrospect, I think it was the AKG headphone’s bulky look that put me off purchasing them. The two solid steel rods connecting the two ear pieces that remained fixed while only the head strap was lowered. This part was designed so much more elegantly on the Beyerdynamics and made me blind to some obvious disadvantages that should have got me thinking, especially with my prior knowledge in audiophile matters.
For one thing, the Beyerdynamic DT 990 PRO only had one single, non-detachable signal cord. A single cord had some disadvantages, when it came to signal integrity, because the two channels ran in very close proximity to each other over a longer distance. This could potentially cause inductivity that negatively affected the signal. The cable being curled like an old telephone cord only contributed to this phenomenon. In HiFi, cables touching cables was generally not a good idea and to be avoided.
I also could not help but wonder, if the two channels had cables of the exact same length, as one of them needed to be run over to the other side of the headphone to reach the other driver. The relatively poor center image of the 990 PRO, especially in comparison with the T1 of the same company, made me doubt that this was the case. One could argue that this should not have mattered on a short cable run such as this. But, if this had been the case, why did Beyerdynamic not simply use the same unequal cable design on their flagship T1 headphones? The answer was simple: Because in HiFi everything mattered.
The fact that the cable was not detachable could be seen in two ways: On the positive side, a soldered connection did not inject as much mass into the signal path as a plug would have done. But on the negative side, it meant that I was stuck with the cable it came with, even though I did not like it much. No upgrade was possible in this case, unless I was prepared to take out my soldering iron and get busy soldering new connections.
The DT 990 PRO were of light weight and did not press too firmly on the temples. I could see that wearing them for many hours would not present a problem. I did find that they could get warm with time and would not recommend them in areas of high humidity or temperature. However, all this I could have easily lived with, if they had offered greater tonal balance. This was the most obvious weak point of the DT 990 PRO headphones and made them rather undesirable for audiophile listeners. It was sometimes said that they were non-linear or ‘HiFi’-sounding — whatever that meant — but I do feel this to be an understatement.
Some frequencies of the mid-band strangely seemed suppressed, either by the driver or cabinet design, or by the thick acoustic foam-padding over the drivers, as to make voices sound thinner and sharper. I tested this with three different kinds of output: my computer sound card (only when digitizing records), our Denon CD player’s internal headphone amp (for comparison), and our Douk Audio T-3 Plus tube headphone amp (during an audition). The loss in frequencies remained similar, and this, although the treble was the harshest on our T-3. Since the latter had no difficulties driving high-resistance headphones and worked very well with the Beyerdynamic T1, I assumed that the effect of a recessed mid-band was built into the headphones themselves.
Given my narrow range of amplifier equipment, it was well possible that the DT 990 PRO would have performed better in combination with other devices. However, especially having the T1 as benchmark, I find it hard to believe that any differences in source design could paste over the general tendency of the DT 990 PRO to sound unbalanced, especially on vocals.
Specifications:
- Driver Type: single, dynamic
- Design: over-ear, open
- Frequency range: 5 - 35.000 Hz
- Nominal impedance: 250 Ohms
- Sensitivity: 96 dB (1 mWatt, 500 Hz)
- Harmonic distortion: 0,2% (1 mWatt, 500 Hz)
- Power rating: 100 mWatts, max.
- Cable: Single (spiralled), fixed
- Plugs: 3.5mm + 6.3mm jack
- Place of manufacture: Germany
- Year: 2021
Beyerdynamic T1

Published: 25/11/2021
Manufacturing date: 2016
Author: Karsten Hein
Category: Gear & Review
Tag(s): Headphones
Following my recent exploration of the affordable T-3 Plus headphone amp by the Chinese brand Douk Audio, I was left wondering how good this little amp actually was. At the time of my test, I was lacking a pair of headphones that would be revealing and balanced enough to allow me a definite verdict from an audiophile perspective. Dissatisfied with the open ending of my exploration, I kept pondering on how to proceed, until I remembered that my friend Michael owned a pair of top-of-the-line T1 headphones from the German manufacturer Beyerdynamic. I invited Michael over to our house and asked him to bring his headphones along. That evening, we set up a test to examine the merits of both: his headphones and Douk Audio’s T-3 Plus preamplifier.
As reference, we used Luigi’s Pata Acustica speakers driven by our Hafler XL-280 power amplifier and our Dynaco PAS-4 tube preamplifier. The latter had its focus on vinyl and a great phono stage. The signal source on this system was a Technics SL1310 turntable with AT-VM 540 ML cartridge. I knew this system to offer excellent tonal balance and dynamics while being revealing enough to be highly engaging. If there was room for criticism at all, this would be in respect to bass extension. The Pata Acustica bookshelf speakers had a natural limit when it came to bass that I generally did not mind but some hard-core bass-lovers might object to.
The test system consisted of our Philips GA212 turntable with Shure M 75 ED cartridge, connected via Fast Audio cables to Douk Audio’s T-3 Plus preamplifier. This had its noise-free energy coming from a new and dedicated linear power supply. By that time, I had already decided that I preferred the Douk’s phono stage abilities to those of its line input. I have not checked, but it is well possible that the line stage is passive on the T-3. On the evening of our test, we focused on three songs on vinyl: Seasick Steve’s minimalist “Hard Knocks” representing male vocals, Helge Lien Trio’s jazzy “Gorogoro”, and Katie Melua’s relentlessly swelling vocals on “Heading Home”. We started with Seasick Steve on the Pata speakers, then moved on to the T-3 Plus with my own Beyerdynamic DT 990 PRO headphones for comparison. Finally, we connected the Beyerdynamic T1. We paused to compare our findings following each step, and although we did not agree in all aspects, our basic assessments turned out to be the same.
The male singer's voice sounded tonally most accurate via the Pata Acustica loudspeakers and very similar to this via the Beyerdynamic T1 headphones. While the loudspeakers set a wider and highly accurate stage and sounded a little fuller, the T1 sounded more intimate and reached a little lower in bass. Slightly more detail was audible on the loudspeakers, with individual notes trailing longer. However, this was mostly due to our new Audio Technica cartridge, the particular cut of its ML stylus, and the greater ability of the Technics turntable. Our own Beyerdynamic DT 990 PRO headphones, in comparison, revealed a midrange dip and did not manage to hold the music together as well as the other two contenders. This made bass sound more boomy and treble more pronounced. Additionally, it seemed as if there was a cloak over some frequencies, an over-dampening of the headphone shells, perhaps. Individual high-notes, especially, were flung deeply and seemingly detached into the cloak of darkness that otherwise prevailed. Interesting, but somehow not useful for voices and acoustic guitars.
On Helge Lien’s Jazz piece, we began with our reference speakers that gave a formidable impression of the event. We then went on to audition the DT 990 PRO first. Our reasoning for changing the original order was that we did not want to fall into the trap of fulfilling our expectations. Without vocals present, the DT 990 PRO sounded natural and exciting, lacking some of the fullness of the instruments on the Pata speakers. While the rendition was engaging and entertaining, careful listeners could notice a lack of substance. The Beyerdynamic T1 brought substance back and held the performance together. Here, the stage seemed wider, and locating instruments on stage was easier, although the speakers prevailed in the latter aspect. There was sufficient musical detail in all three contenders, but the T1 and the Pata's sounded most accomplished.
We completed our test with Katie Melua’s “Heading Home”. The recording showed a slight metallic ringing to Katie’s microphone that might have added an interesting effect on a car stereo but seemed rather misplaced in audiophile listening. Therefore, any character trait during reproduction that highlighted this effect was unwelcome. Not surprisingly, the revealing nature of the Audio Technica cartridge brought out the metallic quality of the recording. The Pata handled this rather well by tonally integrating the effect without letting it break away. This did keep the listener engaged, if only to wonder when the treble would lose control of the moment. The DT 990 PRO brought about a more unfamiliar Katie Melua, accentuating some of the rougher aspects of her voice. Katie seemed more rocky, more like a younger Pat Benatar. I enjoyed listening to this rendition of her voice, until I started longing to have the familiar Katie back. The DT 990 PRO's suppressing of selected frequencies did not come without risk, of course. On the other hand, the T1 managed Katies voice very well, partly because they did not have to struggle with input coming from an over-sensitive ML stylus. The Shure’s elliptical diamond did not add any sibilance (as it sometimes did). Consequently, the performance seemed clear and solid, although not quite as suspenseful as on the Pata system.
Beyerdynamic’s T1s are tonally accurate sounding headphones with a solid sound stage that present the music performance as a homogenous whole. The excellent materials used pay off in creating a pleasant and entertaining musical experience. These headphones deserve a good amp that can deal with high capacitance output of 300-700 Ohms. To both our surprise, the small Chinese T-3 held its own during our test, if only after upgrading, tubes, power supply, and interconnects to an audiophile level. Following these significant upgrades, I can recommend both, even in this combination.
Company History:
Beyerdynamic has a long history in audio electronics. The ‘Elektrotechnische Fabrik Eugen Beyer’, as the company was first called, had its origins in Berlin, Germany, during the 1920s. Its first products were loudspeakers for use in the emerging film palaces. Beyer's first pair of dynamic headphones, model DT 48, followed in the 1930s. With Berlin having been severely bombed during World War II, many German companies left the city ruins to seek new opportunities elsewhere. Eugen Beyer finally found a new home for his operations in Heilbronn, a German city located about 600km south-west of Berlin.
Famous Beyerdynamic products where the DT 49 (1950s) hand-held headphone, used in record shops and popular record bars, the M 160 ribbon mic (1957), and the E-1000 microphone (1965). At the time of writing this, Beyerdynamic is still based in Heilbronn and operates an American subsidiary Beyerdynamic, Inc. in Farmingdale, NY. The company offers a range of products, ranging from headphones and microphones of conferencing and interpretation equipment.
Specifications:
- Driver Type: single, front-angled, dynamic
- Design: over-ear, semi-open
- Frequency range: 5 - 50.000 Hz
- Nominal impedance: 560 Ohms
- Sensitivity: 102 dB (1 mWatt, 500 Hz)
- Harmonic distortion: 0,05% (1 mWatt, 500 Hz)
- Power rating: 300 mWatts, max.
- Maximum output: 126 dB (300 mWatts, 500 Hz)
- Cables: 2x cloth-covered OCC 7N copper
- Plugs: 3.5mm + 6.3mm jack / XLR, mic jack (optional)
- Weight: 356g / 437g with cable
- Place of manufacture: Germany
- Year: 2016, 2. generation
HiFiMAN HE-400i

Published: 14/01/2022
Manufacturing date: 2013
Author: Karsten Hein
Category: Gear & Review
Tag(s): Headphones
The popular Chinese brand 'HiFiMAN' was founded by Fang Bian in New York. It evolved from an earlier company called 'Head-Direct' that had served as web-shop and Head-Fi sponsor. Among HiFiMAN's first products were the HE-5 planar headphones that were already launched in the founding year of 2007. Within a relatively short time, the new HiFiMAN brand became notorious for products offering excellent sound quality and advanced technology at affordable prices. Their widely successful HM-802, HE-560, and HE-400i headphones were released in 2014. Fang Bian’s design philosophy, as found on his HE-400i planar magnetic headphones, was loosely based on the much higher priced, and by then legendary, Stax electrostatic headphones. However, the planar magnetic principle never was in real-world competition with Stax in terms of sonic virtues.
In an effort to bring down production costs, HiFiMAN set up two small factories in China and moved its headquarters to Tianjin in 2011. Early HiFiMAN headphones, such as the HE-5, featured wooden ear cups that had two virtues: They looked exquisite and helped the young company to keep tooling costs down. Although the use of wood served the company well in establishing its reputation as a producer of high-quality headphones, the material was prone to cracking as it aged and dried. Some of the early HiFiMAN customers sent in complaints of cracked wooden ear cups. Hence, the revised LE-version of the HE-5 featured ear cups made of plastic and already boasted some typical traits of the company’s signature planar magnetic headphones that were to follow.
At 93 decibels sensitivity and low 35 Ohms impedance, the HE-400i headphones required only moderate amplification. In practical usage this meant that some listening pleasure could be derived, even when the headphones were connected to a smartphone or computer. This was in marked contrast to the company’s earlier planar magnetic headphones that required lots of clean power to operate, bearing some similarity to electrostatic drivers. Since affordable headphone amps with lots of power were still rare to find in those days, HiFiMAN also started to build their own dedicated headphone amplifiers, such as models EF-5 and HE-6, to power their fleet.
I began my explorations of the HE-400i planar magnetic headphones driving them with our humble Douk Audio T-3 headphone amplifier, which we had only recently upgraded with General Electric JAN 5654W tubes and an ultra-linear power supply. The interconnects used in the listening test were made of solid-core silver with copper-mesh shielding and could be unforgiving of flaws in both the setup and choice of song material. I set out listening to José González’s album “Local Valley”, which offered a mixture of male vocals, lovely guitar picking, and some minimal and delicate sound effects, such as birds singing and the occasional synthesiser support. The album provided tonal balance as well as subtle bass lines in vocals and guitars. In doing so, “Local Valley” skilfully juxtaposed the close and imminent with the vast and distant to achieve an acoustically pleasing and highly entertaining effect.
The HiFiMAN headphones had come to us packaged in a posh-looking black box clad with leatherette. In this box, the HE-400i were pressed so firmly and the cable rolled so tightly that I could not help but wonder if the box design would serve to protect its contents or rather damage the cable and ear cushions in the long run. I also noticed that the previous owner had lost or misplaced the additional 6.35 mm adaptor, because this was not enclosed it in the box. As the 3.5mm plug was angled, finding a replacement appeared to become a challenge. I put on the headphones, leaned back to listen, and immediately noticed that the original cable was too short for my sitting position. I could see how, at a mere 1.5m in length, the stiff and cloth-covered headphone cable could turn out to be too short for a whole range of applications. Replacement cables could be found online, of course. However, purchasing new cables of similar quality would drive up the price of these otherwise affordable headphones.
I thought it best to compare the HiFiMAN HE-400i with our similarly priced AKG K712 Pro headphones. According to my research, the HE-400i had initially been sold for about 400.00 EUR in Germany and then dropped in price to 200.00 EUR, before they sold out in 2018/2019. Our AKG K712 Pro first entered the market at about 300.00 EUR in Germany and then dropped to just under 200.00 EUR, following the Christmas sale of 2021. As they were similar in price and completely different in terms of technology, they seemed to be worthy opponents to me. In order not to be biased by my existing listening habits, I made sure to listen to José González’s complete album on the HE-400i first. This would give Fang Bian's planar headphones and myself some time to adjust, as I could not be sure how long they had been sitting on the shelf, before I arrived at their owner's doorstep to free them from their fate.
One of the first things I noticed was that the HE-400i planar magnetic headphones created a compact and focused image. The music seemed to be close and intimate, however, the impression was not so much of a lover whispering tender words in my ear; instead, it appeared slightly directive. The only exception to this being the birds on José González’s album, which seemed delicate and distant due to the recorded effects. There was a certain robustness to the presentation that took me by surprise and also some getting used to. And, although the ear cups were sealed with a tight metal grid that optically veiled the planar magnetic drivers underneath, the headphones provided little shielding from ambient noise. This made them ideal for critical listening in low-noise environments at home or in the studio. The fact that their music also radiated outward to considerable extent, as it did on most semi-open designs, could make them tricky to use in the monitoring of studio recordings.
The HE-400i presented lots of drive and a tonally accurate midrange, with both male and female vocals sounding natural and full-bodied. There was, however, a limited sense of spacial separation between the singer’s voice and instruments in the room. Surprisingly for planar magnetic headphones, the HE-400i more resembled our Sennheiser HD 580 in this respect. In terms of spacial and tonal separation, the conventionally driven AKG K712 Pro were far superior. Perhaps I would have expected a little more agility from planar magnetic headphones, simply because of their low-mass foil design. While the midband was quite solid and seductive, the lack of agility also showed in the treble, which cut back earlier than on the AKG. The HE-400i started dropping off at 35,000 Hz, which was almost 5,000 Hz sooner than the AKG. And, while treble extension above 22,000 Hz is considered a ‘nice-to-have’ by those pointing out the limits of human hearing, this much difference in treble performance naturally affected the ability of the driver to fully generate the impression of space and dimension in the music. On the positive side, neither the AKG nor the HIFIMAN suffered from an unpleasant accentuation of frequencies.
The HE-400i sounded less edgy when driven with sibilant music material, partly because they were less expressive in the high frequency range. They served well to highlight issues in the mid-band, where they were quite accurate. Bass performance was smooth and natural, showing a slight hump in the lower mid-bass that could have been caused by ear cup resonances interacting with the planar driver. This did contribute to a warmer and fuller sound and was not necessarily a negative aspect for music enjoyment, as it could be perceived as rather endearing. Bass roll-off was at 20 Hz, i.e., a full 10 Hz higher than on the AKG K712 Pro. While this was not a whole lot of difference, AKG did state in their sales material that the K712 Pro was designed with a +3dB increase in bass-extension. This served well to balance out the AKG’s spacious highs without being discernible as a bass-effect itself. The HE-400i seemed more compact in this discipline as well. On the whole, I found the HE-400i to be accurate and smooth-sounding headphones that lacked some refinement in terms of tonal and spacial presentation, especially in direct comparison with our highly engaging AKG K712 Pro headphones.
I had originally embarked on my tour of exploration aiming to learn about the merits of planar magnetic designs as opposed to headphones with conventional drivers. The HE-400i showed me that decent sound performance can be achieved using both concepts. HiFiMAN was still a relatively new contender on the market whose biggest contribution to Hi-Fi was to make planar magnetic designs accessible to the average consumer. However, this did not mean that conventional driver concepts needed to fear being outclassed. AKG, Beyerdynamic, and other experienced headphone manufacturers, were perfectly capable of competing from a sonic perspective and still had the upper hand in some disciplines. For planar magnetic headphones to achieve the acoustic performance of the electrostatic designs of AKG and Stax, it would take far better drivers and amplifiers than we had available with the HE-400i headphones and our humble Douk Audio headphone amp.
Specifications
- Driver type: single-ended planar-magnetic
- Design: over-ear, semi-open
- Frequency range: 20 - 35,000 Hz
- Nominal impedance: 35 Ohms
- Sensitivity: 93 dB (1mWatt, 1.000 Hz)
- Power rating: 200 mWatts, max.
- Cables: cloth-covered, Y-shaped
- Connector: detachable (mini-jack)
- Cable length(s): 1.5m
- Plugs: 3.5mm + 6.35 mm jack
- Place of manufacture: China
- Weight: 370g (without cable)
- Year(s): 2013 - 2018
Sennheiser HD 580 Precision

Published: 30/11/2021
Manufacturing date: 1993
Author: Karsten Hein
Category: Gear & Review
Tag(s): Headphones
In my recent article on the Beyerdynamic DT 990 PRO, I wrote that my reason for purchasing new headphones had been that I could not remember who I had given my old Sennheisers to. Some weeks later, I found them at my parents’s house, next to an unused field recorder. As it turned out, the Sennheisers were much older than I remembered (and had professed in my article). A faded and wrinkled receipt showed that I had bought them at Galeria Kaufhof in 1996. All the more, I was surprised to find them still in good shape, even after 25 years. And something else surprised me: Even before listening to them again, I still had a solid memory of their sound.
Before purchasing my Sennheiser HD 580s, I had listened to music with a set of closed Panasonic studio monitors that we had bought in New York during the 1980s for the pretty steep price of 250.00 USD. I remember that they had impressive bass and were able to lift the ear-pieces off your head. They also featured an otherwise decent sound. I carried them around until the cushions disintegrated and their black and flaky residue would be clinging to my hair for the rest of the day. At the time, I was reluctant to give them up. And switching to the open Sennheiser HD 580 seemed to be a sonic step back. Everything I had loved about the Panasonic headphones was gone. Instead, there was this barren new clarity, a quality that I had trouble warming up to at the time.
Perhaps this was partly due to the fact that the relatively high impedance of 300 Ohms made them more difficult to drive with the equipment I owned in the 90s. It seems that these headphones were directed at the professional market, where high impedance is less of a problem. And, since the Pioneer had been of closed design, the semi-open Sennheisers seemed far less punchy in bass. This made me miss the familiar fullness of the lower frequencies. However, dusting them off and listening to them again after so many years, with years of discerning speaker auditions having gone by, my taste in sound and music had also matured, and the Sennheisers left a much more balanced impression than they used to. I was able to see the advantages of such an open design. It all depended on the application.
On professional recording equipment, such as our Zoom H4n, the HD 580 did do quite a wonderful job in depicting voices and stage dimensions. I noticed this first when I played back a recording of my father playing the guitar. Both the guitar and my father sounded so realistic that I had to look up from the monitor to check if he had started playing again. I was amazed to find him sitting with his hands by his side, patiently waiting for me to finish my listening check. A simmilar effect happened, when I was listening to my recording of Luigi’s Snell C-IV loudspeakers playing the first song of Jörg Hegemann’s “Foot Tappin’ Boogie” album. I had set up two large-diaphragm studio mics, pressed record, and then walked across the room to turn on the CD player. Listening to this again during video production a few days later, I repeatedly looked up, fully convinced that someone was approaching me from behind. The impression was fabulously real.
When it came to voices, the Sennheiser HD 580 deserved the name ‘precision’. Tonal accuracy would have been an even better name. And this character trait did not depend so much on the equipment driving them, either. On the other hand, they were not particularly strong in terms of bass extension. For optimum bass, they required a strong dedicated headphone amp. On our T-3 Plus with GE tubes, the HD 580 showed a punchy mid-bass, but lower bass frequencies were still under-represented to the extent that it took some getting used to. At the higher end of the spectrum, the Sennheisers tended to focus on the essence only. Sadly, this meant losing some of the nuances and subtle transients of the music. This made them excellent companions for smaller recording studios to monitor the tonal balance of voices and guitars but also rather useless for genuine audiophile listening, which was perhaps not surprising given their relatively low price point.
As I found out when doing research on the specifications, there is a real HD 580 fan community out there. And, to my delight, I even managed to find a new replacement head-cushion for my Sennheisers online (not yet shown in the photos). They were well-worth keeping, if only for monitoring future studio sessions with our Zoom recorder. In this scenario, I could not imagine anything more useful.
Company History
Fritz Sennheiser set up operations in a farm house near Hanover in 1945 post-war Germany. His young start-up Laboratorium Wennebostel, or ‘Lab W’, soon became a supplier of measuring equipment to Siemens. In 1958, the company changed its name to Sennheiser electronic. Although Sennheiser’s MD 1 mic still borrowed heavily from existing microphone designs, the MD 2 mic was of the company’s own engineering. Other microphones soon followed, with the first Sennheiser wireless microphone system reaching the market in 1957. In 1960, the company introduced its famous MD 421 microphone, which is still available in stores today.
The company produced a range of successful products and soon expanded to form subsidiaries in over 20 countries. Famous headphones include the HD 25 (1988), the Orpheus electrostatic headphones (1991), the HD 800 high-end headphones (2009), and the electrostatic Orpheus successor HE 1 (2015). Both the Orpheus and the HD 800 are considered to be top-of-their-range products. At the time of writing this article, the company is run by the Sennheiser family in its 3rd generation.
Specifications:
- Driver type: single, dynamic
- Design: over-ear, semi-open
- Frequency range: 16 - 30,000 Hz (-3 dB)
- Impedance: 300 Ohms
- Sensitivity: 97 dB (1,000 Hz)
- Harmonic distortion: < 0.1 dB
- Plugs: 3.5mm + 6.3mm jack
- Weight: 260 grams
- Place of manufacture: Ireland
- Cable length: 3m
- Year(s): 1993 - 1997

Sony MDR-7506 Professional

Published: 28/01/2023
Manufacturing date: 1991
Author: Karsten Hein
Category: Gear & Review
Tag(s): Headphones
I must confess that when my colleague returned from a family trip to the USA and happily reported that he had been gifted with a set of Sony MDR-7506 studio headphones, this did not immediately ring a bell with me. There were two main reasons for my ignorance: It had not been until recently that I had developed an interest in headphones, and my previous impressions of Sony gear had been mediocre at best. Sony used to be quite popular in the low to mid-price consumer market during the 80s and 90s, and this had given the brand the tag ‘OK for the price’, which is close to a death sentence coming from an audiophile, or, as the German pun on the brand name goes: So nie.
When Landon and I took a closer look at the headphones at our Frankfurt office, we found that the soft black imitation leather ear pads were starting to disintegrate from old age. I suggested they might still be available as replacement parts online, and Landon managed to find a reasonably-priced pair of red cushions. I later learned that all the parts used on the MDR-7506 headphones were easily serviceable and available from a host of suppliers. Serviceability has always played a major role in the maintenance of vintage gear, and the Sony studio headphones were certainly not lacking in this respect.
The serviceability and availability of parts would also have been an important aspect for professional users of these headphones. The larger studios of the 90s would own a large number of headphones that was often used by careless studio guests and amateurs alike. The possibility to replace a broken driver or ear pad right at the studio without having to send the headphones in to Sony for servicing would have saved the studio time a money. This also explained why so many MDR-7506 were still around.
Made for professional studio monitoring, the MDR-7506 were of a closed back design. This had two advantages: in the mixing room, the closed and damped shell served well to cancel out ambient noise, and noise radiating from the headphones would less likely find its way into the recording. Wearing the headphones for longer periods of time, I was surprised how well the lightweight ear cups worked in sealing me off from the outside world.
At 230 grams, the MDR-7506 were the lightest headphones I had tested. However this did not mean that they felt light or frail in handling or when wearing them on the head. The single headband was adjustable in size and held the ear pieces firmly in position. At first I was surprised to find that the cushions pressed my ears down flat against my head, but I soon did not notice it anymore. In fact, I was reminded of my dad’s old Panasonic Studio Headphones that had softer inner cushions to minimise the pressure. Wearing glasses with thick temples might be a bit of a challenge, however, I had no problems wearing my glasses with flat temples on the side.
I had mixed feelings about the mechanism that allowed the ear cups to be folded upward into the headband. On the one hand, I could see the advantage of being able to store the headphones in a smaller space. On the other hand, the ear cups continuously folded up in scenarios where this was neither needed nor desired. It was well possible that this feature had been a little tighter when they were new. The other aspect I did not enjoy so much was the non-detachable coiled up cable. Having accidentally rolled over the cable of my AKG headphones with our office chair a few days earlier, I could understand the obvious benefit of having a cable that kept itself short. However, as I was usually sitting quite far from our equipment, I would have prefer to be given a choice. For this reason, AKG offers cables with plugs on the side of the headphones as well as the source.
I began my listening explorations with Helge Lien Trio’s “Album 10”. This begins softly and slowly builds up in loudness and speed with each new song. The music source was our Marantz CD-17 CD player paired with a Cambridge DAC Magic. I could feel the little bit of pressure on the ears and heard the slight ringing from long day at the computer. I heard very little from the surrounding, which was a completely different starting point from my AKG K712 Pro headphones that basically incorporated the room in the listening experience and featured large open-back cups in which the ears could maintain their natural position.
I noticed that the MDR-7506 sounded less airy and more compact in terms of proximity to the listener and also soundstage. They played slightly louder than the AKG and offered a fuller sound with a slightly thickened bass. This more robust bass foundation would serve well when listening to Rock, Pop, or Metal music but most likely come across as emphasis in Jazz or Classical music. I did not notice any bothersome shell resonances as you will find on cheaper and less well-made headphones.
Paired with our Douk Audio T-1 headphone amp with GE tubes, the top end sounded sweet and pleasing. I must say that the JAN 5654W were some formidable tubes for this amp, and the Sony headphones did not take away from their magic. At low volumes, the MDR-7506 sounded a little robust with fast-decaying transients, but at higher listening volumes, the PET diaphragm managed to free itself better, and the music became more spacious and more accurate. Even when playing at higher volumes, bass frequencies did not dominate the music as I had initially feared.
In direct comparison, I found the AKGs to be tonally more accurate and revealing, especially when listening at lower volumes. There was just a bit more insight into the music that served well to gauge the depth and width of each recording. This is not to say that the Sonys were far off, however, which did come as a surprise given the 30+ years of material ageing and scientific advances. I actually found the MDR-7506 to be superior to the Beyerdynamic DT990 Pro and the AKG K702, both of which I have had here for testing and also seen in heavy use at various studios. If I had to come up with an adhoc ranking of headphones, my list for audiophile listening would look like this:
My Current Headphone Ranking
- AKG K712 Pro (the most balanced and tonally accurate)
- Beyerdynamic T1 (nothing to complain about, except for the price)
- Stax New SR-3 (difficult to set up and operate, but sweeeet)
- Sony MDR-7506 (good monitor functions and natural tonality)
- HiFiMAN HE-400i (balanced but a little on the bland side)
- AKG K702 (generally alright but unbalanced, leaning toward bright)
- Sennheiser HD 580 (sweet midrange, lacking precision and bass)
- Beyerdynamic DT 990 (pop-sound with muffled midrange)
Having listened to Helge Lien on CD, I started our Technics SL-1310 with Audio Technica VM 540 ML cartridge to play Fleetwood Mac’s album “Rumours” on vinyl. This made for an enjoyable experience. Returning to our AKG for a quick check, I was surprised how much thinner they sounded. The MDR-7506 here offered a strong and punchy mid-bass with a rhythmical forward drive. As before, they cut a little short in decay and offered slightly less tonal insight. As such, I was reminded of the sound of the 80s and 90s in which sonic finesse was reserved for the ultra-high end of the market. And still I found that the presentation worked very well with the music from the period.
I could see less discerning listeners enjoying the more robust sound of the Sony MDR-7506 more than the AKG, because it was generally more forgiving of the subtle differences in the recordings. Whereas the AKG invited the listener to look past each recording at the spaces that were not sufficiently covered or overly smothered by the music material, the MDR-7506 took the music more at face value and encouraged a more general appreciation of sound. This works quite well and places the Sony above some well-known competitors of its time and beyond.
Specifications
- Type: dynamic studio headphones
- Special features: foldable head band
- Earpiece: on-ear supra-aural, closed-back
- Driver type: 40mm dynamic, neodymium magnets
- Diaphragm: polyethylene terephthalate (PET)
- Nominal impedance: 63 Ohms
- Frequency response: 10 Hz to 20,000 Hz
- Power sensitivity: 106 dB/mW
- Maximum power handling: 1,000 mW
- Plug type: headphone 3.5 mm, TRS
- Connector: gold plated
- Cable design: fixed, coiled
- Cable Length: 1m to 3m (max.)
- Available color(s): black
- Weight: 230 g
- Country of manufacture: Japan
- Year(s): from 1991
- Preceded by: Sony MDR-V6 (1985)
Stax New SR-3

Published: 10/03/2022
Manufacturing date: 1971
Author: Karsten Hein
Category: Gear & Review
Tag(s): Headphones
It all started when Luigi received a pair of 1971 to 1975 Stax headphones and dropped them off at our office for testing. I was just finishing up an article on Jörg Hegemann‘s "High End Boogie Woogie" recording sessions at Hansahaus Studios and could see that this would take some time to complete. However, Luigi suggested that he would not need the headphones back anytime soon and insisted that I give them a try. One reason for his curiosity may have been that I had just completed a series of reviews covering more conventional headphones, and the Stax were of electrostatic design, ‘ear speakers’ as Stax had lovingly christened them.
The most far-out headphone design that I had previously tested had been HiFiMAN’s planar magnetic HE-400i. The planar design concept had often been compared with electrostatic designs, and, I guess, Luigi and I were both eager to learn what the fuss was about. I was not a novice to electrostatic technology either, having run a pair of Martin Logan SL-3 loudspeakers on our main system for a number of years. There was much to suggest that—despite their biblical age—auditioning the New SR-3 series would turn out to be an enjoyable and worthwhile experience for us.
Following my article of a Thorens TD 320 turntable, I once again found myself with some time on my hands and connected the Stax converter model SRD-6/SB to the speaker terminals of our Hafler XL280 amplifier. The way the Stax input cable was designed, it needed an amplifier that had its binding posts for both channels in close proximity to each other. Since this was not the case on our other amplifiers, the Hafler seemed a given. Our input sources were a Technics SL1310 turntable with AT VM540 ML cartridge and a Marantz CD17 CD player paired with a Cambridge DACMagic with upgraded ZeroZone power supply. All peripheral components assured that we had excellent signal quality coming to the Hafler, the latter of which was a true ultra-linear MOSFET powerhouse in its own right.
It first seemed strange to power a small set of headphones with a 145 watts RMS per channel amplifier, however, such was the preferred playing field of the electrostatic design. The two stators in the headphones needed to bridge a gap of 300 microns by means of static electricity and this could take some time and power to build up. I noticed that for the first 20-30 minutes after switching on, the Stax New SR-3 still sounded dull and lifeless, character traits that are not commonly associated with nimble foil drivers. Once fully charged, however, the sound became more agile. Initial channel imbalances were soon forgotten. It was possible, however, that a hair got caught in the stator, leading to a popping discharge of stator bias. This could make the afflicted side lose volume for a few minutes, until the full bias charge was replenished. Our electrostatic Martin Logan loudspeakers, by comparison, did not (and could not) rely on amplification alone to charge their stators and were instead connected to the power grid for stable power potential on the stators. I could see the benefit.
Being somewhat used to our AKG K712 Pro headphones, the Stax ultra-balanced sound took a moment getting used to, before their true merits started to shine through, making me wonder how I had managed not to notice them right from the start. Let me be ultra-clear on this: With the Stax we are talking serious headphones, not some half-baked Bluetooth fashion article with fancy noise cancelling that also cancelled out half the music in the process, as I had heard plenty from both Sony and JBL headphones. No, the Stax SR-3 were, like the AKG K712 Pro, serious listening tools for those who were sensitive to how their music sounds.
Despite their advanced age, the Stax SR-3 offered superb tonal accuracy that allowed the differentiation between a myriad of natural instruments and playing styles. This became especially apparent when many musicians were playing their instruments at the same time, e.g. in Classical music or more complex Jazz arrangements. Instrument separation was the best I had heard and—due to the proximity of the drivers—even surpassed that of our Martin Logan SL-3 speakers. The overall impression was a combination of immediacy and attack, with the music at times crashing out of the headphones with a vengeance. And yet, the stage remained close and intimate, definitely not as spacious as I was used to from our K712 Pros. Similar to our AKGs the Stax excelled at providing lots of high resolution and nuance. Their special strength lay in a superior sense of order at very low noise levels. Natural instruments, piano keys, and metallic sounds benefited from the SR-3’s superb tonal colours. With the stators fully charged, there was a good sense of mid-bass punch, too, which made mid-size drums really come alive.
On the downside, bass extension could have been better, especially in direct comparison with our AKG headphones. From the model I tested, I would have to disagree with Ken Rockwell that this was simply the result of their superior linearity. Some aspects of the lower bass spectrum were simply missing from the music. Bass dynamics also could have been more pronounced on my test sample. This could have been a result of the physical age of the headphones, of course. Half a century must have had an affect on the materials, even if the electronics of the drive unit had recently been serviced and restored where necessary. Another factor to be considered was the Stax’s need for lots of clean amplifier power, which needed to be available at least 30min before each listing session for the stators to be properly charged. Not many people will be able to set aside such a formidable amplifier for the purpose of powering their headphones. And, although the Stax drive unit SRD-6/SB was designed to pass the amp signal through to the main speakers, permanently placing the small black box and its outdated terminal clamps in the signal path of your everyday system would probably not be a great idea.
The Stax offered what I would describe as tonal robustness, that is to say, they produced natural tonal colours that seemed more crude, raw, and realistic than on our more pleasant and refined sounding AKG headphones. In female vocals, there could be a trace of confinement and squeakiness at times, as if the vocals were conveyed via a public address system. I listened to this effect many times over, once even falling asleep during the analysis, and, in the end, I had the impression that the compression was the result of the closed back of the ear cups reflecting back the sound. As I did not conduct any measurements, there could be a host of other reasons for this phenomenon as well. Later Stax headphones had open back ear cups that allowed the inverted outward frequencies to disperse and fade into the environment more naturally, instead of being folded back through the diaphragm. In our listening room, the Martin Logan speakers are given at least three feet distance to the front wall to sufficiently delay the reflected sound.
The New SR-3 headphones presented a wonderful opportunity for us to experience the electrostatic design first hand. For those of us who do not mind having a spare power amplifier on standby, the SR-3 deliver at least 80% of what can be expected from electrostatic headphone designs, and this at a small fraction of the usual price. One needs to consider that, after half a century, the electronics might need looking at, and one needs to be sure to audition them before making a purchase. However, without directly comparing the SR-3 with modern headphones such as the AKG 712 Pro, they offer everything it takes to find great joy in listening to music. It is only in direct comparison that our AKG’s superb design managed to show a bit more of everything, perhaps with the exception of the Stax’s raw tonal colours, a discipline in which the SR-3 are difficult to beat.
Specifications
- Diaphragm: ultra-thin, approx. 5 microns thick*
- Stator electrode gap: approx. 300 microns*
- Input: Stax standard (230 V bias) 6-pin adapter energizer
- Impedance: approx. 130,000 Ohms* @ 10,000 Hz
- Capacitance: approx. 120 pF*
- Sensitivity: 95-100 dB @ 100V RMS*
- Frequency range: approx. 30 - 25,000 Hz*
- Cord design: straight, supple cloth-covered
- Cable length: 2.5 meters, 6 mm
- Weight: 290g without cord; 373g with cord
- Drive unit: model SRD-6/SB
- Drive unit polarity: (R) +red -black / (L) +white -green
- Country of manufacture: Japan
- Year(s): 1971 - 1975
*measurements and estimates by Ken Rockwell, 2011
Headphone Amps
Douk Audio T-3 Plus
Published: 16/11/2021
Manufacturing date: 2021
Author: Karsten Hein
Category: Gear & Review
Tag(s): Headphone Amps
“Is nothing sacred?” was the title of Salman Rushdie’s famous essay that he wrote in defence of his 1988 novel ‘The Satanic Verses’. As it so happened, his work of fiction had prompted Iran’s Ayatollah Khomeini to declare a worldwide ‘fatwa’ on Rushdie, which was, in essence, an order for the author to be killed. With his essay, Rushdie was hoping to mobilise sympathy for his train of thought, unfortunately, without much success. The author had to remain in hiding for years to come. As Rushdie pointed out in his essay, the question “Is nothing sacred?” is usually of rhetorical nature and posed in hope of reaffirming agreement or arousing mutual outrage, whenever an established system of belief is threatened by the careless non-believer: A church that is turned into a restaurant or discotheque. — Is nothing sacred?
This same question must have been on the mind of my friend and fellow audiophile Luigi, when he learnt that I was making preparations for an article on a cheap Chinese import preamp by the ‘eBay-brand’ Douk Audio. Considering the line-up of reputable audio devices presented on this website, my musings on the price-driven T-3 to the well-seasoned Hi-Fi connoisseur must have seemed like a wilful attempt at dismantling my credibility. “I don’t know anyone, who is serious about Hi-Fi and would consider making such a purchase” was his impromptu view of my endeavour.
I could understand his objections, of course. In purchasing audio legends from the past, we had the clear advantage of hindsight. Over their sometimes 40+ years of existence, the true gems of historical audio engineering stood out from the unworthy rest like beacons in the night. And, making purchases from one connoisseur to another, the true merits of each unit were mostl well documented, and the risk of making a financial loss was minimal. The sonic discoveries were glorious. Under the radar and far from the regular consumer claptrap, we found ourselves protected in the world of the informed. Why would I open Pandora’s box for a new and far away contender, when there was still so much of worthwhile history waiting to be rediscovered?
On the other hand, many of today’s legends started out as unorthodox price breakers in their own right. If you think of David Hafler, for example, and his affordable Heathkit audio gems, these, too, were in stark opposition to the more established (and pricier) Harman Kardon designs, and they were often frowned upon by the more established brands. Hafler’s designs earned their reputation and their eternal place in our hearts mostly based on their sonic virtues. In this context, it would be interesting to draw up a comparison between low-price engineering successes and their higher priced counterparts. There would ultimately be some surprises, because a product’s merits can best be gauged by how satisfactory it is to the owner over the course time. A point at which existing vintage models clearly have the upper hand.
Advert eiaudio/shop:
I came across the T-3 Plus when I was preparing to digitise records for a friend of mine. Charles had seen his record collection flooded in the recent heavy rainfalls and had decided to leave what he could salvage with me for restoration and safe-keeping. In return, he had asked me to create CD-quality files for him that he could store and play on his computer. Suddenly faced with this new task, I realised that I did not have a headphone amp that would allow me to match our 250 Ohm headphones with the sound card of my computer. At the time, I still had limited experience with headphones, dedicated headphone amps, or digitising records. Not a great starting point, except for those with the heart of an explorer. And so, I set out to search the web for a reasonably priced headphone amp, taking into consideration new and used units alike.
The T-3 Plus caught my attention because it had a fashionable Steampunk look about itself. It stood upright and combined both dark-brown metal and wooden elements. The industrial look was further highlighted by the tube sockets being conveniently located along its top. It also featured built-in RIAA correction for MM and MC turntables, the combination of which was rare among the smaller tube preamps. I was pleasantly surprised that it also featured micro-switches that would allow me to adapt its input to the exact specifications of the phono cartridge in use. OK, and it probably helped my decision that, after looking at the T-3 Plus just once, it continued to be displayed to me during my following searches. I could have cleared my cookies, but I decided that I did not mind. When I made the purchase I was fully aware that this might be considered blasphemy by the hard-core believer. To me it was an act of inquisitive playfulness at most.
The T-3 Plus arrived here well-packaged in a foamed box of organic grey cardboard with the words “Transmit nature music” written on it. Except for the poor English, nothing about the packaging suggested that this had been designed carelessly. The box contained the preamplifier, a set of Chinese 6A2 825M vacuum tubes, a cheap 1.5 ampere switching power supply, and one 3.5mm to RCA auxiliary interconnect. Unfortunately, both the interconnect and the power supply were of such poor sonic integrity that they would work against Douk Audio’s mission statement of transmitting natural music. — I also had a suspicion about the quality of the tubes, but I was willing to give them a try before making a decision about them.
Although T-3 Plus was of satisfactory build quality, I noticed that it was delivered without rubber feet that would help the unit stay in place in the event of a accidental tugging on the headphone cord. I still had some anti-slip feet available and attached them to the base. The front of the unit featured the 3.5mm headphone socket and a single knob for operation. Although I liked the idea of the power switch being part of the volume control, I did find the dial itself fragile. A bit more resistance would have been desirable. If given a choice, I would also have chosen larger headphone jacks over the smaller ones. The back of the T-3 Plus featured RCA/cinch sockets for phono with a massive gold-plated ground prong. I would have liked to see the same RCA/cinch standard as auxiliary input as well, rather than having to purchase a dedicated interconnect for a 3.5mm socket. Additionally, a manual selector between the two inputs would have been desirable, instead of giving the auxiliary signal automatic priority when connected.
I began my listening adventure with our trusted Denon DCD-1420 player as music source. The T-3 Plus was connected via its original accessories: the cheap interconnect, tubes, and power supply. Unsurprisingly, the music sounded flat and stale, lacking rhythm, excitement, etc. I compared the sound to our Denon’s onboard headphone amp and found the Denon to be far superior. I then understood that some major changes would be necessary in order to get this little headphone amp to shine — if it was possible at all. So, in true explorer spirit, I scanned the web for a linear power supply. Many of the supplies I found had displays that showed the mains voltage and similar futile information. For audiophile listening, I had to make sure that our power supply was free from noise factors. I also contacted Mr Becker and asked him to manufacture a 3.5mm to RCA interconnect for me. I wanted to make sure that I was listening to the headphone amp rather than the cable. We decided on a solid core silver interconnect with Elecaudio’s silver-plated tellurium-copper on the side of the source, and Oyaide’s P-3.5SR silver-plated rhodium plug on the side of the amp.
The power supply and interconnect arrived about three weeks later. I decided that I would give all parts a break-in time of at least 80 hours. To do so, I let our DCD-1420 play for a few hours each day, mostly during working time, in order to monitor the sonic development at a certain interval. While the linear transformer did improve bass response right from the start, the new silver interconnects laid bare some strange metallic sibilance in the treble that, once identified as such, troubled me each time I listened. And, while the T-3 Plus had matured in bass and rhythm, the Denon’s internal headphone amp still had the lead in terms of spacial and tonal accuracy. I was starting to be a little frustrated and suspected the tubes to be the culprit. Some research on the subject brought to light that Chinese 6A2 825M vacuum tubes can be purchased for 3.00 EUR a pair, whereas audiophile vacuum tubes rarely sell below ten times this amount for a matched pair. I was willing to expand my experience in ‘tube rolling’ and contacted Douk Audio for advice. They wrote back to me the following day, giving me a list of possible replacements: 6J1, 6J2, 6J5, 6K4, 6*1N, and 5654.
Since I was still a relative novice in the subject of vacuum tubes, I conducted another web search and came across an article by Rainer Uhlmann published on the audionist.de website, in which Rainer, a musician, described how different tubes affected the music in his listening setup. He explains his findings in such vivid terms that I, too, managed to get a good impression of the potential differences between them. The tubes used in his experiments were:
- Western Electric WE 403B
- RCA 5654 Command
- Mullard CV4010
- Raytheon JAN-CRP-5654
- General Electric JAN 5654W
- Voskhod 6Ж1П-EB (= 6ZH1P-EV o. 6J1P-EV)
- Ericsson 5591
From Rainer’s description, I shortlisted three tubes: Mullard CV4010, General Electric JAN 5654W, and Ericsson 5591. Looking for the most versatile performer, I ended up purchasing a matched pair of JAN 5654W tubes. Unfortunately, this meant having to leave the Mullard and Ericsson tubes for another project. As to my order, I was not sure what to make of the branding of the JAN 5654W tubes as 'General Electric'. The vendor was the Chinese Hi-Fi seller 'Nobsound' who operated on a similar basis as Douk Audio, showing their products mostly on AliExpress, eBay, and Amazon. I doubted that General Electric still made tubes. And the tubes did not look as though they were 'New Old Stock' (NOS), either. I assume that they were instead manufactured in China (like everything else these days), using old General Electric tube patents and designs. If you know more about this, your comment would be much appreciated.
On the day the new tubes arrived, I started listening straight away with great apprehension and was deeply disappointed to find that the metallic sibilance in the treble still remained. It seemed as if there was a tonal up-shift that affected the complete spectrum and caused the sound to be unnaturally bright. Since burning in the tubes for 80 hours had shown no effect on my previous setup, I was not very hopeful that I would see much of an improvement this time around. Still, I decided to give the headphone amp a final chance to shine. I let it play music for five hours a day over a period of five days and made a point not to listen during this time. When I finally returned for auditioning, I found that the JAN 5654W tubes proved less resistant to burn-in and showed a much-improved performance. The top-end had meanwhile become softer and developed a teasing warmth and affection. During passages in which I used to fear being attacked with the harsh sibilance of female vocals, I could now feel a playful attraction. The space between individual instruments had increased, and there was now sufficient sonic width and depth. I could see myself listening for fun and relaxation in this setup without having to suffer any harshness.
Before reaching the technical limits of the T-3 Plus headphone amp, I was able to hear the shortcomings of my monitor headphones. These were the older 300 Ohm Sennheiser HD580 from 1996 and the more recent 250 Ohm Beyerdynamic DT 990 PRO from 2021. Both of these could be classified as entry-level headphones, although the DT 990 PRO could also be found in professional studio applications. While the Sennheiser managed to hold the mid-band frequencies together and gave a more solid-sounding performance, it lacked bass extension and lost most of the delicate transients. The Beyerdynamic, on the other hand, had wonderful bass extension but was lacking mid-bass punch. It gave lots of room to transients and managed great instrument separation, perhaps at the cost of losing the performance as a homogenous whole. It seemed as some frequencies were purposefully muffled in order to give others prevalence, which resulted in a somehow muffled sound in which room aspects where missing.
I ended my exploration of Douk Audio’s T-3 Plus with mixed emotions. While the basic unit was available at an entry-level price, I found that serious audiophiles would need to invest at least twice this amount on the periphery to raise its performance to an acceptable level. Connectivity, as well, entailed some compromises that made this unit a niche product for very specific scenarios. In order to give you a definite verdict on T-3’s full capabilities, I would have needed to invest in equally as capable headphones, a shortcoming that I had yet been unaware of. Therefore, be sure to consider these factors in application before making a purchase, and then decide for yourself, how deep into the rabbit hole you are prepared to crawl. I certainly enjoyed the trip, perhaps because it was unorthodox and almost forbidden. And while doctrine would force us to make a choice between good and evil, loyalty or blasphemy, the open road of exploration meanders freely and ultimatley becomes an amalgamate of the two sides.
Note: For further exploration of Douk Audio’s T-3 Plus see my article on the Beyerdynamic T1 headphones which helped shed more light on the subject.
Specifications:
-
Type: Tube Headphone Amplifier / Preamplifier
-
Audio inputs: RCA phono / 3.5mm Auxiliary
-
Audio outputs: 3.5mm headphone / RCA stereo
Auxiliary Input
-
AUX input level: 1V
-
RCA output level: 2V (max.)
-
Frequency response: 20 -20.000 Hz, -1dB
-
Total harmonic distortion: 0.01%
-
Signal to noise ratio: 100dB
Phono Input
-
Phono input: 0.005V
-
RCA output: MM = 530mW (max.) / MC = 5V
-
RIAA correction
-
Total harmonic distortion: 0.2%
-
Signal to noise ratio: 89dB
Headphones
-
Headphone output: 130mW@32Ω
-
Headphone impedance: 32-300Ω
-
Operating voltage: DC 12V
-
Dimensions: v(W) 50mm; (D) 120mm; (H) 138mm
-
Weight: 540g / 1.19lb
-
Year: 2021
Cables
When discussing components of HiFi systems it is almost impossible to avoid the subject of cables. They constitute the essential link between the individual units, and they play an important role in the fine-tuning and matching of the HiFi chain. They come in many different designs and various gauges, running from straight to braided, with various degrees of and completely without shielding, and they are made of all kinds of wire materials from aluminum to copper, silver and gold in various coatings. For copper alone, there are many different grades and production methods that will effect the crystalline structure. In setting up a proper HiFi system, cables should be selected with the same care as the other components.
Choosing a matching cable requires a good ear, a supportive HiFi dealer, or friend with lots of gear, and some experience. Sadly, it is next to impossible to find the best cable for a specific position in the system from reading the specifications or studying the design alone. While research and personal convictions will help to guide us in a general direction, in the end, the cable will need to be heard in comparison with others, and this in precisely the system and in the room where it is to play. An interconnect, for instance, that works well between our CD player and preamplifier might perform poorly when placed between preamplifier and power amplifier. While it is difficult to find two cable types that sound the same, there is lots of scepticism among HiFi enthusiasts about the necessity of spending money and time on the subject.
Analog Interconnects
Audiocrast OCC and Silver
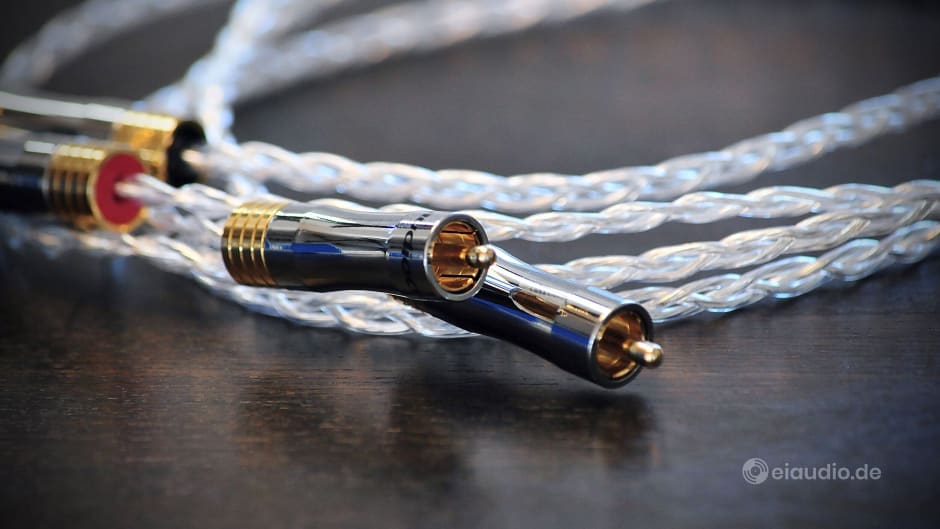
Published: 15/02/2021
Manufacturing date: 2024
Author: Karsten Hein
Category: Gear & Review
Tag(s): Cables
Is it generally a good idea to buy audio cables for our HiFi system from cut-price vendors in China? The answer is: no.—Is it a good idea to buy this particular audio cable from China? The answer is: you bet! There are exceptions to every rule, as we shall see. The problem is that we can never be certain, whether the item we are looking at is the rare and exciting exception, or just another recapitulation of the boring old rule.
From the very first paragraph of writing about this interconnect, I can already feel the sad downside to cheap Chinese imports: The ever-present lack of credibility, certainty, and responsibility towards the customer. As some market observers will know, the cable shown here is sold on eBay. This particular variant is from a Chinese vendor by the name of ’audiophileseller’. But is this even a proper shop, or just a makeshift eBay address, hastily set up to sell off products that have fallen off the back of a truck? And who—or what—does the term ‘audiophile’ in the seller’s name refer to? The shop? The products sold? Or does it merely describe the ambition of the seller, as the name suggests? These are important questions, for those wanting to estimate the risk involved in purchasing from an unknown vendor in far-away China. The few ratings from international buyers rarely help in obtaining a clear picture.
To make matters worse, similar-looking cables can almost always be found from other Internet vendors, often for even lower prices. And, consequently, down the rabbit hole we go: Are these the same products? Are they better or worse? And—finally—are any of these items actually made out of the materials that they are claimed to be? In other words, how many buyers are going to have them delivered, take them apart, run a materials test, and publicly report on them, if their incentive was nothing more than the petty impulse of wanting to save a few bucks? By nature, tests of this kind are rare. And when they do occur, there is still the worry about consistency in the quality of manufacturing. Can we trust the craftsmanship to always be on the same level? Or do products made of similar components differ, simply due to changes in the quality of manufacturing?
In our western mode of doing business, branding helps us to give a product a finished form and character, and—paired with a contact address in case of trouble—a sense of legitimacy. The Chinese brand-free culture sees no other obligation, than to present the most attractive bling at the most approachable price, right at the point of sale. Much like a street vendor. After all, the “30-day test-and-return policy” is little more than a joke. If we consider that many cables have run-in times of more than 30 days, the only thing we can say for sure within this period, is that the product has arrived. And at times, I have even found that the sellers have meanwhile closed shop and are no longer able or willing to accept returns. For these very reasons, I have spent quite a sum of money in hunting for cables that fall short of the term ‘audiophile’ over the years.
Advert eiaudio/shop:
Ultimately, this leads us back to the initial question. Is it a good idea to purchase cables directly from China? Well, I am surprisingly relieved to find that the particular cinch/RCA interconnect that is presented here is a welcome exception to the norm. The plugs really are from the Chinese HiFi-brand Audiocrast, and, from what I could hear in my listening tests, I am also willing to believe that they are of solid copper and plated with 24k gold, just as described. In fact, the plugs are so heavy and slide on so well that they are a genuine highlight in themselves. The cables are described to be of OCC copper with an 8N silver coating. This, too, I can believe.
After all, there is something incredibly satisfying about stumbling upon a great cable. It is usually not any one particular thing that it does well, but rather the sum of its characteristics that comes together in what can only be described as—music. Now, this appears to be an easy enough conclusion to reach, you might think, because all cables connecting audio components cannot help but play the music that is fed through them. Sadly, this is only partially true, because, more often than not, a significant amount of the content of the original music is lost in terms of speed, dimension, dynamics, and tonality. The accumulated loss accounts for the phenomenon that people listening to your system play from another room will not think you have invited the musicians to play for you. The better our system is, the harder this distinction becomes.
The Audiocrast OCC and silver cable, sold by a Chinese eBay vendor, with its golden cinch/RCA plugs, braided design with Teflon dielectric, silver-plated OOC copper wires, and its non-branded manufacturer in who-knows-where, pulls of a magic act to rival well-known manufacturers, such as Kimber, Fadel Art, etc. Perhaps it is just a lucky shot, but the combination of materials works great, with the OCC copper-core providing tonal harmony and the silver-coating maintaining speed. If your system has music inside it, this interconnect will help you bring it to the surface. Never mind that of the three cables I ordered over a period of 4 months, not two actually look the same: two cables have direction indicators that are missing on the third. And one of the two cables with indicators sets itself apart from the rest by having the red and black colour-coating of the plugs confused.
Specifications
- Cable lengths: 100cm
- Material: OCC copper, silver-coated
- Plugs: Audiocrast, gold-plated
- Electrical characteristics: N.N.
- Handling: soft, thin, bouncy (difficult to place)
- Termination: gold-plated, Teflon insulator
- Position tested: CD player to preamplifier
- Country of manufacture: China
- Year(s): 2021
Note: I did ask the ‘audiophileseller’ eBay shop for specifications on the cable (with plugs or without). The response was that they only knew it was made of OCC copper and silver, terminated with gold plated Audiocrast plugs. Well, I expected no less.
HBPS - Pure Silver Solid Core

Published: 12/04/2021
Manufacturing date: 2024
Author: Karsten Hein
Category: Gear & Review
Tag(s): Cables
When I started on my explorations in interconnects, I only had a faint idea of the effects of different materials on cables and plugs. Most of what I knew was based on what I had read from other users, from manufacturers of audio products, and from magazine tests. This left me wondering, how reliable these sources were. Manufacturers and magazines obviously have an interest in promoting certain products, and ‘users’ may be anything from absolute novices to experienced audiophiles. When it comes to discussing the merits of cables, it is useful to speak to an expert, otherwise one will all too often be discussing the flaws of a specific HiFi-setup rather than general cable attributes.
It is no secret that, ever since coming across Holger Becker’s silver solid-core cables, I have been hooked on the sonic abilities of silver. The cable itself is made of a 4N solid-silver strand that is shielded with a pure copper mesh, a combination that has meanwhile proven itself to work rather well. Mr. Becker sells this cable with two different plug terminations: HBS1, utilising a RAMM Audio gold-plated copper plug; and HBS2, with a silver-plated brass plug by WM Audio. The choice of plugs was shown to make a marked difference in cable’s sonic performance over all frequencies, and it was concluded that audiophiles looking for a darker and richer sound might prefer the copper and gold combination, whereas those seeking a more agile and revealing sound would be better served with the brass and silver version.
In the context of our own system setup, I enjoy having both cables available, in order to counterbalance darker or brighter sounding HiFi components. However, considering the merits of silver as a conductor, I could not help but wonder about the choice of plug materials. Gold and brass seemingly worked against optimal connectivity, which a quick check on Wikipedia confirmed:
International Annealed Copper Standard
- Silver……..……. > 105%
- Copper…..……. > 100% (standard)
- Gold……………. 65% - 75%
- Aluminum……. 60% - 65%
- Bronze…..……. 15% - 48%
- Beryllium.……. 17% - 43%
- Rhodium..……. 35% - 38%
- Brass……..……. 25% - 37%
- Tungsten.……. 31%
- Nickel………….. 24%
- Palladium……. 16%
- Platinum..……. 16%
- Tin………………. 15%
I decided to write to Holger Becker about my concerns regarding the combination of gold and brass with silver and suggested that he built an interconnect using the silver version of the RAMM Audio plugs. However, he was not too pleased with this idea and rightly pointed out that these were rhodium-plated and would again introduce impurity. He suggested that we should rather use a pure-silver plug made by Keith Louis Eichmann Innovations (KLEI) called ‘KLEI Absolute Harmony’, which uses a special amalgamate of silver with a conductivity rating of >106% on the IACS scale. I liked the idea, and I suggested that we name this new ‘made-for-eiaudio’ interconnect “HBPS” for Pure Silver. He liked the name, and I placed my order.
Advert eiaudio/shop:
The Australian couple Keith and Patricia Eichmann made a name for themselves, when they premiered the famous ‘Bullet Plug’ connector to the world. The Bullet Plug was a radical rethinking of the classic cinch connector, which had originally been developed by the Radio Corporation of America some 60 years earlier. The KLEI design improved conductivity, enhanced signal integrity, brought about higher resolution, and improved the mechanical connection. In fact, Eichmann’s patented Bullet Plugs were used with great commercial success by many HighEnd brands. The cable manufacturer WSS used them on their “Gold” and “Platinum” lines, for instance.
The KLEI Absolute Harmony Plug is an enhanced version of the original Bullet Plug design that features improvements in terms of geometry, mass ratios, durability, and metallurgy. It is also the highest contender of the Harmony range, about which KLE states the following: “Compared to a typical gold plated brass connector used in the vast majority of deluxe Phono/RCA plugs, the Harmony RCA plug range, utilising our proprietary alloys, achieve improvements in conductivity exceeding 320%.” — Now, that is quite a statement, indeed, and perhaps explains, why our silver cables generally play louder and with superior dynamics than our copper versions. The manufacturer goes on to describe that lots of care went into minimising turbulences in the electron flow (Eddy Currents) and improvements to capacitive reactance and micro-arcing. And, while all this is theory, of course, with potentially no practical use to us listeners, I enjoyed the concept of now having a single silver-solid core strand running from end to end. Finally, no more material transitions.
When the new cable arrived, I set everything up to allow for a speedy switch between interconnects and decided not to run the first test alone. The signal source was our Rega Planet 2000 and the preamp was our DB Systems DB1. I decided that I would use our HBS2 cable as benchmark. At the time, this had been running in for about one month and had sufficiently matured in sonic balance. While the low-end was not yet fully present, listeners unfamiliar with our system or with silver cable in general would have had nothing to object to. When my wife walked into the room after putting our kids to bed, I asked her if she had a moment to try out a cable with me. Sabina was unaware that I had bought a new cable and did not know about the differences in materials, etc. She did know, however, that most of the cables we were now running were made of silver. Not that I think this made any difference. I played approximately 1 minute of Vocal Jazz on the HBS2 and then played the same passage on the HBPS. — “Holy! This is much better.” — was her immediate response. Having just returned to my seat, I was pretty much thinking the same.
Although Holger Becker had reported to me that he had played the HBPS for 1-2 hours to get an impression in his own system, I think it is still safe to say that this interconnect had the best out-of-the-box performance of the three variations. Compared to the HBS2 it was already fuller in bass, even if slightly less agile sounding. However, there was a whole new dimension of order and detail. The stage was dimensionally more concrete with lots of space between individual sounds in comparison to HBS2. On the all-too-familiar Diana Krall album 'All For You' the recording studio‘s background now was electrically and physically present at all times, for the first time in our listening history. From tiny shifts on the piano stool, the tapping of a foot, clicks, pops, and static from cables and the microphone, it was all there, even when played at relatively low volume.
The HBPS custom made for eiaudio is both the most elaborate and lightest interconnect in our range of cables, simply because the Eichmann Absolute Harmony Plugs are of extremely low mass. From its touch and feel alone, it would be difficult to guess the sonic or material value of this interconnect. Only those familiar with the industry will understand that this is a special cable in many ways. But listening to it is an exceptional experience. The interconnect is highly revealing and made for those who enjoy listening very deeply into a recording. For casual listening, this might be a little too much at times, and I do know even experienced listeners who will shy away from such a detailed experience, simply because they find this to be unrealistic. It therefore makes sense to have a choice of cables at hand and to change between them from time to time. But, is the HBPS hands down the best interconnect we currently have? Yes. It certainly is.
Specifications
- Cable lengths: 100cm
- Material: 4N silver solid core, copper shielding
- DC loop resistance: 0.48 Ohm
- Parallel capacity: 50 pF (55 pF, terminated)
- Handling: non directional, flexible
- Termination: KLE Innovations, Absolute Harmony Plug, silver
- Position tested: Rega Planet 2000 to DB1
HBS-QS1 - Silver Solid Core (Quasi-Balanced)
Published: 22/06/2021
Manufacturing date: 2024
Author: Karsten Hein
Category: Gear & Review
Tag(s): Cables
Of course, I remember fully well that in my presentation of the HBS4 I had written that this would be my last silver solid core cable presentation. But sometimes predictions are made, and then life happens and makes it seem absurd to stick by them. Shortly after writing my review of the HBS4, Holger Becker contacted me to report that he had been working on a new cable design which he was currently testing on his own system and would send to me for auditioning thereafter. How could I resist the temptation of listening to it or writing about it once the listening was done?
Mr Becker’s latest design was a quasi-balanced cinch/RCA concept consisting of the same type of 4N silver solid core wires that I had thoroughly tested and written reviews on before. The term quasi-balanced refers to the use of two identical wires for the hot and the ground connector respectively. This means that the same gauge and materials of wire are used to transport current from the source to the preamplifier and back. For improved noise cancellation, the hot and the ground wire are usually twisted together to form what is called a ‘twisted pair’. An external shield is then wrapped around the twisted pair to block out external interference. In case of Mr Becker’s cables, this shield is made of a high-purity copper mesh that is connected to the ground prong on one side of the cable only.
There are many terms describing such quasi-balanced cinch/RCA designs. The most prominent variations are pseudo-balanced, pseudo-symmetrical, and quasi-symmetrical. I prefer the term quasi-balanced myself, as pseudo is often used to mean ‘fake’ and therefore has a negative connotation; and non-symmetry often refers to a difference in length, which is not the case on a quasi-balanced cable. The balance rather stems from its non-coaxial layout. On a standard coaxial design, the hot wire is usually positioned at the centre of the cable with the larger mesh shield serving both as signal return path and as absorber of electro-magnetic interference. With interference travelling along the signal return path, the negative effect on music is often audible in terms of a loss in dynamics or the augmentation of the upper frequency spectrum.
Quasi-balanced cables help to eliminate some effects of interference on music signals while inviting others. They are directional in the sense that their shielding needs to be attached on the side of a well-grounded device, such as a preamplifier or an amplifier for it to be effective. Their specific layout lends itself for use with turntables, because phono cartridges are in themselves symmetrical. When it comes to usability and handling, the additional inner wire makes the finished cable thicker and slightly less flexible, qualities that I rather enjoy on a solid core interconnect, as these cables tend to look and feel rather insignificant and flimsy. Very few people would be able to guess the sonic abilities of the HBS 1-4 from their looks alone. This is pleasantly different in the case of the new quasi-balanced design.
Advert eiaudio/shop:
As I was testing a prototype rather than the finished product, the cable did not yet have a name. I therefore christened it HBS-QS1 (short for Holger Becker Silver Solid Core - Quasi Symmetrical), fully aware that this might just be a working title. And I began my explorations by connecting the interconnect between our Sansui SR-525 turntable and DB Systems DB1 preamplifier. This had been the only position on either of or systems in which I had not yet been successful in getting the HBS solid core cables to work. Somehow, our DB systems preamplifier expected higher capacitance than the cable and cartridge combinations were able to provide. I ended up returning to our trusted FastAudio Black Science cable, which worked very well in this position but did not have the full depth, tonal accuracy, and authority of our silver interconnects.
The cartridge mounted was our Audio-Technica VM95 ML with Micro-linear stylus. The VM95 ML is a great tracker that reaches deep into the record groove to retrieve lots of musical detail. On the downside, it offers the slightest bit of a silky overtone on voices, pointing to the fact that it is still a budget engine, even if the stylus is quite sophisticated. Moving from the FastAudio to the HBS-QS1, I noticed the leaner factual sound of the solid core wires. As the FastAudio had already been commendable, I was not immediately certain, if I preferred the music following the change.
Listening for longer, the HBS-QS1’s timbre began to shine though. I love the cleaned up sound of solid core cables and much prefer this to multi-stand designs, and I have become a sucker for the authority and bass extension of silver. I was surprised how well the Fast Audio had been able to keep up in this position, because I normally would have expected the silver cable to blow the BlackScience out of the water. Yet, this did not happen. The change was rather subtle, one of nuance and not a major game-changer.
The HBS-QS1 appeared cleaner, leaner, and there was slightly greater silence in the absence of music. The FastAudio on the other hand presented slightly more detail and seemed to dig deeper into recordings. I was perfectly fine either way. For me the good news was that, finally, I had the option to run my turntable via the same great silver cables that had struck me as irreplaceable in all other positions. Happy with my findings, I decided to test the HBS-QS1 on our Shure cartridge which I keep mounted on a separate head shell. This has just been fitted with a new oval diamond needle and is in generally good shape. I love the bass output and high volume of the Shure. However, the relatively cheap N75-6CS spherical diamond stylus cannot compete with that of our Audio-Technica, especially in terms of tracking and musical detail. The HBS-QS1 performed with the same authority in this combination.
HBS Series - Silver Solid Core Interconnects
- HBS2 WM Audio (brass/silver) - agile, responsive, engaging
- HBPS KLE Innovations (silver) - highly revealing, highly engaging
- HBS4 Elecaudio (copper/silver) - well-balanced, informative
- HBS1 RAMM Audio (copper/gold) - rich, dark, and soothing
- HBS-QS1 Elecaudio (copper/silver) - well-balanced, for turntables
Finally, I can easily agree with Mr Becker that the quasi-balanced HBS-QS1 is a great companion to connect turntables to preamplifiers or amplifiers that benefit from higher capacitance cables but do not want to miss the musical advantages of solid core silver cables. I guess, the alternative would be to increase the diameter of the solid core wire itself. For future explorations, I would also like to see a construction in which the shield is placed further away from the twisted pair, but let’s not get ahead of ourselves. Such explorations in audio can wait for another day.
Specifications
- Cable lengths: 100cm
- Material: 2x 4N silver solid core in twisted-pair
- Type: Quasi-balanced with copper shielding
- DC loop resistance: 0.48 Ohm
- Parallel capacity: 50 pF (55 pF, terminated)
- Handling: directional, solid to flexible
- Termination: Elecaudio, tellurium-copper, silver-plated
- Position tested: Sansui SR-525 turntable to DB1 preamplifier
HBS1 - Silver Solid Core
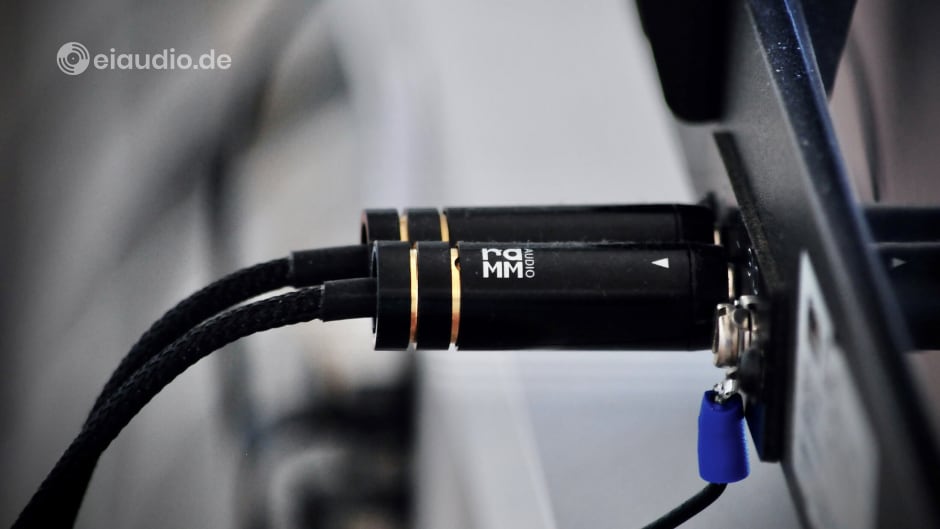
Published: 28/02/2021
Manufacturing date: 2024
Author: Karsten Hein
Category: Gear & Review
Tag(s): Cables
When I was younger and still drinking beer, I was attracted to Pils rather than export or wheat beer, because I was fascinated with the concept of having to wait seven minutes for it, while its foam was settling in the glass. Seven minutes seemed a long time to a young man‘s heart, and the reward was a smooth refreshing drink that appeared to entail a certain maturity, which it also bestowed on the juvenile drinker.
As I grew older, I started to prefer wine over beer. And, in terms of wine, I had a preference for mature reds with a dark and fruity nose. Irish and Scotch whiskys as well have at times captured my imagination. One such highlight in whisky was the discovery of an old Haig whisky from the 1950s that still tasted smooth and fulfilling after over sixty years. Amazing!
It is no secret that some things get better as they get older, while others fade away quickly. And the difference between the two will not reveal itself to the hasty consumer. Long-term quality is more than a coincidence. It is much rather a secret bond between mature customers on the one side and experienced craftsmanship on the other. In other words, a sacred pact between the steady hand and the steady mind that will not be side-tracked by trifles.
Where quality does prevail, both customer and vendor follow the basic idea that perfection has its price. Sadly, the relationship between quality and price is all too often inverted, and customers are sad to find that their expensive products break soon after purchase. We can therefore safely concur that paying a high price does not necessarily entail quality. Customers looking for a safe purchase are therefore best advised to trust in a well-established relationship or purchase from a well-known brand.
Advert eiaudio/shop:
The trouble with well-known brands in recent years has been that they, too, are driven by shareholders with minimal interest in the company’s products. All their focus, so it seems, is on the short-term and mostly in themselves. This creates a scenario in which established brands with a name to lose are forced to save on materials and labour and to sell their products at the highest possible price. Increasingly, therefore, paying a higher price does not entail sufficient quality anymore. It will be interesting to see which brands can manage to survive, once the relationship of trust with their customers has been broken.
Ultimately, this leads to the question of who to trust when exploring unfamiliar territory. Solid Core Silver cables are an exotic breed, usually reserved for High End audio enthusiasts with lots of money to spend. Buying such cables from an established manufacturer can easily set you back a few hundred euros, although the basic materials are not actually that expensive. If they were, people would not be able to afford silver cutlery, etc. Manufacturers of silver cables might be rare, and this might drive up prices, perhaps, but even bulk cables can be found at relatively affordable prices. Sadly though, terminated solid core cables are mostly expensive due to brand image, patents, and a whole lot of marketing.
From the beginning of this exploration, it was therefore clear to me that I would not be able to afford any brand interconnect of this type. Even used, these cables were out of my reach. And since I did not have a well-established relationship with a specialist yet, I had to find a source willing to partner with me at the monetary level that I was at in that moment. Among the many used cables on offer, I spotted a vendor by the name of Holger Becker, a man who has found a liking to simple but effective silver interconnects and enjoys building them for himself and others.
The HBS1 is Holger Becker’s number one silver cable. It bears the initials of his name, followed by the letter for silver and the figure one for his highest quality product. Holger especially intended the interconnect to work well with critical turntable cartridges. Measured with the plugs in place, the product features a total resistance of just 56pF. The cable consists of a silver solid core conductor that is shielded by a copper mesh. It is terminated with gold-plated pure copper RCA/cinch plugs made by RAMM Audio that screw firmly into place. The cable is relatively thin and surprisingly flexible, has no rigidity of its own and needs to be suspended freely behind the rack.
Silver is a completely different beast from copper, of course. And although I have experience in running in cables, and have read that silver solid-core conductors have a run-in time of approximately 2 months, I must say that the first three weeks made me doubt that this interconnect was ever going to sound good, not even to speak of great. When the cable arrived, I did not recognise anything in its performance that reminded me of the cherished joys of listening.
The HBS1 produced mostly mids with disappointing and overly tight bass. The music clung to the speakers, and there were hardly any transients to speak of. Individual notes appeared to be cut short, leaving sad blotches of emptiness in the soundstage. If it had been real musicians playing and not the speakers, they would have packed up and left our listening room, appalled at what was coming out of their instruments. And I must confess, it is only due to my experience with our Belden 9497 speaker cables that I had an ounce of hope left that allowed me to endure. To help me through it, I marked the dates in my calendar: ‘HBS1 one month old’ and ‘HBS1 two month old (Review?)’.
I decided that I would give this cable time to fully mature, just like a good wine or whisky, before attempting to write a review on it. And, thankfully, I had meanwhile become seasoned enough myself, not to jump to hasty conclusions. Mr. Becker himself was hesitant when I asked him about sound quality and run-in time and suggested that this was a personal matter he would rather not comment on. I must confess that I was a little disappointed, because I could have used some reassurance in my time of expectation.
From week to week there was less that troubled me about the cable. I hooked it up in various positions that would allow more current to flow than our turntable is capable of producing and found that it sounded great on all sources. For some reason, however, I could not get it to perform well between preamp and power amp. Perhaps it had to do with the need for higher resistance on one of the devices? This aside, I am now 6 weeks into my exploration and can safely say that this interconnect is doing a fabulous job on our Sansui SR-525 turntable. I have never heard such an effortless growling bass coming from a turntable while enjoying stellar transients in the treble and a wonderfully warm midrange.
In fact, my brother came over just the other day, and we ended up having an extended listening session together. My original intention had been to show him a Rega Planet CD player that I had recently bought from an audio enthusiast in Remscheid, near Wuppertal, but instead we kept retuning to the Sansui SR-525 turntable with the HBS1 interconnect, marvelling at how positively engaging, expressive, and powerful it sounded. Manu Katché’s “Neighbourhood” had all the drive and energy one could ask for. The vintage Shure M75-6S is a highly musical cartridge with high output and excellent bass slam that wants to entertain, paired with the HBS1, these positive characteristics are a real joy.
Silver cables take their time to mature, because the base material is very hard and fractures easily. Such micro fractures take a long time to heal. Moving the cable around will cause new fractures resulting in renewed run-in times. Silver cables only make sense in applications where they are left to rest in position over longer periods of time. Similar to a good wine and whiskey, they do not appeal to the entry-level consumer. As a result of their excellent conductivity, they have the potential to reveal nasty flaws in a HiFi system that go unnoticed with regular copper conductors. But for mature listeners who understand about setting up flawless systems, this type of cable will help to bring improved agility and realism to the system. Effortless, expansive, subtle, and merciless are only some of the adjectives that come to mind.
Note: I could not help but wonder about the material transitions from the silver solid-core cable construction to the pure copper gold-plated plugs. RAMM audio also makes silver-plated plugs, but on his HBS2 interconnects Holger Becker uses lower-priced silver-plated WM-Audio plugs instead that have a brass core, a decision that again introduces a third material into the equation. I shall have to give the HBS2 a listen to find out, if the choice of materials makes a discernible difference in this case.
Specifications
- Cable lengths: 100cm
- DC loop resistance: 0.48 Ohm/m
- Parallel capacity: 58 Pikofarad/m
- Handling: non directional, flexible
- Termination: RAMM audio, pure copper, gold plated
- Position tested: Turntable, Shure M75-6S (original stylus)
HBS2 - Silver Solid Core
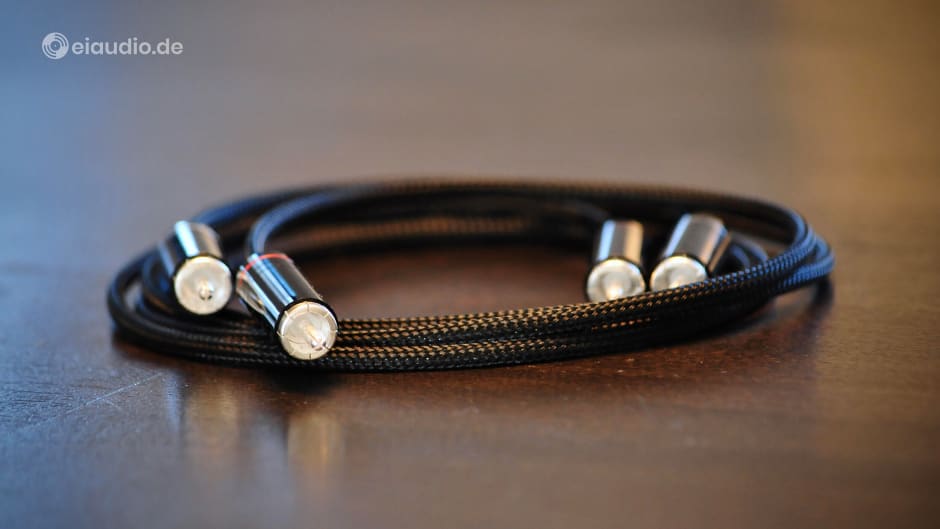
Published: 21/03/2021
Manufacturing date: 2024
Author: Karsten Hein
Category: Gear & Review
Tag(s): Cables
Those who have followed my recent posts on HiFi cables will know that I have developed an affection towards the use of silver in the signal path. This has turned out to be especially true for 4N solid core silver cables, ever since I came across Holger Becker‘s HBS1 interconnect. Although still quite affordable, the HBS1 is terminated with gold-plated copper plugs from the American manufacturer RAMM Audio that contribute to this cable being the most expensive of his current range. What had surprised me about the HBS1 was that it introduced seemingly unnecessary material transitions: gold+copper to silver+copper and—at the other end—the same transitions in reverse.
When I voiced my concerns about this mix, Mr Becker suggested that the use of gold was of lesser concern, because the RCA/cinch sockets found on quality devices are mostly gold-plated themselves to avoid oxidation. In this scenario, the gold-plating of the cable plugs matches that of the device’s sockets to form a corrosion free coupling. The alternative would have been to use silver-plating or, even better, solid silver, which would be in line with the material of the cables.
When it comes to pure silver, there are concerns about oxidation, of course. And while such concerns have some validity in tropical climates, the realm of vintage audio is special, in the sense that the original sockets of vintage devices are rarely of the gold-plated type. In a vintage environment gold is often just an additional metal in the signal chain. In fact, the very idea that gold-plating should be the premium metal of choice was sold to the general public much later. The fact that gold is better than polished metal was easy to sell, simply because gold is precious and therefore must be good.
While the HBS2 is based on the same solid core silver cable, it is terminated with WM Audio’s silver-plated brass plugs instead of gold+copper. Brass has its place in the context of plugs, sockets, and other audio applications, however, I was disappointed that these plugs again bring a third metal into the equation: 1. Silver, 2. copper, and 3. brass. In principle, the WM-Audio plugs are well made, with a meticulously crafted ring of outer contacts and a two-fold split centre prong that is oval-shaped to increase the inner contact pressure. The construction makes an excellent fit, even if it has a tendency of being a little tight when trying to remove the plugs at a later stage. Brass—by the way—has a conductivity of less than 40% compared with pure copper. In my understanding, this indicates that most of the signal travels through the silver plating.
Advert eiaudio/shop:
Fresh out of the box, the HBS2 surprised me by showing an accomplished top-end. The highs were not yet perfectly softened, transients not extended enough. However, just getting to this stage of performance had taken a few weeks on the HBS1. I even wrote to Holger Becker, asking if this cable had already seen some running-in before it was sent out to us. He denied this, saying that he had built it afresh for me and had put it in the mail straight away. Since both the HBS1 and HBS2 had arrived here in the same basic condition, I suspect that the improved out-of-the-box performance of the HSB2 was due to the substitution of gold-plating for silver. If true, it would mean that the initial lack of upper frequencies during break-in on the HSB1 had been due to material transitions rather than micro fractures. The result being that the HBS2 makes the running-in period faster and more pleasant.
Similar to the HSB1 during the initial stages of warming up, the HBS2 started with a solid mid-band and a slight emphasis of the upper vocal section. This upwards shift can possibly be attributed to the still obvious lack of deep bass during the break-in-phase.
If solid core silver cables have a musical signature of their own, this would have to be the no-frills assertive manner in which they bring forth the music. Right from the first few seconds of playback, it was clear to me that this cable holds the reigns tight and drives the ensemble forward. I had never heard such clenched determination from a multi-strand. The HBS2 thrusts piano notes forward with might and bone-chilling timbre, which made it difficult not to look up from writing this text to smile with content. With their 2 Volts of line output, digital sources (CD player, streamer, etc.) are useful companions for running in interconnects, as they offer just enough energy to speed up the process. And our Rega Planet 2000 staged a soulful performance with Naim Audio’s 2009 “Phantom Limb” CD. The recording itself is on the compressed and bright side on any of our CD players, but voices and instrumentation are ferocious and loud, and that is just what was needed to chase the Caveman out of Bristol.
After a few days of playing, bass became layered and more extended. This helped female voices to find their natural timbre. Piano sounds were still astounding, but they were no longer as piercing as they had been at the beginning. When it comes to burn-in characteristics, the lower frequencies took their time to develop, similar to my experience with the gold-plated HBS1. I love the no-frills sound of both these interconnects. If there is an audible difference between the two cables, it is that the HBS1 sounds more extended in the bass, plays slightly fuller, darker, and softer. The HBS2, on the other hand, seems more agile and responsive. It makes the music seem closer, more tangible, three-dimensional, and highly engaging. Which is better? Well, in a double-blind test between the cables, my wife Sabina suggested that the HBS1 had the feel of a dark and vaulted Jazz club, whereas the HBS2 was more similar to an open concert stage. I could not find a more fitting description.
At this point, some of the perceived difference between the cables might still be caused by the two months lead of the HBS1 in terms of running-in time. However, I doubt that the basic difference in character will dissolve completely. To be absolutely sure, I will need to compare these two interconnects again in a few months time. If my impression should then change, I will gladly revise my findings.
Specifications
- Cable lengths: 100cm
- Material: 4N silver solid core, copper shielding
- DC loop resistance: 0.48 Ohm
- Parallel capacity: 50 pF (58 pF, terminated)
- Handling: non directional, flexible
- Termination: WM Audio, brass, silver-plated
- Position tested: Rega Planet 2000 to DB1
HBS4 - Silver Solid Core

Published: 25/05/2021
Manufacturing date: 2024
Author: Karsten Hein
Category: Gear & Review
Tag(s): Cables
The HBS4 is the final contender in our range of solid core silver cables. These interconnects are all based on the same base cable, using a 4N solid core silver conductor that is surrounded by a high-purity copper mesh shielding, a circumstance that leaves the audible differences between the range of interconnects to the choice of plug termination. And, since this is the point where most readers will grunt in disbelief and turn on their heels, all we can do is ask those skeptics to leave quietly and begin our next paragraph without them.
To those who are still reading, it will be important to know that material transitions, differences of mass ratios in the signal path, and the general layout of the plugs have a marked influence on how electricity travels through them, thus creating a signature that is specific to this cable and plug combination. If you have set your HiFi system up well, i.e. in keeping with some of the items listed in the High Fidelity section of this blog, your system should be able to highlight the difference between cables to you in a swift A-B comparison.
The HSB4 was added to the list at a later stage and therefore has a higher number, although it probably deserves a greater priority than this. The plugs are manufactured by Elecaudio on a tellurium-copper basis and have been silver plated. Since the cable itself is made of silver and copper, these plugs make good sense in combination with the cable in terms of minimising material transitions. On my vintage equipment, the Elecaudio plugs are a little too tight and need to be pressed on quite firmly, even if the outer barrel is turned back. Later, in taking them off, I even needed to use a knife edge as lever. Other than these minor mechanical issues, I have no complaints about this interconnect.
Running mostly non-gold-plated vintage equipment, I love the fact that the plugs are silver rather than gold-plated. This has the advantage of reducing material transitions. And, while the HSB4 has all the sonic merits of a silver solid core cable: crystal clear treble, superb transients, a sweet and compelling midrange, musical authority, and thunderously deep bass when needed, it does not emphasise a particular spectrum, as some of the other contenders in this range do. Depending on the setup of your system this may or may not be an advantage, but it is definitely good to know.
HBS Series - Silver Solid Core Interconnects
- HBS2 WM Audio (brass/silver) - agile, responsive, engaging
- HBPS KLE Innovations (silver) - highly revealing, highly engaging
- HBS4 Elecaudio (copper/silver) - well-balanced, informative
- HBS1 RAMM Audio (copper/gold) - rich, dark, and soothing
Your own choice of cable will most likely depend on the requirements of your current setup and your budget. The HBPS, for instance, costs more than twice as much as the HBS2, but if your system has the potential for it, and if you enjoy being entertained, the KLEI Absolute Harmony plugs make the HBPS engaging on a level that the other configurations simply cannot reach. For less revealing systems, the HBS2 can bring that extra momentum into the music, perhaps at the cost of lessening some of the lower end of the spectrum.
Advert eiaudio/shop:
The HBS1 on the other hand will serve well in places where your music sounded a little thin and where a slight dampening of the treble is to be desired. All considered, the HBS4 is perhaps the most neutral of the range. It plays all frequencies well and provides sufficient detail in the music, however, it does not reach so deeply into each recording. In direct comparison with the HBPS you would notice the difference and perhaps feel that you are missing something, but in longer listening sessions, the HBS4 might just be more pleasant to listen to, because too much detail can be exhausting.
In our own setup, we are running the HBS4 between our preamplifier and power amplifier with very positive results. On the same system, we are running a HBPS from the CD player to the pre-amp. This is an amazing combination in many ways and has since made many a listener wonder in disbelief. When paired with a turntable, the low capacitance of all cables can serve as a low-pass filter. This can be fixed with an additional capacitor but is something to keep in mind and, at this time, the reason for us running a higher capacitance FastAudio Black Science cable from the turntable to our preamplifier, instead of introducing yet another low capacitance silver cable.
Specifications
- Cable lengths: 100cm
- Material: 4N silver solid core, copper shielding
- DC loop resistance: 0.48 Ohm
- Parallel capacity: 50 pF (56-58 pF, terminated)
- Handling: non directional, flexible
- Termination: Elecaudio, tellurium-copper, silver-plated
- Position tested: DB1 preamplifier - ST140 power amplifier
Kimber Kable Timbre

Published: 09/01/2021
Manufacturing date: 2024
Author: Karsten Hein
Category: Gear & Review
Tag(s): Cables
“Are you nosy?” My grandfather asked me, seeing that I had gotten up to look outside the window to see which car’s engine sounded so full-bodied in the passing. “No,” was my reply, as I was sitting back down. But I knew it was a lie. Back in the day of former German soldiers turned factory workers, being nosy was considered a nuisance which had to be tamed, a speck of childishness on the way to being a man. And I felt guilty, of course, because I knew I was nosy way beyond my own control.
In today’s world, a playing field of competing ideas rather than battle and obedience, nosiness is considered an asset rather than a burden. What is desired changes over time, and I am fortunate enough to have been born at a time when the doors were beginning to open, and explorations of the individual were again possible. After all, what character trait other than unruly nosiness would make me search for a cable to top the Kimber Tonik, especially at a time that I was very happy with how my system sounded. I am actually listening to the Tonik as I am writing these lines and can only marvel at its ability of getting the harmonics right. However, it is high time to change to the test candidate.
Similar to the Tonik, the Timbre’s design features Kimber’s tri-braid field geometry and VariStrand technology. However, all features are slightly more elaborate. The braided cables comprise individual strands of seven different gauges, not just four. And, although Kimber does not directly specify, their “hyper-pure” copper is most likely OCC rather than “ultra-pure” OFC. The Timbre’s dielectric is made of low loss fluorocarbon, and the terminations are fitted in a nitrogen assisted hand soldering process. Instead of the more basic Ultratike plugs, the Timbre is fitted with the more sophisticated Ultraplate RCA-type connectors that are precision-machined from a solid piece of metal and feature a split centre prong for improved contact.
Changing from Tonik to Timbre, some haptic differences become apparent. The Timbre feels thinner, smoother, and is generally less stubborn to manage behind the rack. The Ultraplate plugs may be better engineered, however, they are also harder and less flexible. This makes them a little too tight to be slid all the way onto our Restek V1 preamplifier with its slightly oversized sockets from the 1980s. If the Tonik resembled household installation wires, the Timbre feels more like holding jewellery in one's hands. When it comes to sound, the Timbre also sets itself apart from the Tonik, which can be seen as beneficial, but can also be a hindrance in other scenarios. It all depends how we have set up the rest of our system.
Advert eiaudio/shop:
Where the Tonik’s strength lies in maintaining tonal balance, the Timbre is far more informative. Diana Krall’s voice gets a greater sense of huskiness and realism holding more of the original timbre of her voice. The same can be said about the instruments. On “I Have Changed My Address” the cymbals simmer much longer, and the sound of metal is more realistic than on the Tonik. While the simmering is mostly about a greater width in treble, there are dark undertones that the Timbre layers in ever so subtly, while they go unnoticed with the Tonik. The next song on Diana’s album is “Love Me Like a Man” picks up the pace, and the long simmering of the cymbals slightly overlaps with the music that follows. This leads to a bit of congestion in the treble and thereby draws the listener’s attention to it, making it seem slightly off balance, which it is not. Treble congestion is something I have not experienced on the Tonik, and, depending on the rest of your setup, can become a reason for listening fatigue.*
The Timbre sets a wonderful stage which is at once wide and deep. There is ample space between the instruments and individual notes are often flung deeply into the room or beyond the left or right of the speaker position. Diana Krall who is usually the only singer on her albums and mostly positioned centre stage, appears lifelike and three-dimensional in front of me with the instruments arranged around her. Musical instruments are clearly discernible in their individual character—or timbre—and given their own space to perform. The Timbre’s ability as a performer and entertainer makes it an interesting contender in the step above entry-level range. Its revealing nature will surely raise the bar for your existing components and go a long way in helping you to optimise your system. On our smaller system—which I mostly use for nighttime listening—I might change back to the Tonik at some point, which is far less exciting to listen to. But will I be able to do it without feeling that I am missing something? It will be difficult for sure because I still am way too nosy.
Tested on the following setup: CD player: Denon DCD 1420 (on Digital Coax HiVilux Reference); DAC: Cambridge DacMagic 100 (on Kimber Kable Timbre); Preamp: Restek V1 (on Wireworld Luna 7); Power amp: Hafler XL-280; and Tannoy XT8F (bi-wired, on Belden 9497)
Specifications
-
Cable lengths: 100cm
-
DC loop resistance: 0.057 Ohm/m
-
Parallel capacity: 62.1 Pikofarad/m
-
Serial Inductance: 0,493 Microhenry/m
-
Characteristic impedance: N.N.
-
Handling: directional, smooth flexible
-
Termination: rhodium plated, Teflon insulator
-
Position tested: CD player + DAC to preamplifier
* Note: 4 Apr 2021 — I have meanwhile found out that the treble congestion described above was caused by one Timbre strand touching another audio cable behind the rack. When suspended freely, the cable stays well ordered, also in faster passages. Cables without mesh shielding appear to be even more sensitive to physical contact than their shielded counterparts.

-
Kimber Kable Tonik

Published: 07/01/2021
Manufacturing date: 2024
Author: Karsten Hein
Category: Gear & Review
Tag(s): Cables
Kimber’s entry-level interconnect was also my entry ticket to audiophile listening pleasures. With the market for stereo products in decline and a growing demand for home cinema installations in need of much longer cable runs, manufacturers of high-class audio cables had to come up with more affordable solutions to stay in business. Kimber’s Tonik interconnect was especially designed with a slippery and durable outer skin that would make it easy for it to be pulled through holes and installed in walls. While other Kimber cables use wires that consist of strands of seven different gauges, this number was reduced to just four gauges on the Tonik to bring down cost. Other concessions were made in the choice of plugs, e.g. the Tonik’s Ultratike cinch/RCA connector does not have the split centre prong that we typically find on more pricy Kimber products, such as the Timbre or PBJ.
I was attracted to the Tonik by its braided design and affordable price. According to the excellent customer reviews that existed at the time, it offered an exceptional performance for an entry-level interconnect. The novice that I was to the subject of cables, I was absolutely blown away by the immediate improvement in sound, especially in direct comparison with the conventionally shielded cables that I had been familiar with, such as entry-level Sommer or Fadel Art interconnects. I have since been informed that the name Tonik refers to the base tone of a musical scale. But to me it sounded more like ‘Gin and Tonic’, rich in flavour and full of sparkly, bubbly joy.
In true Kimber fashion, the Tonik plays fast, highly dynamic, and informative. Although it is capable of presenting lots of musical detail, it still retains coherence and tonal balance, more so than its in-house competition. The Ultratike’s rhodium-plated contacts seem to help a great deal in supporting the Tonik’s inner momentum. The wires themselves are of ultra-pure copper. Kimber does not specify if OFC or OCC, and it is probably not important, because the cables’ magic trick much rather rests in its tri-braid field geometry, and its construction of wires of various thickness—or VariStrand—as they call it. The PE dielectric is less flexible than that of Kimber’s Timbre or PBJ cables, which makes it a bit more stubborn to handle behind a HiFi rack. Its braided construction serves well to shield it from external interference. Connected to a DAC, CD player or streamer, it is nearly impossible to get it to hum.
Kimber’s braiding technique has a long history. In the 1970s, Ray Kimber was working for a company that installed light and sound gear in some of the first discos. Noticing how long runs of light and sound cables rolled out side by side negatively affected the sound by injecting interference, he found that twisting and braiding these cables together in a specific way would not only protect them from interference but even enhance the sound. Based on this discovery, he founded Kimber Kable, a manufacturer specialising in using braiding techniques. At the time of writing this article, the Utah based Kimber Kable company has 12 employees and supplies audiophile interconnects and speaker cables to music lovers around the globe.
Advert eiaudio/shop:
Kimber’s Tonik allows music to flow freely, with zest and harmonic richness. Piano notes and voices sound full and instantly endearing. It sets the stage well, but in comparison with the Timbre lacks some width and depth. The tonal presentation is accurate, however—again in direct comparison with the Timbre—the top-end is not quite as open, and individual notes do not simmer for as long. On Diana Krall’s “Black Crow”, the Tonik presents the music accurately with solid foundation, but the Timbre places the cymbals further away from the speakers and much deeper into the room. The same is true for bass extension. While the Tonik plays a full and compact bass, the Timbre’s bass is lighter, nimbler, and capable of more nuance. With these characteristics in mind, the Tonik is most likely a better companion for Rock, Pop, Hip-hop, etc., whereas Jazz and Classical music lovers would probably be well advised to spend a little bit extra for the next higher level. In the end, it is a question of taste, budget, and how well it blends in with the other components, of course. The Tonik is a superb entry-level cable that allows us to experience sophisticated Kimber sound, or at least 90 percent of it, without having to break the bank. If you do not have any prior experience with braided cables, the Tonik is definitely a good starting point. And—having listened to it again today—I am certainly keeping mine.
Tested on the following setup: CD player: Denon DCD 1420 (on Digital Coax HiVilux Reference); DAC: Cambridge DacMagic 100 (on Kimber Kable Tonik); Preamp: Restek V1 (on Wireworld Luna 7); Power amp: Hafler XL-280; and Tannoy XT8F (bi-wired, on Belden 9497)
Specifications
- Cable lengths: 100cm
- DC loop resistance: 0.055 Ohm/m
- Parallel capacity: 52 Pikofarad/m
- Serial Inductance: 0,772 Microhenry/m
- Characteristic impedance: N.N.
- Handling: directional, hard flexible
- Termination: rhodium-plated, Teflon insulator
- Position tested: CD Player + DAC to preamplifier
Stager Silver Solids

Published: 27/05/2024
Manufacturing date: 1996
Author: Karsten Hein
Category: Gear & Review
Tag(s): Analog Interconnects
Marc Stager has a passion for audio. His business, Stager Sound Systems, is located in New York City, and provides high quality sound systems for concerts and special events. Marc’s focus on delivering undistorted and natural sound to both intimate and large-scale music venues also led him to explore the subject of wiring between the components and culminated in the development of his own line of audio cables. It was in this latter context that Marc reached out to me to inquire if I would be interested in writing a review on a set of his cables.
Marc’s query reached me at a time when we had just completed the move of our businesses and family from the bustling city of Frankfurt to the sleepy North Sea town of Marne. The new location provided eiaudio with its own 70 square meter listening space, along with an additional control room for recording purposes. And, for the first time in the history of this blog, I was able to set up systems completely outside the family’s living quarters, positioning my loudspeakers to fully factor in room resonances, treating the floors and walls for reduced reverb times, and assuring that clean electricity would reach each of my three HiFi systems (that I used for equipment testing) straight from the central fuse box of our stand-alone house. There was sufficient crawl space behind each rack to allow for carefully thought-out wiring schemes and to assure that there was no accidental cross-induction between the wires that would deteriorate soundstage or transients.
At that stage, I had already written over 180 articles and reviews on HiFi gear and recently established a connection with Symphonic Line, the German manufacturer of High End audio equipment. Testing their vintage components had rather unexpectedly broadened my horizon in terms of tonal accuracy in music reproduction. Although this was a subject that I had previously been aware of, I had never heard this aspect so flawlessly executed as to appreciate its value for the impression of musical integrity. To put it in a nutshell, I had established a professional testing environment and was now familiar with a whole new dimension of audio pleasures. Feeling set for my next stage of explorations, I eagerly wrote back to Marc saying that I would indeed be honoured to give his cables a listen and write a review on them.
The Stager Silver Solids arrived rolled up in an unpretentious cardboard envelope just a few days later. I inspected the cables and saw that they had survived the trip in excellent condition. My specimens were terminated with Marc’s standard Canare F10 Cinch/RCA connectors that have a machined brass centre, a Teflon insulator, and 24K gold-plated contacts. According to their specifications, the Canare plugs’ coil spring strain reliefs are able to take rather hefty wires of up to 6.0 mm in diameter, a fact that somehow made them look out of proportion when used in combination with the approximate 2 mm diameter of the two twisted Stager wire strands. The Canare F10 have a solid centre prong (rather than a hollow or split one) and use a non-adjustable ring ground rather than providing a single point of contact, which is the predominant fashion in High End applications these days.
Advert eiaudio/shop:
Stager’s cable conductor is manufactured from a twisted pair of 99.9% pure soft-temper 24 AWG solid-core silver wires. According to Marc, each strand is hand-polished to create a grainless surface and is then placed inside a translucent Teflon (PTFE) insulator. The cable ends are colour-coded red and black using Polyolefin heat shrink tubing. Without further mesh shielding in place, the cables are non-directional and can be connected either way. From their specifications, I gather that their ‘unshielded’ symmetrical design assures a low capacitance of 9 pF/ft. Protection from outside interference is provided by the cable’s twisted pair layout that is wound at approximately 1 cm per half-turn.
The idea of twisting cables for improved interference protection is not new. The first time I heard the term was in the context of telephone and LAN connections, where twisted pairs are found in combination with wire mesh and/or aluminum shielding to assure superior signal integrity. In cinch/RCA audio connections, twisted pair designs also have a long tradition. I once had a 22 AWG Western Electric cable for testing that used a twisted pair of solid-core copper with silk dialectic to generate exceptionally sweet-sounding vocals, above all else. My favourite all-round speaker cable (in conjunction with vintage loudspeakers) is the Belden 9497 that twists two wires of tinned copper multi-strands at a winding ratio of about 5mm length per half-turn. A comparable shielding effect is reached by means of tri-braided field geometry, as it is propagated by Kimber Kable, amongst others. I had the Kimber Timbre in my collection for a while and remember that this, too, served its purpose quite well.
Silver solid core wires are a completely different beast, of course. When it comes to audio connections, a solid core design offers great musical homogeneity, whereas silver provides superior connectivity. If the music signal ‘moves’ through copper, it ‘crashes’ through silver. When changing from copper to silver, I get the impression that the brakes come off, the music can finally breathe, dynamics can unfold, and that I am listening right through the recording to where the music hits the studio floor. I first discovered this phenomenon with the silver cables that Holger Becker made for me. I remember that we had lots of fun with our new discoveries and with each new cable became bolder, until shielding and plugs finally served to meet the benefits silver had to offer. Or so we thought.
Curious about how Marc Stager’s Silver Solids would perform in this context, I first connected his cables between my Cambridge DAC Magic and Symphonic Line RG2-MK3 preamplifier. I gave the setup about one week to break in and then first wrote my review on the RG2 preamp. The Silver Solids remained in the system for the duration of my review and positively contributed to some of my observations on the sound of the system. My own (first generation) silver solid core cable, running from the preamplifier to the Dynavox VR70E-II tube power amplifier, needed to be replaced, because Symphonic Line’s own Harmony HD cable managed to produce superior dynamics in this position, especially when playing in conjunction with Symphonic Line’s speaker cables. — Well, such is life.
When I finally focused on Marc’s cable for review, it had already played at least 80 hours of music. To fully mature, silver wires tend to take approximately 200 hours. It is therefore quite possible that some aspects remained hidden from me during my review. I started my session re-playing some local German music highlights, such as Bad As We, the Senior Jazz Trio, Anna Boulic, the Sunday Morning Orchestra, and Alexander Möckl from CD, all of which Heinz-Peter Völkel and Andreas Sandreuter had recorded in their Live||Tape sessions. Their idea was to record all the songs live using a professional reel-to-reel studio recorder, in order to show how well analogue recordings really worked. It was a fun project, and the only downside was that they had to transfer their masters to CD for me, because I did not have a tape machine of my own, yet. The recordings had an ‘anything-can-happen’ small stage flair to them, and I enjoyed listening to them a lot.
The Stager Silver Solids contributed to a tonally pleasant and engaging sound. They allowed low bass to thunder right through without any unnatural restraint. Somewhat unusual in the context of silver end-to-end cables was the fact that the treble remained soft and silky, instead of turning bright and crisp. I attributed this pleasant softening of the treble to the material transition from silver to gold-plated brass plugs. Despite this, there was sufficient detail retrieval to provide for a joyful presentation. I was happy to note that Symphonic Line’s trademark tonality remained intact. This made it possible to better distinguish between a multitude of singers and instruments when the session became crowded. After all, tonality also conveys feeling and thereby assures that we remain attentive to the music from an emotional perspective.
As with most twisted pair and braided cables, I found the stage to be huge and at times slightly out of proportion, with individual tonal events freeing themselves all to easily from the loudspeakers in an uncalled-for fashion. Under normal circumstances, I might not have noticed this ‘carelessness’ so much, if it had not been for Symphonic Line’s reputation for maintaining strict order and proportion in the music. To explore this effect further, I connected the Stager cable on my second system between the Symphonic Line RG9 integrated amplifier and RG11 power amp. In this scenario, the RG11 was driving the electrostatic panels of our Martin Logan SL3 loudspeakers, whereas the RG9 was supporting the bi-amping setup in driving the dynamic woofers. The Silver Solids did a tremendous job in terms of dynamics, tonal accuracy, and detail retrieval. However, the sensation of unbridled proportions remained.
Reading Adam LaBarge’s review of the Stager Silver Solids on 'The Audio Beatnik', I saw that Adam had also used them to positive effect between his turntable and preamplifier. As I had never been able to run twisted or braided cables in this rather delicate position myself, I decided to give this another chance and connected the Stager cables between my Dual CS-505-3 and RGR Model 4 preamplifier. Perhaps not surprisingly, the result was an obnoxious 50 Hz hum paired with some high frequency hissing. When I replaced the Silver Solids with Fast Audio’s Black Science or Symphonic Line’s “Das Schnelle”, any background noise disappeared at an instance. To assure that the Stager cables did not have a defect, I whipped out an older braided Audiocrast silver-clad copper interconnect and found that this produced even louder noise than Marc’s cable had done. Good to know that Marc also provides shielded phono cables that will perform much better in this position, nevertheless, our short phono experiment serves to demonstrate that differences in cable shielding do exist and matter.
Having arrived at my third HiFi system, I alternated between Audiocrast’s silver-clad OCC copper cable, Stager’s Silver Solids, and Symphonic Line’s “Das Schnelle”. The loudspeakers were my Epicure EPI 500, driven by a rare RG9-based power amplifier with RGR Model-4 preamp. The CD player was the rather enjoyable Pioneer PS-S604 with platter drive disc mechanism. I listened to the Jazz performances on Helge Lien’s double album “10” and to Youth Lagoon’s album “Heaven is a Junkyard”, and I enjoyed the Silver Solids a lot. They had an obvious tonal advantage over the silver-coated Audiocrasts and presented the music in a livelier fashion than even the Symphonic Line cables. When it came to maintaining order and proportion, however, the Symphonic Line’s better shielding proved to be superior.
The large soundstage effect, which has also been described by Adam LaBarge, could in part be caused by high frequency interference. Although the interference itself was inaudible in line applications, such as CD players with power levels of 2 Volts peak to peak (or 316 mV @-10dBV), it could become directly audible in more sensitive environments. Phono cartridges have a maximum output level ranging from 2 to 7 mV, depending on the cartridge type and model, and RIAA equalised amplification of phono signals is therefore much greater. And even if we cannot easily detect interference in line setups, its effects on music can be heard on the sensitive directional signals that are carried by high frequencies which can, as a result, seem out of place.
In their price range, Stager Silver Solids are a worthwhile investment. From many perspectives, they can keep up with audio cables many times their price. Because of their thin and rigid nature, they are not always easy to handle behind the rack. Their unshielded design makes them good companions for line operation. Listeners attracted to tonal correctness, dynamics, and detail retrieval will find pleasure with these cables. They are non-fatiguing due to a soft and silky top-end. However, listeners who are particularly fussy about accuracy in soundstage and dimension might be better served elsewhere. I have decided to keep my Stager cables close at hand, for example, to breathe new life into systems lacking in dynamics, detail, and tonality. They sure tickle the senses and make for an overall enjoyable setup.
18 Jul 2024: This cable is so enjoyable to listen to that I have decided to promote it through the eiaudio shop with a definite recommendation from my side:
Stager Silver Solids are now available from eiaudio >
Specifications
- Cable type: Pure silver solid-core interconnects
- Application: Cinch/RCA, XLR optional (line level signals)
- Construction: Twisted pair shielding, non-directional
- Conductor: 99.9% pure soft-temper 24 AWG solid-core silver (hand-polished)
- Dialectic: Translucent Teflon (PTFE)
- Measured Capacitance (cable): <9 pF/ft
- Terminations: Canare F10, brass core, 24K gold-platind (Neutrik XLR)
- Capacitance (Canare F10): 1.5 pF, a piece
- Cable length tested: 100 cm unbalanced, RCA terminated
- Positions tested: DAC—CD / pre—amp / phono—pre / CD—pre
- Country of manufacture: USA
- Year(s): 1996 - today
Photographic images: Stefan Bluhm, 2024
Western Electric Silk Solid Core

Published: 27/12/2020
Manufacturing date: 2024
Author: Karsten Hein
Category: Gear & Review
Tag(s): Cables
When it comes to historic cables, few names cary the weight or spark the imagination as Western Electric. The company has borne its all-American name since 1872, and, in close proximity of the AT&T golden years, grew to become a giant among giants. From the early federal telegraph network all the way to modern telecommunications, Western Electric has developed cables and electronics for every imaginable purpose. The company founder, Elisha Gray, was even credited with inventing the telephone, simultaneously with Alexander Graham Bell, until losing a court battle against Bell in 1879.
Signal processing and signal transport were among Western Electric's main concerns, and experiments were conducted using different types of wires, construction methods, and dialectics. Depending on their designated position and application, cables needed to be flexible, durable, temperature resistant, resistant to moisture, substances, etc. Sometimes to connect devices over huge distances and sometimes in the tiniest of spaces. At times to be installed in fixed position for eternity, and at times to be constantly moved around. Cable design needs to take many aspects into consideration and is mostly a compromise, considering location, usage and cost.
When it comes to audio cables that are to be arranged behind a home-based HiFi rack, this somewhat limits the need for wear and tear resistance, however, it does pose a challenge in terms of signal homogeneity over a wide frequency spectrum, an optimal ratio of resistance and capacitance, etc. While there is no doubt that many cables will do the trick of making a basic connection by allowing current to flow, this does not mean that they will do so equally well, from a timing and amplitude aspect over all frequencies.
The historic Western Electric cable featured here is made up of two solid strands of high quality copper. Each copper strand is wrapped in silk cloth and the strands are twisted against each other to form a single cable per channel. Silk has some advantages over many other covers in the sense that it does not effect the tonal balance of music signals that are sent through it. Due to its twisted pair construction, outside interference is sufficiently reduced so that no additional foil or mesh is needed in protection. Conventional shielding has a negative effect on agility and dynamics, and better types of shielding often come at a higher price.
Advert eiaudio/shop:
This particular Western Electric was built by using XLO Electric XLO HT PRO RCA plugs. While the quality is not bad, there was a time when they could be found cheaply online. The plugs are 24K gold plated and of light weight. The overall result is very pleasing in many ways. When used in primary position between CD player and amp, there is no comparison with a conventional shielded multi-core design. The Western Electric simply plays in a different league. And even in the braided or twisted pair category, the silk cable can hold its own.
Having run the Western Electric Silk between our Marantz CD-17 and DB1 preamplifier for close to a year, I am well-accustomed to its abilities, and finding an upgrade to it proved to be a challenge, indeed. The Western Electric produces a true-to-life natural sound that had me hooked from the first moment I heard it. Like most solid core wires it is direct and forward sounding, but, despite this, it almost never came across as aggressive. It offers great speed and clarity with slight vocal emphasis. Due to the amount of musical detail, I found it most realistic to listen at moderate volumes. The Western Electric is a great companion for tube amps.
I have read some place that the Western Electric does not provide its own signature. From my own comparisons between cables I am not sure I can agree. Without criticising its performance, which is phenomenal, I found the following characteristics to shine through: There is a slight and pleasant high frequency roll-off which becomes obvious when listening to cymbals for instance. On the positive side, this contributes to a more amiable sound. And voices are slightly pronounced. Bass notes are portrayed accurately, however, deep bass is not this cables particular strength. As such, the Western Electric is great for listening to natural and acoustic music at realistic volumes. Jazz, Blues, Folk, Classic all work great. If you purchase NOS, make sure to allow for 80-100 hours of break-in time. If you know and have some experience with this cable and would like to share this, please leave a comment below.
Specifications
- Cable Lengths: 100cm
- Cable Construction: Twisted Pair
- Wire Diameter: 22AWG (0,644mm)
- Wire Material: Solid Core Copper
- Dialectic: Silk Cloth
- Handling: bi-directional, flexible-resilient
- Termination: XLO HT-PRO RCA plug
- Position tested: source to pre (not phono)
Wireworld Luna 7
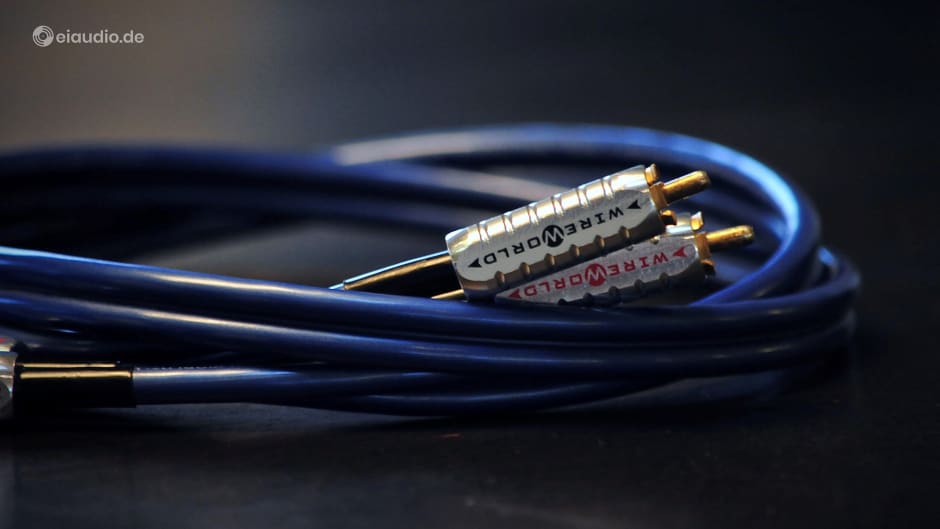
Published: 04/01/2021
Manufacturing date: 2024
Author: Karsten Hein
Category: Gear & Review
Tag(s): Cables
Wireworld’s Luna 7 is a real lightweight among the entry level audiophile interconnects. However, despite its flimsy feel, it does pack some punch. It features Wireworld’s patented DNA Dual Helix design, which internally consists of two veins of flat cable with two separate and equally spread out strands of 20 OFC copper wires in each. The silver clad aluminium plugs feature low mass gold plated contacts and a hollowed gold-plated centre prong. The two channels are physically joined together in the centre with the outer plastic skin, as is more prominently found on speaker wires. As this goes against all my advice given on this website, I was tempted to pry them apart to improve channel separation, but ultimately decided against it to preserve resale value. Although moderate in price, such a re-design of my own making would be difficult to explain to a future buyer.
I had originally bought this cable to play between our Denon CD player and preamplifier. In this position it only gave a mediocre performance and was soon replaced with more expensive braided interconnects by Kimber. Between CD player and preamplifier, the Luna 7 had sounded rather soft, producing a pleasant but unrealistic halo around the highs and lacking bass attack as well as bass control. Because of its delicate touch and feel, it had simply not occurred to me to test it in any other position. At the time, I had assumed that this was how it sounded and had placed it in my cable box with some disappointment.
Looking at the subject of cables again for the eiaudio.de website, I came across the Luna 7 again. And although two years had passed since I had last heard it, I was surprised that I still had the sonic memory of it. My first impulse was to sell it without trying it again or discussing it here, but then I called my friend and co-audiophile Luigi to discuss some ideas on cable position with him. We both agreed that there were few general rules on how a cable will perform in a given position and that, except for a few exceptions perhaps, to be absolutely sure, each cable should be tested in as many positions as possible to reach a full understanding of its abilities in combination with the given equipment.
Before re-connecting the Luna 7, I had been running a pair of Georg Neumann interconnects with HiCon plugs between preamplifier and power amp on our Restek-Hafler-Tannoy system. The Neumann cables are fast and punchy with a slight edge to them in the highs. They add a bit of drama, which I generally like. I replaced the Neumanns with the Wireworld Luna 7 and was surprised that the halo I remembered did not shine through this time. The Luna 7 still produced a softer sound, but in this new position, the change was not at all unpleasant nor was it unrealistic. While there was sufficient timbre on piano notes, there was also a new delicacy to cymbals. I had read somewhere that the Luna 7 produced a boomy bass, a phenomenon that I was unable to confirm in either position. Bass was not particularly nuanced, this was true. However, it blended in well with the overall picture.
Advert eiaudio/shop:
Voices were perhaps a bit on the light side and appeared to be slightly set back, but they were never unpleasant. Kari Bremnes’ song “A Lover in Berlin” is a good case in point, as the voice can all to easily sound too piercing. This was no longer the case with the Luna 7. Other aspects of the music moved forward and reached further into the room than had been the case with the Neumann interconnects. The Luna 7 would have served well to enhance electronic music, as effects were slightly more pronounced. The soundstage could have been more clearly set and perhaps also more assertive perhaps. The Neumanns had produced a lifelike stage with lots of separation between the instruments. This was not necessarily a strong point of the Luna 7 (unsurprisingly), however, the stage that it did create was rather enjoyable and laid back.
The biggest strength next to its pleasant highs were arguably its price, at which there was little competition at the time (or even now). For those who are interested and wish to purchase new, Wireworld have released updated versions, such as the Luna 8 with a slightly improved DNA double helix design and similar sonic features. Used versions of the Luna 7 are available at very reasonable prices. Both versions have been given favourable reviews by critics and consumers alike.
If the aim of this website is to propagate affordable HiFi solutions that deserve the term ‘fidelity’, this cable should be listed among the available options. I will keep the Luna 7 running for a few days, as I am positively surprised by its performance between preamplifier and power amplifier. Not ‘High End’ but highly enjoyable nevertheless. At this point, I am not sure if I can get over the fact that the two channels are running in parallel with that tiny space of plastic between them, and, after all, there are further cables to be explored. If you are familiar with the Luna 7 or Luna 8 interconnects, you are more than welcome to leave a comment below.
Tested on the following setup: CD player: Denon DCD 1420 (on Digital Coax HiVilux Reference); DAC: Cambridge DacMagic 100 (on Kimber Kable Timbre); Preamp: Restek V1 (on Wireworld Luna 7); Power amp: Hafler XL-280; and Tannoy XT8F (bi-wired, on Belden 9497)
Specifications
- Cable lengths: 100cm
- Longitudinal resistance: N.N.
- Parallel capacity: 300 Pikofarad/m
- Serial Inductance: 0,34 Microhenry/m
- Characteristic impedance: N.N.
- Handling: directional, soft flexible
- Termination: Aluminum (silver & gold plated)
- Position tested: pre to amp
fastaudio Black Science MK II

Published: 14/12/2020
Manufacturing date: 2020
Author: Karsten Hein
Category: Gear & Review
Tag(s): Cables
Thomas Fast opened his first HiFi studio in Stuttgart in 1998 and has since become a trusted focal point for audiophile music enthusiasts nationwide. Fastaudio offers a range of quality services, ranging from the sale of HiFi and High End components to the setting up and fine-tuning of these components in households, offices, or in professional studios. Today, fastaudio is also a reputable manufacturer of cables and acoustic room treatment solutions.
The fastaudio Black Science MK II RCA/cinch interconnect is a cable of the brand’s own making and—now in its fourth generation—has made a name for itself as an able performer. It can be purchased in many different lengths, and terminated versions offer a choice of plugs: the more affordable Neutrik NF2 CB-2, and the pricier WBT Nextgen. Both Neutrik and WBT undoubtedly make excellent plugs. I have been a fan of the NF2 CB-2s, mainly because of their massive feel and their convenient spring mechanism, a design by which the ground is pushed into the outer shell when plugging it in, thus creating an easy to place, but very firm, grip on the socket. It really is an incredibly well-designed plug.
The version of the fastaudio Black Science MK II that is shown here has been terminated with WBT’s Nextgen plugs. Just from looking at the design of the interconnect, it becomes clear that fastaudio means serious business. There is the hollow center prong of the WBT that is split apart ever so slightly as to provide maximum contact with the socket. Instead of a circular outer contact, the WBT grips the outer part of the socket in a controlled manner. The cable itself has been designed to reduce skin-effects by using a blind mesh. Both its shield and hollow inner conductor run parallel to its longitudinal axis to reach a more favourable ratio of inductance and capacitance. A promising design in many ways.
The name Black Science itself is an allusion to ‘black’ magic (or voodoo, as cable critics would have it), to the concept of the cable as an inexplicable ‘black’ box, as well as to ‘science’ and research, disciplines that help to shed light on the many undiscovered mysteries in the universe. I cannot be certain that this was Thomas’ intention when naming the cable, but, as linguist, I cannot help but place the name in the context of popular discourse.
Advert eiaudio/shop:
With its shielded design, the Black Science MK II will most likely be connected between preamplifier and amplifier. (Fast makes a separate version for connecting to phono, that either comes terminated with the traditional 5-pin DIN or simply as RCA/cinch and includes a separate ground lead terminated with spade.) The cable that I had been using instead of the fastaudio until this point was the EPIC 1 of Haegermann audiolabs. I had chosen this cable, because it was fast, accurate, and forward sounding with great dynamics. In this setup, our system could appear a little harsh at times. In combination with the electrostatic speakers it seemed to deliver enough detail. I did not miss much in the music but was not terribly excited about the sound either.
Upon connecting the Black Science MK II between preamp and amp, I first noticed that the stage had difficulty forming, the sound was a bit muddled, and I sensed a slight 50Hz humming on the right channel while the left channel was dead silent, as is usual for the DB1-ST140 combo. I checked the position of the cables and made sure that they neither crossed nor touched. I checked the sound again and seeing some improvement, I doubled my efforts of placing the cables, until both channels were silent. Standing next to the system and the bi-directional electrostatic speakers, it is difficult judge the impact of any change, except for obvious flaws such as humming. But sitting back on the couch, I immediately noticed that my efforts were starting to pay off.
When properly placed and connected, the Black Science MK II is capable of constructing a very convincing stage with plenty of natural width and depth. It does this much better than the EPIC 1 with which the music was more entangled with the speakers. The MK II plays more seamlessly when panning left to right and also reaches out further into the far left and right corners of the room. The cable seemingly provides a greater spectrum of sound and is able to show more nuance. Individual notes linger much longer. This is especially obvious when listening to natural instruments being played. Jamie Saft's 'Loneliness Road' really shines in all its natural beauty, providing fully contoured natural bass. Instruments and voices are presented without tonal coloration. Comparing our two present HiFi systems, the Restek-Hafler-Tannoy and the DB1-ST140-MartinLogan, I can say that the latter paints in slightly warmer and therefore more pleasant colours whilst offering similar dynamics and detail. If this can at least partly be attributed to the fastaudio cable, I would tend to see this as an asset and still be perfectly happy with its performance.
Tested on the following setup: CD player: Marantz CD-17 (on WesternElectric); Preamp: DB Systems DB1 (on fastaudio Black Science MK II); Power amp: B&K ST-140; MartinLogan SL3 (bi-wired, on Belden 9497)
Specifications
- Cable lengths: 100cm
- Longitudinal resistance: 100 Milliohm/m
- Parallel capacity: 53 Pikofarad/m
- Serial Inductance: 0,3 Microhenry/m
- Characteristic impedance: 60 Ohm
- Handling: directional, soft flexible
- Termination: WBT Nextgen
- Position tested: pre to amp
- Country of manufacture: N.N.
- Year(s): 2020
Digital Interconnects
Digital Coax - HiViLux Reference
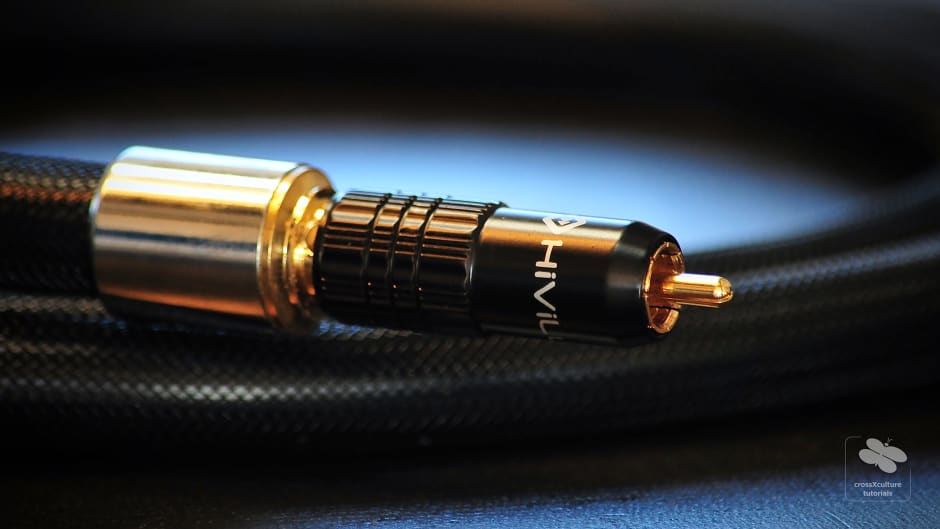
It was one of those moments in which anything seems possible and time is irritably suspended while we attempt to determine whether our last move was either utterly ridiculous or absolutely brilliant. Are you familiar with such moments? It seems they usually occur when stepping onto new terrain, especially when brushing against the grain of popular belief. Well, who would ever do that?
Guess no further, because, with this page bearing ‘explorations’ in the title, stepping onto new terrain is precisely what we aim to do, and if we can take down established myths in the process, all the better. However, as we shall see, the subject at hand is especially tricky, because the HiViLux Reference Digital Coax Cable, as it is called, has quite a number of firm (and very vocal) convictions to brush against. For one thing, there is the ‘cables-don’t-matter’ corner, which is made up of audio enthusiasts who have personally never made a test between two cables but will not tire of predicting that they would not hear a difference, even if they tried.
Then there is the ‘digital-is-digital’ corner made up of technically-minded people who claim that the reduction to zeros and ones will make signal loss a thing of the past or that it at least cannot have an influence on audio performance. In the third corner are the ‘if-I-don’t-know-it-it-can’t-be-good’ people. They usually deny that they are even sitting in this corner. And, finally, there is the ‘if-it’s-cheap-it-can’t-be-good corner’, made up of high-brow rather than high-end audio gurus who have bought their way out of the reach of ordinary people and have since come to fear anything that might lessen their monetary lead on the rest of us.
Perhaps now you can imagine the forces against me, as I was unpacking the mid-market coax cable from a new manufacturer to replace a digital cable that I already owned (and that appeared to be working just fine), all in the hope of experiencing a revelation. However, I figured the following: If this cable performed as well as the one I already owned, I would have two cables to connect two devices to our DAC, and the money would not be wasted. And if it performed better, even just a little bit better, victory would be mine, as quality in music reproduction often happens in incremental steps but ends up being purely magical in the sum.
At that point I had already read a lot about OCC copper, and somehow, this ‘new’ type of pore-free copper conductor had made a lot of sense to me. As I had learnt, OCC stands for “Ohno Continuous Cast” and bears the name of the inventor of its manufacturing process. A process by which copper wires are not only produced to keep them oxygen free, as is usual in Oxygen Free Copper or OFC, but also grain boundary free, as if the whole strand was made of one continuous copper crystal, reaching a purity of 99.9997%.
With this new awareness, I had searched the web for OCC interconnects from time to time, only to find overpriced or suspiciously cheap offers, nothing that I really trusted to produce quality results. Until I had finally come across HiViLux cables with their Chinese-owned home cinema shop in Germany. Curious about their offers, I had checked the design of the cables. Their Reference Digital Coaxial Cable had struck me as being well-built and realistically priced so that I had dared to make a purchase. It seemed to me that their range of cables was rather to enhance the sales of their other gear, a fact that seemed convincing.
And, there I was, holding my sturdy-looking cable box bearing the HiViLux logo, not yet sure which of the four ‘corner-jocks’ I would fall prey to first. The cable itself was of impressive 1.4cm diameter and the quality of manufacturing appeared to be excellent. Thick as it was, it proved to be more difficult than usual to arrange behind the rack, and the turn-fastening plugs were a little tight when pushing them onto the cinch/RCA sockets. I had to take especially good care not to break anything. I positioned the HiViLux Reference cable between our Denon DCD 1420 CD-player and our Cambridge Magic DAC 100. The cable to be replaced was a four-times shielded coax that had also been designed for quality SPDIF connections. ‘Music playback’ had been listed among the purposes of use. In this combo of CD player and cable, the DAC had already outperformed the internal one of the CD player with sufficient musicality, offering an increase in stage and dynamics.
Hooking up the HiViLux Reference brought about some surprising revelations that changed our understanding of the setup. For one thing, there was a sudden and significant increase in musicality, dynamics, space between the instruments, and the general ability for the system to breathe. The difference was so intense, and the colours of instruments were so real, that I had a hard time believing that this could all be attributed to the cable design. Something else had to have changed along with the cable, and I soon found out what this was: namely, the presence of a second cable on the DAC’s two coaxial SPDIF inputs. Since I had not yet disconnected the original cable and simply used the second input, both inputs were now connected and thereby sealed off. And it seems this is what the Cambridge DAC needed to function properly. For the DAC to perform well, we should have used a 75 Ohms plug to seal off the open input. This means we had never heard the DAC working properly before and had not been aware of what it was truly capable of. One cannot help but wonder how many owners of this DAC are in that same position.
But, just as clearly, the other 50% of the audible improvements could be attributed to the HiViLux coax cable which corrected the sonic colours, especially those of metal instruments and percussions, to put life-like performances into the room as we had never heard before. On 2Cellos’s album “In2ition” the instruments appeared to be much larger than I was used to, and I heard nuances that had simply been missing before. Familiar songs that had long since lost their lustre for me were highly entertaining once again. Jamie Saft’s album “Loneliness Road” seemed more vibrant and now offered a deeper and wider soundstage. Percussion had a timbre to it that I had only heard during live performances until that day. On Boris Blank’s album “Convergence”, individual samples became visible as such, and it was possible to hear right through to the bottom of the recording.
It took several hours for the fresh-out-of-the-box cable to fully come to life. In the very beginning it seemed slightly analytical with an overly tight bottom end. However, this quickly subsided for a full and lush sound that had me coming back for more over the next few days. What took me by surprise was that the increase in punch and musicality was a more pronounced step up than we had felt when moving from the Tannoy 6 to the larger Tannoy 8 speakers. There was simply more of everything, and for the first time I had the impression of listening to a genuine high end system with every component, from CD-drive all the way to the speakers, being able to show that a great system is so much more than the sum of its parts. At its current market price, this cable offers more than the usual performance and will be a good point of reference when deciding on other components.
Note: Not all HiViLux ‘Reference’ cables are at the same quality level as their digital cable. Happy with my first purchase, I tested a pair of cinch/RCA interconnects of the same design which only gave a rather restrained performance. Their golden plugs showed signs of tarnishing from sudden temperature changes during transport (I used baking soda to restore the shine), one cable was actually 1 cm shorter than the other (!), and the ferrite rings had been fitted at random. The latter of which were probably to blame for the restrained sound. I returned the cinch/RCA interconnects after two days of trying them in different positions. Sadly, they underperformed our existing interconnects in all possible positions and combinations.
Power Cables
Audioplan Musicable PowerCord S

It is no secret that the choices we make in audiophile listening evolve with each new sonic discovery, and some of them are only comprehensible to those who have fully grasped the dimensions of what is possible by having walked the path themselves. This is especially true for the subject of cables. Whereas to the average listener the purpose of a cable is simply to establish a connection, most audiophiles will report from experience that even microscopic deviations in cable design will make or break a system, regardless of how much money was spent. This understanding is especially relevant for interconnects closest to the music source and for the power cables that drive the source.
At the time of purchasing our first Audioplan PowerCord S, we had already been running our Martin Logan SL3 speakers in the main listening room for a number of years. These were fascinating speakers, because their large electrostatic drivers were of such light-weight material that they hardly showed any resonance or time-lag issues in and of themselves. In theory, this meant that the sound they conveyed was identical, or at least very close, to that created by the music source of our system.
In music reproduction, it is difficult to find components that become invisible themselves — a commendable trait of the Martin Logans — and still, I confess, there were moments when I thought that I had them pegged and could detect a signature sound that was intrinsic to these speaker. I even described such character traits in previous articles of this blog, when — as I know now — what I was describing was simply the total synergy of our system in its many stages of development. This is not to say that my descriptions were inaccurate, they were rather a total record of our system at the time.
In fact, the Martin Logan sound went through many stages of formation with us. From the outset, I had quickly understood that our 60 Watt Hafler DH-120 amp would be too weak for the job. The speakers’ hybrid design needed high-current delivered in abundance, which was beyond the Hafler’s abilities. At the time, I hoped that bi-amping with our 60 watts Rotel amp might be a solution. However, I soon realised that we were missing out on genuine homogeneity, with the speakers being unable to unfold their full potential. It was only when we changed to the B&K ST140 amplifier that the music really began to sound coherent. With the new amp in place, a few months went by, during which our system underwent further transformations.
For example, upgrading our music sources to a Sansui SR-525 turntable and a Rega Planet 2000 CD player brought some improvements in dynamics and transients. These changes became even more notable, when we upgraded our interconnects from twisted or braided OFC and OCC copper to silver solid-core. Suddenly, there was a new robustness and sincerity to the music that I had hardly heard anywhere else before. And, of course, having upgraded to the Belden 9497 speaker cables surely helped the overall result. Allowing for some months break-in time of all cables and components, I was indeed very happy with our setup and the tonal balance that it was capable of.
The Martin Logan appeared at ease with any song material. Voices, especially, had this sweet honesty to them that is only possible to achieve in a tonally balanced setup. The silver cables brought wonderful bass extension that was perfectly capable of sending shock-waves through the stairwell of our 100-year-old building, and, to our neighbours’ delight, all in graceful and multi-layered fashion. I must confess that mid-bass punch could have been a little more forceful, perhaps, but I attributed this to the age and design of the Martin Logan panels. All the more, I was surprised to feel bass punch again when changing the pre-amp to our Thorens Restek V1 (fully refurbished with new caps and ops by Restek and with custom power supply by Mr. Kassel). Before making its re-entry in our main system, the V1 had been sitting on our shelf for a few months, waiting to be sold. I had simply never tested it on our Martin Logan system and, in an instant, decided for the V1 preamp to stay. It was simply too good to be sold.
Thus far, it had been the typical story of Audiophile listening. One change had followed another, and there had been many weeks in-between, during which there was no progress to be made. Improvements came in increments and often from the realisation that some aspect of the music did not sound quite right, yet. Such discoveries took lots of time and experience. Product marketing had made people believe (including myself) that one could go out and buy an audiophile system, but this had long since turned out not to be true. With each unit (speaker or other equipment), room and house being different, audiophile systems took months, if not years, to set up. This was especially true, if the listener, as well, was still learning what to listen for during the process. However, with the Thorens Restek V1 playing on the Martin Logans, I was finally convinced to have reached perfection within my available budget and quite possibly beyond. — Until this happened:
While installing the V1, I realised that I was missing one audiophile power cord to connect all our units. This was so, because our DB Systems preamp had come with its own fixed power cord, whereas the V1 required a separate cord. Looking around our house, I saw that all our Lapp Oelflex cords were in use already. Hence, I decided to help myself with the standard cord that had come with our Dynaco PAS-4 preamp, until a good offer for a more worthwhile cord was to be found. Power cords were important, of course, and I had always noted some improvements in both timing and rhythm when changing from the standard to our Lapp cords. However, the improvements to be expected were usually the frosting on the cake, not strictly necessary to feel nourished, but nevertheless helpful for a well-rounded experience.
I went ahead and placed a search for audiophile cords in the usual channels and then forgot all about it, until I received a notification regarding a certain “PowerCord S” by the German HighEnd manufacturer ‘Audioplan’. The offer showed the cord for less than half its usual offer price — not a common thing to happen on audio power cords lately — and so I decided to give this a try. Audioplan was already a familiar name to me, as I was using their classic ‘PowerStar’ grounding-optimised distributor and had previously used their infamous Sicomin ‘AntiSpikes’ for acoustic decoupling.
When the PowerCord S arrived, I was surprised by its rigidity, a fact that was additionally highlighted by the circumstance that it had just come in from the cold. The outer material also felt a little rough when compared with other cords. I decided not to mind and allowed it some time to warm up to room temperature, gave our system a last discerning listen with the standard cord on the V1, and then swapped the old standard cord against the new PowerCord S. It is no exaggeration that nothing that anyone could have told me about this cord would have prepared me for the changes I was about to hear. And this was true, despite my previous experience with silver cable connections.
When changing from one interconnect to another, the difference in sonic presentation may also have been perplexing at first, but it was also explicable, due to the fact that the music signal actually needed to pass through these cables. In the case of power cords, however, the improvement was just to mains voltage, which, in our parts of the world, was at 230 Volts and 50 Hz. It was not easily comprehensible how changing the cable of just the final meter of such a connection would lead to improvements at a significant scale, especially when connected to a preamp that required very little power on its own and in which some aspects of line signal operation were passive.
I was so surprised by the increase in our system’s musicality that I asked my wife to stop baking Christmas cookies for a moment and to join me for a quick sound check. In our beginnings of audiophile listening, I had quite frequently asked my wife to check out the improvements with me, but such moments had become less over the years with progress becoming more predictable. And still, here we were once again, trying to make sense of what changes had taken place on our system.
The most obvious difference was that the stage seemed more solid and deeper. There was more nuance between left and right, and spaces between individual instruments seemed larger. Bass extension had been impressive before, but now seemed better integrated and naturally translucent. The position of the speakers seemed less obvious with sounds being able to free themselves better. There was renewed speed and agility to the Martin Logans, of the kind I would have expected from refurbishing their Mylar foil, perhaps. Our Christmas CD “The White Christmas Album” had suddenly become an extremely intimate event with strong and separate tonal character of each instrument.
I spent the final hours of the day typing this article, listening to music and watching a film. And I noticed three things: At the same volume setting, the music seemed to play louder than it did before. This may have had to do with the increase in dynamics, but I had to turn it down in order not to over-exert my ears. Second, watching a movie made sound effects more three-dimensional than before, with the sounds of action sequences bouncing off the side and back walls of our listening room to a greater extent than usual. And, finally, the voices of actors appeared more life-like, to the point that I had a “this is real” sensation a few times during the (rather exceptional) movie “Motherless Brooklyn”.
And, although I am aware that we get used to even the most sophisticated of sounds, it was a revelation that I will keep in good memory as one of the milestones in setting up our system.
Note: While running one PowerCord S on our preamp was highly beneficial to the performance of our system, connecting a second one on the amplifier turned out to present almost too much musical detail, taking us from our comfortable seat in the audience to the more intimite processes left and right of the singer's tongue. Norah Jones's album "Come away with me" seemed overladden with unneccesary (because normally hidden) information. In the end, it is all a matter of taste, of course, and technically-minded listeners might get a kick out of this microscopic presentation. For our own listening preferences, however, it looks as though the second PowerCord S will serve better elsewhere.
Audioplan Company History
Audioplan was founded by the German couple Volker and Renate Kühn in 1980 as a high-end studio. They started out compiling a catalogue of audio products based on strictly listening to them. The company soon started the development of their own range of loudspeakers, in 1982, which lead them to the realisation that the integrity of the source signal was already corrupted by the poor design of power cables. Audioplan had been among the first companies to identify the importance of interconnects, but when it came to the design of power cables they were true pioneers. By 1986, Audioplan had developed a whole range of unique and patented audio solutions and become an official distributor for Jadis. Renate Kühn died in 1993 and Volker handed leadership of Audioplan over to his son Thomas Kühn, who has been leading the family business in its second generation.
Specifications
- AC voltage: 230 V
- Power rating: 25 A
- Design: (4x) 1.25 mm, (1x) 2.5 mm
- Conductor: High-purity copper
- Damping: Sicomin, CRC and CDC design
- Length: 1.5 m
From the Audioplan website
“PowerCord is a symmetric power cable with four (instead of the usual three) leads. The fourth lead is a second ground conductor placed opposite the first. This creates a quasi-symmetric arrangement. PowerCord uses high-purity, heavy silver-plated copper litz wire with increased conductivity. The litz wire and cable design meet the requirements of the VDE. The individual conductors are isolated with materials demonstrating low loss and accumulation effect. This unique construction ensures low scattering, high noise suppression and the best possible dynamic behavior of the conductor and makes shielding unnecessary. This would otherwise result in the loss of dynamics from eddy current and dielectric effects. Finally, the use of Sicomin ensures that mechanical vibrations do not become electrical noise due to induction effects.”
Power Cord - LAPP Ölflex
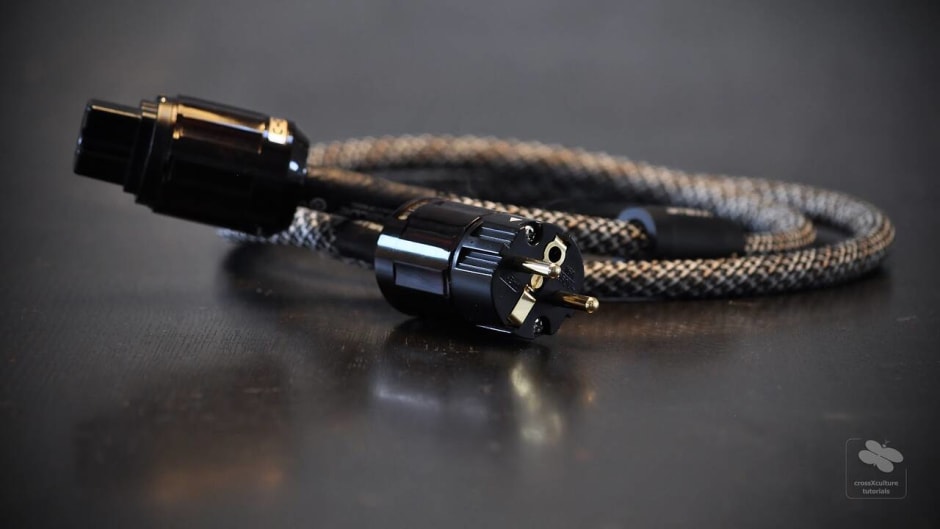
Probably the cheapest way of upgrading your existing power cords is through use of the now famous Lapp Ölflex Classic cable for industrial usage. Its specially shielded design provides a good foundation for power integrity, and the inner diameter of 3 times 2.5 millimeters should be more than sufficient for most HiFi applications, even if you are running a very powerful amplifier. This is not to say that it will not be an asset to our far less power hungry components as well.
The hand confectioned cable shown above is based on Lapp’s affordable Ölflex CY 110 power cord and was fitted with a pretty looking Viablue sleeve to lessen the glossy effect of the visible shielding. The plugs are of the high quality made-for-audio kind and were manufactured in Japan. Viablue shrink tube was used to hold the sleeves in position and a ferrite IMF shield of the same brand was added for extra protection.
I was a little disappointed with Viablue’s approach to the ferrite clamp, for two reasons: first, it is a slide-on design which is difficult to place over a just-fit cable. Second, it consists of a thin inner ferrite liner as well as an outer aluminum tube. While the outer tube may look impressive, all the work is done by the inner ferrite core which appears to be rather thin. I have not yet compared this cable with one that is fitted with a proper Würth Elektronik 74271151, 15mm ferrite ring, but I would not be surprised if it cannot compete. If I were to choose again, I would probably go with the more expensive Würth.
Symphonic Line High End music electric cable
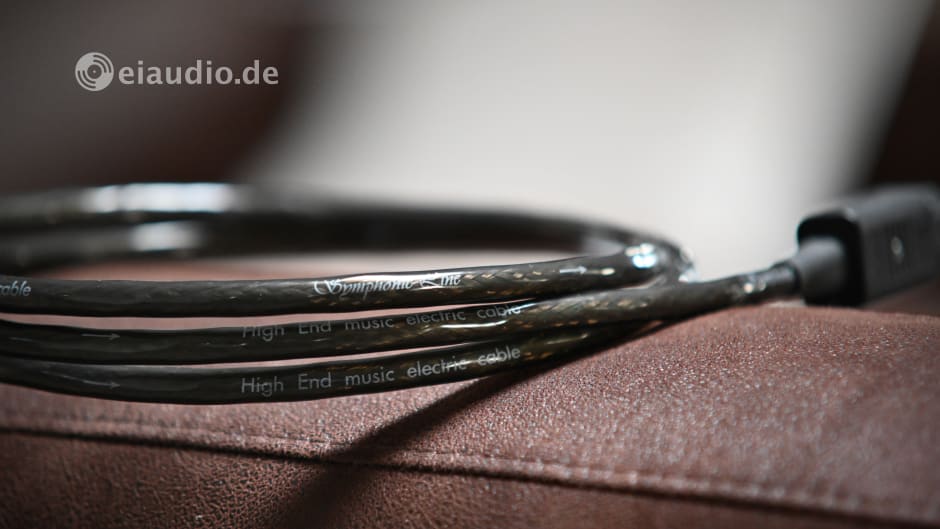
Published: 29/03/2025
Manufacturing date: 2025
Author: Karsten Hein
Category: Gear & Review
Tag(s): Power Cables
If you are a cables-don’t-matter-person and believe that even lamp cord is perfectly suitable for amplifier-to-loudspeaker connections, then this article is not for you. To all those who know how to set up a good HiFi system and have the ears to approve it, the Symphonic Line High End music electric cable is a valuable asset in unleashing the performance of your High End amplifier.
A world of magic.
Join any public HiFi forum today, and you’ll quickly find fiery discussions about audio cables. These conversations often reach a stalemate between those convinced that quality cables significantly impact sound and those who argue that nearly any cable that completes a connection is sufficient. Interestingly, this pattern repeats itself, whether discussing interconnects, speaker cables, or power cords.
While many debates boil down to two questions—'Do cables really matter?' and 'Are High-End cables just snake oil?'—perhaps a more productive approach would be to step beyond personal opinions and anecdotes and to ask: Are forums, where contributors often use pseudonyms and vary greatly in experience, truly the ideal place to explore complex technical issues like cable quality?
Essentially, what cable-effect skeptics do not realise is that they ask us to believe in a magic trick by suggesting that they can change the medium without this having any effect on the crucial properties: capacitance, resistance, inductance, internal resonances, eddy currents, level of signal loss and interference, etc. To the skeptic, a cable will have the same effect on the frequency spectrum and the dynamics of music, regardless of whether it is of an unshielded silver solid-core design or, quite the opposite, a copper-clad aluminium multi-strand with mesh shielding. And this is simply not the case.
The magic of reality.
Back in the real world, the characteristics of cables are so divergent that I have hardly heard two signal cables on a HiFi system that had the same effect on music. Each cable has specific strengths and weaknesses that I accept and have learned to use to my advantage when setting up a system. Since on High End music systems, we normally do not have any attenuators for bass and treble, cable characteristics can be used to darken tonal colours, slow down or increase speed, or to make the HiFi system sound crisper, until the resulting balance sounds just right.
However, despite my personal experience with the importance of signal cables, it did take me some time to accept that this also applied to power cords. Music signals are obviously delicate and span a whole range of frequencies, whereas power cords are directly connected to the house electrical grid (often by means of a power distributor) and only have to handle one specific voltage and frequency (240 volts, 50 Hz for Europe). At first, this seemed like a simple enough job to me that just any cable could do, but, surprisingly, the audible differences between power cords are also quite substantial. Power, after all, is the basis for everything.
How is it possible that power cables contribute to sound?
For one thing, the home electrical installation is made up of solid-core copper wires. These are not certified for movable devices, because solid-core wires are rigid and can easily fracture when bent repeatedly and cause fires. It is for this reason that we change from solid-core to flexible multi-strand wires in a power cord. Doing so causes audible deviations within the electrical current flow. And since this degrading effect is located right before the music-processing device (CD-player, amplifier, etc.), where power integrity should ideally be getting better and not worse, the effect can be considerable.
The power cord is in a crucial position, because it becomes part of the resonance circuit of the respective music device. Its ability to provide clean, resonance free electricity in abundance is essential for the music signal to remain intact. Contrary to popular belief, the ability of a cord to support clean music reproduction does not show in the dimensions of its cable nor in the design of its shiny plugs. Power cords need to be evaluated in their effectiveness when applied in a real-world listening test. And this is precisely where the Symphonic Line High End music electric cable meets its mark.
Built for music.
The authentic reproduction of music signals across the frequency spectrum, with life-like dynamics, correct timing, and natural tonal colors, is a challenge and demands more attention to detail than the power supply of a heating, cooling, or light emitting device. Different rules apply to the design of a power supply and the cord that feeds it, and it takes lots of experience to get the balance just right.
Symphonic Line can look back on a 40-year history of engineering audio devices that satisfy the needs of audiophile High End listeners around the world. The company is owner-operated by its founder, Rolf Gemein, and offers a full range of true-to-source music devices, spanning from CD players, analog drives, integrated amplifiers, pre- and power amplifiers, to loudspeakers and the cables that make each device perform at its best. And as the resulting performance hardly ever hinges on a single device, improving the connections between them has been as important as the devices themselves.
The Symphonic Line High End music electric cable is based on a relatively new concept and was designed to unleash the full performance of High End amplifiers and related audio gear. It is an optical understatement and does not demand much visual attention. It feels light, soft to the touch, and is surprisingly flexible. The cord is moderately priced in the high-end segment, especially when we factor in the sound experience. Its conductors are made up of 2.5 mm2 and 1.5 mm2 multi-litz wires paired with an ultra-fast dielectric with the benefit of low dielectric absorption and fast polarity reversal. The cable uses a filler that is chaotic in structure for higher resonance absorption paired with a soft and transparent outer sheath for better decoupling from the floor.
The quality of workmanship is at the high level that has become the trademark of Symphonic Line products, and the resulting sound is breathtaking. “I wanted to design a cable that would indicate endless clean power reserves to the amplifier under all conditions”, Rolf Gemein said to me, as he was handing me the High End music electric cable for testing at the Norddeutsche HiFi-Tage. “Let me know what you think. And feel free to write about your experience.” On that day, I was taking the Manger P2 loudspeakers to write a review, and the prospect of having a great power cable to choose from presented a welcome opportunity for me.
Since then, I have tested the cable in combination with a Symphonic Line RG10 MK4 Reference amplifier, the Manger P2 bending wave transducers, and my own Martin Logan SL3 electrostatic speakers with a variety of music styles. And I have documented my highly positive experiences in my reviews on the RG10 MK4 Reference amplifier, the Manger P2 loudspeakers, and the WSS Platin Line LS4 speaker cables. All these articles have one thing in common: a power source that is fast and clear of harmful resonances.
Ways to perfection.
I did detect traces of HF interference, however, that the cable did not manage to filter completely, and I therefore decided to add one ferrite bead about 12 cm before the cable enters the amplifier. This immediately freed it from any trace of interference. The RG10 MK4 Reference is a sensitive and powerful amplifier that will take whatever we feed into it and amplify it to well above 50,000 Hz. As we have a large cellphone tower in our neighborhood with visual contact when looking out the window, I have not been able to use any power cable without a ferrite clamp. With cellphone coverage being present in an increasingly tight mesh, this same phenomenon might also apply to your location.
The finished setup allowed for clear and calm sound reproduction. Freed from resonances and HF interference, the RG10 MK4 Reference could realize its full dynamic potential. The music could sound powerful and massive yet delicate and sweet simultaneously, or shift dynamically within milliseconds.
This new potential changed my listening habits and made me favor Broadway musicals simply for the joy of dynamics and the multitude of instruments and voices. Rolf Gemein often talks about the importance of an even power distribution across the entire frequency range, rather than focusing on a single measuring point for better specifications. It is this characteristic that is special in the context of Symphonic Line amplifiers, especially when they are fed from a high quality power source.
With energy effortlessly moving to and from the amplifier, the recording distinguishes itself from the HiFi setup and becomes audible in all its dimensions. There is order on the tonal and dynamic scale at once. Performances take shape, and the body of music can be felt and not only heard in all its dimensions. Marco Kolks (link shows PDF of the German article) wrote about his experience with the High End music electric cable in the German publication “Hörerlebnis”, and I can only agree with his findings and congratulate him on his thoughtful and detailed analysis.
I feel that Rolf Gemein has succeeded at building a cable that provides amplifiers with unbridled clean power, which was his declared mission. If you have the chance to test it on your amplifier, this is certainly an experiment worth your time. Don't judge a book by its cover. The High End music electric cable will easily dwarf cables that look three times more impressive and are much higher priced. Here is one piece of the puzzle on the way to a true High End system.
Specifications
- Type: High End power cord
- Application: High End music sources and amplifiers
- Inner conductors: 2.5 mm² / 1.5 mm²
- Cable length: 160 cm (without plugs)
- Variations: Also available per meter.
- Cable diameter: 9 mm
- Weight: 350 g
- Country of manufacture: Germany
- Year(s): 2022 -
Speaker Cables
Belden 9497
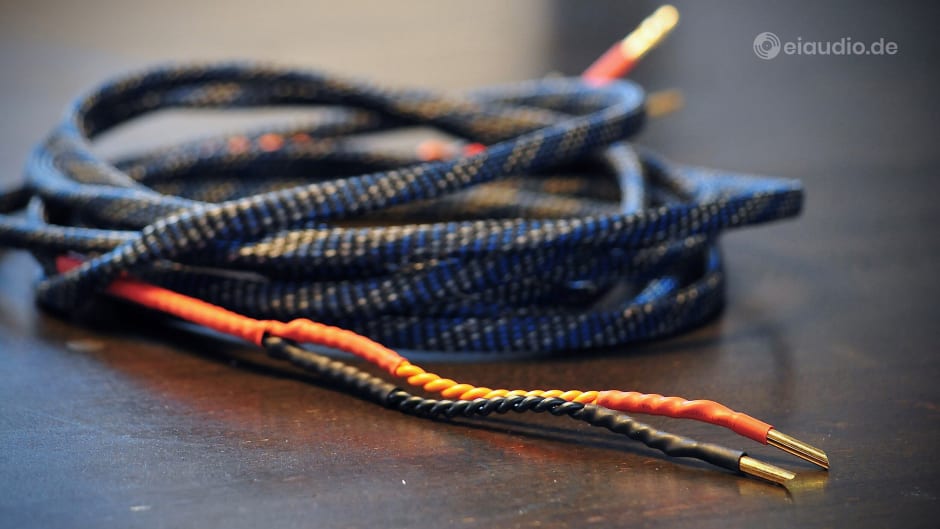
Published: 16/01/2021
Manufacturing date: 2024
Author: Karsten Hein
Category: Gear & Review
Tag(s): Cables
When the subject of cable quality comes up in HiFi forums, it is best to disregard the post completely and look at the one-thousandth picture of an amplifier, CD-player, or turntable instead. It is perfectly acceptable to write a comment on an amplifier, such as ‘nice’ or ‘cool’. One might even claim something down the lines of “a friend of mine has one” or, more boldly, “I heard this one once, but I liked another one better”. Because it has been accepted that CD players sound different from each other, because they are made of different materials, have different layouts, etc. Some are better shielded against outside interference, some feature more opulent electronics. The same can be said of preamplifiers, amplifiers, streamers, speakers, and other audio devices. The answer to whether any of this matters is usually: “Of course, because it affects the sound of our HiFi system.” Manufacturers often make a great fuss about having developed a new feature, and, especially in High End, this usually has very little to do with usability, but everything with how it sounds.
When it comes to the subject of cables, however, we are invited to believe in a magic trick. For some obscure reason, both public and expert opinion has it that two cables made up of different materials in different gauges, and based on completely different design concepts have exactly the same effect on sound and behave the same way across all frequencies. According to this popular view, a speaker cable made up of straight 12 AWG copper clad aluminium (CCA) has the same performance over all frequencies as a twisted 10 AWG cable design made of OFC or OCC tinned copper. The implicit logic being that, although the medium changes, the sound stays the same, because cables are merely transducers with no electronic or sonic relevance on their own. Strangely enough, the holders of this argument do not seem to notice or mind the contradiction involved in running 100% of the music signal through a changed medium, without this signal’s quality being affected by the change. While this might be true for cables that are installed to operate a motor or a lightbulb, audio installations are far more sensitive in terms of signal integrity. The simple presence of current is not enough. Cables affect many aspects of music signals which are made up of a combination of overlapping wave lengths and amplitudes that are all too easily influenced by high frequency infiltration and even sensitive to outside touch. The resulting differences are audible in bass extension, bass nuance and layering, mid-band tonal accuracy, voice and instrument timbre, timing, agility, stage representation, high frequency extension and nuance, coherence, and more generally: musicality. Not surprisingly then, in A/B comparison, I have not heard two cables that have the same influence on sound.
In this context, the Belden 9497 is no exception. Heralded in vintage audiophile communities as an entry-level High End speaker cable that works well with low-power tube devices, for instance, it is easily recognisable by its orange and black coating and its tight twisted-pair design. This lollypop look makes it stand out among its unicoloured competition, even before one has had the pleasure of hearing it perform. The two high-conductivity tinned copper conductors are of relatively small 16 AWG diameter and covered with heavy duty PVC insulation. No outer shielding is used, but—similar to Western Electric and similar manufacturers—Belden have tightly twisted the cable’s conductors to cancel out high frequency (HF) radiation. The downside of this design is that the individual cable becomes longer. However, considering the 9497’s low resistance over 1000 ft of just 4.27Ohms, one meter more or less is likely to have a relatively small impact when compared to the benefit of cancelling out airborne high frequencies from the signal. Conventional shielding, on the other hand, introduces additional mass to the signal path and tends to hamper the agility and thereby the musicality of a cable. Going without shielding altogether is becoming increasingly impossible in times of interfering communication signals such as WiFi, DECT and cellular.
Advert eiaudio/shop:
How does it sound? Well, to my ears it sounds great, but it took us a long time to get there. The cable was recommended to me by Luigi, who has devoted his life to finding audiophile gems, especially in the context of vintage audio. This recommendation happened at a time, when I had only been familiar with regular multi-strand speaker cables that were composed of various diameters and ranged from copper-clad aluminium (CCA) to oxygen free copper (OFC). Neither of these cables had been very special in their sound, although I had noticed that changing from 2.5mm to 4mm diameter lead to improvements in bass response. And I had changed speaker cables often enough to understand about run-in times. Because, whenever I had changed cables, I had been disappointed at first, thinking that I had made a wrong purchase. Yet, after a while, I grew accustomed to the new sound, until I was happy again, often happier than before. I had simply thought this was me getting used to the cable, until I began changing back and forth between used cables and realised that they did lead to a different sound, but never to the one that had troubled me when they were fresh out of the box. The cables had matured somehow, but I did not give it much thought, until I connected the Belden 9497.
After hearing the Belden at Luigi’s house, I had decided to purchase a pair for myself. The 9497 are not so common in Germany, and importers usually levy a big mark-up. I therefore found a supplier in Japan and ordered 10 meters for bi-wiring with 2x 2.5m on each side. I also bought 5 meters of Viablue cable sleeve, some shrink tube and silver solder, a better soldering station, and some gold-plated rhodium-copper banana plugs—the hollow version for low-mass connections. By that time, I had already learnt that low-mass was important for maintaining musicality, and that a single point of contact on the amp side produces superior homogeneity. This means, in customising the cables, I used two banana plugs on the side of the amp, joining the poles of the same colour together for the purpose; and I used four banana plugs on the side of each speaker, with separate connections for the high and low frequency drivers. In my experience, this provides greater bass control than simply using cable jumpers or the speaker manufacturer’s standard bridges.
My first sonic impression of the customised cable playing in our main system was anything but pleasant. The music sounded overly tight and tinny, there were no transients to speak of, and mid-bass was as low as it would go. The stage seemed centred and packed, and the music clung to the speakers. What irritated me most was a tonal imbalance in the voices. If I had not heard the cable perform before, and if I had not learnt about cable burn-in, I would have gone back to my OFC copper on that day, or on any day over the next few weeks, actually. Since it was not much fun to listen to, I would turn on our system before going to bed and get up early in the morning to listen for changes. After the first week of playing, voices began to sound more natural and closer to those on our matured system. Some time later, the music started to free itself from the speakers with individual notes lingering for longer. After about a month, bass had become more extended and natural. After about two months, the stage was fully set, with lots of space between instruments, natural voices, as well as full and contoured bass.
I have gone back to the OFC cables on occasion, for example when changing the length or making other changes to the Belden. Whenever I do so, it feels as if I am listening to music through a thick veil. The Belden beats the OFC in all aspects, most obviously in terms of agility, tonal balance, and transparency. For the sake of further explanation I will try other speaker cables, of course. But considering the engagement and joy I get from listening with the Belden, I know to have set a standard that is going to be difficult to beat. Following the considerable improvement in sound, I have since installed this cable on both of our systems. The run-in time was the same on both occasions.
Tested on the following setup: CD player: Marantz CD-17 (on WesternElectric); Preamp: DB Systems DB1 (Haegermann audiolabs Epic 1); Power amp: B&K ST-140 (on Belden 9497); MartinLogan SL3
Specifications
- Cable Lengths: 2.5m
- Cable Construction: Twisted Pair
- Wire Diameter: 16AWG (5,3mm)
- DC Resistance: 4.27Ohms / 1000ft
- Inductance: 0.19 uH / ft
- Wire Material: tinned copper, multi-strand
- Dielectric: Polyvinyl Chloride
- Handling: bi-directional, flexible-resilient
- Termination: gold-plated rhodium copper
- Position tested: amp to speakers
Characteristic Cable Impedance

The first time I heard the term ‘characteristic cable impedance’ was on one of my routine visits to Winfried Echle. The seasoned technician and developer of audio equipment explained that unmatched impedances could lead to undesired reflections that would negatively affect amplifier performance and signal integrity which could in turn also affect tonality. Later that day, I went home to check the nominal impedance of speaker cables and found this to be substantially lower than nominal speaker impedance. Realising that I was probably not looking for the correct specifications, I figured that there must be a difference between nominal impedance and characteristic impedance.
As I wanted to find out more about the phenomenon, Winfried referred me to Roland Kuhn, who had done some research on characteristic speaker cable impedance and had also constructed some cables for use with specific audio equipment. Roland sat down with me and pulled out some publications on the matter. He asked me if I had perhaps already read some of them. I told him that I had not, and that he would need to start his explanations from scratch. Roland explained that the adjustment of the characteristic impedance originally played a role in telecommunications, where signals have to be transmitted loss-free (without reflections) over long distances. However, this principle also applies to the system of amplifier, cables and loudspeakers, and mismatches would be particularly noticeable in this area, if the quality of the individual components, the correct positioning of the loudspeakers and the individual listening experience permitted.
Roland explained that the characteristic impedance of cables changed with the frequency of the electrical signal flowing through them. In case of a mismatch between characteristic impedance and the attached load (or loudspeaker), reflections occurred at the point of transition. The amplitude and polarity of the reflected wave depended on the degree of the mismatch. Graphs from the research papers that Roland showed me illustrated this effect by means of overlapping lines or ripples. From these observations it followed that the characteristic impedance of a loudspeaker cable should match the impedance of the loudspeaker as closely as possible in the range of audio frequencies.
I learnt that the differences in characteristic impedance of non-matched cables could vary by a factor of 5-20. For low frequencies, the characteristic impedance was very high and dropped asymptotically to a lower value. I could see that frequencies above 500,000 Hz usually saw characteristic impedances that were constant. It was also shown that the reflected waves that resulted from the transition to the loudspeaker would run back to the amplifier at the output stage where they could negatively affect amplifier performance, signal integrity, and, ultimately, tonality and imaging.
The cable that is shown here used a selection of capacitors and resistors to peg characteristic impedance roughly at the 8 Ohm value of the loudspeaker. In setting up my equipment for the listening test, I was warned that not all amplifiers were able to handle this type of cable design, and that there was an actual risk of the amplifier overheating to the point of destruction. As a precaution, I was asked to stay with the amplifier for a few minutes after turning it on to make sure that it did not react in this way.
[Review in progress. Coming up next.]
Specifications
- Type: linear wave resistance
- Material: multi-strand copper
- Resistance: 8 Ohms continuous
- Cable design: double-braided
- Termination: banana plugs
- Plug-type: Nexmex 8-16 AWG, 24K gold
- Lengths: 2 meters (x2)
- Weight: 672 gr (mono)
- Country of manufacture: Germany
- Year(s): 2010
HMS Gran Finale
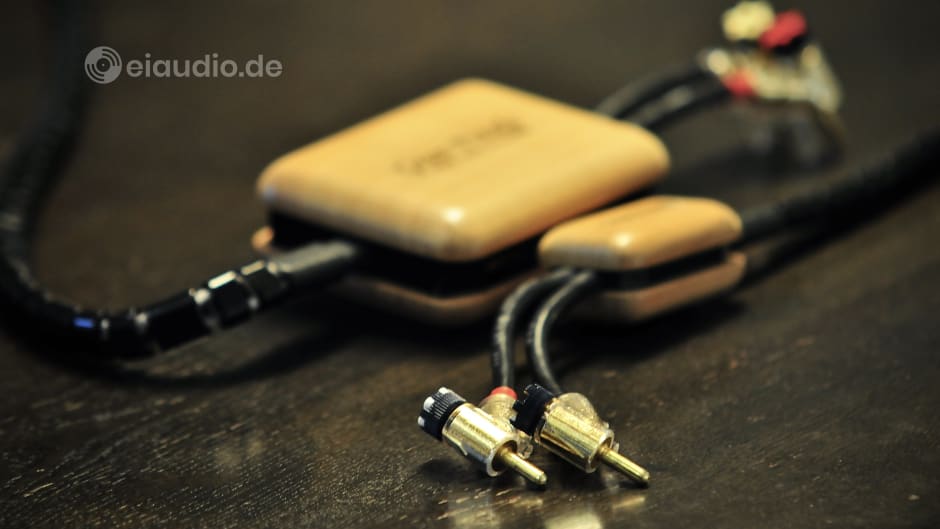
HMS are the name initials of one of the pioneers in audiophile music reproduction. Hans Martin Strassner’s interconnects, power cables, and speaker cable designs, are often the culmination of a long journey in Hi-Fi. The Hans M. Strassner GmbH is based in Leverkusen, Germany, and began as a specialised electronics laboratory that developed testing equipment for German industry, before it produced its own set of audio cables in 1993. HMS showed its heritage in research and development in their corporate claim “Messtechnik für Forschung und Industrie”, before this was changed to the more internationally comprehensible “Kompetenz in Kabeln”.
Strassner believed in the importance of perfectly matching the characteristics of amplifiers with the attached loudspeakers to achieve the best quality in sound. And since the speaker cables formed one electrical unit with the loudspeaker’s internal wiring and crossover, the electronics for matching could most easily be positioned there. Hence, from the company’s very beginning in 1993, the HMS line of speaker cables included a box with electronics to be used for amp-to-speaker matching. Strassner never made a secret of the components used in his designs and invited the press to have a look inside. And yet, his designs remain unmatched to this day and have resulted in a number of acclaimed successors in each HMS product line.
The HMS Gran Finale was launched during the mid-1990s and featured Strassner’s signature ‘TOP-Match’ technology. The cable presented here was among the first Gran Finales ever produced and was later succeeded by the 'MKII' and 'Jubilee' (2010) versions in which the materials and components used were further developed and optimised in both single and bi-wiring versions. Recently, the Gran Finale's prime status was diminished by the release of the "HMS Suprema LS". However, this is not to suggest that the original Gran Finale version was lacking in quality or performance. At the time of its release, the cable was the company’s top-of-the-line product and featured everything that HMS understood about loudspeaker cable design.
Its most obvious features included two network boxes with lacquered cherrywood cheeks, high-quality WBT spades and banana terminations and tight-fitting, black-lacquered ferrite beads that were perfectly spaced out along the cables. While the spades were to be clamped down by the amplifier’s terminal screws, the bananas were of split design and could be fixed in position by means of a centre screw. The result was a permanently tight-fitting connection that would stand the occasional accidental tugging. Each cable came in its own foamed suitcase for storing, which contributed to the high-quality touch-and-feel of the HMS Gran Finale.
I installed the HMS cables on our main system featuring our Restek V1 preamplifier with an H&S Exceptional amplifier on Martin Logan SL3 electrostatic loudspeakers. A Sansui SR-525 turntable (with AT-VM95 ML cartridge) and Rega Planet 2000 CD player served as music sources. All units were interconnected using our standard solid-core silver cables with copper-mesh shielding and silver terminations. On the HMS Gran Finale, the switchable TOP-Match box was positioned on the side of the speakers and the bananas screwed in position. Since the component matching was done via two switches in the TOP-Match box, of which each had three positions allowing for 9 setting combinations, I began my listening in the recommended start position with both switches flipped inward into position 1.
The Gran Finale’s ferrite bead design was a testament to Strassner’s belief that all cables, regardless of lengths, acted as antennas and would carry external noise interference in addition to the desired music signals. This observation is particularly significant for our time in which local Wi-Fi networks overlap with all kinds of digital and cellular communication, to create an increasingly complex mesh of interference on many levels and at all times. Strassner explained that the faster the noise signal was, the more likely it would exceed an amplifier’s slew-rate and result in an audible augmentation of the music signal. In addition to preventing external high-frequency interference, the ferrite beads also protected from local EMF that could be caused by cables crossing or running in parallel to each other and also reduced the amount of stray current from the speaker cables themselves in order to minimise signal loss. For improved signal flow inside each cable, Strassner made use of Teflon beads that served to create air pockets around the central conductor while adding structural stability and damping.
With both switches set to 'position 1' in the manual, my first impression was generally positive but not yet ideal. From the very beginning, the sound was smooth and not at all edgy or unaccomplished. The tonal balance shifted towards dark with a slight sense of the bass frequencies being bloated. During faster passages, e.g. in Tony Bennett and Diana Krall’s album “Love is Here to Stay”, the bass lines alternated between bloated and wooden with some lack of control. Voices, too, were on the heavy side, as if the singers had spent a lifetime filled with heavy vaping. Tonal colours appeared overly dense. At the same time, there was a sense of transients being unnecessarily cut short. In this first setting, I felt a constant urge to turn up the volume in order to hear more nuance. I checked the cable's operating manual and found that 'position 1' had been designed for easy to drive 2-way speakers with a flat impedance curve and amplifiers of a damping factor of around 30:1 to 100:1.
Our system was none of the above. The electrostatic drivers instead acted much like capacitors and created high-frequency impedance of sub 2 Ohms. In addition to this, the H&S Exceptional amplifier had a damping factor rated at a formidable 800:1. I started exploring the settings of the TOP-Match box by shifting lever A into middle position (position 3 in the manual) and sat down to listen. I could sense a slight decrease in bass-bloating. Voices, however, were still not as believable as I was used to. After testing all possible combinations by exclusively focusing on Tony Bennett and Diana Krall’s voices, I ended up with both switches leaning outward (position 2 in the manual). I then sat back and listened to the result.
The HMS Gran Finale had lost some of the (at first) impressive lower bass, but now it played a beautiful and highly accurate midrange. Bass, too, now seemed far less accentuated than elegant. Transients were natural with lots of clean spaces between the instruments. The music painted natural colours, and I no longer felt the need to play loud. The longer I listened, the more I noticed how musical these cables had become, increasingly stepping out of the way of the original music event. The stage showed excellent left-to-right panning with a focused, yet wide centre image. While the stage had been lacking depth at first, there now was a pleasant interaction with the listening room that made Tony Bennett and Diana Krall’s Jazz performance really feel alive. I enjoyed listening these cables very much and began dreading the day that I would have to give them back.
The last time I had felt like this was during my test of the Madrigal (Mark Levinson) flat-cables that had reached a similar result by walking a completely different path. The Madrigal had followed the concept of integrating the loudspeakers on the amplifier’s circuit board by rolling out a 50mm wide and flat solid-copper sheet. The HMS Gran Finale, instead, followed the path of shielding their cables as if they were enclosed in the amplifier’s own metal cabinet. And although I am a normally great fan of solid-core cable designs, the Gran Finale’s 1,000+ stranded and braided design lead to a very similar result. While both cables were among the best of their kind, I would probably prefer to own the HMS gran Finale for its TOP-Match cable-to-amplifier accommodation versatility, the unobtrusive look, and the relative ease of installation.
Specifications
- Resistance (R): 10.4 mOhms per meter
- Capacitance (C): 2 nF per meter
- Inductivity (L): 84.6 nHenry per meter
- Conductor material: oxygen free copper (OFC)
- Conductor layout: 1,000+ stands per wire
- Wire diameter: 4.14 sqmm
- Termination: WBT banana plugs and spades
- Length: 2.50 m
- Weight: 850 gr per cable
- Year: 1995 (approx.)
- PDF: Operating Manual (original version)
MIT Terminator 5
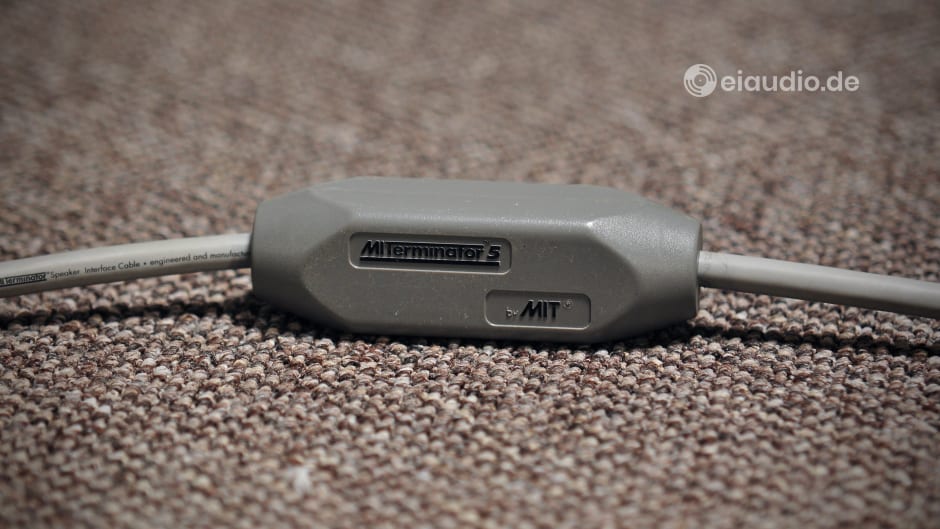
Published: 06/06/2024
Manufacturing date: 1995
Author: Karsten Hein
Category: Gear & Review
Tag(s): Speaker Cables
The innovative MIT cable company is based in Reno, Nevada. And, although their acronym is the same, there is no relation with the world-renowned Massachusetts Institute of Technology. Much rather, the cable company’s letters stand for “Music Interface Technology”. Bruce Brisson, the head and master mind of MIT, is most famous for his research on how to eliminate the typical comb filter effects on signal cables. The Terminator 5 speaker cables were launched in the mid 1990s and already employ MIT’s patented multi-pole network technology.
The Terminator 5 offer a single-wire design that measures an impressive 12 mm in diameter. The specimens given to me for testing measured 3.60 m in length, with the network box (14 cm in length) starting at 2.60 m distance from the amplifier or 2.46 m from the loud speakers. With the signal direction indicated by small arrows running along the sides of the cables, the network box must be placed closer to the speakers than the amplifier. In most setups, the trademark network box with logo will therefore be visible somewhere in the open space between the loudspeakers and the HiFi system that drives them.
I first listened to the Terminator 5 cables perform at Matthias’ house when auditioning his Duevel Bella Luna loudspeakers. He was driving his omnidirectional horn speakers with a Devialet Expert power amplifier, and one of the first things I noticed was a slight midrange compression that I primarily attributed to the horn drivers of the loudspeakers. It was only upon closer inspection of the system that I saw a loop having formed on one of the MIT wires, most likely due to a careless moment during their installation. We got rid of the loop, and the horn compression effect bothered me much less, although some minor traces of it still remained.
When Mattias upgraded his HiFi system from the Duevel Bella Lunas to their flagship Jupiter speakers, he also swapped his MIT Terminator 5 cables against more capable contenders. And, seeing that I was interested in the MITs, Mattias suggested that I take them to our new studio in Marne for a more thorough examination. I was thrilled to be given this opportunity and quickly agreed. After all, one year had passed since I first listened to the Bella Lunas, and I had since then come a long way in my own explorations. The new studio, especially, had given me the chance to explore the subject of sound more deeply than ever before.
In the cable test that followed, I compared and contrasted the MIT Terminator 5 with three other popular vintage brands: Mark Levinson’s HF-10 C, a Swiss-made 10 AWG multi-strand ultra-pure copper wire; Symphonic Line’s Harmonie HD; and Sommer Cable’s entry-level Elephant cables. All of them had previously been re-confectioned with gold-plated banana plugs to increase usability over the original spades. There is not much I can say about the quality of the (mostly solid prong) connectors other than to state that they were all free from visible wear and corrosion. The Sommer Cables were the only ones using hollow banana plugs, which happen to be my personal favourite when confectioning wires.
My listening setup consisted of a Restek V1 preamplifier with external “Kassel” power supply. The preamp had been upgraded with new caps and ops by Restek a few years earlier and had generally performed well since. The amplifier was Symphonic Line’s RG11 MK5 S. I used Symphonic Line’s “Das Schnelle” interconnect between my Cambridge DAC Magic and the preamp as well as an older Symphonic Line Harmony HD cable between the preamp and the power amplifier. The Sansui SR-525 direct drive turntable was connected via my own silver solid-core interconnects, which generally served well in this position.
Connecting the Terminator 5 to my Tannoy XT8f floor-standing loudspeakers, I noticed how positively solid the single-wire design makes these cables feel. The materials are highly durable and still looked great after more than 30 years of service. As none of the wires in my test were made for bi-wiring applications, I had re-fitted the Tannoy’s dual binding posts with bridges made of 4mm solid-core copper wires cut and stripped from home installation cables. I connected the speaker wires in the typical fashion for single-wiring, directly addressing Tannoy’s dual-concentric drivers and then running the bridge down to the bass units from there.
From my listening position, I enjoyed the sophisticated look of the MIT cables. The network box was placed on the carpet floor right next to the speakers with the Terminator branding being clearly visible. This was my most “modern”-sounding setup, as the Tannoys could offer lots of musical detail, and the Restek V1 preamplifier, too, contributed to an open and transparent sound. The RG11 MK5 S is a highly musical and exact amplifier offering superb dynamics as well as tonality. From my first impression, it did not sound quite as tonally dark and rich as the Symphonic Line RG9 integrated amp, which would again appeal to a more modern Zeitgeist. The Symphonic Line interconnects could be quite unforgiving of flaws, and it was good fortune that neither of the components had the tendency to sound harsh.
I played music from two CDs: The German “Stereo” magazine’s song compilation “Die Hörtest CD Volume IX” lent to me by Arndt Voss and Diana Krall’s “Only trust your heart”. Stereo magazine’s CD offered the greater recording quality and more variety in the songs, however, I knew Diana Krall’s CD better, which allowed me to comment more accurately on tonality. On my Sansui turntable, I played Jazz albums by Helge Lien in order to have an alternative yardstick to the CD player and DAC. The MIT cables were the first specimens I auditioned in my test. I turned on the RG11 MK5 S and felt the reassuringly solid clang of the new Super-transformer being magnetised, long before the relays clicked in to engage the loudspeakers. I believe, there is no sensation quite like the buzz of powering up this amp.
Eduard Strauss’ “Bahn frei Polka” is a classical music piece performed by a large orchestra, and I was quickly reminded how important correct tonality is in maintaining order in multi-layered music. The MIT Terminator 5 supported the clean presentation by keeping a dark background. This assured an ordered and sophisticated sound. On Scotty Wright’s “Sound of Silence” I noticed the MIT’s midrange-focus and clarity that was topped off by a soft and silky treble. The singer did appear a little smaller than was otherwise usual on this system, and there was also that sensation of squeakiness again, which I had previously encountered when visiting Matthias. This was especially noticeable on female vocals, as I experienced with Tokunbo’s song “New June” but also when listening to Diana Krall's performances. I examined my system to see if either of the cables had accidentally become entangled behind the rack, but I could find no such fault.
In addition to the slight compression of the midrange, I could detect a bass hump in the area of 100-150 Hz. While this had worked well with Matthias’ Jupiter speakers, it did lead to occasional resonances in my listening setup. California Project’s song “Wouldn’t it be nice” starts with an ultra-loud drum beat. In combination with the Terminator 5 cables, I must confess that I almost fell off my chair. Dynamics in the kick-bass frequency range were truly beyond the ordinary, and none of the other cables packed such punch in this category. The MIT offered a super-wide stage impression and superb instrument separation on an otherwise black stage. This characteristic was supported by their ultra-quick sonic decay. I also noticed a preference towards warm and wooden tones. Tonality therefore was a bit more confined and not quite on par with some of the best (but also more expensive) cables I have heard.
Despite being more than 30 years old, MIT’s Terminator 5 provided an enjoyable and engaging listening experience with a sophisticated presentation. Their slight lack of tonal accuracy might easily be forgiven, considering the many advantages the cables offer. Among these were: Superb dynamics, a generous stage width, the physical separation of instruments from left to right (not so much tonally), a leaning towards pleasantly warm wooden tones. They were also capable of surprisingly low bass, whenever this was provided by the source material. The cable fits music genres that is fast and punchy, such as electronic music, Pop, Rock, etc. Due to its tweaked tonality, it would probably not be the first choice for listeners with a preference for Classical music, Vocal Jazz, or Singer Songwriter, unless it is able to balance out existing system flaws leading in the opposite direction.
Specifications
- Type: Single-wire loudspeaker cable
- Directional: Yes. Indicated by arrow.
- Length tested: 3.60 m (per channel)
- Termination tested: Nakamichi banana plugs
- Cable diameter: 12 mm
- Compensation: via network box
Madrigal Flat Copper Core

Madrigal Audio Laboratories was founded by Mr Sanford Berlin during the mid 1980s and took over Mark Levinson, the manufacturer of high-end audio products, in the same year. In the company's nearly 20 years of existence, Madrigal owned a number of famous audio brands, such as Audioaccess, Proceed, and Imaging, who developed and produced some outstanding Hi-Fi products, before Madrigal was ultimately absorbed by the Harman International Group in 2003 and saw its headquarters closed down later that year.
The loudspeaker cables shown here were manufactured by Madrigal Mark Levinson during the late 1980s, most likely in an attempt to answer the question of how speakers would sound if they could be integrated directly with the amplifier's circuit board, rather than being connected by means of sound-compromising speaker cables. This notion may seem perfectly understandable to an audio engineer, but it perhaps needs some explanation to be fully appreciated by those outside the industry.
Right from the first gramophones, audio reproduction had originated from a single source that transmitted its signal directly to some type of transducer. The first radio receivers were of mono design, and their loudspeakers were integrated with the electronics. It was only with the advent of stereo listening that loudspeakers needed to find their own place further away from the electronics driving them. People listening to broadband speakers connected to their home stereo setup during the early 60s may not have noticed the loss of signal integrity so much, however, as loudspeaker cabinets, crossovers, and driver technology became more sophisticated during the 1970s and 80s, the design imperfections of loudspeaker cables were gradually being exposed.
Manufacturers of audio equipment such as Madrigal Mark Levinson had an interest in demonstrating the benefits of their improving technology to their customers and noticed that some portion of their research was lost even before the music signals reached the loudspeakers, simply due to the fact that the wires connecting each step of the process were a compromise in themselves. The standard speaker cable during the 80s was, much like today, made up of two multi-stranded copper wires of a smaller diameter (i.e. higher gauge / AWG). While this would serve to establish the basic connection for current to flow, the question was, if this presented the best possible solution. Madrigal went back to the drawing board and developed a speaker cable that was designed based on its sonic merits alone, leaving all other aspects aside and true to the Bauhaus motto: "Form follows function".
By the 1980s, it was already known that solid-core wires offered greater musical homogeneity over all frequencies by limiting Eddy currents within the cable. It was also known that electrical current mostly ran along the outside of the wire. Madrigal’s aim therefore was to design speaker wire that was made of a single core and still offered the large surface of a thick and multi-strand wire. The result was a flat, ultra-pure, solid-core copper cable of 50mm in width per strand. In its original design, both one positive and one negative strand were stacked on top of each other, leading to an ultimate width of 100mm. Since this made the cable quite unmanageable in everyday usage, the Madrigal's original owner decided to separate the two strands.
I decided to install the speaker cables on our main system. This consisted of our Restek V1 preamplifier with an H&S Exceptional amplifier driving our Martin Logan SL3 electrostatic loudspeakers. Our Sansui SR-525 turntable with AT-VM95 ML cartridge and Rega Planet 2000 CD player served as music sources. All units were interconnected by means of solid-core silver cables with copper-mesh shielding. I had recently written a review of the H&S Exceptional amplifier and was eager to find out, if the change of cables would lead me to a different impression of the amplifier. And, while I normally set up our system in bi-wiring with our Belden 9497 speaker cables connected to a single point of contact on the side of the amp, I used bridges with the Madrigal cables, half expecting that I would not be able to hear any improvement.
I need not have worried. The Madrigal Mark Levinson solid-core copper cables turned out to be a game changer by any definition. OK, they were difficult to connect and to place behind our rack, and, yes, they looked pug-ugly with the wife-acceptance-factor (WAF) of a spaceship having parked in our garden, but these unique cables were able to drive our large Martin Logan speakers as if they were tiny headphones. José González’s album ‘Local Valley’ surrendered even the minutest details in the recording some of which I had yet been unfamiliar with, even from listening to the album with our AKG K712 headphones. The H&S Exceptional was a powerful amp that exerted lots of control in driving our Martin Logan speakers (also in terms of back-current decay), and these qualities worked very well in combination with the Madrigal cables.
I found that the Madrigal Mark Levinson flat cables facilitated a tonally rich and highly musical presentation on our system. Although laden with recording details, their imaging remained focused, leaving lots of natural space around each tonal event. Homogeneity, order, and intimate vocal charm were their strong points. They helped to promote natural dynamics and were fully rhythmical and engaging throughout. It seemed that the Madrigal cables were capable of cutting the music free from any unnecessary constraints. Both the amplifier and the speakers disappeared from the music. Could these be the perfect speaker cables? Well, thus far, I have heard nothing better. Not by a long shot.
Specifications
- Design: solid-core
- Material: ultra-pure copper
- Termination(s): spade and banana
- Length: 230 cm per channel
- Width: 2x 50 mm per channel
- Weight: 537g per channel
- Country: USA
- Year: 1988
If you should have any further or different information concerning these speaker cables with regard to their original name, precise manufacturing date, and origin, please contact me at karsten@eiaudio.de
Mark Levinson HF-10c

Published: 15/07/2024
Manufacturing date: 2024
Author: Karsten Hein
Category: Gear & Review
Tag(s): Speaker Cables
“Don’t know how you’d find me, I don’t look much like the photos. Whatever man you’d come to look for, I’m not him.” sings Sean Keel, smack centre and wonderfully surrounded by the sound of acoustic and slide guitar lingering miraculously suspended in our studio. I can tell that my old Denon DCD-1420 is at times having difficulty keeping its worn-out laser optics focused on the track, thus giving Sean’s already cracking voice an even more endangered and fading impression. The amplifier of the evening is my thirty-year-old Uher UMA-1000, which—in combination with Luigi’s Mark Levinson HF-10c speaker cables—lends sonority and substance to Gabriel Rhodes’ sparse piano notes.
Keel's voice sounds musty with age and wisdom: “You sang blessed assurance. And then it was my favourite song.” The firmness and tonal richness with which our Tannoy XT8f speakers present each key stroke confirms the reality of assurance, despite the risk of losing it all right in the next second. It is a good evening for listening to slow music, with each note as distinct as it can be. Perhaps it is the start of the holiday season that supports this vast amount of clean energy from the grid, perhaps it is my cheerful mood, following the return of summer after a seemingly endless winter season that dragged on well into July this year.
Having been out of service for a long time, the large and heavy Mark Levinson copper cables proved difficult to resuscitate. Luigi had handed them to me without proper terminations and, in passing, told me to get some plugs that would fit the 6mm cable diameter. It was typical of Luigi’s suggestions to require at least some form of effort from my side. And I was usually only too eager to simply tag along. I liked the lockable gun-shaped WBT-0610 CU banana plugs that I had first seen on the HMS Gran Finale cables, but I was reluctant to spend that much money on a pair of cables that weren’t my own. I therefore ended up with an affordable replica of the WBTs, hoping that I would (from an audiophile’s perspective) get away with it.
It was obvious that the cable ends had seen some oxidation in their time, despite the fact that their bundle of individual strands—each no thicker than a human hair—was soldered to a single chunk at the point where the original terminations had been. I firmly sunk the hexagon screws in the solder, fully aware that these cables would take still considerable time to break in. On a side note, I have sometimes found that break-in times do not require the equipment to be running all the time, for as long as the components remain connected. The very fact that copper, led, brass, and gold are brought in direct contact with each other already leads to a slow homogenisation of electrical properties at the transition points, minimising the resistance between them. This is not a scientific statement, just something I have acoustically observed when confectioning and listening to new cables over the first couple of weeks.
I call the Tannoy XT8f setup my “new” system, not so much because of the age of its components, but because of the Tannoy’s relatively “modern” sound. Loudspeakers of our time tend to be tuned to measure well in the labs, whereas the engineers of the past did not have lots of fancy measuring equipment at their disposal. They almost exclusively had their ears to rely on. And—believe it or not—human ears are not a bad yardstick when it comes to making decisions on the merits of sound. This also explains why some classical instruments still sound superior to modern gear, despite the fact that technology has involved. The Mark Levinson HF-10c in combination with my old Uher amp make my Tannoys sound “musical” above all else, and this despite their tendency to sound modernly analytical.
Music becomes impressive with dynamics, but it only comes alive with tonality. The HF-10c support darker and more full-bodied tones. Pair them with a weak amplifier, and you will witness the life being sucked from the amp. The 150 watts per channel Uher, however, has no difficulties driving them. I can hear the amp, too, slowly coming out of its many years of hibernation. “World’s got a brand new baby, I lie awake listen to her bawl. Must feel a lot like flying.” Tonight, I understand what Sean means by it. I enjoy evenings like this, when the air smells clean after the rain, and the setting sun forms square orange patches on the otherwise anthracite carpet and the wooden beams in our studio.
I am reminded of the Madrigal Flat Copper cables that Luigi handed me for audition back in January 2022. Mark Levinson related products always seem to have an interesting twist to them. Something that makes them a keeper, even if the times have moved on. The musicality of the HF-10c is quite striking, even though speed, detail, and bass control are perhaps not their greatest forte. After all, these are not exactly shortcomings, when it comes to mitigating the deafening effects of high-power amplifiers. And Mark Levinson certainly has some of those in the house. High damping factors, lots of clean burst power right up into the treble, beryllium or titanium dome tweeters on loudspeakers, all these lab approved technical overkills will find a soothing counterbalance with these cables.
Going through my usual repertoire of Folk, Jazz and Vocal Jazz, and Rock, the HF-10c maintain a soft and silky treble that is assuringly non-aggressive even when listening at higher volumes, a charming midrange that I can quickly warm up to, voluptuous true to life vocals that are displayed on a wide centre image, warm tonality and (especially in Jazz performances) a realistic amount musical detail. The sound is tube-like, rich and wholesome with stern piano notes. The cables offer a medium length of sonic decay, not as shortly cut as MIT’s Terminator 5 cables and not as long-lasting as Symphonic Line’s Harmonie HD.
In terms of potency, the Mark Levinson remind me of the Symphonic Line cables, although they are quite different: The Symphonic Line play louder and are more agile. When piano notes become piercing, this is apparent on the Symphonic Line cables first, because the HF-10c are far more forgiving. Bass control is firm and punchy on the Harmonie HD and perhaps overly punchy in some frequencies on the MIT cables. To achieve the same result of bass contour and punch with the HF-10c, one would need an amplifier with massive power and a high damping factor. And I do believe it was this powerhouse of an amplifier that the Mark Levinson engineers had in mind when they commissioned the HF-10c with a cable specialist in Switzerland following their legendary “never-mind-the-cost” approach.
Specifications
- Type: ultra-fine multistrand speaker cable
- Diameter: 10 AWG (5,26mm) copper strands
- Gap between strands: 5mm
- Conductor material: ultra-pure copper
- Length tested: 2x 2.24m (stereo)
- Terminations: adjustable bananas, 24K gold-plated
- Country of manufacture: Switzerland
- Year: approx. 1992
Symphonic Line Harmonie HD

Published: 09/06/2024
Manufacturing date: 2023
Author: Karsten Hein
Category: Gear & Review
Tag(s): Speaker Cables
“I would not focus on cables so much, as long as you like the sound and they fit your equipment.” Heinz-Peter said to me over the telephone the other day. — This was not the response I had been hoping for, considering that I had just completed my review of MIT’s “Terminator 5” speaker cables and was diligently working on my articles on Symphonic Line’s “Harmonie HD” and Marc Levinson’s “HF10C”. On the other hand, I knew that HP was right in suggesting that we always listen to a system and rarely to an individual component. This makes cable discussions rather futile and has led to many misunderstandings between audiophiles. Despite all this, even the most sceptical listeners will agree that cables can make or break a great system, and I therefore do believe that they deserve to be discussed in terms of the contributions they make, even if these observations are not finite. After all, how are we to discuss even loudspeakers, if the rooms they are placed in and the HiFi systems that are driving them are not identical?
It is probably fair to say that Symphonic Line speaker cables are primarily designed to work with Symphonic Line equipment. This is especially so, because Rolf Gemein produces HiFi components reaching from power cables via tuners and CD players all the way to the speakers themselves. However, this is not to say that his speaker cables will not work with HiFi gear from other manufacturers as well. In fact, most of my audiophile friends compile their systems with components from many manufacturers and tend to own multiple devices of each product category for system matching and fine tuning. Therefore, this absolute trust in a single HiFi manufacturer to deliver all the components of a system—and this is what it would require if we were to place components matching in the hands of a producer—must be rare. It is also true that some manufacturers only have a single HiFi component of true High End quality in their product portfolio. In this case, the matching of devices across brands becomes a necessity rather than a matter of choice.
It is probably fair to say that we learn most about the characteristics of one HiFi component by successively pairing it up with components from a wide range of manufacturers. The sound signature that is derived from the various combinations serves to reveal the special contribution this component makes to sound: It is the one constant that remains when everything else around changes. Components become familiar individuals, similar to a friendship that becomes deeper and more multi-dimensional as it matures over time. Perhaps it was this perspective that allowed me not to be deterred by HP’s cautious advice and to let myself be guided by the continued urge of exploration that comes so naturally to me and has long since been the basis of this blog.
I set out to test the Harmonie HD speaker cables on my most modern-sounding HiFi setup. This consisted of Tannoy XT8f Dual-Concentric loudspeakers, a brand new Symphonic Line RG 11 MK5 S power amplifier, with upgraded S-transformer, and my recently refurbished Restek V1 preamplifier with fresh caps and improved ops, as well as a custom-built external power supply by Hermann Kassel. My music sources were a Sansui SR 525 turntable, with AT VM540 ML cartridge, and a Denon DCD 1420 CD drive connected to a Cambridge DAC Magic. While this front end did not consist of the highest flying components in the business, both the Sansui turntable and the Cambridge DAC are solid and musical performers that leave very little to complain about. And—important for our gear comparisons—this was the exact same setup that I had previously used on my review of MIT’s “Terminator 5” speaker cables.
Whereas the MITs use a mono-cable design to unite the positive and the negative wires under a single (and quite thick) cable sheath, the Harmonie HD take the opposite approach. Each wire not only uses a separate Teflon dielectric but is also individually wrapped. Although these cables are flexible enough to be rolled up on a large spool, they do not like being bent into small loops and, due to their weight, naturally assume a flat position on the floor. Each cable has an indicator to show the signal direction, and HP informed me that the cable marked red should be connected with the arrow pointing towards the speakers whereas the arrow on the cable marked black should point in the opposite direction. This way of connecting speakers was new to me, and without these instructions, I probably would have connected the black wire’s arrow pointing in the same direction as that of the red wire. My specimens were terminated using Stäubli’s famous Multi-Contact plugs.
When it comes to the terminations, I would have preferred the reduced mass and superior contact of hollow bananas myself and could also feel the slight wobbliness of the plugs in the sockets. However, I decided to forget about this phenomenon, until I had a chance to properly listen to the cables. The music material I chose was varied: Helge Lien’s album “Hello Troll” on vinyl; the German Stereo magazine’s sampler “Die Hörtest CD Vol: IX”, Nick Cave’s live solo concert “Idiot Prayer”, and Laura Kipp’s 2023 album “Sunset Balcony” on compact disc.
Compared with the MIT “Terminator 5” cables, the difference in sound was enormous. The Symphonic Line cables sounded quite a bit louder. Whereas the MIT had given preference to bass punch and a dark setting to the music, the Harmonie HD cables appeared dynamically capable and fast across the frequency band. I noticed a perplexing increase in fine dynamics and detail, which the MITs had previously hidden. Sound was at once highly energetic, engaging, and entertaining. The midrange compression of the Terminator cables was gone, and vocals sounded sweeter and highly believable. The stage impression was natural, although the spaces between the instruments appeared a little fuller than would have been perfect. The amount of detail and attack seemed quite overwhelming. Especially the “Hörtest CD Vol: IX” produced a consecutive chain of musical highlights, up to the point where I started to wonder, if I would actually be able to listen to music of this intensity over a longer period of time. Permanent crescendo and vast amounts of detail might be impressive at first, but they are not very realistic.
“A highlight is the special moment in which the music rises above itself” my HiFi chum Luigi used to say. And, for a moment, I could appreciate what he meant by it. I therefore decided to exchange the Restek V1 preamp with the Symphonic Line RG9, still feeding into the RG 11 MK5 S power amplifier. As I sat down to listen, I was happy to observe that the overly eager presentation of the Restek had been replaced by calm sophistication. Although the music was still detailed and dynamic, the vocals were even sweeter. New spaces had formed between the individual instruments, both dimensionally and—as Symphonic Line does so well—tonally. Tonal separation and accuracy might just be the most perplexing and alluring aspect of listening to music. Superb transients and realistically long decay made for a highly musical listening experience.
My personal listening preference is for Jazz combos, singer-songwriter, and Folk music. This is possibly so, because I enjoy the recognisable instrumentation, the natural order, and the hand-made simplicity of it. All the more, I was surprised by how well the Harmonie HD managed to maintain these dimensions in Eduard Strauss’ fully orchestrated title “Bahn frei Polka”, and they did so without sacrificing detail and speed. Scotty Wright’s rendition of “Sound of Silence” includes a slight touch of harshness in the vocal recording, which became less pronounced with the RG9 as preamp but was still audible. In “New June”, Tokunbo’s voice was sweet and alluring, while freely levitating over a seamless carpet of puckering bass. Nick Cave’s impressive pandemic-year solo performance of “Idiot Prayer” at London’s Alexandra Palace revealed a youthful, boyish charm in his voice that took me by surprise. I was quite familiar with the album, and remembered his voice to be older.
Listening to this setup made me want to browse through my music selection once again to see what else I had missed in the recordings. Symphonic Line cables are relatively insensitive to distortion when touching and crossing themselves and other cables. However, I have found that they, too, benefit from a faultless installation, if they are to provide undisturbed transductance, which translates into tonal and spacial correctness, and fully intact micro-dynamics. The Harmonie HD is a fast and revealing loudspeaker cable that is capable of pairing a balanced tonality with dynamics and detail. Its agility and clarity make it unforgiving of faults in the system, particularly near the music source. Depending on your taste in music and your knowledge of how to properly set up your HiFi system, you might find this either be a true blessing or a curse. Either way, it is going to make its mark on your system.
Specifications
- Type: single-wiring loudspeaker cable
- Features: fully shielded, directional
- Length(s) tested: (2x) 4.00 meters
- Termination: Stäubli Multi-Contact
- Weight: 2,058 g (per stereo pair)
- Country of manufacture: Germany
- Year(s): 1994 - today

WSS Platin Line LS4
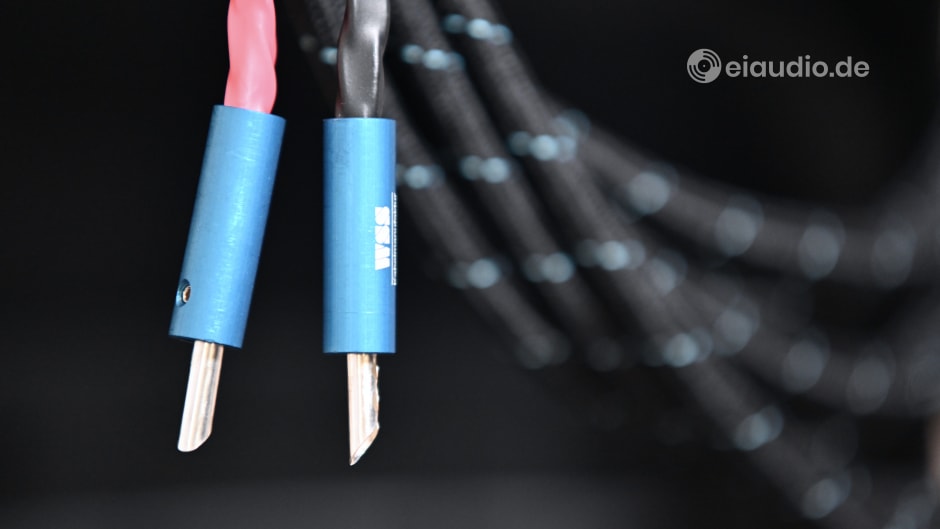
Published: 15/03/2025
Manufacturing date: 2025
Author: Karsten Hein
Category: Gear & Review
Tag(s): Speaker Cables
The WSS-Kabelmanufaktur GmbH & Co. KG run by Jochen Bareiß has been quietly manufacturing affordable High End loudspeaker cables from its home base in Nürtingen since 2002. Each cable is built to WSS specifications and combines highest-quality materials with patented made-for-audio designs. Since its very beginnings, the company has maintained an excellent reputation among audiophiles for its expertise in cable design and down-to-earth product pricing.
A Trusted Standard.
When Daniela Manger entrusted me with a pair of P2 loudspeakers at the Norddeutsche HiFi-Tage trade fair in early February 2025, she mentioned that her speakers performed best when set up in combination with WSS speaker cables. As I still held the company name in good esteem from listening sessions with my former HiFi mentor Luigi di Adamo, I was not surprised by her suggestion and agreed to take this into consideration for my review. The circumstances at the fair, however, prevented me from taking the WSS cables home with me that day. Instead, Daniela asked Jochen Bareiß to send me a pair of his Platin Line LS4 speaker cables by mail.
As, upon my return to our studio in Marne, the WSS cables had not yet arrived, I first set up the Manger P2 using my standard Belden 9497 speaker cables. The amplifier was a Symphonic Line RG10 MK4 Reference in combination with Rolf Gemein’s newly designed Music Cable power cord. My music sources were one trusty Thorens TD320 turntable, featuring an Audiophonics linear power supply and Audio Technica VM95 ML cartridge, as well as a Marantz CD-17 “Ken Ishiwata Signature” CD player wired with Symphonic Line Harmonie HD interconnects. To unleash its audiophile potential, our Thorens was placed on a vibration-cancelling base that was built by Klaus Finnern of Nordic Wood Art for me. Some degree of resonance treatment had also been applied on the Marantz player for a similarly positive effect.
The first listening sessions already revealed a level of sophistication that was highly convincing, with the Manger P2 speakers boasting musical detail and transients that I would rather have expected from our electrostatic Martin Logan SL3 speakers. As I had never heard the Manger P2 perform even remotely at this level while visiting any of the audio shows, I was relieved to see that my review would be a positive one after all. And although Manger’s bending wave driver concept made perfect sense from an acoustic perspective, the fabled transducer did prove to be demanding in terms of front-end integrity and room placement, if it was to show its full potential. In sum, I felt deeply satisfied with the P2’s performance and started to have my doubts whether the WSS cables would have anything more to contribute to this.
First Impressions.
The set of Platin Line LS4 speaker cables came in two simple yet sophisticated suitcase boxes with inner foam lining. One box held the pair of single-wiring speaker cables and the other contained the four cable jumpers for the bi-wiring terminals. All cable ends were terminated with hollow bananas featuring a beryllium/copper base and rhodium-plated surface. The exception was of one of the jumper ends, which featured a spade in order not to get in the way of the speaker cable’s hollow banana plugs. Similar to the Symphonic Line Harmonie HD speaker cables, the WSS Platin Line LS4 use one separate wire strand for the positive and one for the negative connector. On the WSS cables, however, these stands are then joined via shrink tube sleeves at both ends and loosely twisted together for additional shielding effect. The cables look unobtrusive, feel solidly robust, and are well manufactured.
Having connected the LS4 and returned to my listening chair, it did not take me more than five seconds to realise that these speaker cables were indeed special. They had the ability to acoustically step aside and let the music play. The amount of dynamic freedom was more pronounced than on any of the setups I had heard before. While the Belden were superb sounding cables that offered a sense of harmony commonly associated with solid-core designs, speed and agility similar to silver wires, and the musical insights of a low inductance cable, the LS4 did all of this and elevated the experience to a whole new level. For the first time in my audiophile listening explorations, the characteristics of the HiFi system acoustically separated themselves from the recording to set the music free.
I could understand Luigi di Adamo’s long-time fixation with WSS cables and also see why Daniela Manger had nudged me to review her speakers with the LS4 cables. In the end, it was not just one characteristic alone, but a combination of many that made the Platin Line LS4 so potent. Agility and rhythm, tonality and timbre, transients and decay, bass and treble extension: neither of the acoustic properties can fully describe the transformation that happens when the degrading effects of a cable disappear to make its properties invisible to the ear. It was at that moment that I decided to give Jochen Bareiß a call to learn more about the company history and the philosophy behind the LS4 cables. However, as Jochen is quite busy running the WSS Kabelshop, his Hoerenswert-HiFi studio, and visiting trade fairs, I did have to make a few unsuccessful calls, before he eventually called me back and we could have our long talk.
What and Who is WSS?
In this talk, Jochen explained that WSS (the acronym for wire@sound systems) was originally founded by Konrad Wächter in 2002. Wächter was a genuine cable expert who had migrated from the former East Germany to the West in search of better opportunities for his exceptional skills. He was soon hired to run the engineering department for Specialised Cable Applications of a Stuttgart cable works. Wächter later left the company to found his own Kabel Wächter GmbH, a company soon to be known for its innovations in cable designs. When he finally sold the company in 1995, he had many patents to his name and the financial freedom to do what he enjoyed.
As Wächter was not only a cable expert but also an active musician who had studied the bassoon, the idea of manufacturing cables for music applications presented a great opportunity for him to combine his passions in a single project. The Platin Line LS4 is a testament to Wächter’s dedication to music, in that it allows the original signal to reach the loudspeakers without the loss of detail and dynamics associated with broad frequency cable connections. At this time, Jochen Bareiß was running a HiFi studio not too far from Wächter’s new cable company and started to sell them in his shop. He became a regular customer, so that a friendship formed between the two men.
In 2019, Jochen joined WSS to handle the administration of the business, and preparations were made for Konrad Wächter to retire. Jochen Bareiß renamed the company into WSS-Kabelmanufaktur and has been successfully running the shop on his own since 2022. The WSS focus remains on high quality products at affordable prices. The Platin Line constitutes the company’s mid-priced speaker cable segment of which the LS4 is the highest contender. It is made up of seven strands of OFH copper varying in thickness and seven stands of silver-coated copper. As no primer is used in the coating, the silver layer is uncommonly thick and does not bear the risk of acoustic harshness. The wires are stranded in a patented ZS design to reduce cable inductance. The conductor diameter is 2x 4.8 mm² per channel. Teflon is used as dielectric, and a combination of thermoplastic and textile sleeve complete the cable on the outside.
A Real-World Test.
When the P2 speakers were returned to Daniela Manger, I connected my Martin Logan SL3 electrostats to the WSS and was intrigued by the consistency of sound. I completed my article on the Symphonic Line RG10 Reference, and the LS4 played an important role in my assessment to this amplifier. They also led me to reassess the considerable merits of the Martin Logan speakers that had the ability to grow with each improvement. To achieve maximum homogeneity, I had to connect the speaker cables to the bass driver of the Martin Logans and to connect the panels via the jumpers. When connected the wrong way around, the panels acoustically outpaced the dynamic bass driver, causing a slurred impression.
While there are lots of grand theories about speaker and cable design, what ultimately counts is how they appeal to the human ear. In this case we had a friend visit us from Thuringia. Although Katrin is not an audiophile listener by definition, she does enjoy music and is a keen theatre goer. She loves musicals and asked me if she could listen to the Phantom of the Opera on our system. Katrin had seen this musical live in Hamburg and had a CD with some of the songs of it at home. I checked our CD library and found a copy of the full musical. As a kid I had been to the Broadway show and remembered one or two songs that I liked. I remembered the rest of the CD as being rather mediocre and handed Katrin the remote control of the CD player so that she could jump to the track as she liked.
The musical starts with a prelude of almost three minutes, followed by the overture of two minutes, and the first scene of again three minutes. I was sitting on a chair behind Katrin, half expecting her to skip to the next tile and half hoping she would not, because I had never heard the musical in this intensity before. Katrin did not press a button on the remote, until the first CD ended after 19 songs and 60 minutes. She then turned around and looked at me. “So, what do you think?” I asked. “Are you kidding me?” she responded. “This mind-blowingly good and even better than I remember it from the event itself. I could understand every single word, no matter how many people were singing and how many instruments were playing.”
And I knew exactly what she meant, because, until this day, I had not been able to sit through more than three songs of the album. On this system, however, we were both sitting glued to our seats listening for each nuance and following each musical turn the performance took. Music can do that for us, and the WSS Platin Line LS4 are one part of the puzzle.
Specifications
- Type: 2x single-stranded loudspeaker cable
- Application: Single-wiring (with WSS jumpers)
- Termination: beryllium/copper hollow bananas with rhodium-plating
- Design: seven pairs of ZS-stranded wires
- Wire materials: OFH Copper & silver-clad OFH copper
- Manufacturing: silver-coating without primer
- Dielectric: Teflon FEP
- Inner liner: highly flexible thermoplastic
- Outer sleeve: Black textile with thin blue line
- Stranded cross-section: 4.8 mm²
- Cable diameter: 7.8 mm²
- Manufactured in Germany
- Year(s): 2008 -
Audio Racks
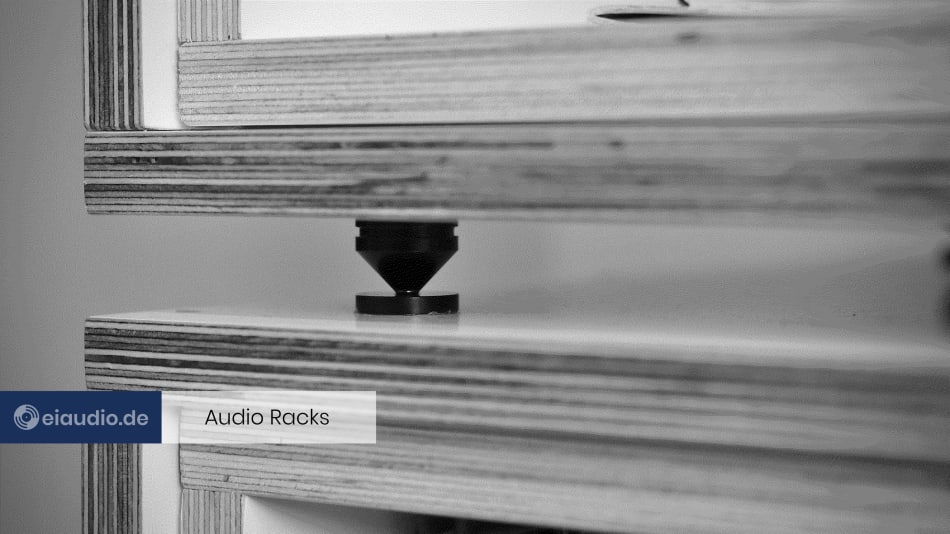
When I first began my journey in Hi-Fi, I did not give the subject of Hi-Fi racks much attention. During the 1980s, my racks were simple laminated plywood constructions for audio and video devices. In the 90s, I built my first dedicated audio rack out of MDF boards in order to place two turntables side-by-side. They were submerged, as to create a seamless surface with the rack. I built this rack for looks and convenience. A positive influence on sound was my least concern, as I could not imagine that audio racks were even a factor to be considered in the context of acoustics.
It was not until my return to Hi-Fi in 2014 that I started to read in forums about the sonic importance of Hi-Fi racks. In forums also read that IKEA Besta series shelves had some positive effects when it came to placing Hi-Fi gear. Therefore, when we moved to our new apartment in 2015, I made sure to place all Hi-Fi components on a such Besta shelves. I was sufficiently happy with the sound but could not say for certain, if anything had changed acoustically. However, I have meanwhile learned from moving devices to different positions on our racks that there are four major factors to be considered when placing Hi-Fi components:
- Transformer vibrations (50 Hz in Germany, 60 Hz in the US)
- Transport vibrations (CD drive, turntable motor, etc.)
- Infrastructure vibrations (city hum 20-40 Hz, 20-40 dB)
- Usage vibrations (doors closing, human steps, the loudspeakers)
Music that is played from conventional hard drives, CD-players, and turntables, is made up of data that is invisible to the human eye, and it has this aspect in common with the first three types of vibration listed above. Everyone knows the effect of a person walking over the hardwood floor of an old building and might automatically have a sonic memory of glasses rattling on a shelf. But this does not mean that the fourth item on the list has a greater impact on sound quality, since it is the easiest to eliminate by telling people to be more quiet or careful. Transformer vibrations coming from a Hi-Fi unit will have two effects: 1. inward (on the unit itself), and 2. outward (affecting all other units in a rack). Inward vibrations are usually reduced by strong coupling towards the ground by means of spikes, etc., whereas outward vibrations should be absorbed and/or directed toward the ground.
Placing an amplifier on the same level as a source device will usually impose transformer vibrations on the source signal and thereby compromise musical fidelity. Amplifiers will inevitably have at least one large transformer contributing to their weight and performance. when positioned close to the ground, vibrations can best be absorbed and directed downwards. On the other hand, amplifier vibrations can influence all devices in a system, if some of the vibrations are transported upwards towards the other components of the system.
Primary transport vibrations are at around 33, 45, or 80 Hz, depending on the type of device used as music source. Added to this are vibrations from the motors themselves that have much higher cycles. CD drives also add irregular vibrations coming from their laser positioning and focusing mechanisms. Conventional hard drives function similar to CD drives, in the sense that they introduce many types of vibrations to a system. Even if these sources of vibration are not visible to us, they do loom large when considered in juxtaposition to music signals. Source vibrations will also have two effects: 1. inward (on the unit itself), and 2. outward (affecting all other units in a rack). In my own experiments with placing source devices, I have found thorough decoupling from the rack most beneficial, as counter-intuitive as this might seem at first. However, this is not true for all devices and needs to be tested for each unit.
Infrastructure vibrations are especially prevalent in rural areas. In our direct neighbourhood, there are trams and trains, Europe’s largest international airport, two major highways and hundreds of busy city streets with busses and trucks, all within visible and audible distance. I conducted some measurements and found that infrastructure vibrations constitute for around 37-45 dB of low-frequency noise ranging from between 20-40 Hz at all times of day. I have found minimal-surface decoupling most beneficial for racks placed in this environment, of the sort that is provided via spikes or slender furniture feet.
Additional design considerations might be: 1. to allow for easy connections between devices in which 2. cables that carry signal or power do not touch. Characteristics that 3. constitute a faradic cage to shield off influences of EMF will also be seen as preferable. And one could possibly dig deeper and find even more factors that have an influence on sound.
AIHR-T1 Acoustic Insulating Hi-Fi Rack

As we had some free time over Christmas 2021, my wife and I decided to build a proper rack for our Hi-Fi system. This was going to be our first dedicated Hi-Fi rack and serve the purpose of providing improved home entertainment, but would also serve as a more professional backdrop for our future interviews with friends in music production and audiophilia. And since we were missing a dedicated room for our Explorations in Audio, we knew that our new rack would need to serve multiple purposes at once.
The idea of building a rack had been on our minds for at least two years, and we had already discussed our expectations and created designs that were close to being completed on paper. As most of my early designs included metal couplings that needed to be welded by a professional, we were also looking at the possibility of purchasing a finished rack. After some weeks of searching and contacting metalworkers, we gave up trying to find either: a welder who was interested in a small-scale project for a rack prototype for eiaudio, and a ready-to-buy rack solution.
During the housing market bubble in Frankfurt, it was simply impossible to motivate a metalworker. Even when we informed them that we intended the rack to be a prototype for units to be sold via our eiaudio.de shop and on Amazon, not a single professional followed up his promise to call us back. On the other hand, the racks that were available for purchase were either ridiculously expensive or of poor sonic design. It also seemed that most audio racks were created for children's rooms, man caves, or a single's apartment rather than families. The ones that had some obvious sonic merits often looked overly technical and offered limited room for vinyl records. We, on the other hand, enjoyed having some of our vinyl collection at hand right at the rack. This also served to reduce a rack's technical and cold impression.
When it became clear that we would be waiting in vain for professional support, I drew up a new design that was entirely based on wood. This consisted of two separate shelf bodies stacked on top one another and separated by six spikes with coasters. Sabina found some cool-looking height-adjustable furniture feet that slanted outward and pressed down on a surface the size of one cent. The original design showed two layers of multi-ply on all parts of the rack. Sabina felt it was better for the inner structure to be constructed of a single layer. She also suggested that the inner boards should be recessed towards the front to give the rack a more elegant look.
I wanted to divide the left side of the top body with a horizontal board to place smaller devices there. In the sections that were to hold our records, I added a board to keep them from slipping out the back, but also for improved diagonal stability. Although the feet and spikes offered some electro-acoustic benefits, I was not yet truly content with the design. After giving it some more thought, I suggested that we place 1.5 mm of felt insulation between the two layers of wood all around each inner body. During assembly, we made sure that there was no contact between the outer and the inner layer, except for the felt itself. The rack shows visible torx screws on the outside, because screwing from the inside out would have created acoustic bridges between the layers.
We first built the inside and then the outside of each body, until they were both complete. Using a spirit level, we put the lower body in balance and then stacked the upper body on top. I placed our records in their opposite compartments and added the devices. We double-checked the position of the top board and found this still to be perfectly level. Since our Rega Planet CD player was a top-loader, I had first intended this to be placed on the top counter, next to the turntable. Sadly, it turned out that my interconnects were too short for the CD player to be positioned there. Rather than purchasing new cables, I placed the preamplifier on the counter, instead. With a bit of attention to detail, I managed to set all units up so that no cable touches another.
Our Rega Planet is special, in the sense that it can all too easily wobble if the surface underneath it is not rigid enough. I was able to stop its renewed wobbling in the rack by placing a multi-ply board underneath it. The result is an excellent-sounding rack that makes listening to vinyl a real joy. Not only does the new rack contribute more to sound than the IKEA BESTA solution, it also looks more sophisticated. Although the building material itself is heavy, it is still possible for Sabina and I to carry each rack body separately. Moving house with this rack is not a scary idea. We are both very pleased with the outcome.
Specifications
- Rack type: AIHR-T1
- Vibration insulation: felt-liner, acoustic spikes, adjustable feet
- Dimensions: (W) 1400 mm; (H) 902 mm; (D) 400 mm
- Spikes with coasters: (W) 22 mm; (H) 22 mm
- Furniture feet: (H) 80 mm
- Design: eiaudio.de
- Year: Dec 2021
Accessories

Many factors contribute to the integrity of sound. This is especially true to all components that are in electric, physical, or accoustic contact with our HiFi chain. A HiFi unit is always placed on something and connected with something, and how it is placed and connected and how it relates to the room will have an influence on its ability to perform.
For people starting their journey into HiFi it is often surprising to learn that the cable used to connect any two units together may well be considered just as important in terms of sound signature as the units themselves. In fact, those who have not experienced this with their own ears may even put this information off as hogwash. In the end our ears decide, and those of us who have no interest in exploring may decide to simply stop doing so here. For all others, the accessories chapter will hold some very useful information.
Aucharm Audio Absorbers

I came across the Aucharm Audio Absorbers offered by a Chinese vendor on eBay when seeking to upgrade my current acoustic spike solution that was mounted underneath our TD320 turntable. The Thorens had originally been placed on felt cushions that had become worn out, badly compressed, and hardened in their considerable years of use since the late 1980s.
My first impulse had been to replace the worn out felt cushions with new felt; however, I was not at all satisfied with the result. While quieting the turntable musically, the felt also introduced more than a little instability that would make the record skip whenever someone touched the rack too abruptly. The sound signature itself also felt a little recessed and muddy, with the resulting impression being far removed from modern audiophile expectations.
In my effort to select a worthwhile turntable support, I came across images of the TD3020 perched on spikes. This made it look quite elegant, actually, and I decided to give this a try. I still had a set of height-adjustable copper spikes lying around the house and fixed these to our Thorens by means of double-sided adhesive tape. However, when we sat down to listen, our legendary turntable sounded more feeble and clinical than we were used to. I could not immediately decide whether I enjoyed the new sound, but I did notice that, over the next few days, we started to listen to records less. This is usually an indication that something is wrong.
I conducted another web search and came across the affordable Aucharm Audio Absorbers shown here. They were made up of four components: an outer aluminium ring with an inner thread, a foot plate that is screwed into the thread from the bottom up, three ceramic balls for acoustic decoupling, and a further metal plate that acted as device support. I was attracted by the fact that the absorbers were height-adjustable, as black as the Thorens, and not so overly large that they would throw the turntable’s design off balance.
To be honest, I did not expect a major affect on sound when changing from the spikes to the absorbers, but I asked Sabina to join me in a quick listening comparison. We put on Stacey Kent’s song “Bullet Train” which provides lots of insightful nuance. Listening with the spikes, we set the volume and locked in our expectations. I then took off the spikes and positioned the absorbers. The resulting difference was quite baffling, especially when considering that these absorbers were sold as amplifier feet.
Perhaps something had been wrong with my spike and adhesive tape solution to begin with, but the Aucharm absorbers brought more attack and greater tonal accuracy to the table, important factors to audiophile listening that I had been sorely missing. Channel separation was also improved. It is well possible that motor resonances had somehow managed to stay active when listening with the spikes and were now removed with the absorbers. Whatever it was that did the trick, I will henceforth not want to miss them on our Thorens.
Specifications
- Type: acoustic decoupling absorbers
- Features: > 5mm height-adjustable
- Material: powder coated aluminium housing
- Decoupling: 3x ceramic balls (per absorber)
- Device support: acoustic rubber cushion
- Dimensions: (W) 39mm; (D) 39mm; (H) 18-23mm
- Country of manufacture: China
- Year: 2022
Audiocrast RCA Caps

The first time I read about RCA caps was in the instruction manual of the Restek V1 preamplifier. In this it is explained that all unused RCA input circuits must be shortened to suppress noise potential coming from high frequency radiation. It is stated that the unit could not otherwise fulfil its specifications in terms of total harmonic distortion and signal to noise ratio. Not knowing what to make of this information, I was relieved to find out that they come in a dozen varieties and are relatively inexpensive to purchase new.
Despite the Restek V1’s gold plated inputs, I decided to purchase the caps from a Chinese importer called Audiocrast. The base material is brass which has then been rhodium coated. These plugs were much better rated than their golden equivalents, otherwise I would have attempted to lessen the effect of material transitions by using the same contact material as the inputs.
On the Restek the plugs have the effect of making the noise floor dead silent, on all sources except for the phono stage. Listening to Diana Krall’s ‘Turn up the Quiet’, the fading out of the studio’s ambient noise is now much more apparent than before. I also enjoy listening at higher volumes more than I did before, simply because the music stands out more prominently from the background. I especially enjoy the affect the plugs have on stage depth, which has just become that little bit more realistic. If your system is capable of great sound, this little add-on can well be considered an audio essential.
Audiocrast Tri-Ball Absorbers

Following my positive experience with the Chinese-made Aucharm acoustic absorbers on our Thorens TD320 turntable earlier this year, I felt encouraged to explore an alternative tri-ball absorber design for our Dual CS-721 turntable. Three months had passed since my original purchase, during which I had further experimented with the Aucharm absorbers. And, although I was generally happy with how they worked, I had also detected a slight wobble that appeared to stem from the three liner holes of the top-liner being asymetrical to the holes in the base. It was difficult to say if this was an error on the side of the producer or simply a part of the design philosophy. Instead of standing stable on the three metal balls, the top section would wobble, until a Hi-Fi unit was placed on top.
The Aucharm absorbers had two interesting features that made them ideal for the TD320. The diameter of the upper support was smaller than that of the base underneath and perfectly complemented the Thorens' round chassis indentations. And they were height-adjustable to level an uneven surface. These features did make them intersting to keep, despite the slight wobble, but they also made me curious as to what else the market had to offer. The Audiocrast absorbers perfectly filled that niche for me, as they looked to be more sturdy. In addition, I found it interesting that the Audiocrast absorbers came in different colours to better match their equipment. The choices were solid silver, black, and gold. The colour presented here is obviously silver, even if we ultimatley decided to go with black for our Dual CS-721 turntable, because it looked more accomplished in combination with the original black top half of the plinth.
The Audiocrast absorbers were not height adjustable. This was important to keep in mind, if one was to be fussy about the turntable being absolutely level. They also featured a centre prong with a rubber seal around it. The rubber seal held the top half of each absorber in place over the base. A welcome feature, if the unit on top was to be pushed across a shelf or the floor, however, this design would also compromise the insulation characteristics of the absorber, simply because there was an additional acoustic bridge in addition to the ball coupling. Furthermore, the Audiocrast absorbers had 1mm plastic cushions on the top and bottom surfaces that might affect the overall purity of sound. My expectations therefore were not all too great, and I ordered a spring-based absorber system in addition to the tri-ball absorber to have more choice when comparing the affect on sound.
To my surprise, the Audiocrast absorbers surpassed the Aucharms in combination with our Dual turntable with American walnut plinth at an instance. Bass frequencies sounded cleaner and had slightly greater punch. Both the Audiocrast and the Aucharm absorbers surpassed the spring-loaded absorbers, as their impact on sound was still comparable. It seemed that the sping-loaded absorbers, while being superior isolators, did not offer enough stability to quiet the inherent vibrations of the turntable motor. Alternating between the three absorber designs, I found that the black Aucharm look worked far better with our Dual than the silver ones did. As the Audiocrast absorbers sounded superior in combination with our CS-721, however, I would need to order them in black as well. The spring absorbers, on the other hand, were so special that, at the time of writing this, I was not sure if there was a scenario in which their lack of support might ever come in handy.
Specifications
- Manufacturer: Audiocrast
- Type: tri-ball acoustic absorber
- Application: vibration dampening and insulation
- Base material: aluminum alloy
- Ball material: stainless steel (ceramic optional)
- Available colours: silver, black, gold
- Load capacity (set of four): 200 kg (max.)
- Dimensions: (W) 39mm; (D) 39mm; (H) 23-24mm(*)
- Centre screw (optional): 8mm
- Weight: 264-272g per set; (66-68g, each(*)
- Country of origin: China
(*) Note: differences in weight and dimension are due to variations in ball diameter
Audiophile Amplifier Cooling

I love our Hafler XL-280 amplifier. Rated at 145 watts RMS per channel, it produces enough energy to play loud on speakers with low efficiency levels. And its high-current abilities make it a great companion for even the most demanding speaker designs. Its fabled MOS-FET transistors create a musical and pleasing sound that is thought to be similar to tube amps, while maintaining the accuracy of solid-state amplifier designs. On the downside, the Hafler’s relatively high class-A output is anything but energy efficient and produces lots of heat as a result. Hafler did provide large external heat sinks, one on each side of the amp, to provide passive cooling, but on warm summer days, the transistors on our 1988 unit go into self-protect mode and begin limiting current, a measure that is audible through a flat and compressed sound and a helpless flapping noise instead of solid bass. When I first heard it, I mistakenly took our CD player to be at fault and had it serviced. Little did I know that what I was hearing was caused by an overheated amp.
As I learnt, there were many factors that may have caused our old amp to overheat. For one thing, the transistors are usually coupled to the heat sinks with the aid of a heat-conducting paste. When this paste becomes brittle with age, its capacity to transport the temperature away from the transistors lessens. Secondly, the perfect place for a large power amp would be close to the floor, where transformer vibration can be best absorbed, and where the temperature is usually the lowest. In our setup, however, the amp was placed at about 40cm height right under a slanted roof. This brings me to a third factor: The temperature in attic rooms — and such is our Listening Room II — are usually higher than in the rest of the house. Due to all this, there was just not enough cool air passing the transistors and heat sinks to maintain normal operating temperatures for our amp, causing it to eventually limit the current travelling though the transistors.
Hence, I needed to find a cooling solution that would solve my heat problem without interfering with the integrity of the music. And — as is usual when there is a problem — there was the immediate excitement that presented itself from a new possibility for exploration. I started browsing the web and found some existing PA solutions, involving cooling fans built into 19-inch rack cabinets, as well as a range of individual fan motors with separate heat sensors for rack installation. However, none of these offers were particularly silent, good looking, or even practical for a HiFi setup. It was not until I came across AC Infinity's "AIRCOM S9" that I began to think audiophile amp cooling was within reach, even for amps that did not have super silent air movers built in from the beginning. And yet, from the product description alone, I could already guess that some additional work would be needed.
AC Infinity builds air movers in various formats that extract heat in different ways: e.g., to the front, to the back, etc. The company has its roots in audio engineering, and I saw that the S9 conveniently had the exact width of the Hafler amp. It extracts the air from any device placed underneath and propelled it straight upward by means of three ultra-silent movers. I anticipated this design to be most beneficial for my application, although I had not yet decided whether to place the AIRCOM S9 underneath or above our amp. Since the S9 was built with modern multi-channel amplifiers in mind, rather than 2-channel vintage equipment, it was about 20cm deeper than our Hafler, which entailed that I would need to design an additional support for its rear feet to incorporate it in our setup. I chose the S9 over its more expensive sibling, the T9 (which would have had more features and digital technology on board), because I felt that fewer digital gimmicks would mean less interference on the audio stream. Sadly, both units came equipped with rather unpleasant and un-audiophile switching power supplies, a fact that was already apparent from their descriptions online. In my eyes, a contradiction to the company philosophy.
I saw that AC Infinity were selling their S9 at very affordable prices in the USA. The price for the same product from a German importer was approximately double. I weighed my options and decided to buy from the German importer, thinking that I would support a local firm, have improved support options and also receive a power supply made for the German market. It turned out that the latter was not the case, and that I had simply paid a 100% markup for the same product with US power supply that would not even fit into a German AC outlet. I was quite disappointed, made a mental note never to buy from that German supplier again and exchanged the cheap and non-compatible switching supply for a conventional regulated one with obvious audiophile advantages, as it would not cause as much as a ripple on the power grid. — While my caution regarding switching supplies is often humoured by non-audiophiles, I later read that not few of AC Infinity's customers had complaints about electronic noise radiating into their audio systems; a phenomenon that I have not experienced using a linear supply.
When switched to temperature triggered operation, the S9’s internal heat sensors will start the fan motors automatically when the amp becomes too hot. There are two modes: a simple on-off switching at a given level setting when the temperature limits are reached, and a smoother heat-dependent operation in which the AIRCOM sensors determine the level setting independently. Both settings only work when the unit is based above the amp, as heat rises upward. I consequently designed a simple stand that would position the cooler above the amp without hindering much of the original air-flow. The design has proven itself to work very well. In simple on-off switching mode, the AIRCOM S9 turns on for the first time after the Hafler XL-280 has been running for about 1-1.5 hours. It then remains on at the preset speed (level 1 of 4) for approximately 40 seconds, before switching off again for about 5-10 min. In heat-dependent mode, the S9 runs more often for shorter intervals. Obviously, the cooler the room, the less cooling is needed.
Since the AIRCOM S9's lowest level of operation should be sufficient for most household applications, the S9 is quiet enough to be classified as an audiophile cooler. While I can detect the aeolian tones associated with soft wind in a silent room, this sound is almost completely absorbed once music is playing, even when it is playing at very low volume. My observations were made sitting 2.5m away from the device diagonally. In combination with our Hafler, this audiophile fan cooling system is doing a wonderful job.
Specifications:
- Manufacturer: AC Infinity Inc
- Product: AIRCOM S9
- Type: audiophile fan cooling system
- Air movers: 3x dual-ball bearing fans
- Motors: PWM-controlled
- Manual controls: 4-step
- Thermal controls: 2 trigger modes
- Extraction: vertically upwards
- Airflow: 210 CFM
- Noise emission: 1 dBA
- Dimensions: (W) 43,2cm x (D) 34,3cm x (H) 3,8cm
- Year: 2021
Audiophonics 25 VA, 16V

Ever since my positive experience with upgrading the power supply of our Cambridge DACMagic 100, I have been a firm believer in the effects of clean and abundant power, even in context with electronics that, at first glance, did not seem to be all too demanding. Changing from the cheap original switching unit to the ZeroZone 100 VA supply was an overkill perhaps, but it gave the DAC a substantially more wholesome sonic performance. Therefore, when we purchased our Thorens TD 320, I was not overly concerned when I found that the original power supply had been damaged and needed replacing.
The TD 320 was run on 16V, and the number of replacement choices was rather limited. Another factor to be considered was that modern power supplies were often equipped with digital displays that could have a negative effect when combined with genuinely audiophile devices. All the more, I was happy to find that Audiophonics, the French distributor of audio equipment, had a regulated linear power supply available that appeared to check all the right boxes: It had a special anti-vibration transformer, an AOP-controlled HEXFET IRF-type controller, as well as EMI RFI filters with chokes and film capacitors. It did not have an LED or LCD display and came in a high quality black anodised body that would optically fit our Thorens well. I loved the fact that it also featured a 3-prong IEC socket, which meant that I could use my own choice of power cord.
Having listened with the power supply for a few weeks, I was very happy with its performance. The device itself produced no detectable vibrations during operation. The power switch being located at its front made it easy to reach and the power supply therefore easy to place on any Hi-Fi rack. The body was heavy enough not to be tugged backward even by our heavy Lapp cables. Our Thorens TD 320 produced no audible background noise when connected to the Audiophonics supply. In this it was similar to our experience with the far more expensive TK Audio’s T500 isolating transformer that had also come equipped with network filters. The only downside to this supply was the brightness of the glaring white-blue LED power indicator. Considering the overall build quality of the supply, this seemed quite an oversight somehow. One might use a coloured pen to soften the effect, but this might feel a bit improvised, of course.
Specifications
- Supply type: low-noise, linear, regulated
- Output voltages: adjustable 5-24 volts, 25VA
- Output socket(s): 2x jack DC 5.5 / 2.1mm
- Features: EMI RFI filters with chokes and film capacitors
- Case: brushed and sanded aluminium
- Paint coating: black anodized
- Shielded moulded anti-vibration transformer 25VA
- AOP-controlled HEXFET IRF-type controller
- Power input: via 3-prong IEC socket
- Input voltage: AC 220-240V
- (D)174 mm x (w)100 mm x (H)51 mm
- Weight: 850 grams
- Country of manufacture: China
- Year(s): 2022
Isolating Transformer (Cinch)
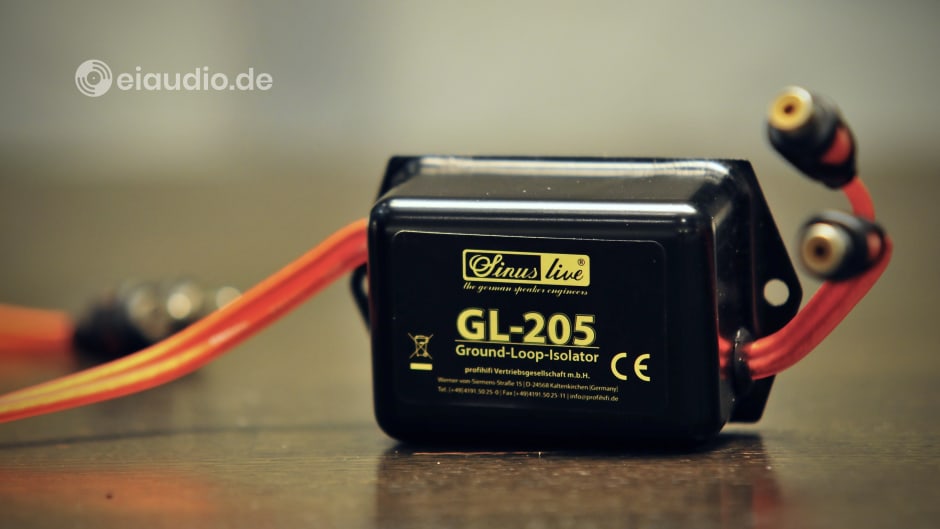
Differences in ground potential between devices play a major role in shaping the sound of any HiFi system. When mains ground potentials are not exactly the same on two or more HiFi units connected via cinch/RCA, this results in a homogenisation of potentials via the chinch/RCA interconnects. The effects may range from a 50/60 Hz hum to a leaning of the resulting sound towards bright, harsh, and unpleasant.
Ground potentials often vary when HiFi devices are plugged into power strips that have not been designed for use with HiFi gear, when power plug polarity has not been optimised, when individual devices are connected to an outside grid, such as the cable or radio network, or are connected to a wall outlet far from the main system. While small differences in ground potential may stay unnoticed for some time, any HiFi system’s delicate audio signals will benefit from near perfect grounding.
When I first set up our system consisting of Martin Logan SL-3 electrostatic speakers, Hafler XL-280 power amplifier, DB Systems DB-1 preamp, Nikko FAM 600 radio tuner, Rega Pant 2000 CD player, Sansui SR-525 turntable, and Apple TV with HDMI to cinch/RCA audio extractor, I understood that I had found some worthwhile components, but what I did not know was that I had also produced serious grounding issues.
The result was an unpleasant humming from the speakers that I was unable to eliminate by optimising power plug polarity. It took my some weeks of tests and listening to to understand that the power supplies for the Martin Logan’s high voltage needed to be plugged into the same outlet as the other units of our system. By doing so, humming was reduced by roughly 33%. The other humming factor was the house antenna connected to our Nikko radio tuner. I purchased a device for the physical decoupling of the antenna. This reduced audible humming on our system by a further 33%. At this stage it was only when I held my ears directly on the speakers that I could still hear a slight hissing which I thought was normal for our HiFi units.
It was not until a few days ago, when I was changing the tubes on our PAS-4, that I had one hand on the Dynaco preamplifier and the other on the chinch connector leading to the audio extractor of our Apple TV and suddenly felt a strong tingling in my hand. I did not measure it, but, from the feeling alone, I would guess it to have been at around 100 volts. I could not believe it and touched it again to the same result. There were about 12 meters of cinch/RCA cable running from the position of the Apple TV to our HiFi system, as I had always viewed the ability to play movie audio little more than a necessary evil.
Without the Apple TV, audio extractor, and Acer DLP projector attached, our HIFi system was dead silent, despite our Hafler XL-280 amplifier being set at full 145 watts gain. With all our video gear connected to the cinch/RCA input of our Dynaco preamplifier, the remaining 33% of humming noise returned and remained the same regardless of the music source. Given the scope of my blog and my knowledge regarding the importance of ground potentials, I was starting to wonder how it was possible that I had missed this noise factor for so long. It must have had to do with the little care I have been willing to devote to video.
In search for a solution, I came across ground loop isolators that could be placed directly in the path of a cinch connection. As I learned, the isolator is a transformer of two equal coils of which the primary acts as the inductor and the secondary as the receiver. Having gathered some experience with XLR and optical connections and converters, I was sceptical if any affordable device would be able to solve my issue without audibly diluting the sound or sacrificing the joy of music and therefore decided to first try a budget device with acceptable ratings.
I ended up with a Ground Loop Isolator branded “Sinus Live” that was sold by the German profihifi Vertriebsgesellschaft m.b.H. in Kaltenkirchen, an importer of HiFi gear to Germany. I enjoyed the fact that the device came in an unpretentious-looking housing that was not labelled as High-End. The cables seemed to be of decent quality, and the plugs were bare metal with a split centre prong and a split outer ring. While gold-plating usually has a negative effect on sound due to additional material transitions, a split prong and split ring do make some sense. I also liked the low-mass design of the plugs.
Having listened to the Sinus Live Ground Loop Isolator for a few days, I must say that I was very happy with the result. Not only was the small and inexpensive device able to instantly stop the humming on our system, it also did not take away any of the familiar charm of listening to music or watching movies via our Apple TV. I would have liked to present more proper specifications with the device, but so far have found none. If profihifi is able to provide me with specifications, I will later add them below this article.
Specifications:
- Type: ground isolation for chinch/RCA connections
- Principle: two isolating transformers
- Number of channels: two (stereo)
- Transmission: induction
- Frequency range (-3 dB): 2 - 20,000 Hz (?)
- Line input: 2x cinch/RCA (female)
- Line output: 2x cinch/RCA (male)
- Dimensions: (L) 70mm, (W) 50mm, (H) 34mm
- Country of manufacture: China
- Year(s): approx. 2000 - 2023
TK Audio T500
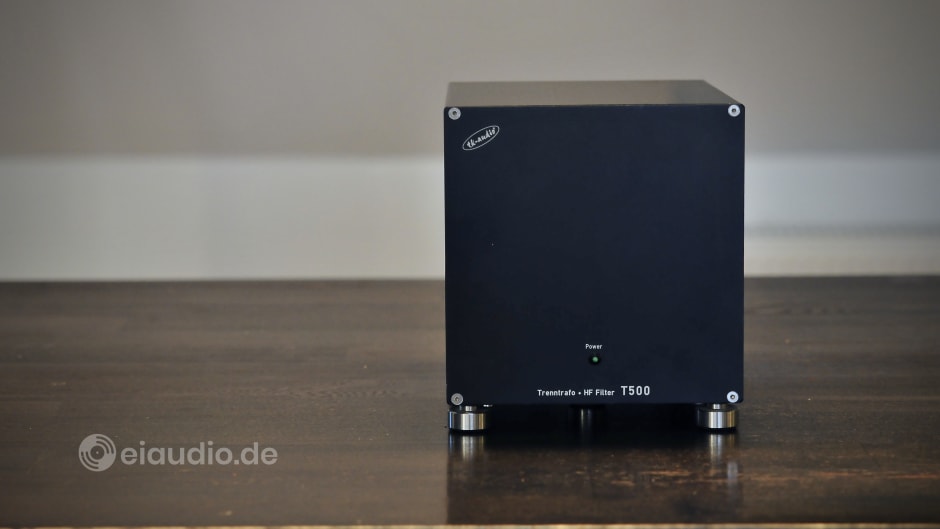
It has often been described, for instance in my article on system grounding here in this blog, that differences in ground potential between Hi-Fi components will be disruptive to the integrity of the music signals processed and exchanged within a system. In audiophile setups, therefore, lots of effort and money is invested into the approximation of ground potentials. In this context, it is important to understand that ground potentials exist on all Hi-Fi components, even if no additional 'earth' wire has been included in the power cord, because, in AC voltage, the hot phase fluctuates against a neutral (= ground) conductor. This is as true for the operating voltage as it is for the signal ground. On the inside of each Hi-Fi unit, it is common to use a type of star-grounding to harmonise potentials, either through circuit board design (e.g.: Dynaco PAS-4 preamplifier) or through direct wiring (e.g.: B&K ST140 amplifier). However, star grounding works just as well between Hi-Fi units (e.g.: Audioplan PowerStar distributor).
While differences in ground potential can be measured, most audiophile listeners prefer to harmonise ground potentials by starting from a common ground and aligning the power plugs of each additional unit by means of A/B listening comparisons. To a guitarist, the correct tension of each string is determined by listening to it. In a similar way, the tonality and homogeneity of a Hi-Fi system change, if it is struggling with less-than-ideal grounding between the devices. Audiophiles place their emphasis on listening to unconstrained sound, simply because it matters to their ears. If a system is of poor tonal balance, lacking transients, dynamics, etc. it cannot address the listener's emotions in the same way, is not engaging to listen to, and will soon be replaced by other past-time activities. Audiophile accessories — however superfluous they may seem to an outsider — mainly serve one common purpose: to achieve sonic integrity.
Having followed the path of audiophile listening for a number of years now, we had — through multiple improvements — set up our systems to the best of our ability and achieved a balance of tonal richness and musical detail that was rarely found on Hi-Fi systems. This was the result of well-engineered products having been meticulously set up to allow for free-flowing music signals on the basis of harmonised ground potentials. Only the best materials and cable designs had been used to achieve a highly pleasing result. Hence, when my friend and fellow audiophile Luigi dropped off his TK Audio T500 isolating transformer, I could not imagine one aspect of our system that could still benefit from this. The sound of our setup was already at a level of sophistication that I had previously never imagined possible. However, since my project is called 'Explorations in Audio', I had no other chance but to find out for myself.
Before starting to run listening tests and write this review, I carried the black 12 kg box up the stairs to our studio in order to take the photos. The T500 seemed to have been carved from a single block of metal. It did not make the slightest sound when I picked it up, dragged it upstairs, or set it down on our wooden table. This somehow caught me by surprise and instantly made me want to look under the hood. What I found inside were a large isolating transformer, some very solid wires with high-quality terminations, and a small circuit board holding the HF filter unit. The inside of the cabinet was fitted with two types of non-resonant absorbers, and both the transformer and the board were held down by sturdy metal bolts. It became clear to me that the manufacturer, TK Audio, had spent lots of time on the design and execution of this unit to come up with the best conceivable solution for their product, despite production numbers for specialised audio applications of this kind being relatively small. A lot of these High End audio products actually start out from crafty audiophiles building solutions for themselves.
I decided to run my listening tests of the T500 on our Martin Logan system in the main listening room, as our electrostatic speakers were capable of exposing even the smallest alterations in music signals. And, since turntables were symmetrical and basically passive devices, I felt that they should be most resilient to changes in the mains voltage. As far as I knew, the power supply on a turntable primarily served to drive the motor, strobe-light, and the motor electronics, whereas the music signal was generated through magnetic induction into coiled wire and then transferred from the cartridge to the preamplifier through the tonearm cable. I could not see how an isolating transformer would be a benefit in this scenario, unless there was ground potential from the motor and electronics to the platter, in which case, the needle might serve as grounding-bridge to the tonearm. Turntable designers will probably feel the need to chuckle at my musings. Therefore, if you have a deeper understanding about ground potential on turntables, do feel free to leave a comment below.
I first listened to the system with our Sansui SR-525 turntable as source, performing Malia’s album “The Garden of Eve”. For practical reasons, I focused on the album's first two songs “Hope” and “Last Show”. This particular LP had only recently unveiled its magic to me, following the Audioplan PowerCord S upgrade on the external power supply of our Restek V1 preamp. The Sansui, just like all other components of our system, was plugged into an Audioplan PowerStar distributor of an early generation. Once I had familiarised myself afresh with the lazy-cruising sound of the album, I plugged the TK Audio T500 into the socket where the turntable had been and connected the turntable plug to the 230V power output on the T500. To my surprise, I noticed a slight increase in intensity, with each instrument note receiving an exact termination, comparable to being able to see along the side of a raindrop to where it ended. I had not experienced such plasticity from our turntable before, and, switching back and forth between the modes of connection, I noticed an increase in dynamics that made the music seem slightly louder and more piercing. There was this new urgency and clarity to the music. Channel separation also seemed to have improved.
Turning the T500’s plug in the socket, shifted the tonal balance upward and negatively affected the natural timbre of Malia’s voice. I found this change to be quite unpleasant to the ears and took a mental note that polarity mattered on isolating transformers (with HF filter modules). I was curious to find out, if grounding also played a role in conjunction with such transformers and plugged the T500’s power cord into an adjacent wall-outlet. While the performance was still pretty solid, some of the tonal balance was lost, similar to the effect of inverting the plug. The sound became overly muffled when changing polarity in the remote socket. From this, I concluded that isolating transformers, too, should be included in the star grounding of the system, and that one should listen to the plug turned in either direction. I have not yet tested our CD player on the T500, but I will keep adding to this article, if doing so should lead to additional findings or a completely different result.
About TK Audio
TK are the name initials of a German engineer who set out to build a small line of high-quality power filters and audio cables for the local audiophile community. A dedicated audio shop based in Frankfurt compared these to other available products on the market and decided to place a substantial order with him in order to distribute them among their own customers. Sadly, the engineer himself stopped production shortly after and withdrew from the market, when he found his filters and cables the subject of a 'religious' war, being repeatedly bashed and attacked by the "cables-don't-matter" and "this-is-all-snake-oil" community in public forums. The excellent products that have remained in circulation are much sought after within the community to this day. The TK brand is not to be confused with the audio module producer TK Audio from Sweden.
Specifications:
- Type: isolating transformer
- Dimensions: (W) 16.5 cm x (D) 24.0 cm x (H) 18.5 cm
- Transformer: Michael Riedel, Germany
- Operating voltage: 230 V to 230 V
- Power handling: 500 W / 2.17 A
- Weight: 12.2 kg
- Place of manufacture: Germany
- Year: 2013

Vinyl Singles Puck

I remember vinyl singles mostly from my parents’ small vinyl collection in the seventies. The fact that singles have a lager centre hole than long-lay records was usually compensated by a thin plastic star that was clicked into position right after purchase. The centring star then remained in this position until the collection was stored in the basement and forgotten about. In this sense, singles were made to handle like LPs, and the advantage of them having a larger centre hole was lost.
From the 1950s until the middle of the 80s, vinyl records were the primary way of storing music in households, but also at public venues, such as nightclubs, bars, and radio stations. Due to their short running time, singles in many cases needed to be changed more often than long-play records. This could result in greater wear on the centre hole, especially, if the picking and placing was done by a juke box. The larger center hole distributed the forces along a larger surface and left greater margin for error, if the prong was conical in shape.
I bought my first vinyl singles in the early 80s and simply adopted my parents’ method of clicking the star in place. Then there came a long time without records, from about 1995 to 2017, during this time I sold my collection and forgot all about vinyl. And although it has been a few years now that vinyl saw a comeback to our household, vinyl singles had not been among my prized possessions until my friend Charles handed me a stack of singles to keep. To my surprise none of them had the little star inside, and I no longer owned the typical plastic puck that came with every original player.
When searching the web, I was actually surprised to find that one can still find the original plastic stars for centring vinyl singles, but I was not going to settle for this. I wanted to explore the benefit of singles having the larger hole and, frankly, I just wanted to own the best centring solution available on the market, one that makes best use of the possibilities that the design of a vinyl single provides.
The puck I came up with is turned from a solid piece of metal with a smooth and polished surface. Singles effortlessly glide over the hemisphere and land in perfect position. Exact machining ensures that the fit is neither too loose nor too tight. Weighing a solid 150 grams, the massive puck can be used as record weight for LPs. Especially vintage players benefit from a less heavy record weight to reduce bearing and motor wear but also to keep the player position level.
Support our project and purchase this item from shop.eiaudio
I love the fact that the puck remains decorative and useful, even if it is not centring a single or pressing down on an LP. When placed next to the record plate, the puck helps to minimise chassis resonances and looks quite sophisticated at the same time. What more could we ask for in a puck?
Specifications:
- Type: Vinyl singles puck
- Material: Stainless steel
- Dimensions: (D/o) 3.80cm, (H) 2.40cm, (D/i) 0.70cm
- Weight: 150 grams
Zero-Zone 100 VA, 12V

When it comes to the manufacturing of High End dinosaurs in our modern times, China will surely be heading the list. Two factors are contributing to this phenomenon: On the one hand, upcoming Chinese entrepreneurs have been harbouring a personal craving for vintage American, European and Japanese High-End designs that they previously could only read about in magazines. With incomes having risen and the cost of manufacture still reasonably low, such cravings can now be fulfilled. On the other hand, western industry leaders have neglected to serve their local customers with reasonably priced High End designs that are based on long-established standards.
Buying directly from China is not without risk, of course. The great distance makes returning products more difficult, and some deeper cultural issues come into play. For instance, one might not actually receive the product purchased in the exact design advertised. The internal parts used will often change with each new consignments, following local Chinese sourcing decisions that might either be price or quality driven. While this may be acceptable to Chinese local customers, it is certainly not best practice in western countries. Buyers looking for certainty and consistency are therefore better advised to purchase elsewhere. Finally, the cost of transportation mostly does not include customs duties which can come as a surprise.
For buyers who understand about the product they wish to purchase and are willing to take a risk, the Chinese High End market offers some exciting opportunities. It is probably wise to keep in mind: the simpler the product, the less can go wrong, and the Zero Zone 100VA 12V power supply is such a case in point. A five kilos dinosaur in its own right, it was brought in to replace the DACs original switching power supply that had been sending surprising levels of audible distortion to the whole HiFi system. Not a small blunder for such a sensitive device.
With 4mm brushed aluminum front and massive heat sinks on both sides, a large 100VA toroidal transformer and heavy duty caps the regulated linear supply has the potential of powering heavy machinery over long periods of time, properties that come in handy when providing maximum bursts of clean energy to a small and power sensitive unit like a DAC. Placed on three Oehlbach pucks, the unit rests so firmly on the rack as if to challenge anyone to attempt to move it ever again.
Specifications
- Input voltage: 230V
- Output voltage: DC12V, 6A
- Front panel: Silver
- Dimensions: 210mm x 70mm x 257mm
- Toroidal Transformer: 100VA
- Weight: 4.5kg, approx.
- Power Polarity: inner"+" external"-"
Picture description
Seen from above, we can identify the AC power socket and mains filter (top right), the toroidal transformer (on the left), a rectifier (top center), two large audio grade electrolytic capacitors (right), two voltage regulators (top and bottom), as well as parts for the unit's soft start circuitry (center). The DC output socket is located bottom right.


